
This may be my favorite room ever! I’m so excited to share the finished photos of our new playroom.
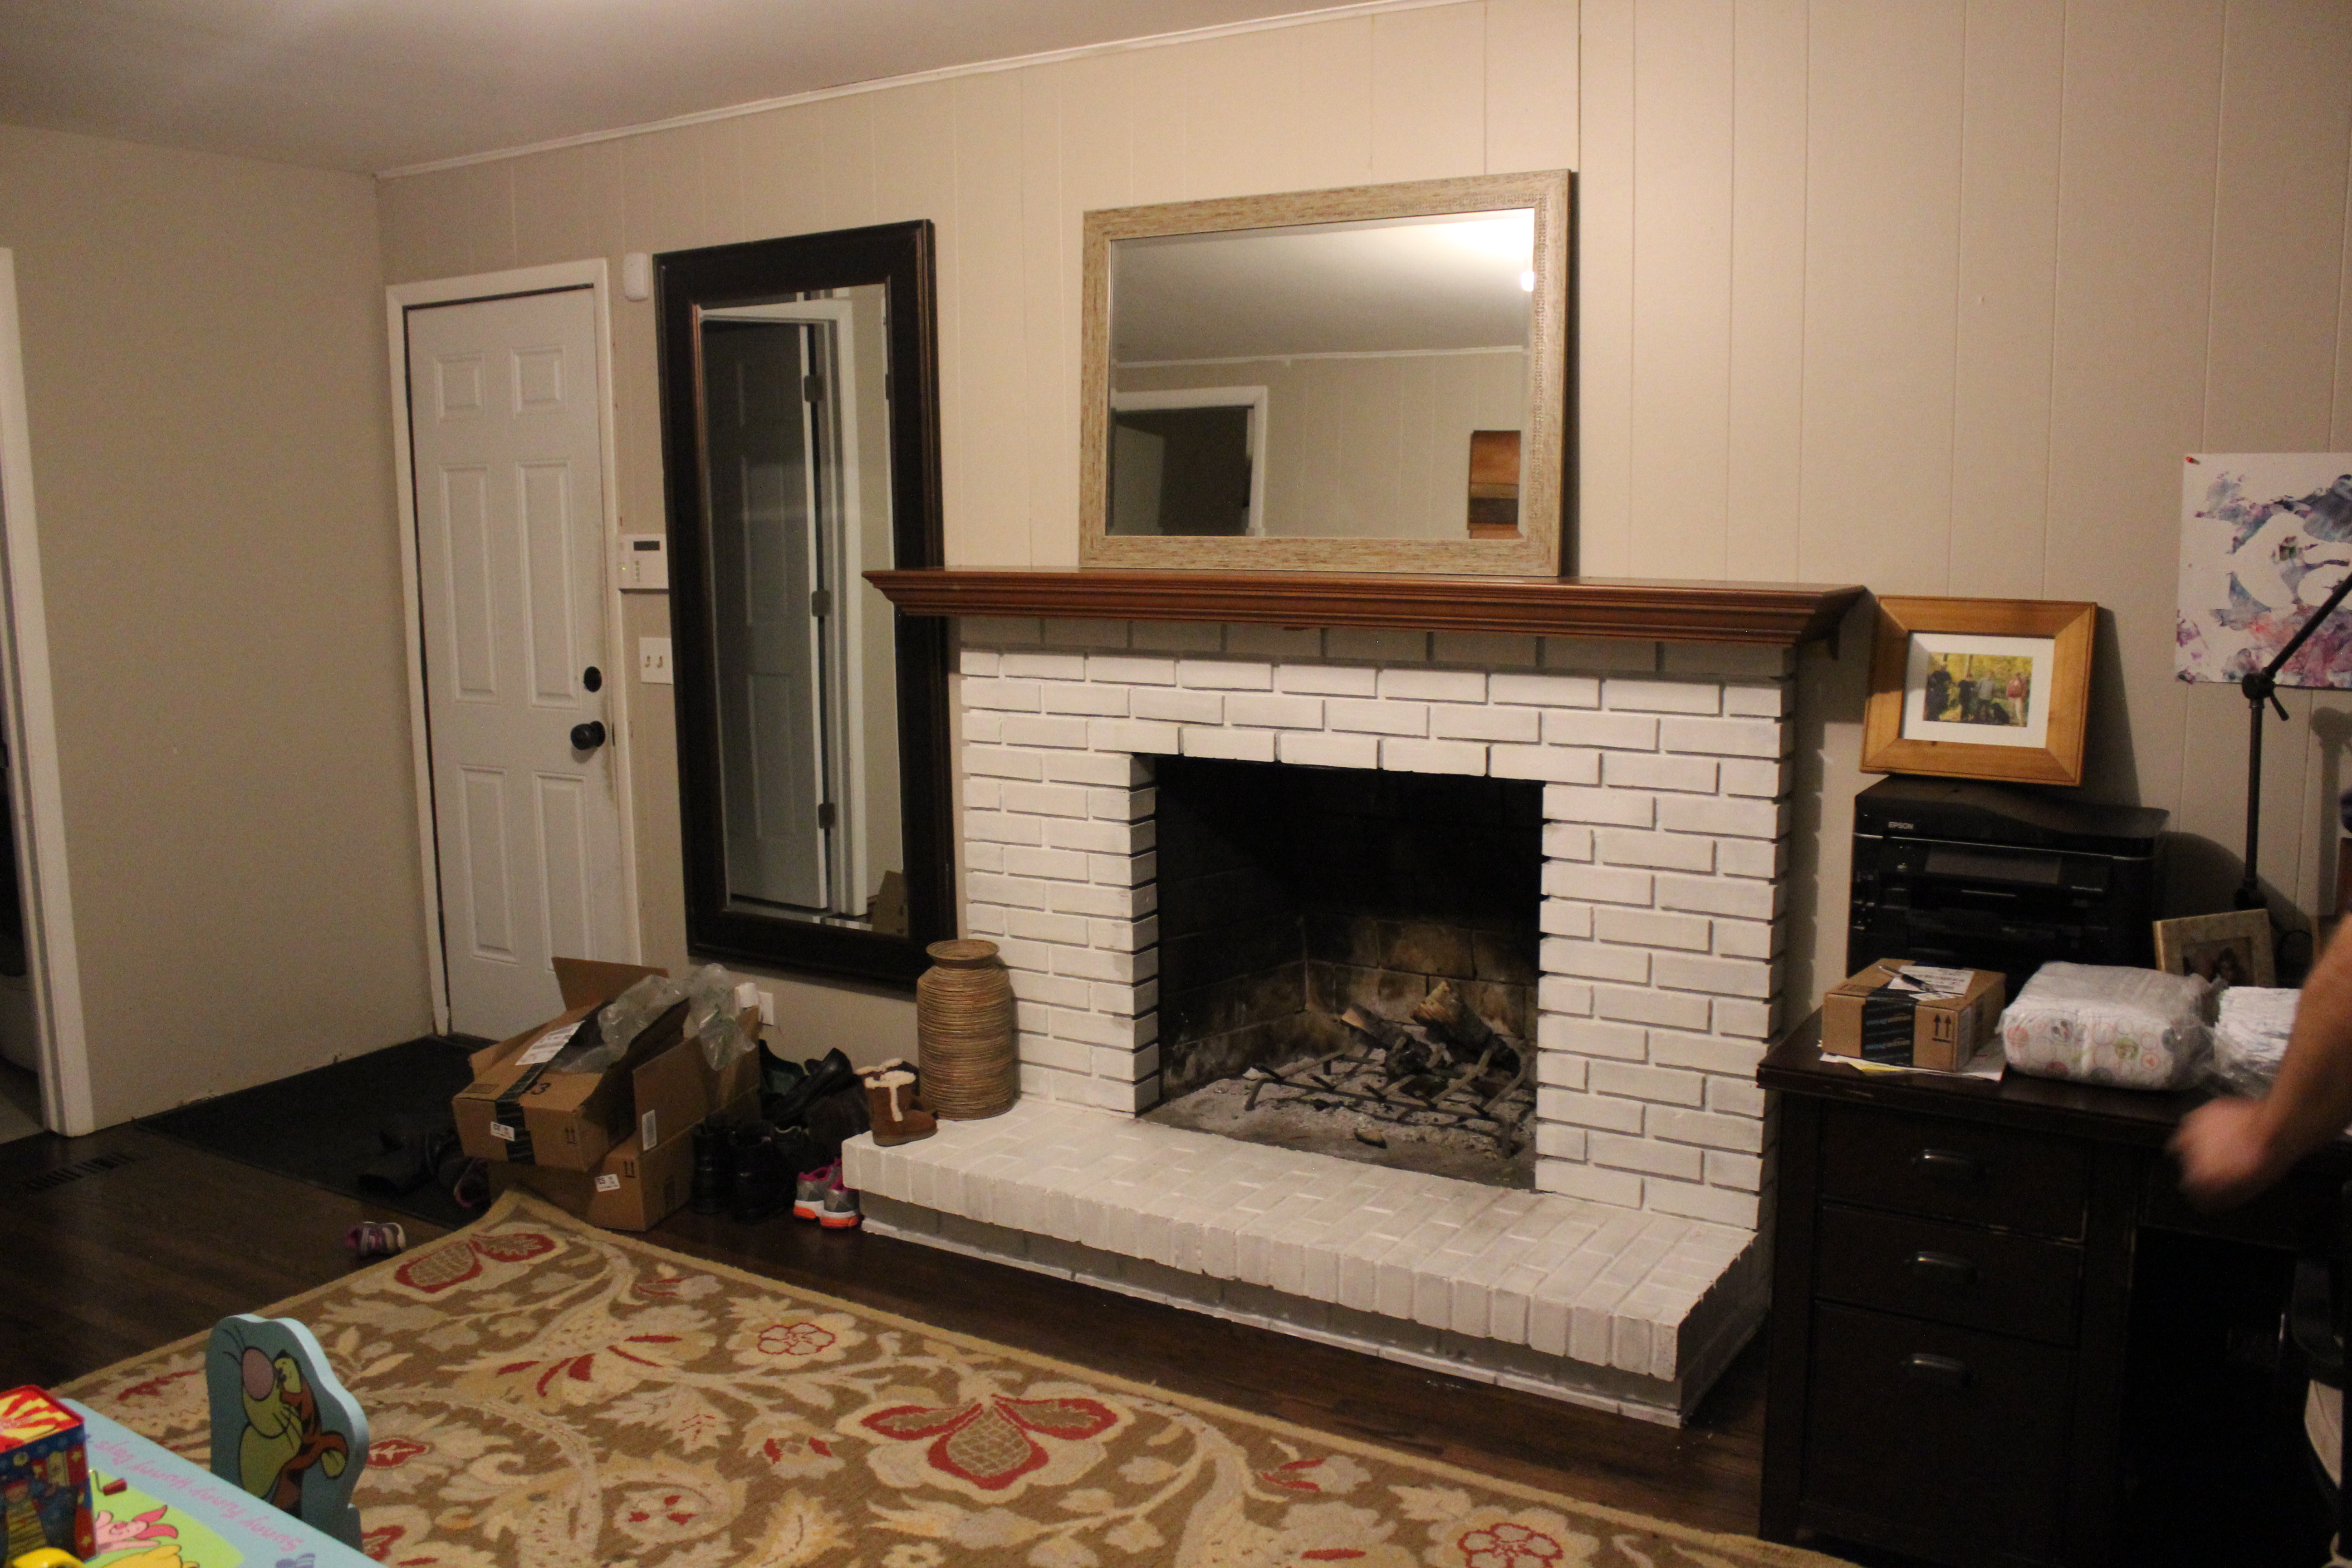
As a reminder, here is what the room started as, it was a weird den/office that we hardly used.
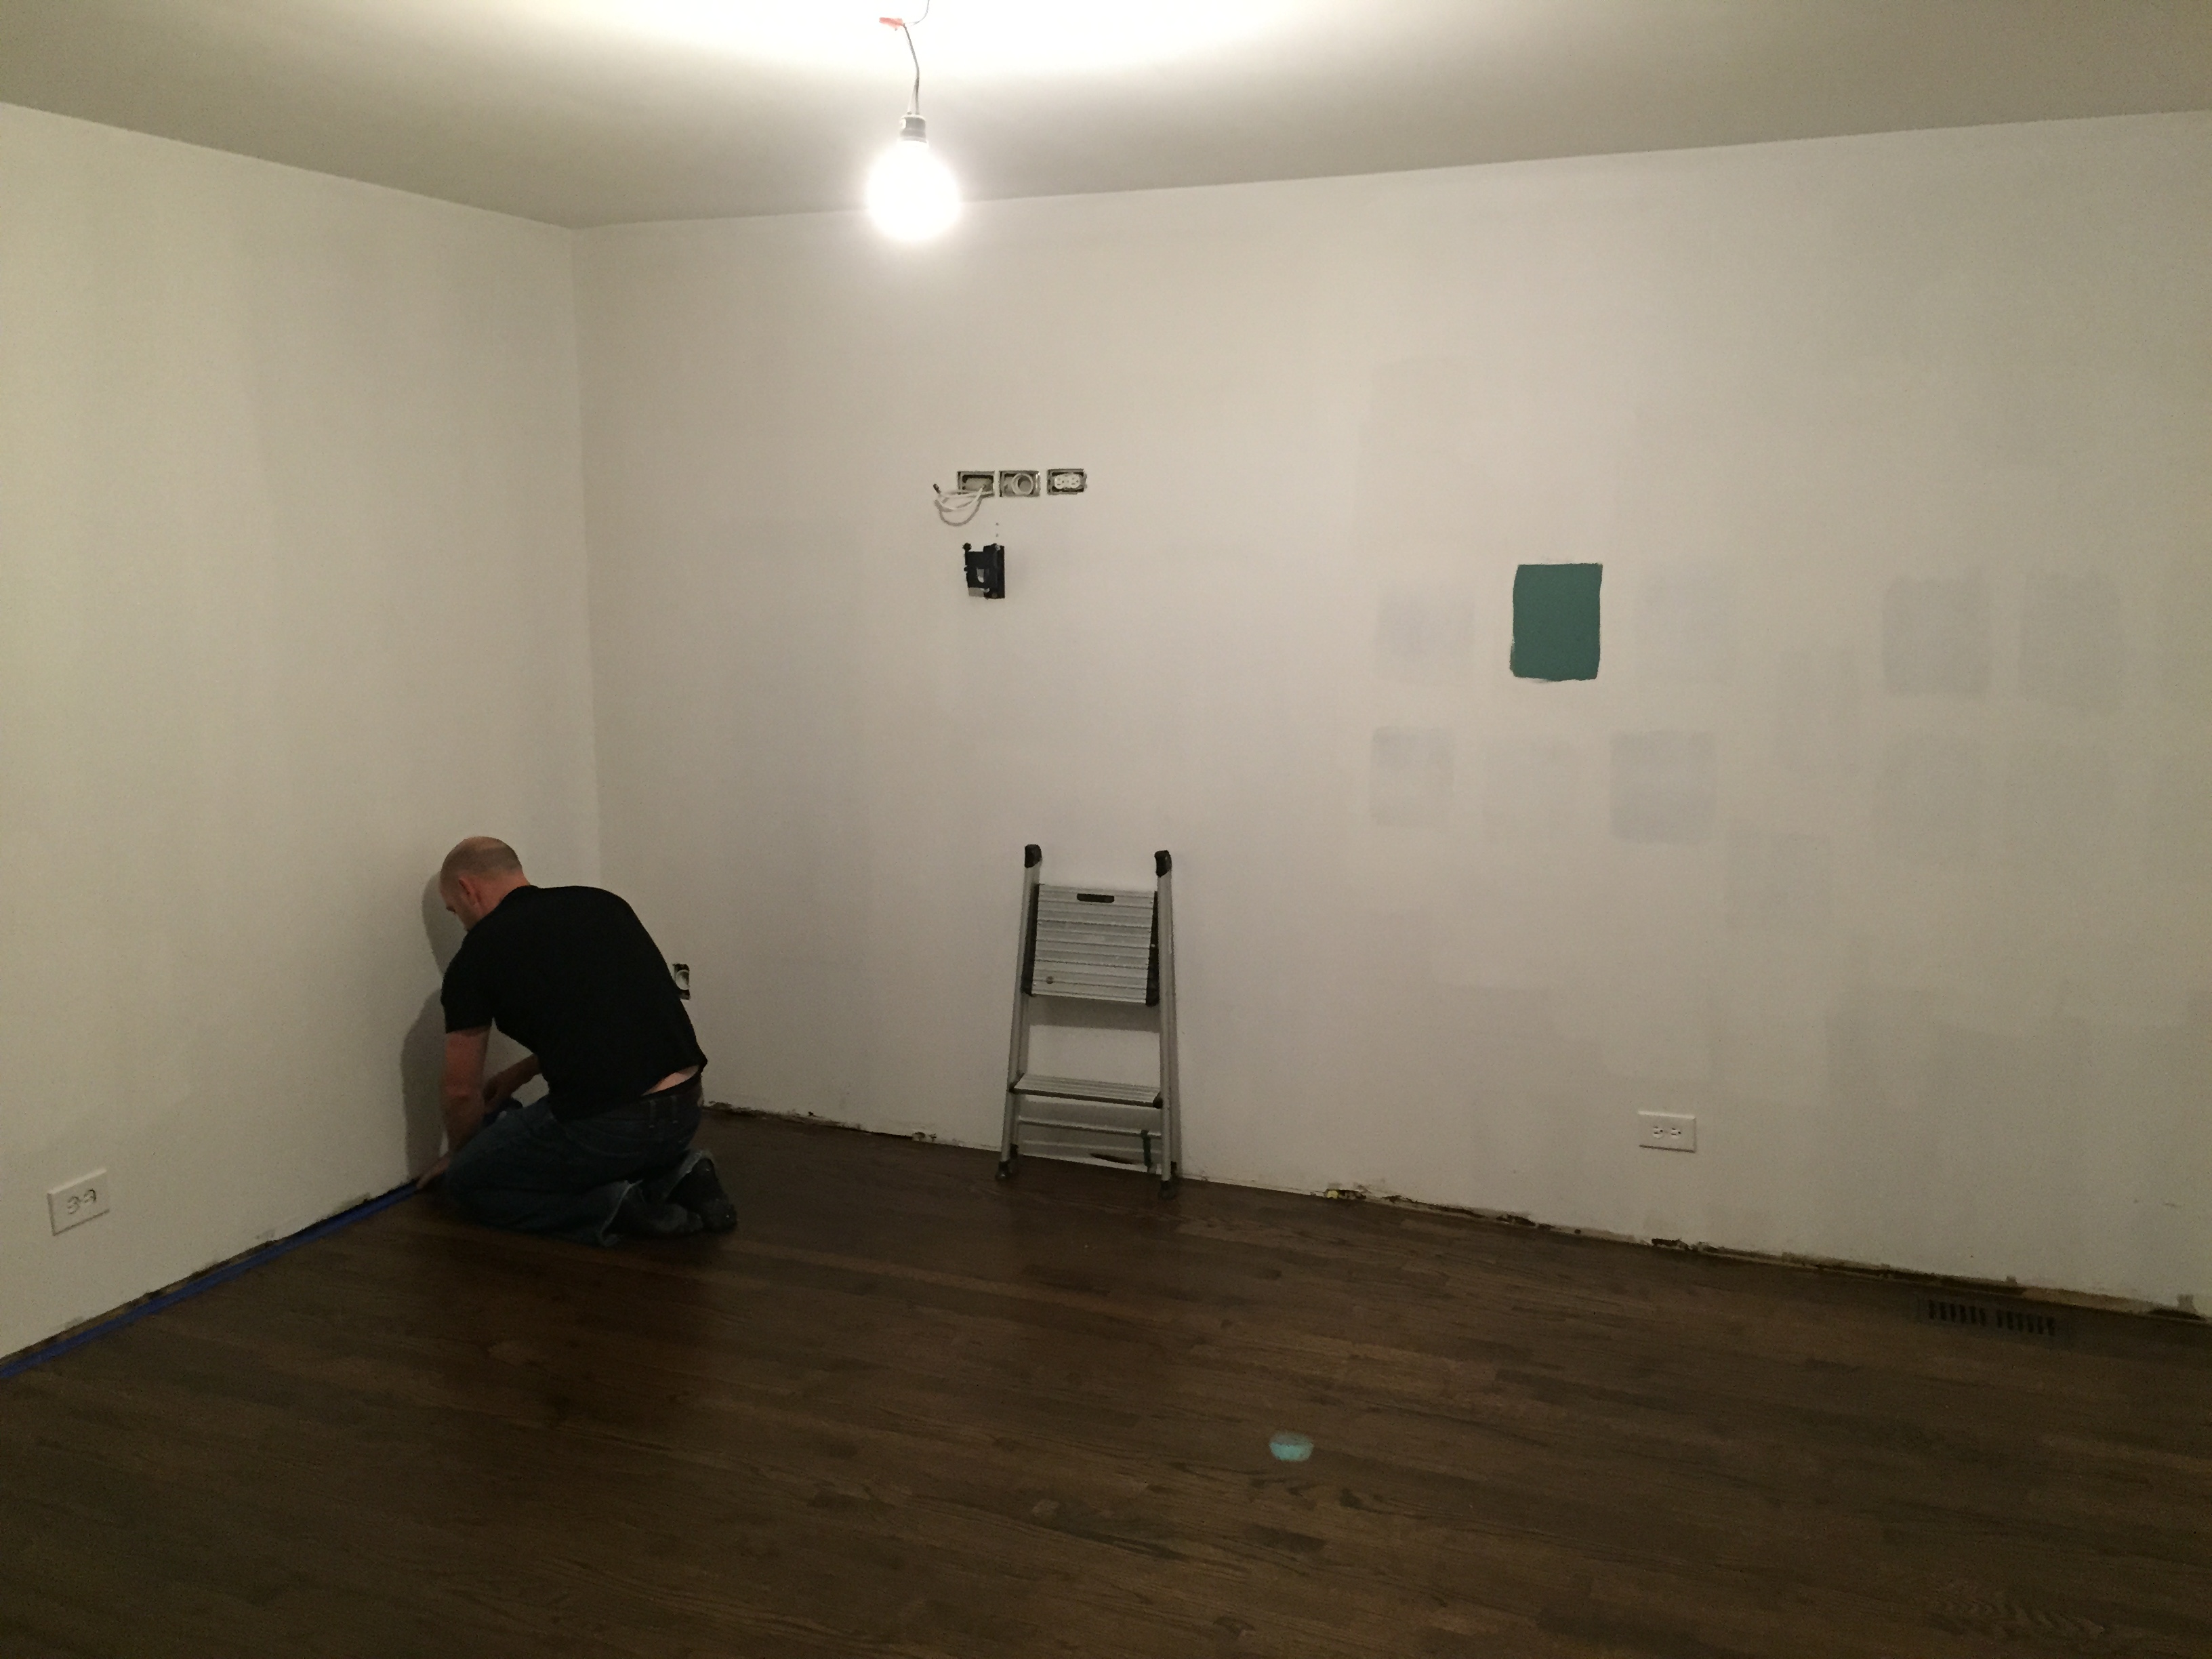
After we built a wall dividing the space into a seperate playroom and mudroom, removed the fireplace, patched and re-stained the hardwood floors, added/moved some electrical, removed the wall paneling and finished the drywall, the room was looking like this.
Today, it looks like this.
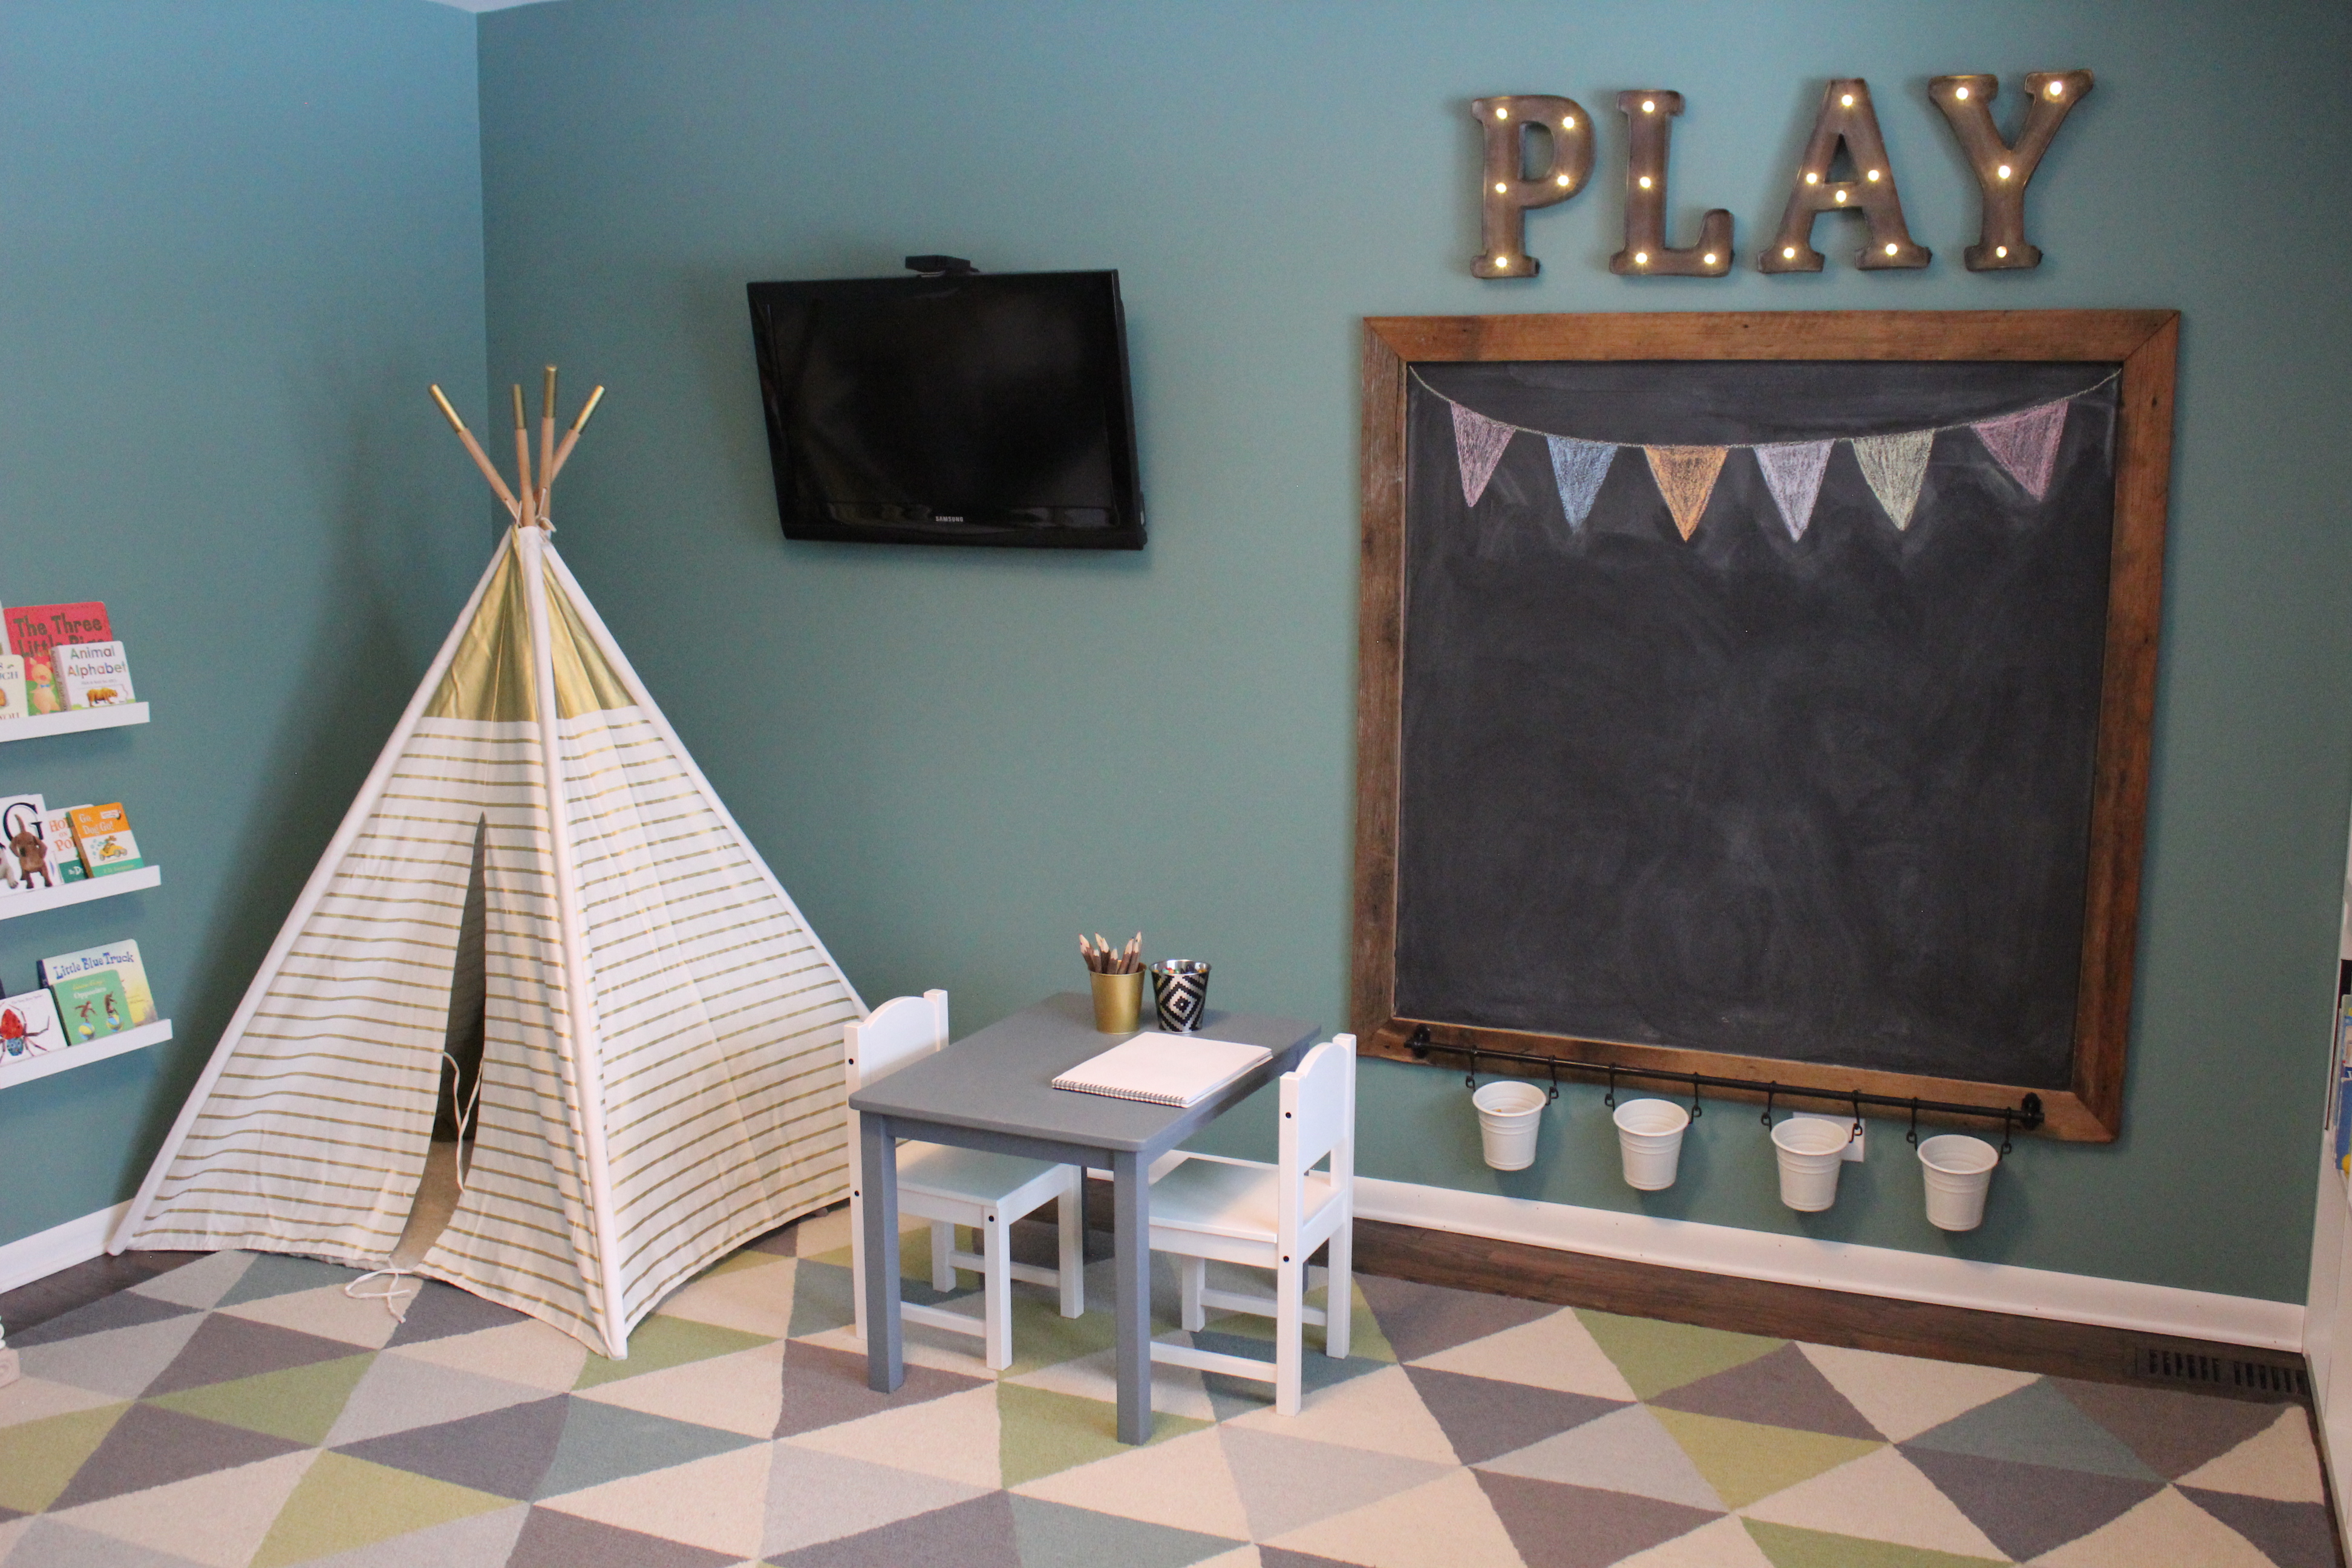
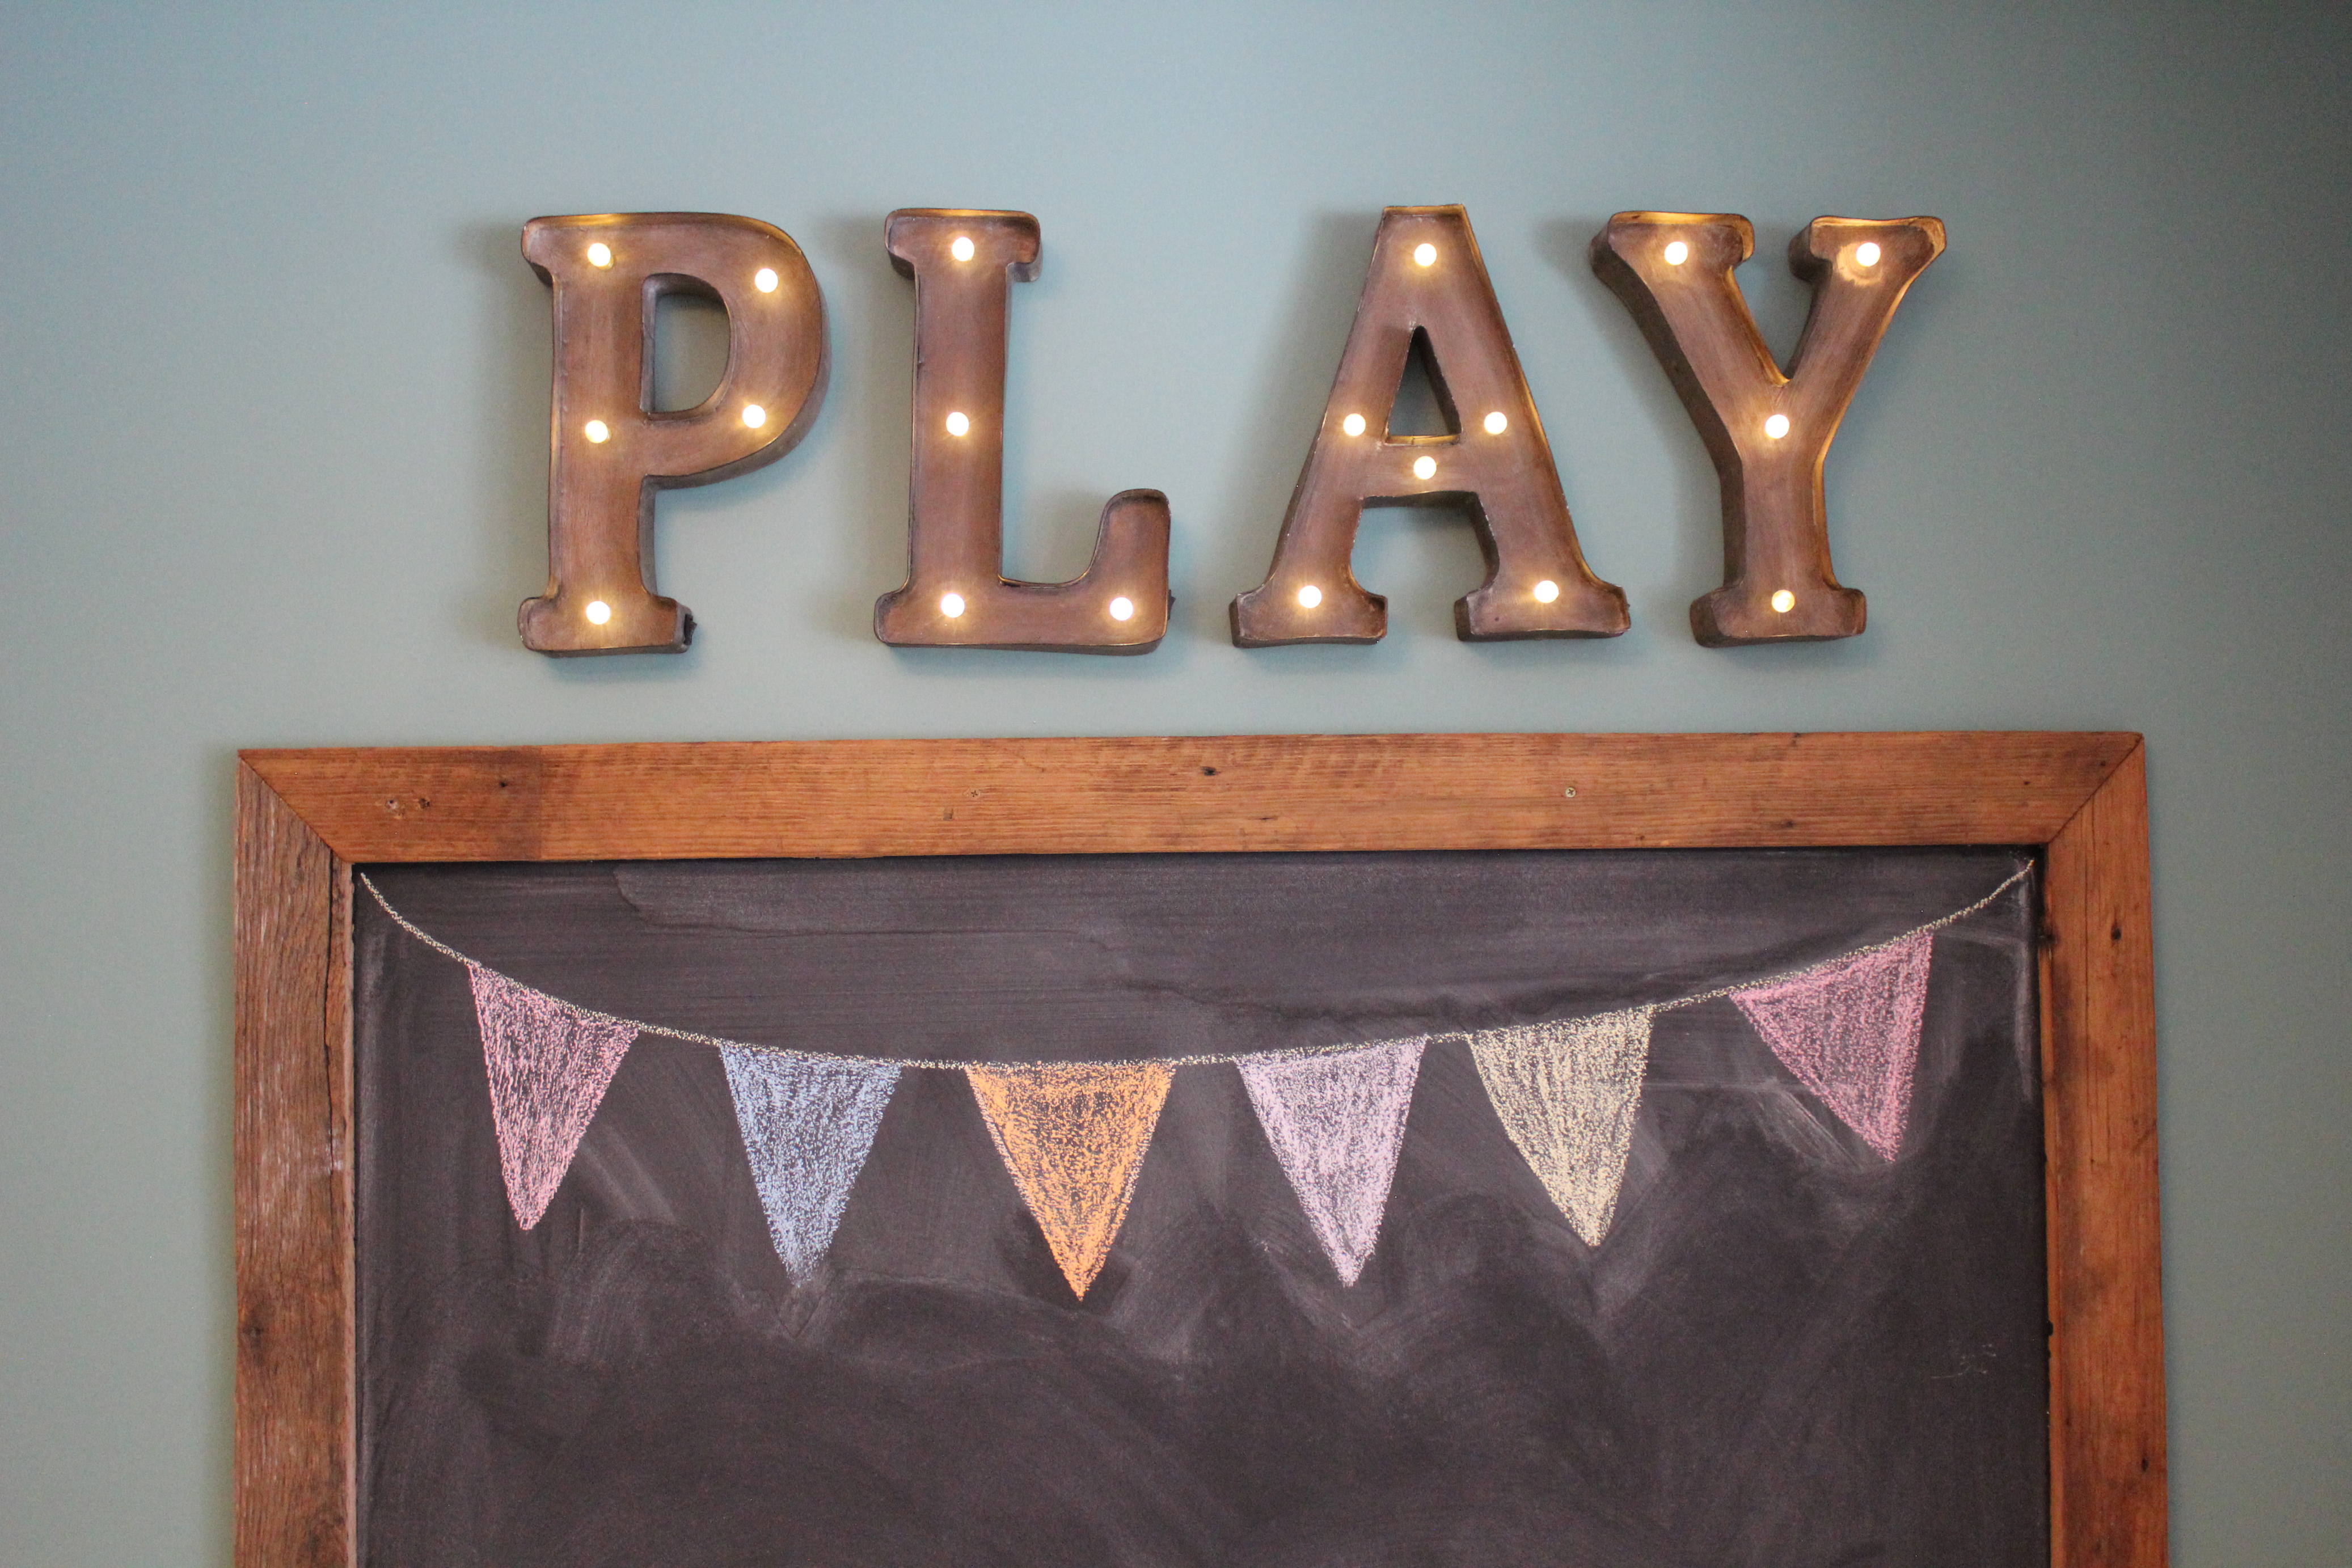
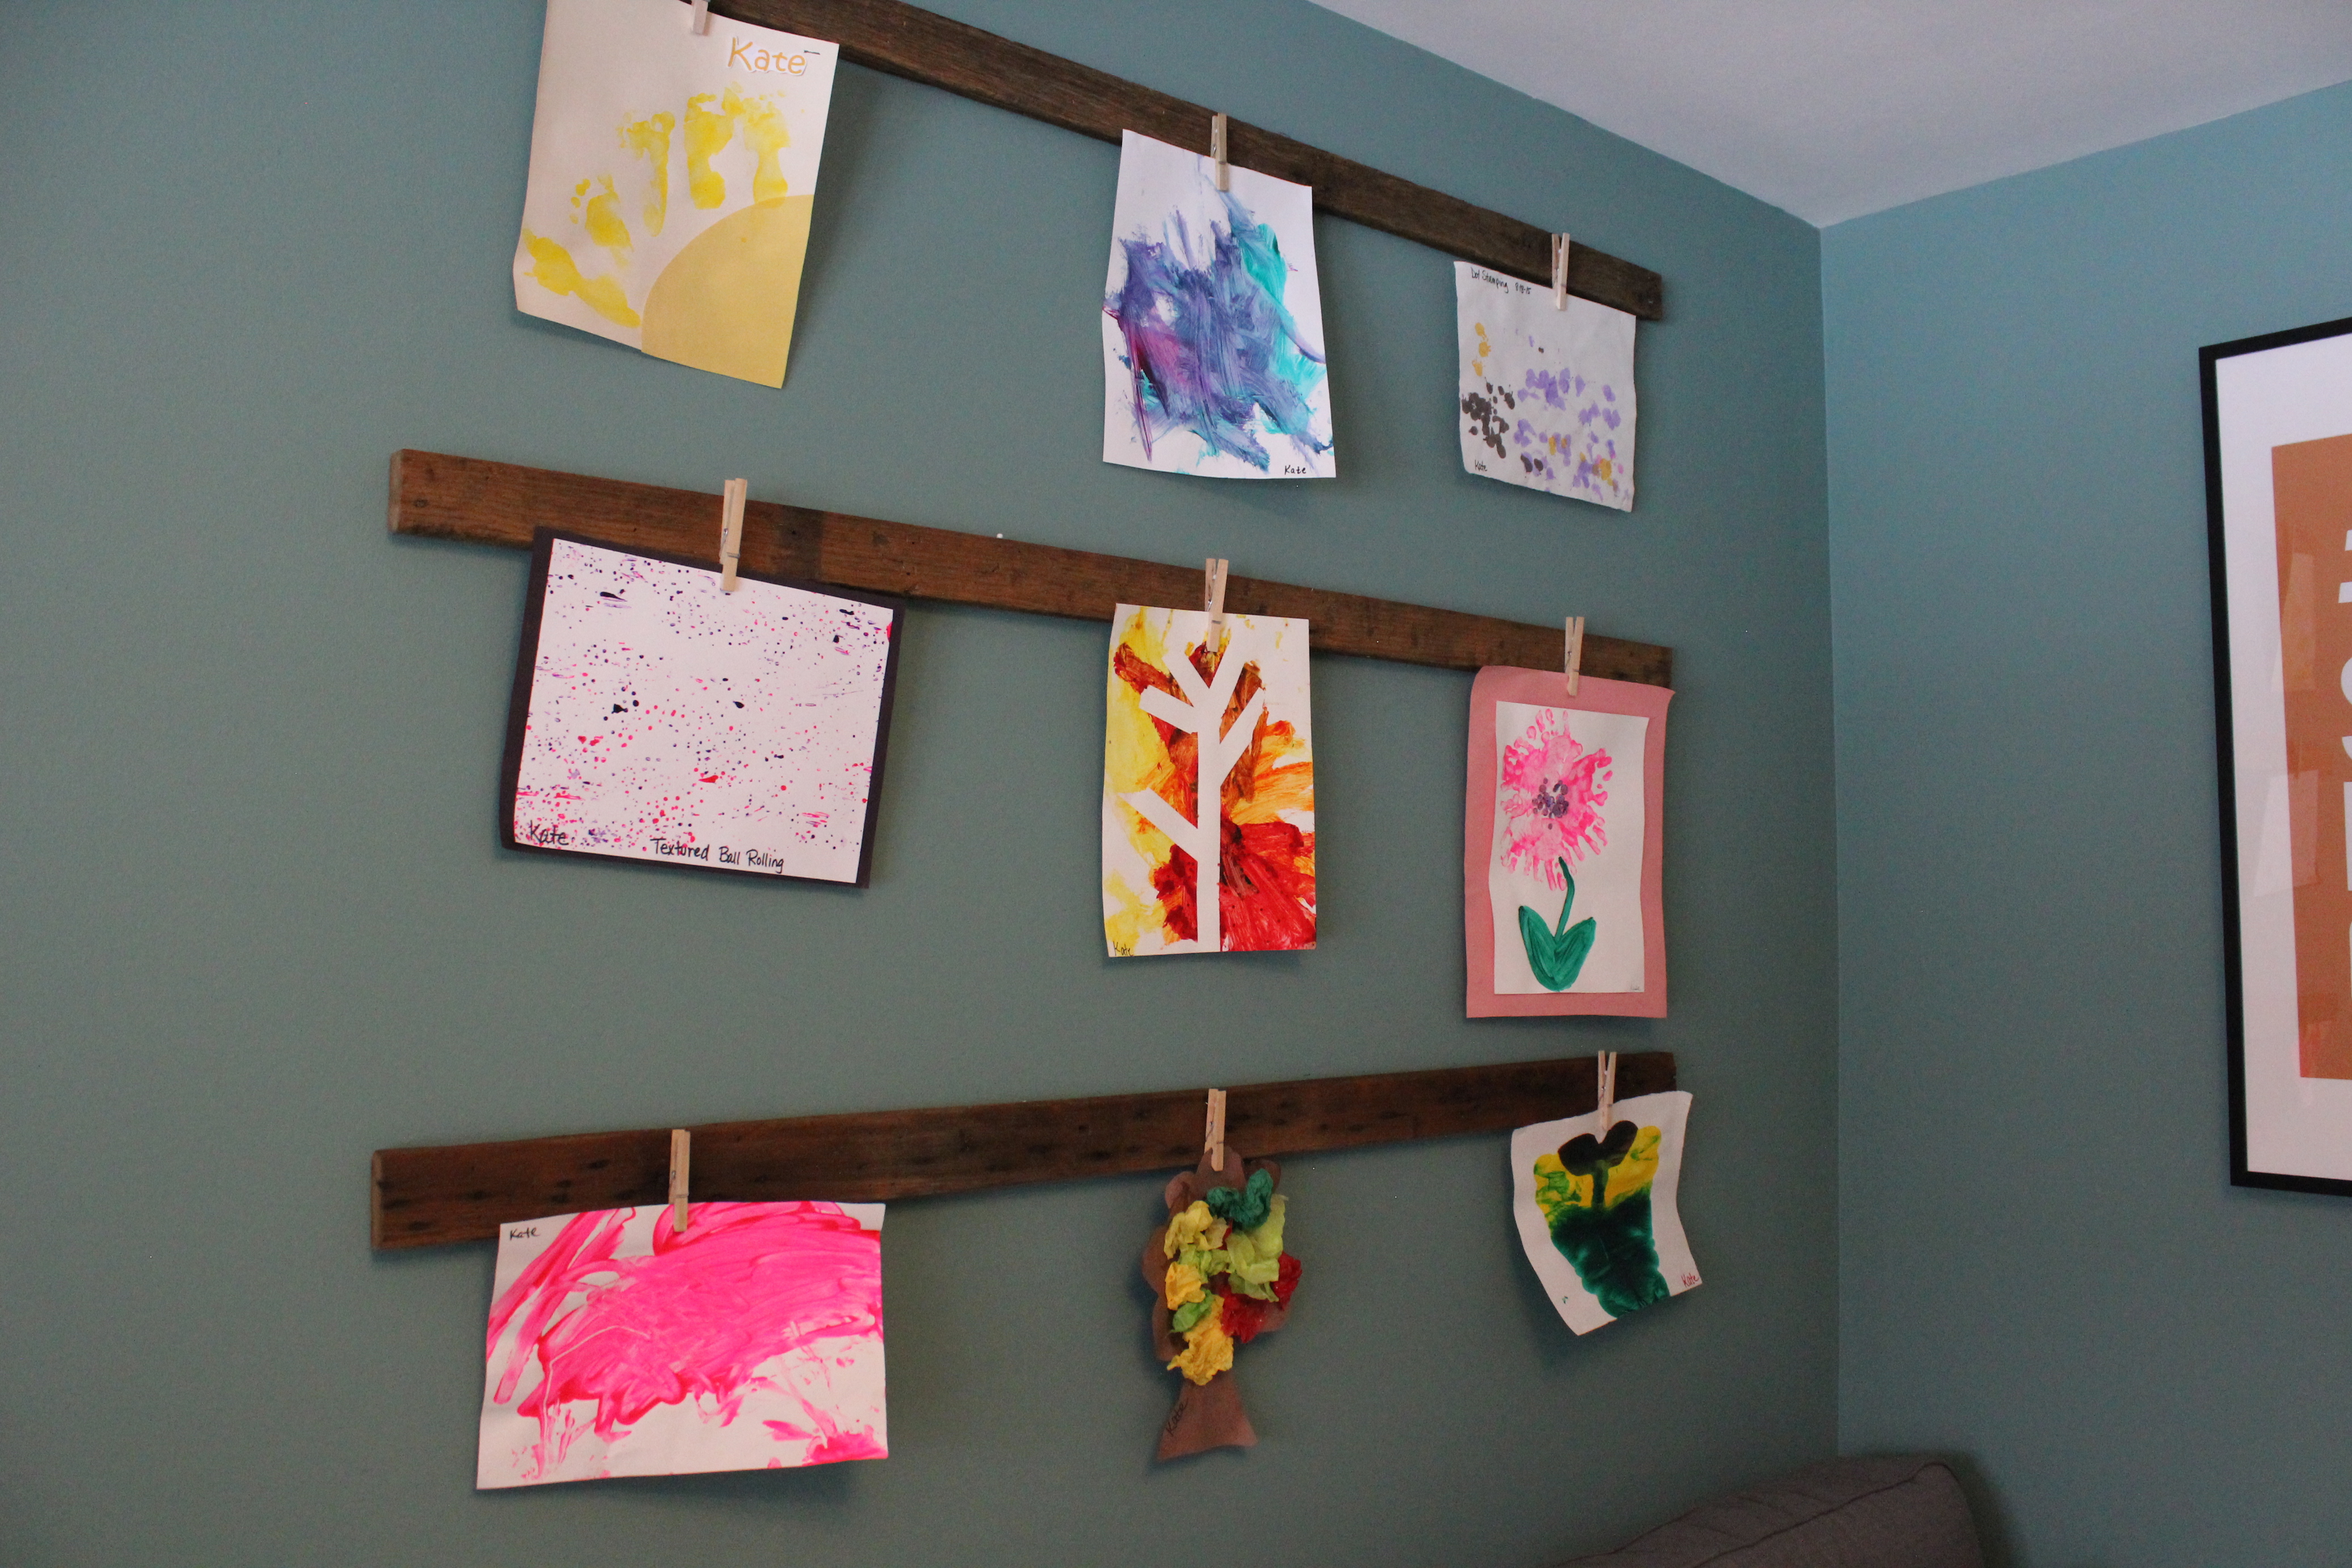
We painted the walls a dark teal from Benjamin Moore called Shenandoah. It is such a fun color, I love it! We built the chalkboard using reclaimed barn wood that we had leftover from our living room beams.
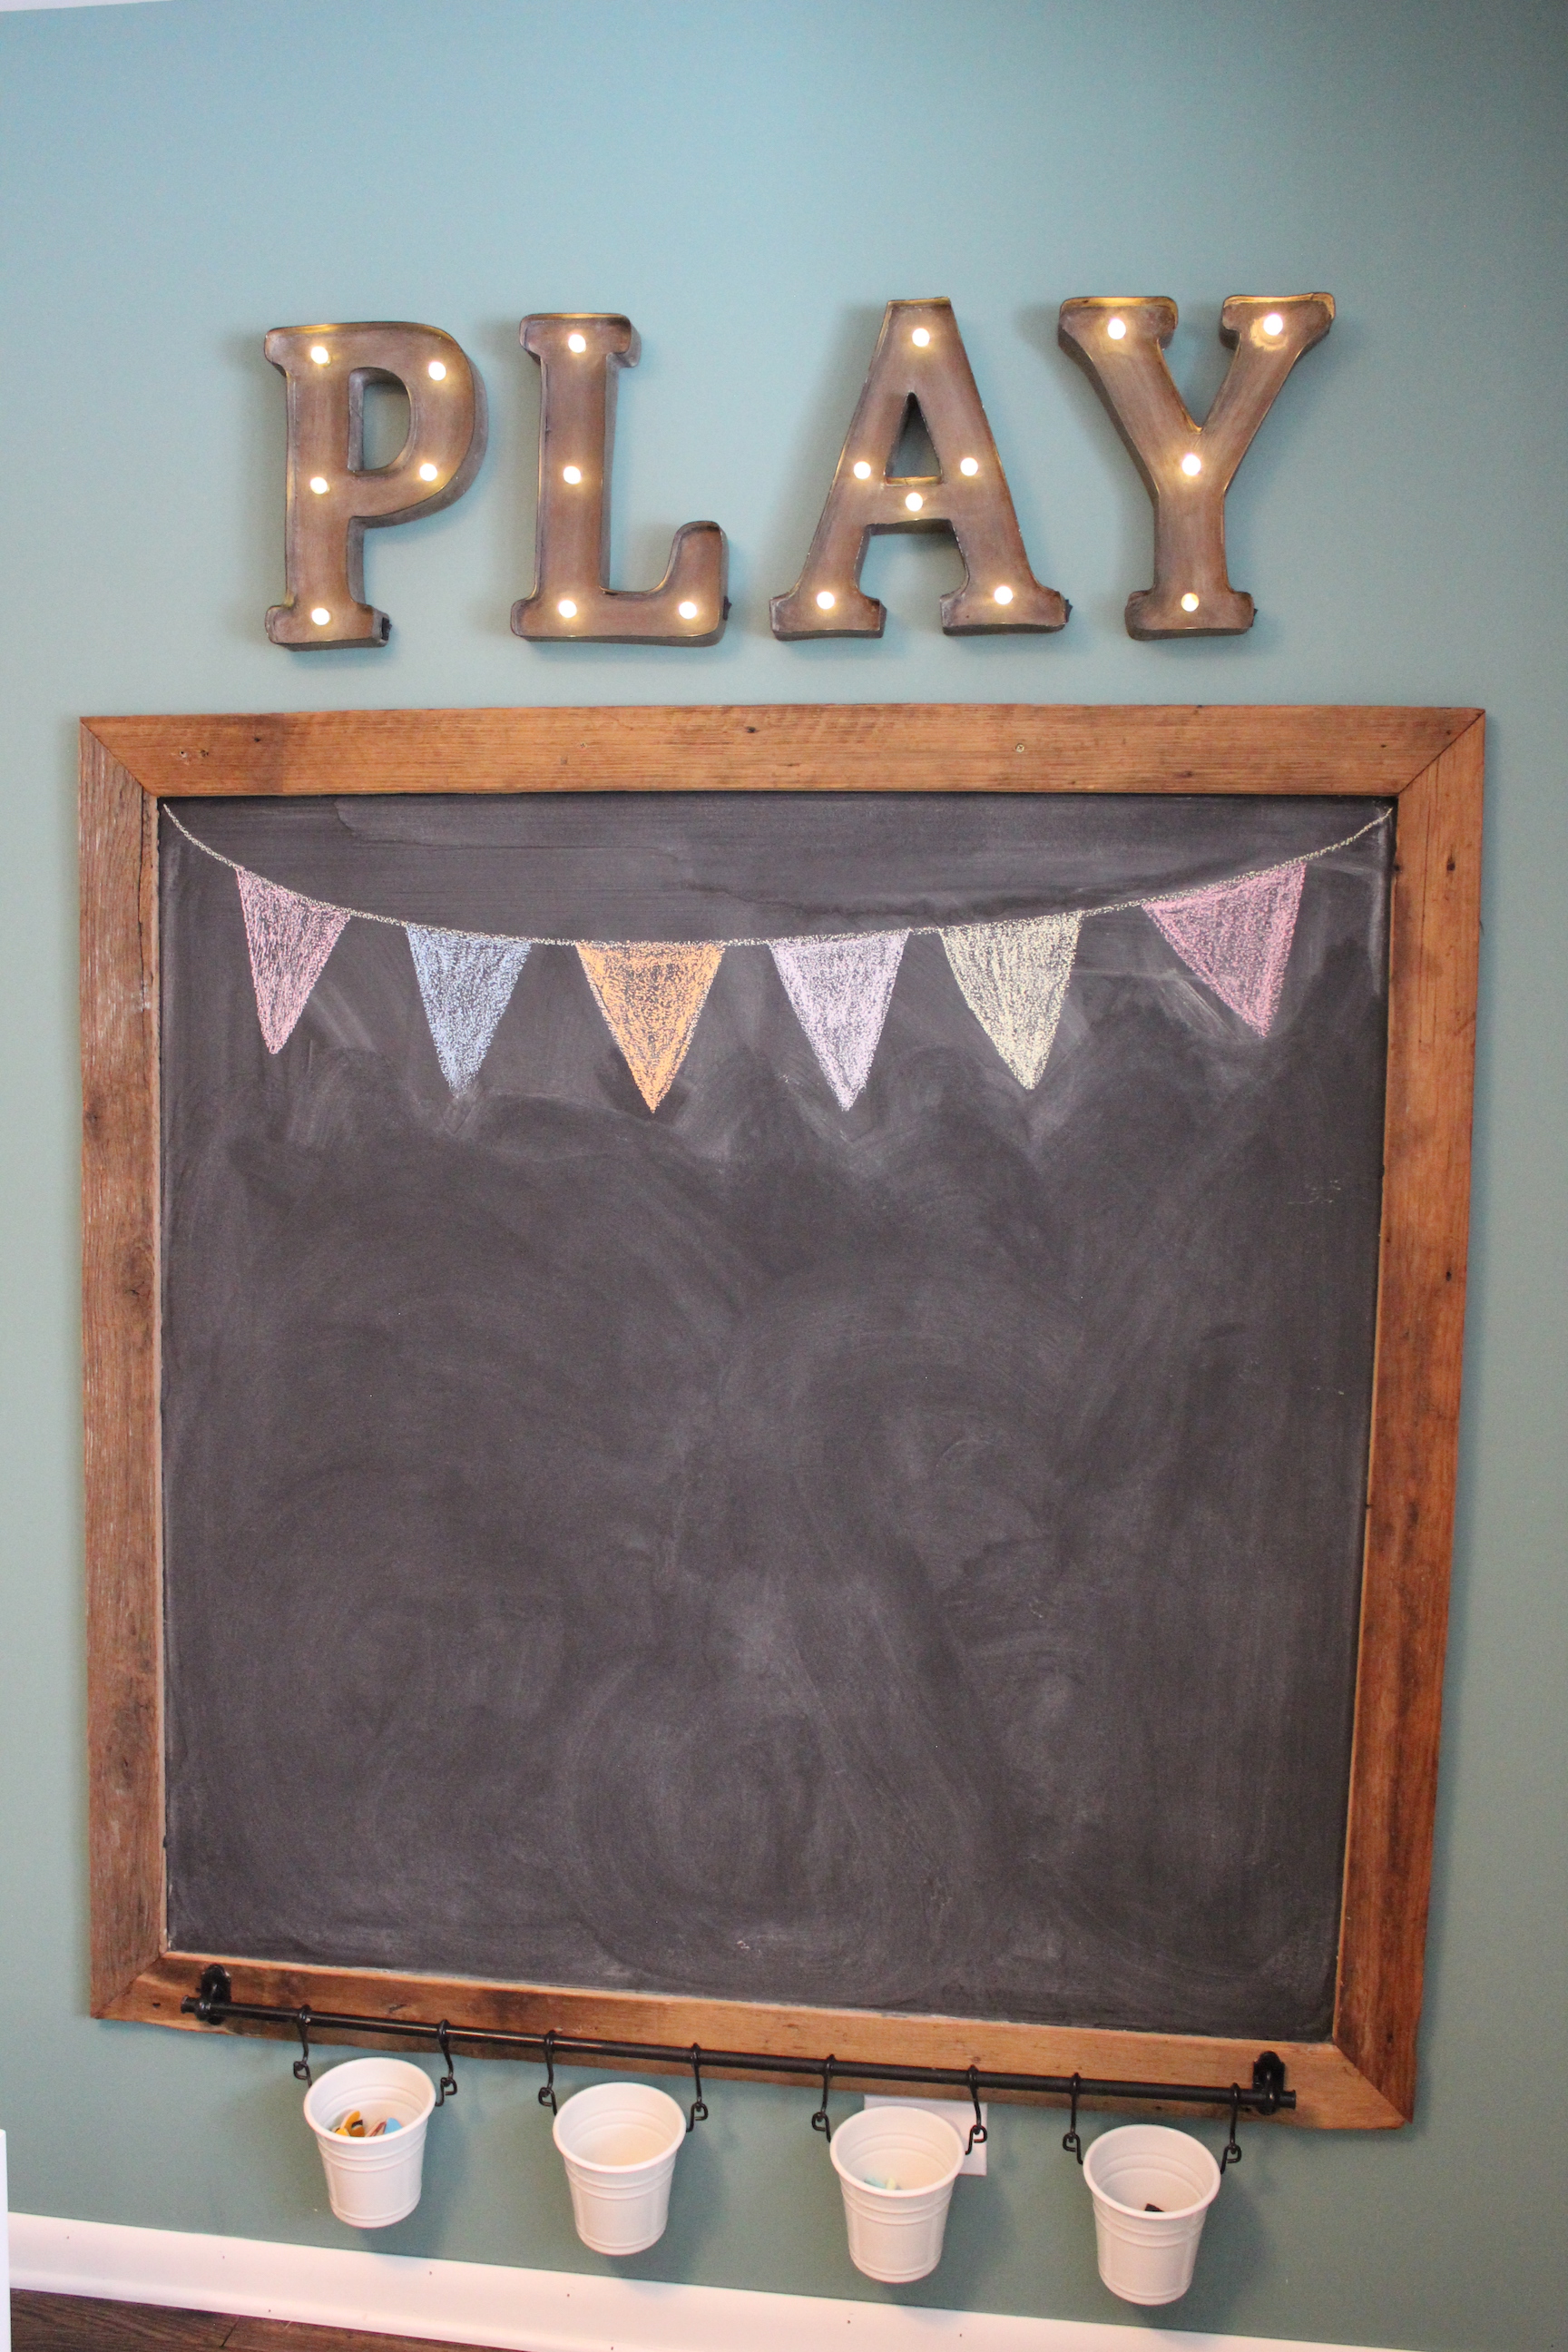
We just framed a sheet of plywood painted with magnetic and chalkboard paint with the barnwood. The buckets at the bottom hold chalk, an eraser, and magnetic letters. It is the Fintorp system from Ikea.
Above the chalkboard are these marquee letters from Pier 1.
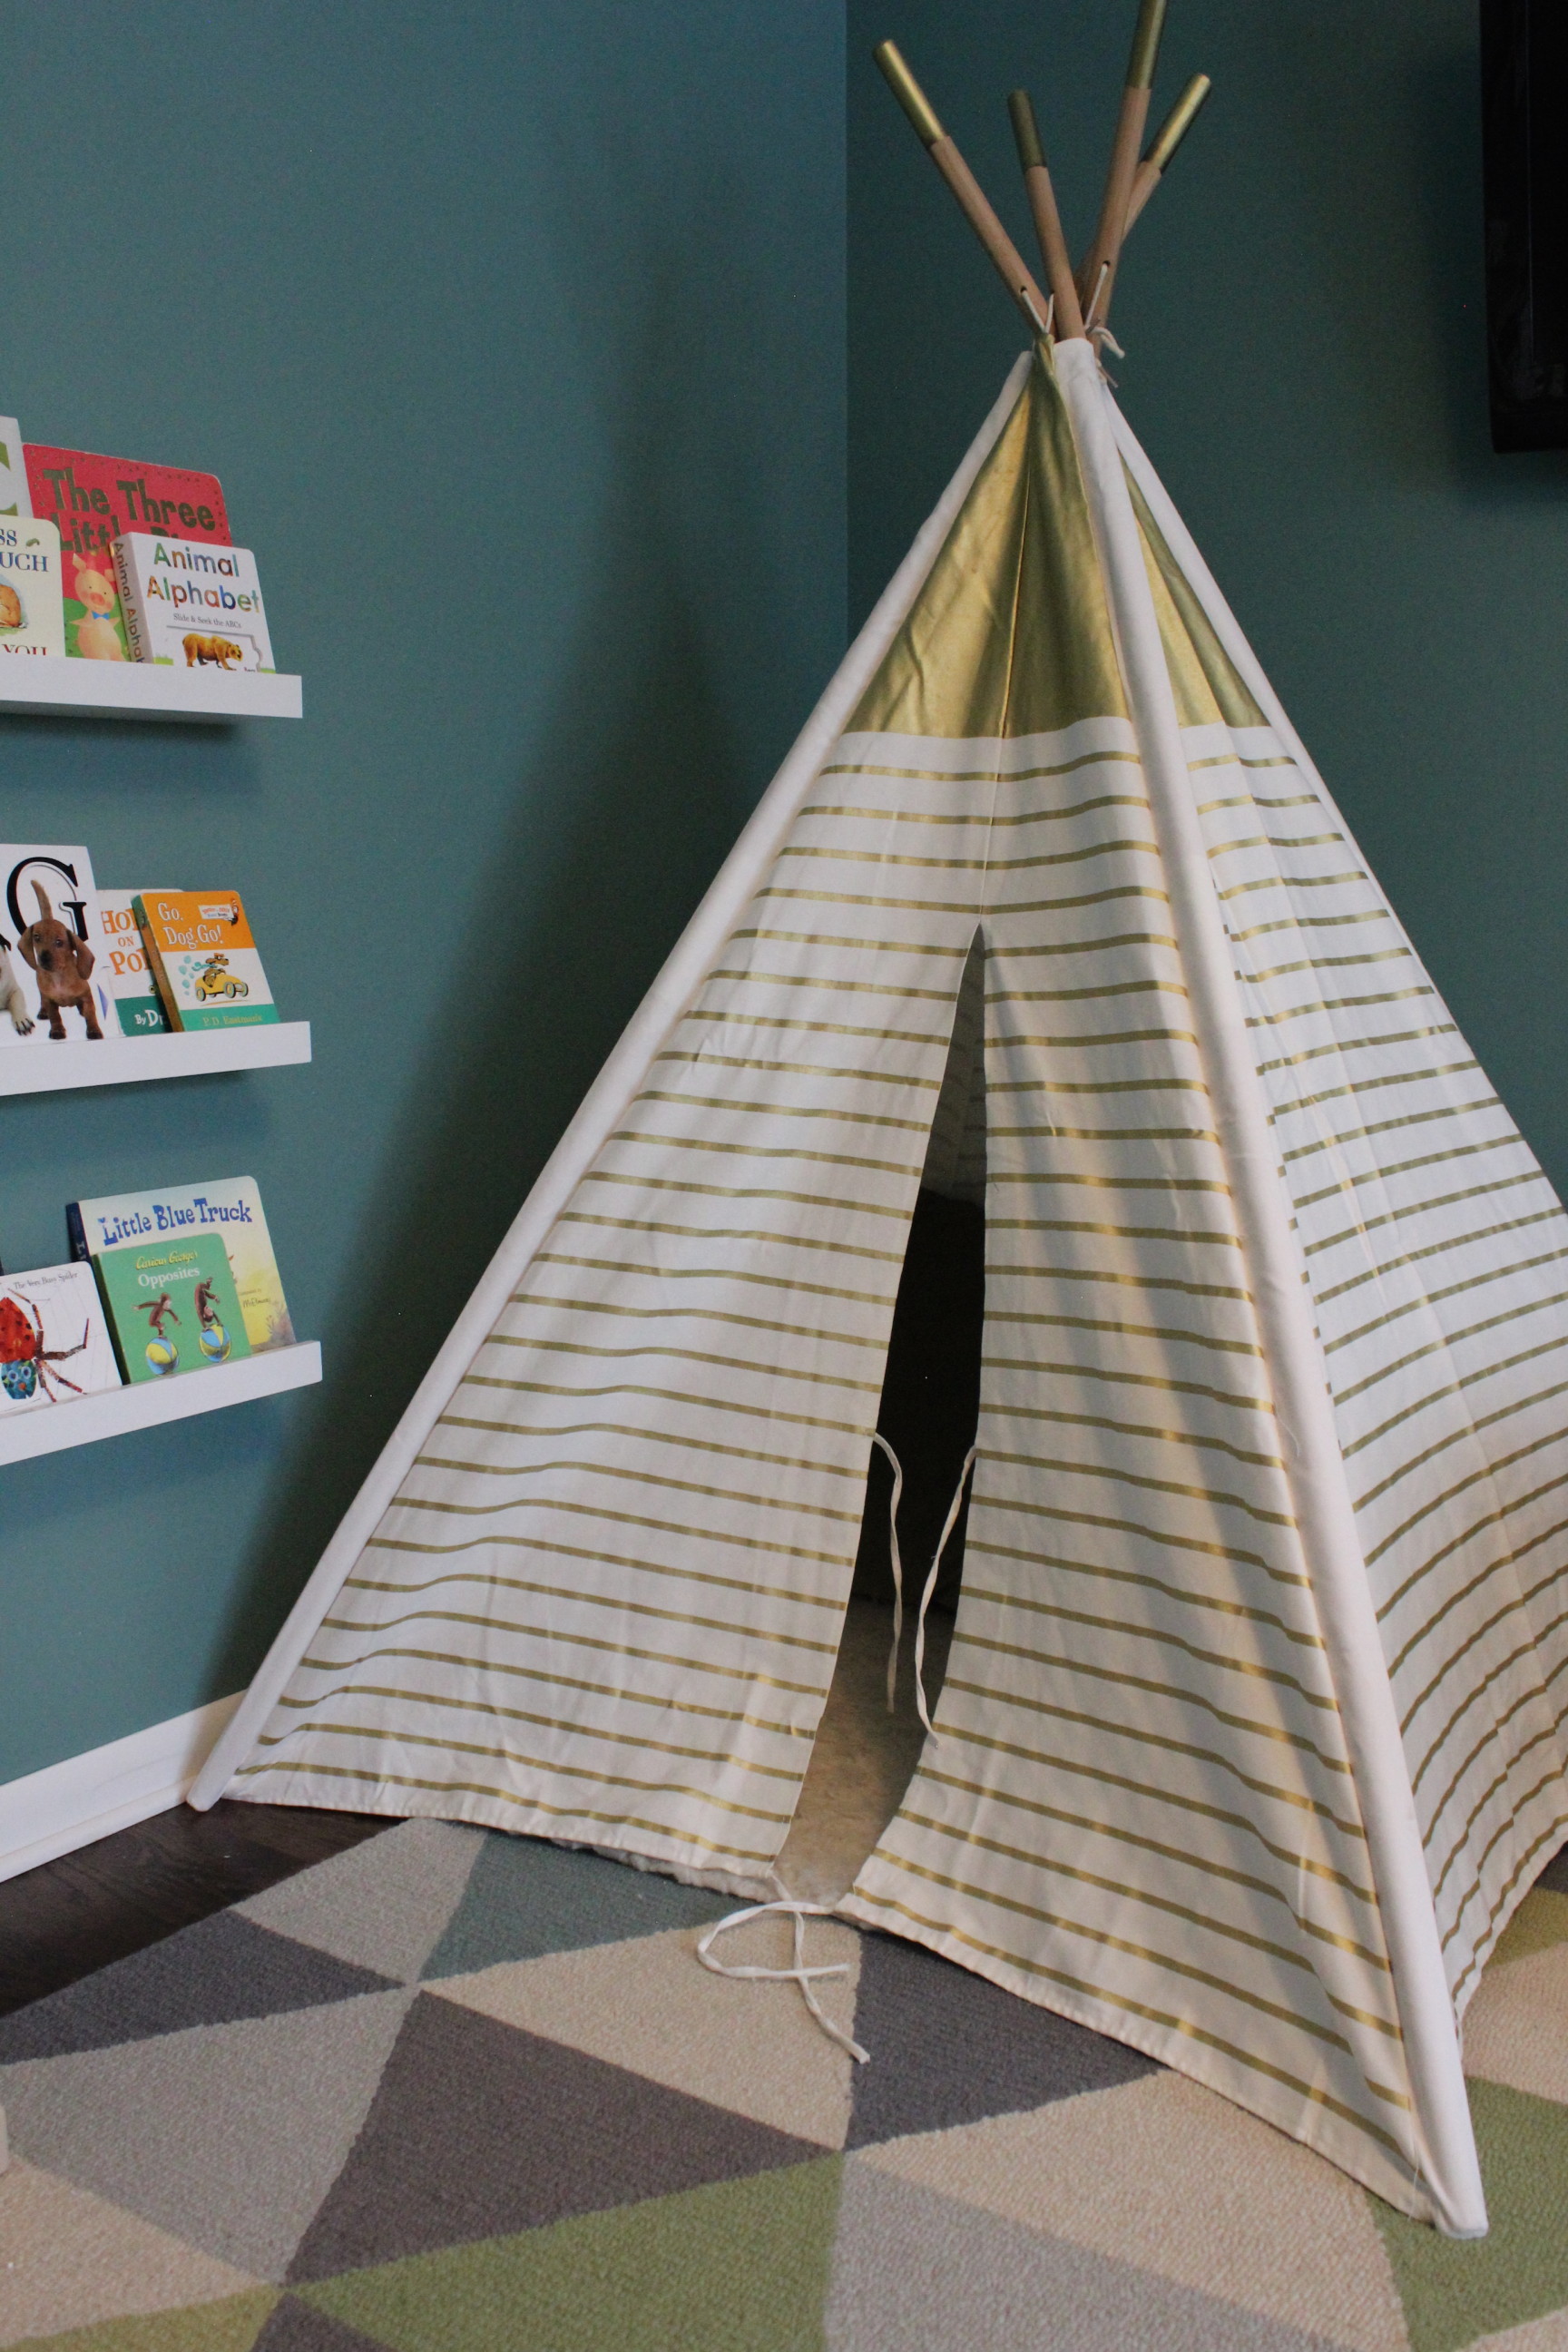
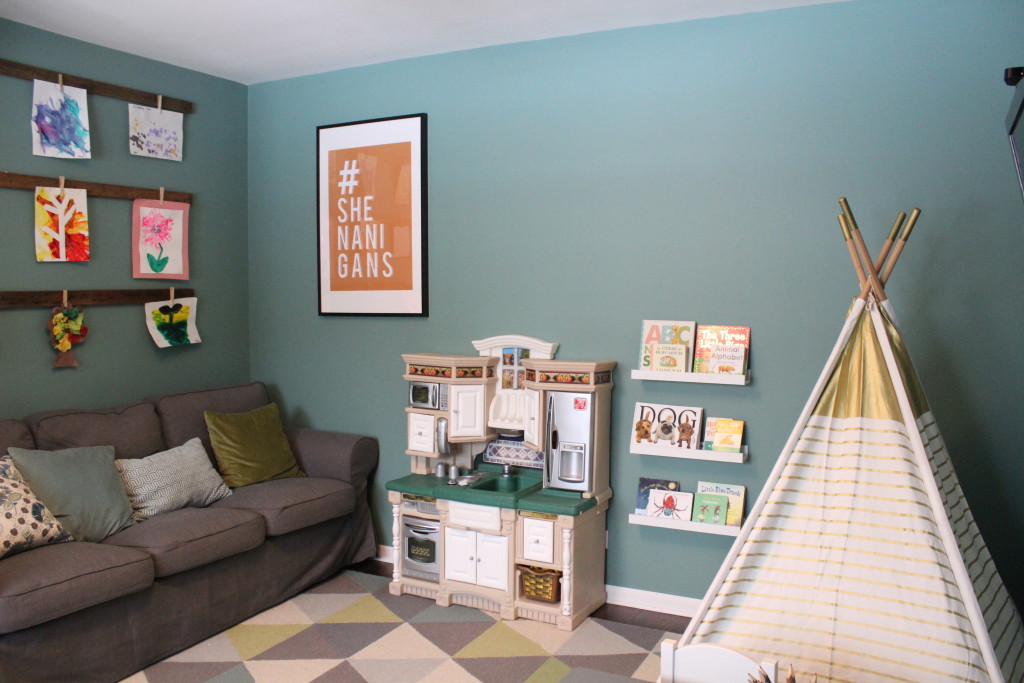
The gold and white striped teepee was Kate’s big present from Santa. “He” got it from Land of Nod. And then we hung these ledges from Target next to it for easy access to books.
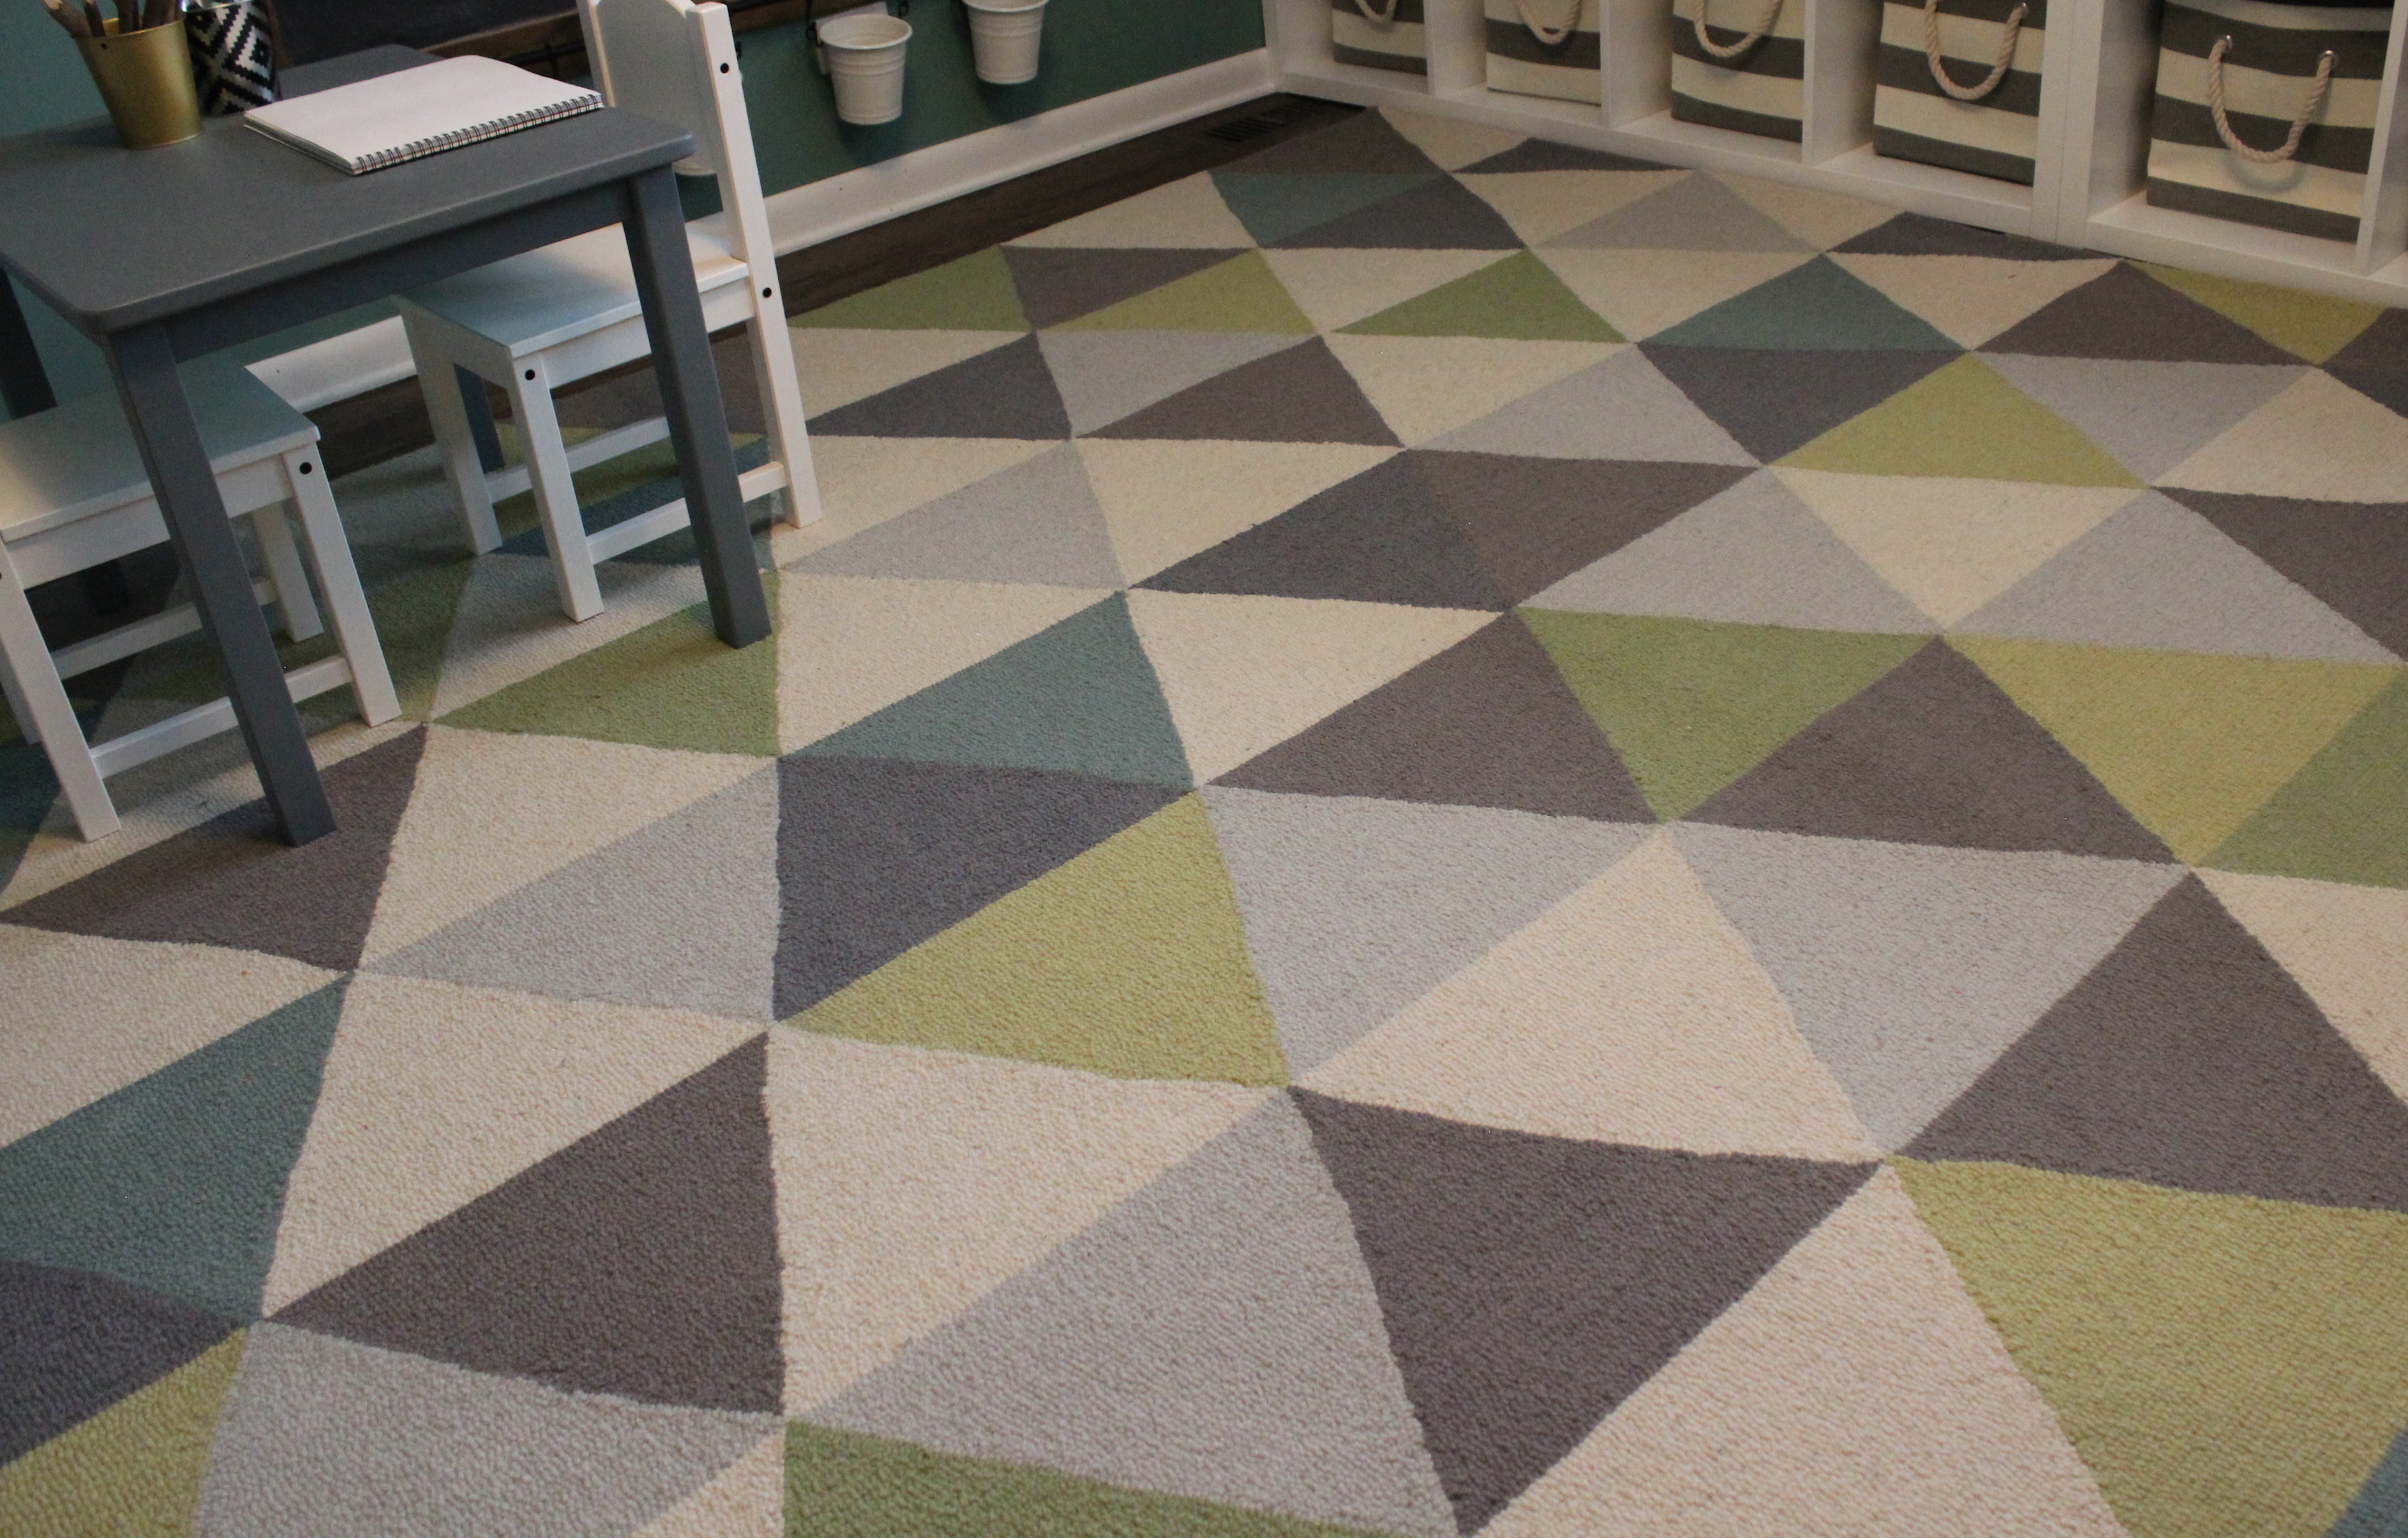
The rug was my inspiration for the room. It is this one from Rugs USA, which I got 80% during a Black Friday sale. I love that is fun and playful, but not too kiddy. It is a great quality rug for the price.
The table was a hand-me-down Winnie the Pooh table that I painted Peak Point by Behr. The chairs are the Sundvik chairs from Ikea.
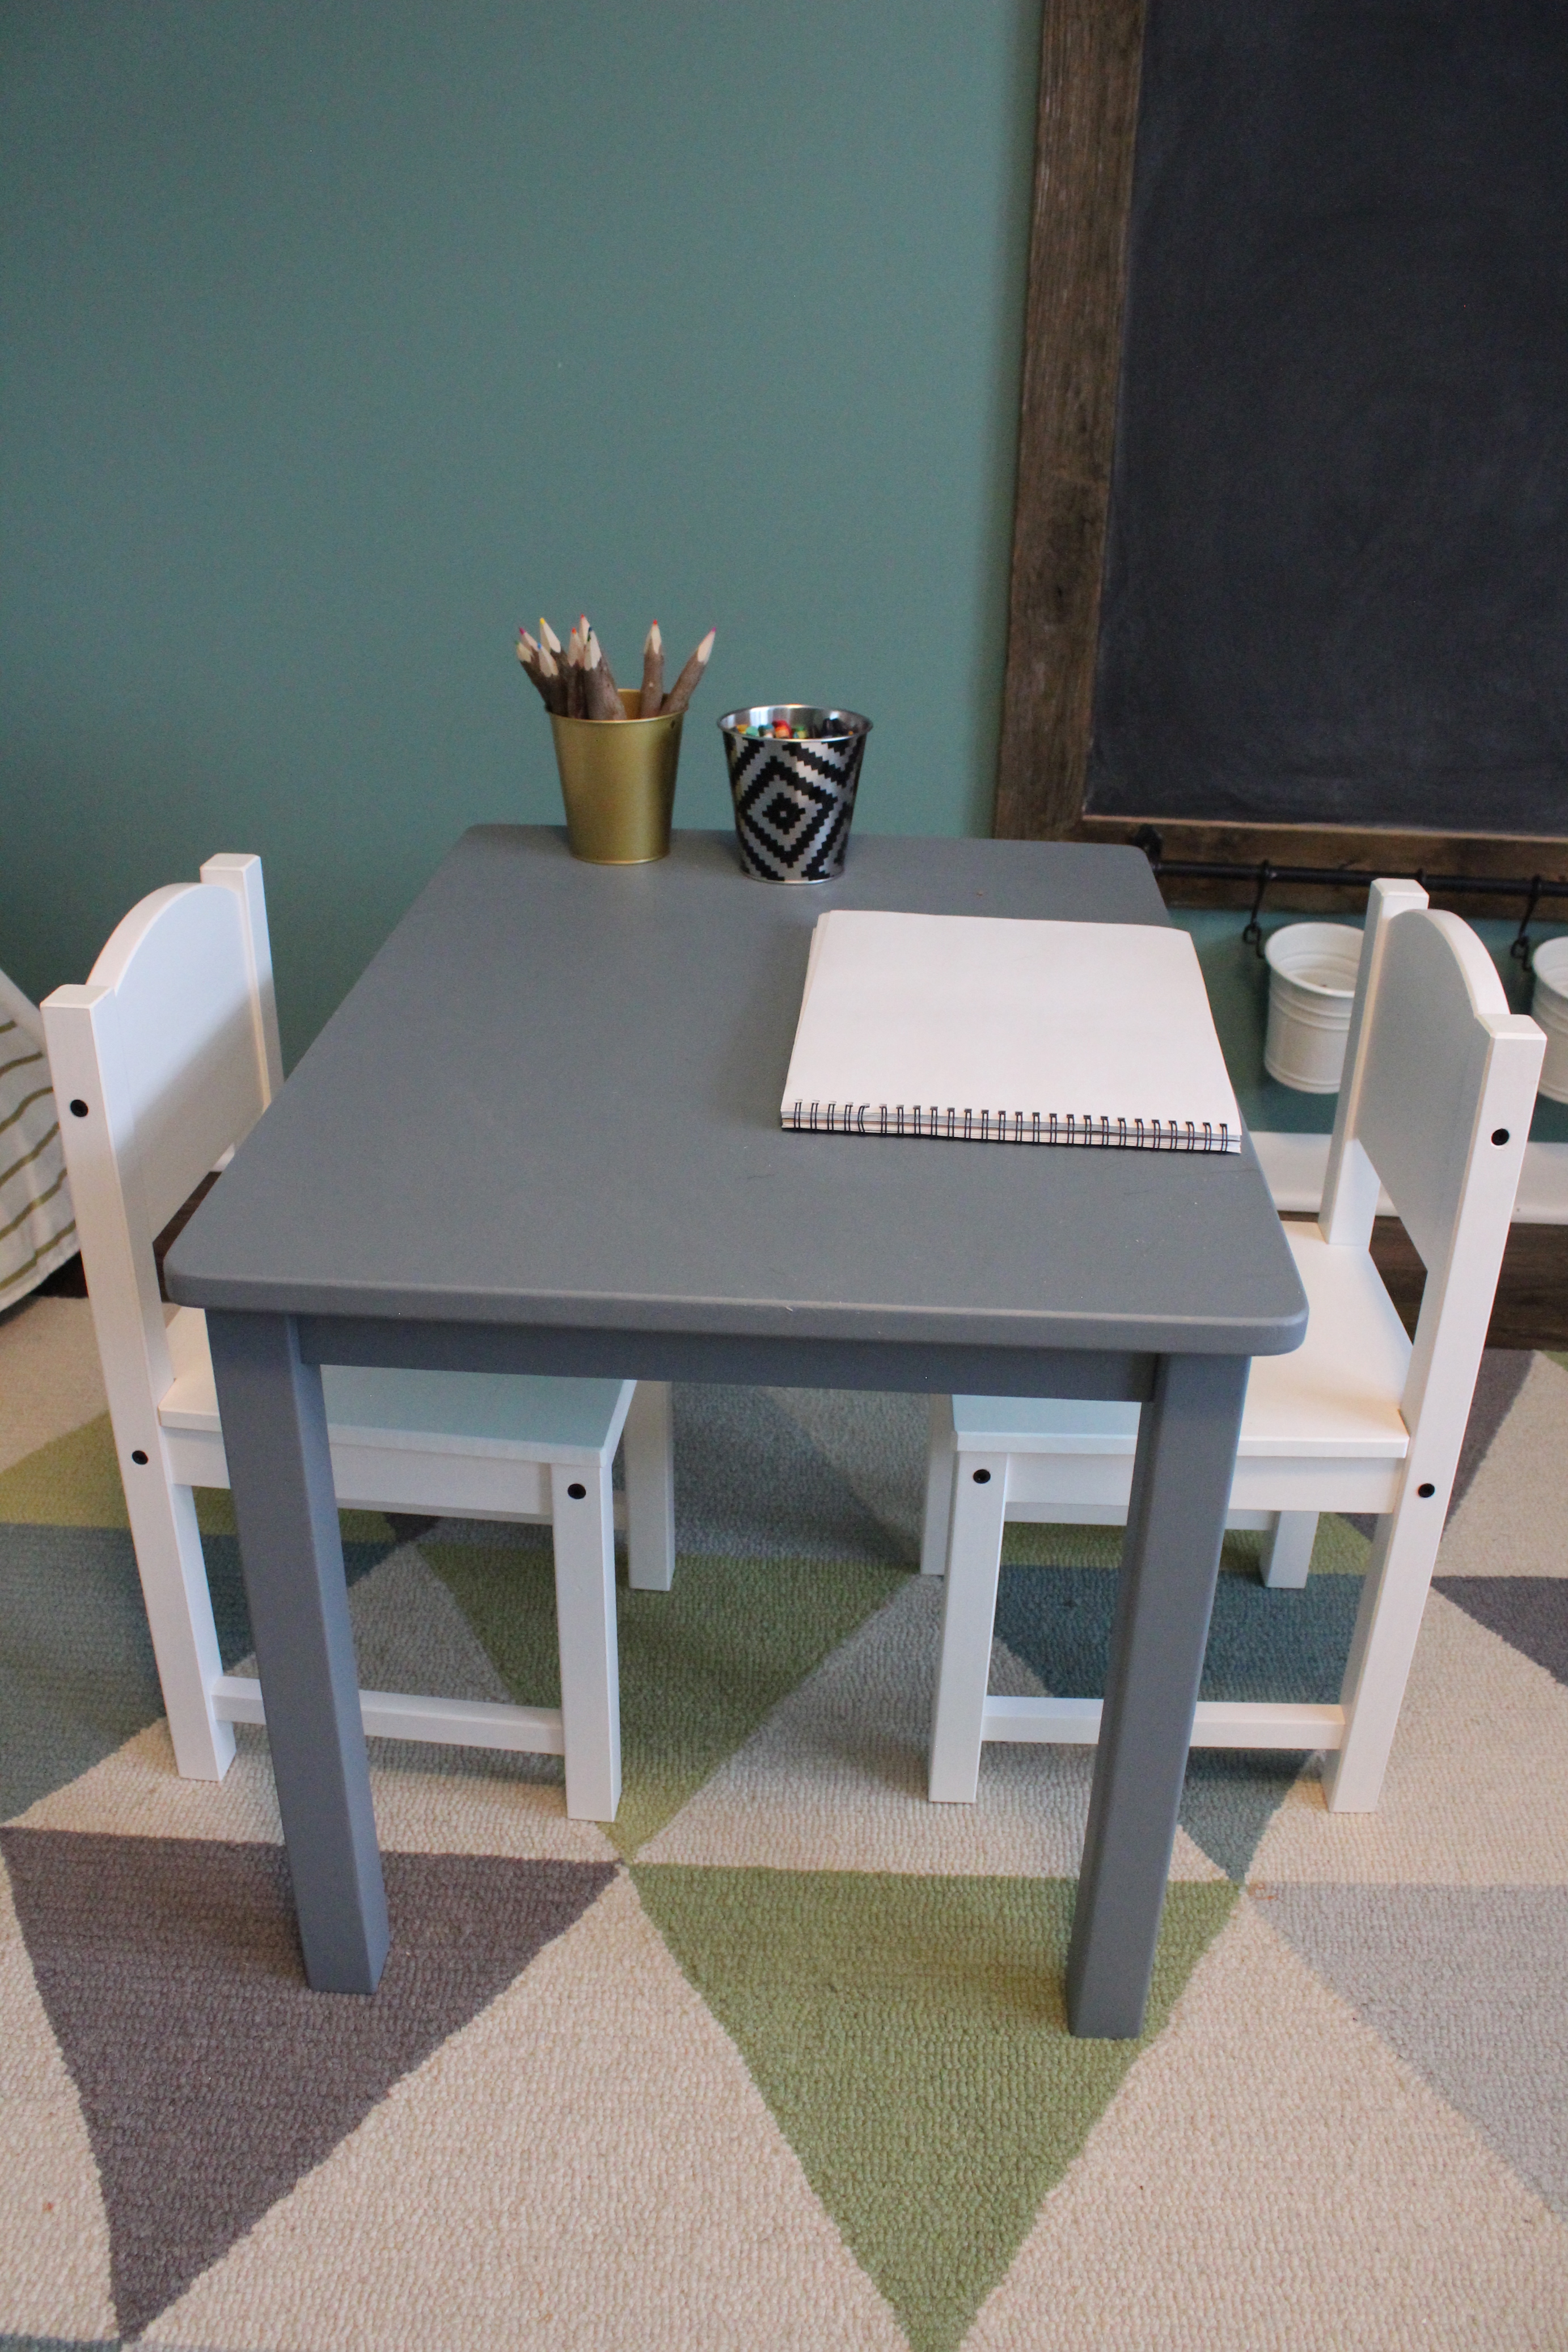
I love these little buckets to hold art supplies that I found in the Target Dollar Spot.

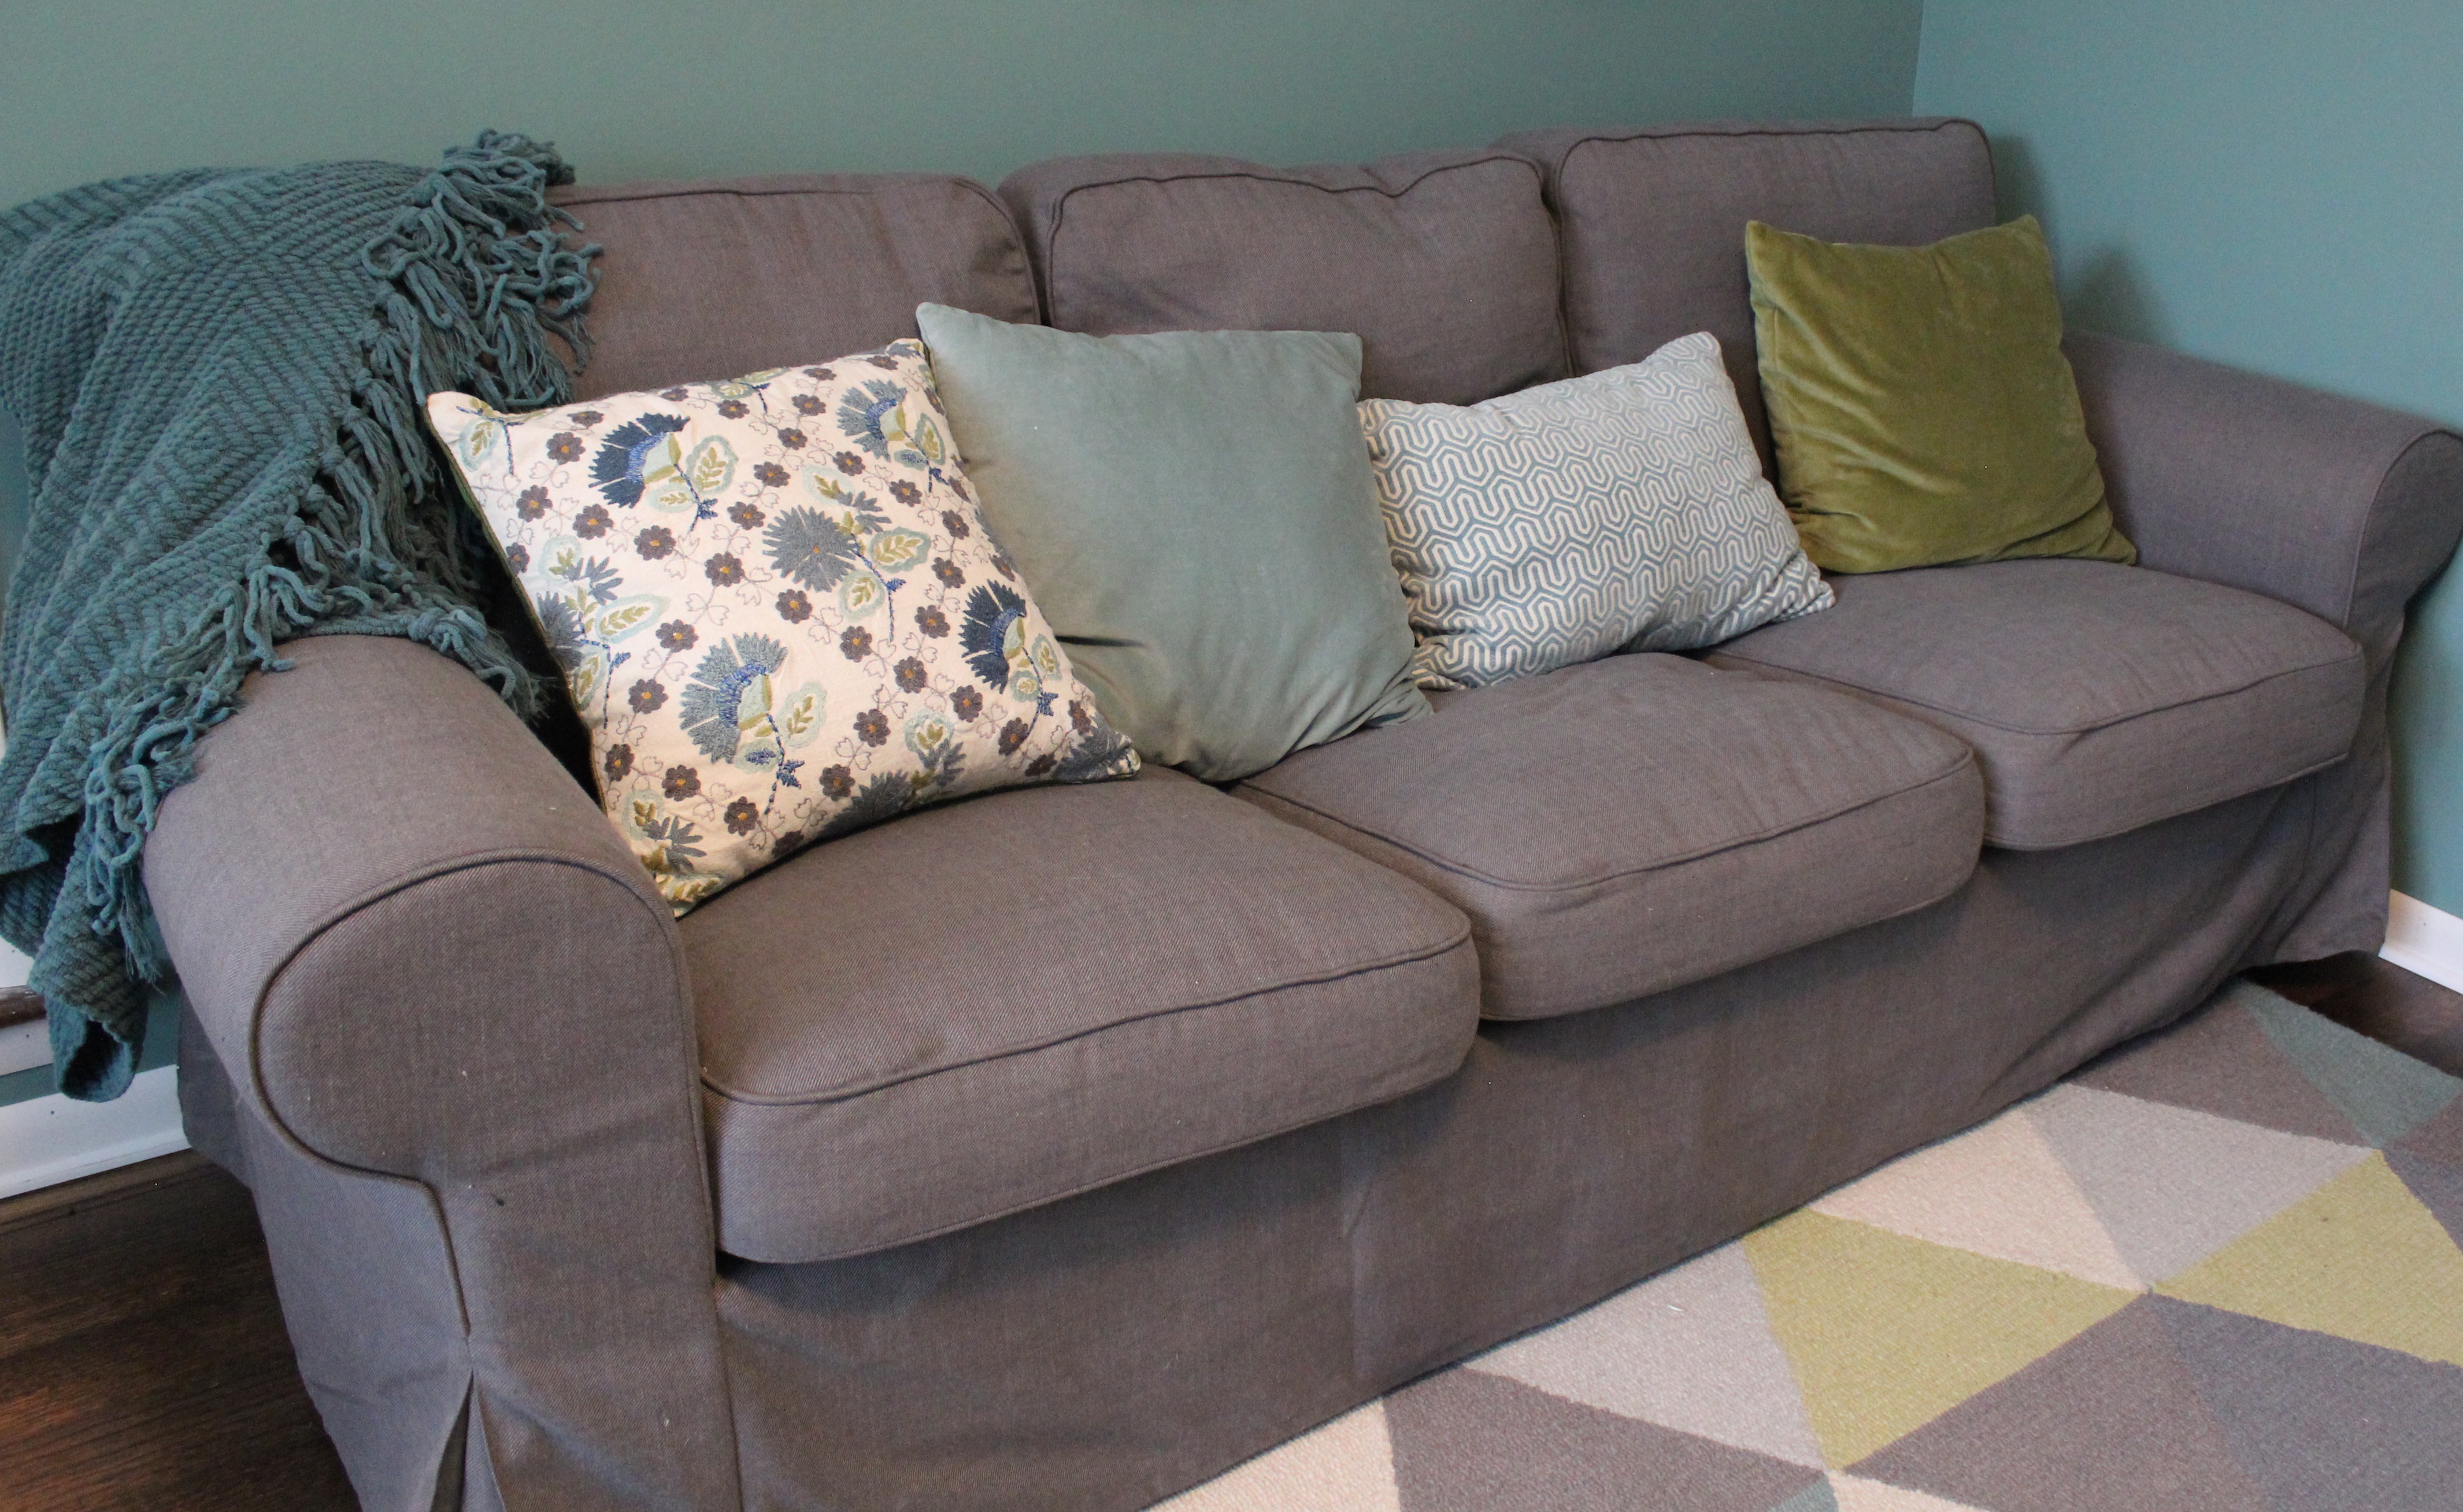
On the other side of the room is Kate’s play kitchen (a hand-me down), a comfy couch, and Kate’s art projects.
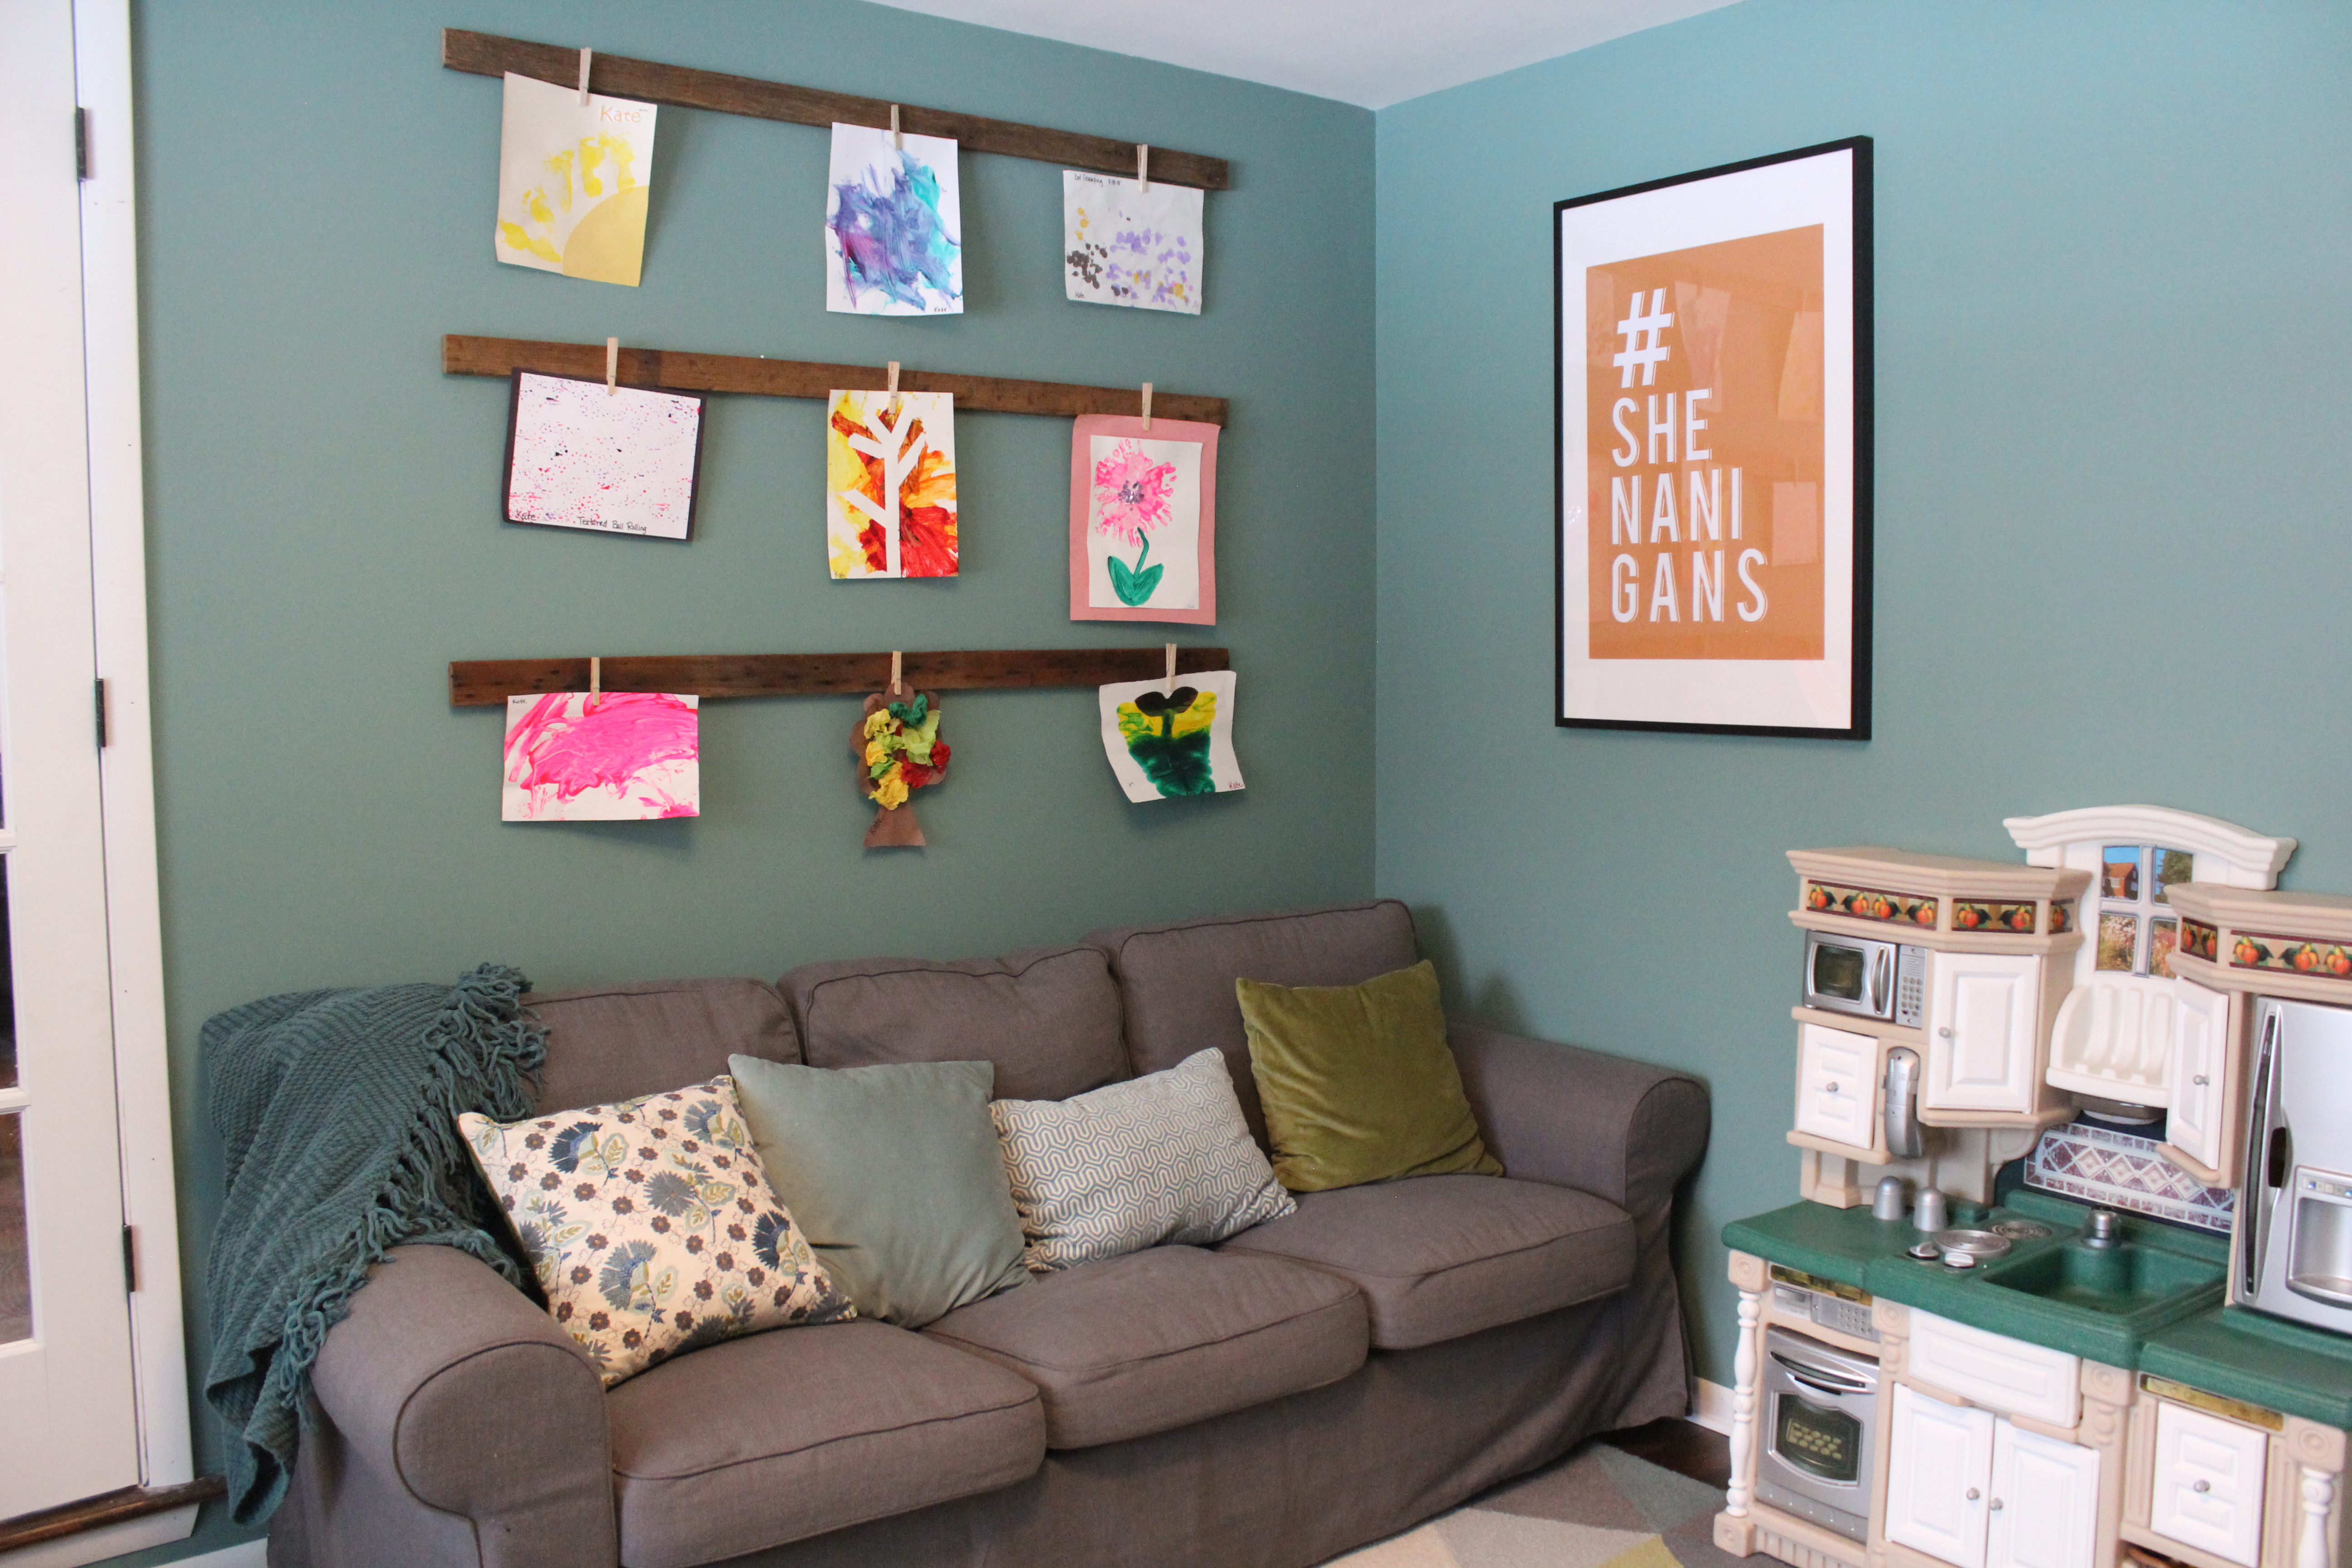
I got these green and blue throw pillows and blanket from World Market. The couch is the Ektorp from Ikea. It used to live upstairs in a spare bedroom, so we were happy it fit well in this space.
The art holders are made from more of the leftover reclaimed barn wood. I stuck pushpins through clothespins and pushed them into the wood to hold the art. This way I’ll be able to move them around as needed. I’m still contemplating spray painting the clothespins.
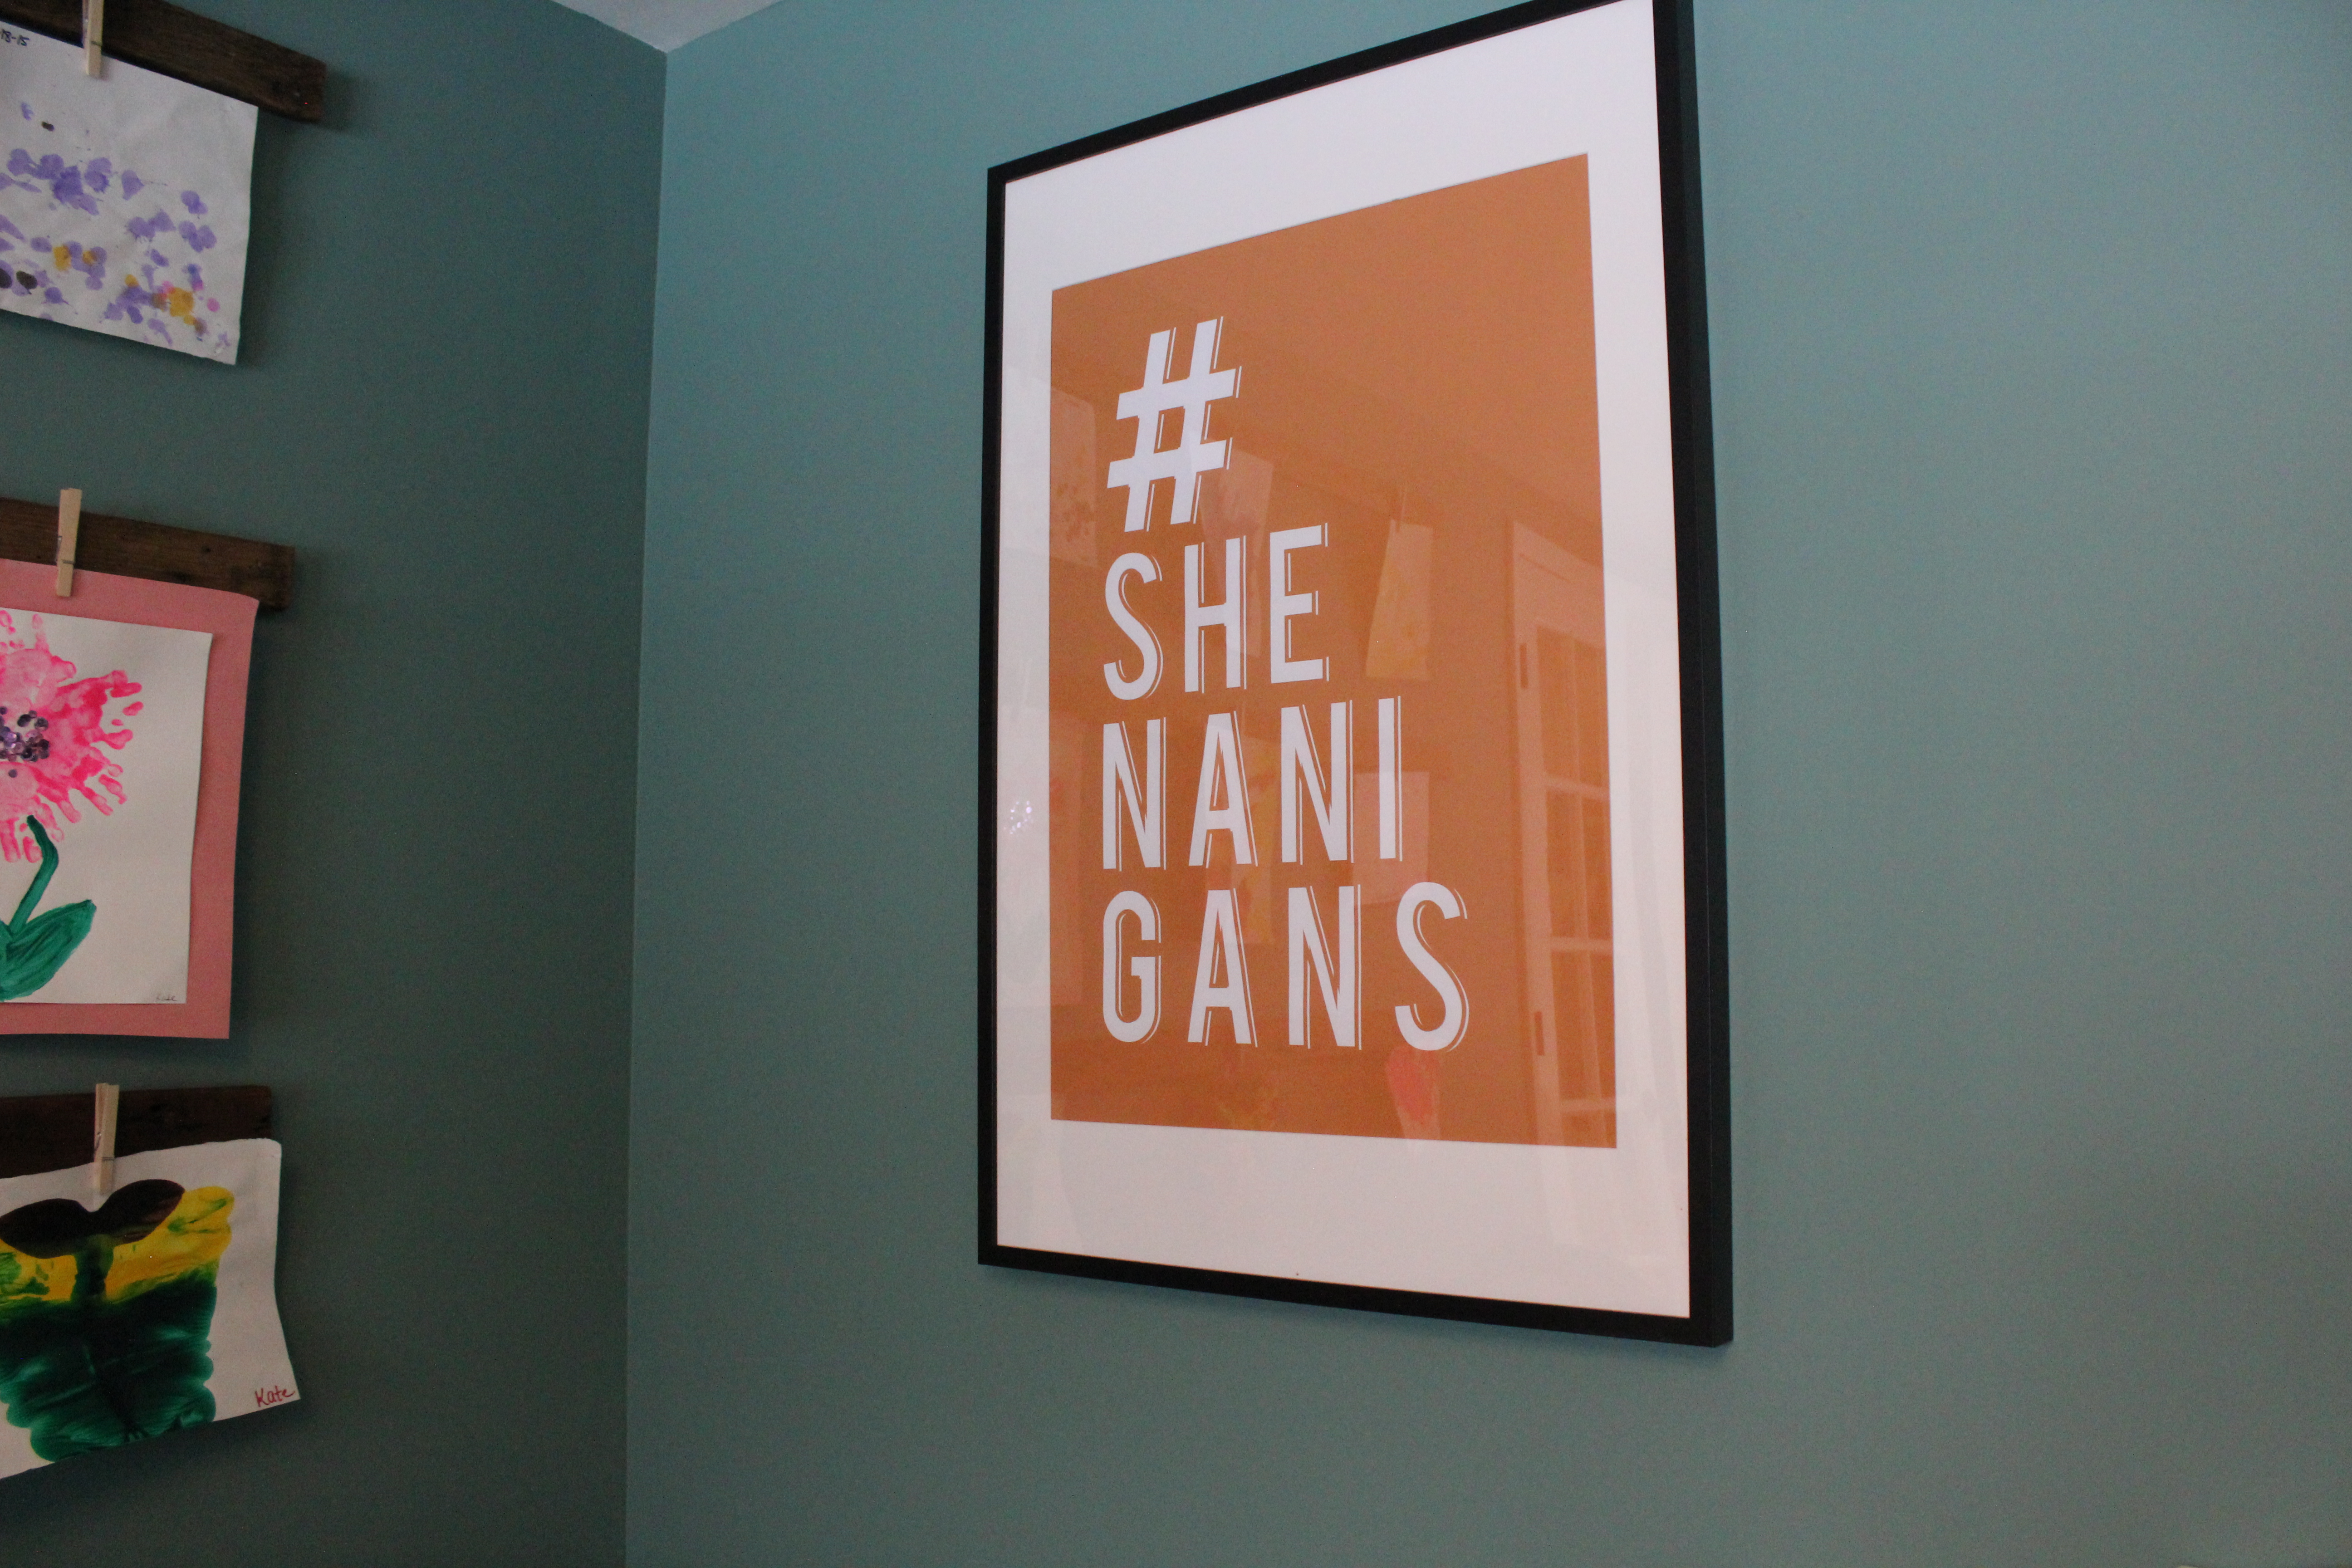
The wall art is a free printable I found here (it’s available in four colors). Then I just printed it at Office Max and framed it with an Ikea frame.
On the last wall is a big wall of cubbies to hold all of Kate’s toys. How do they accumulate so much?
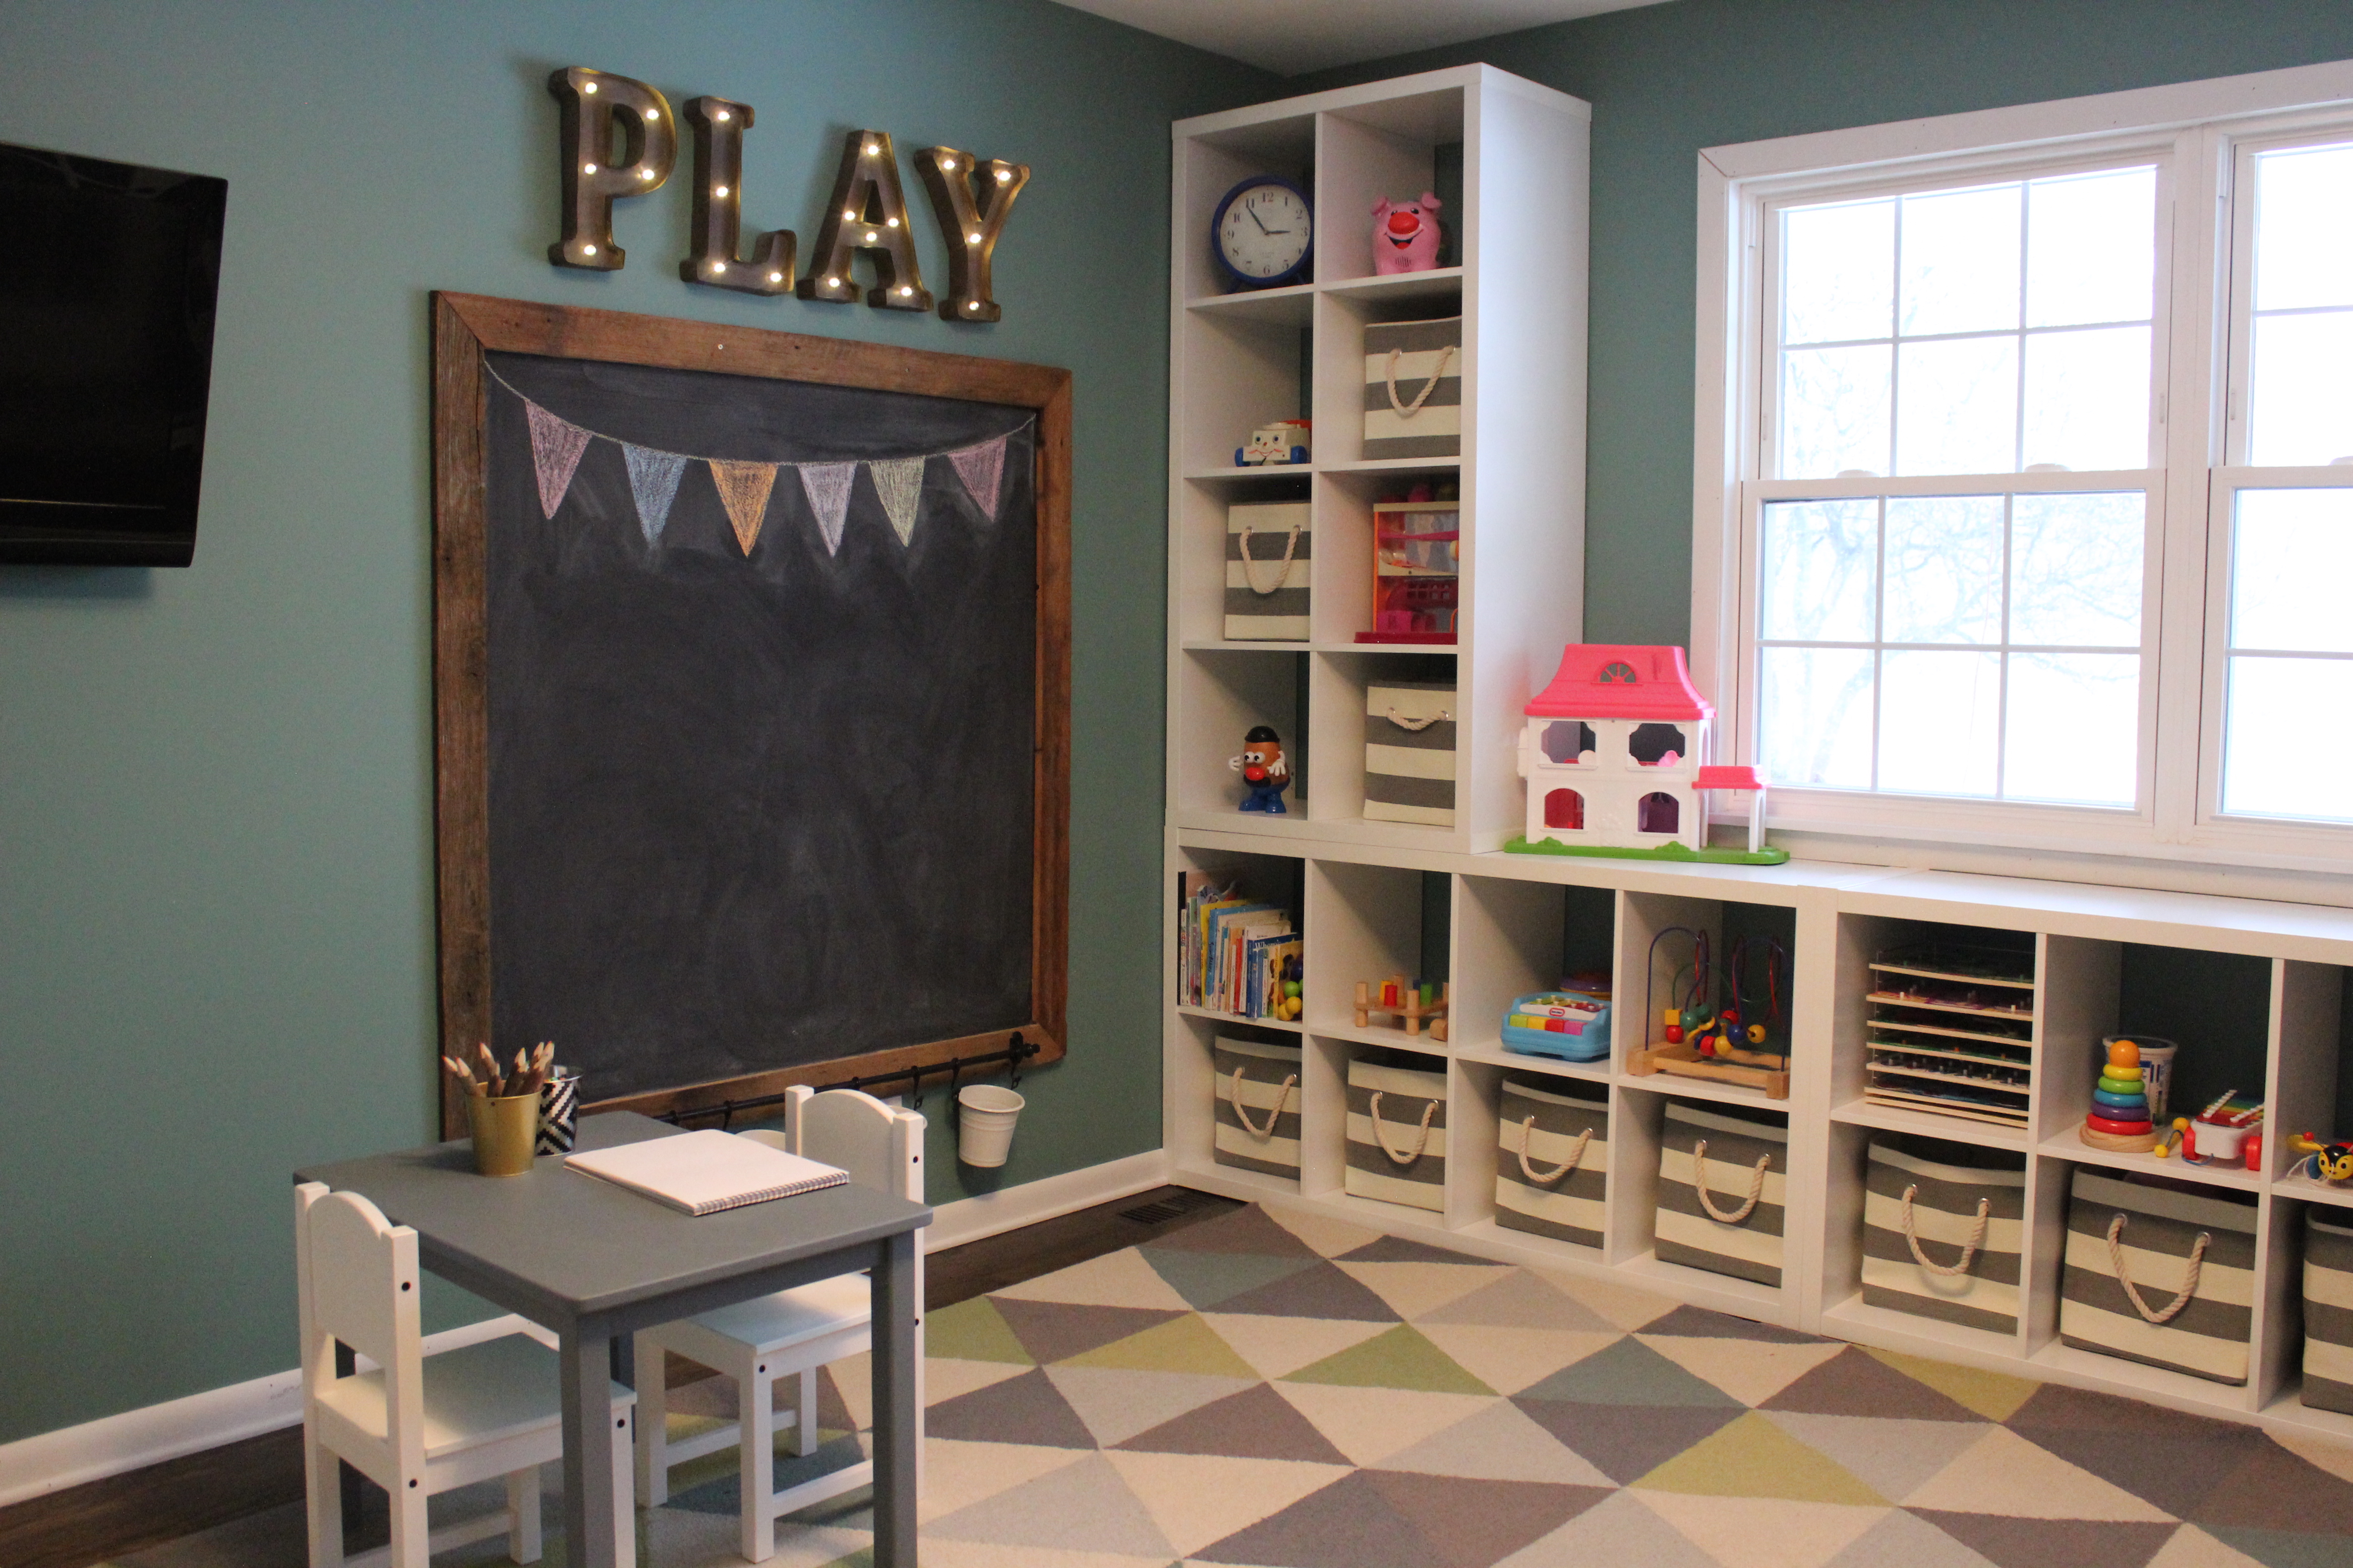
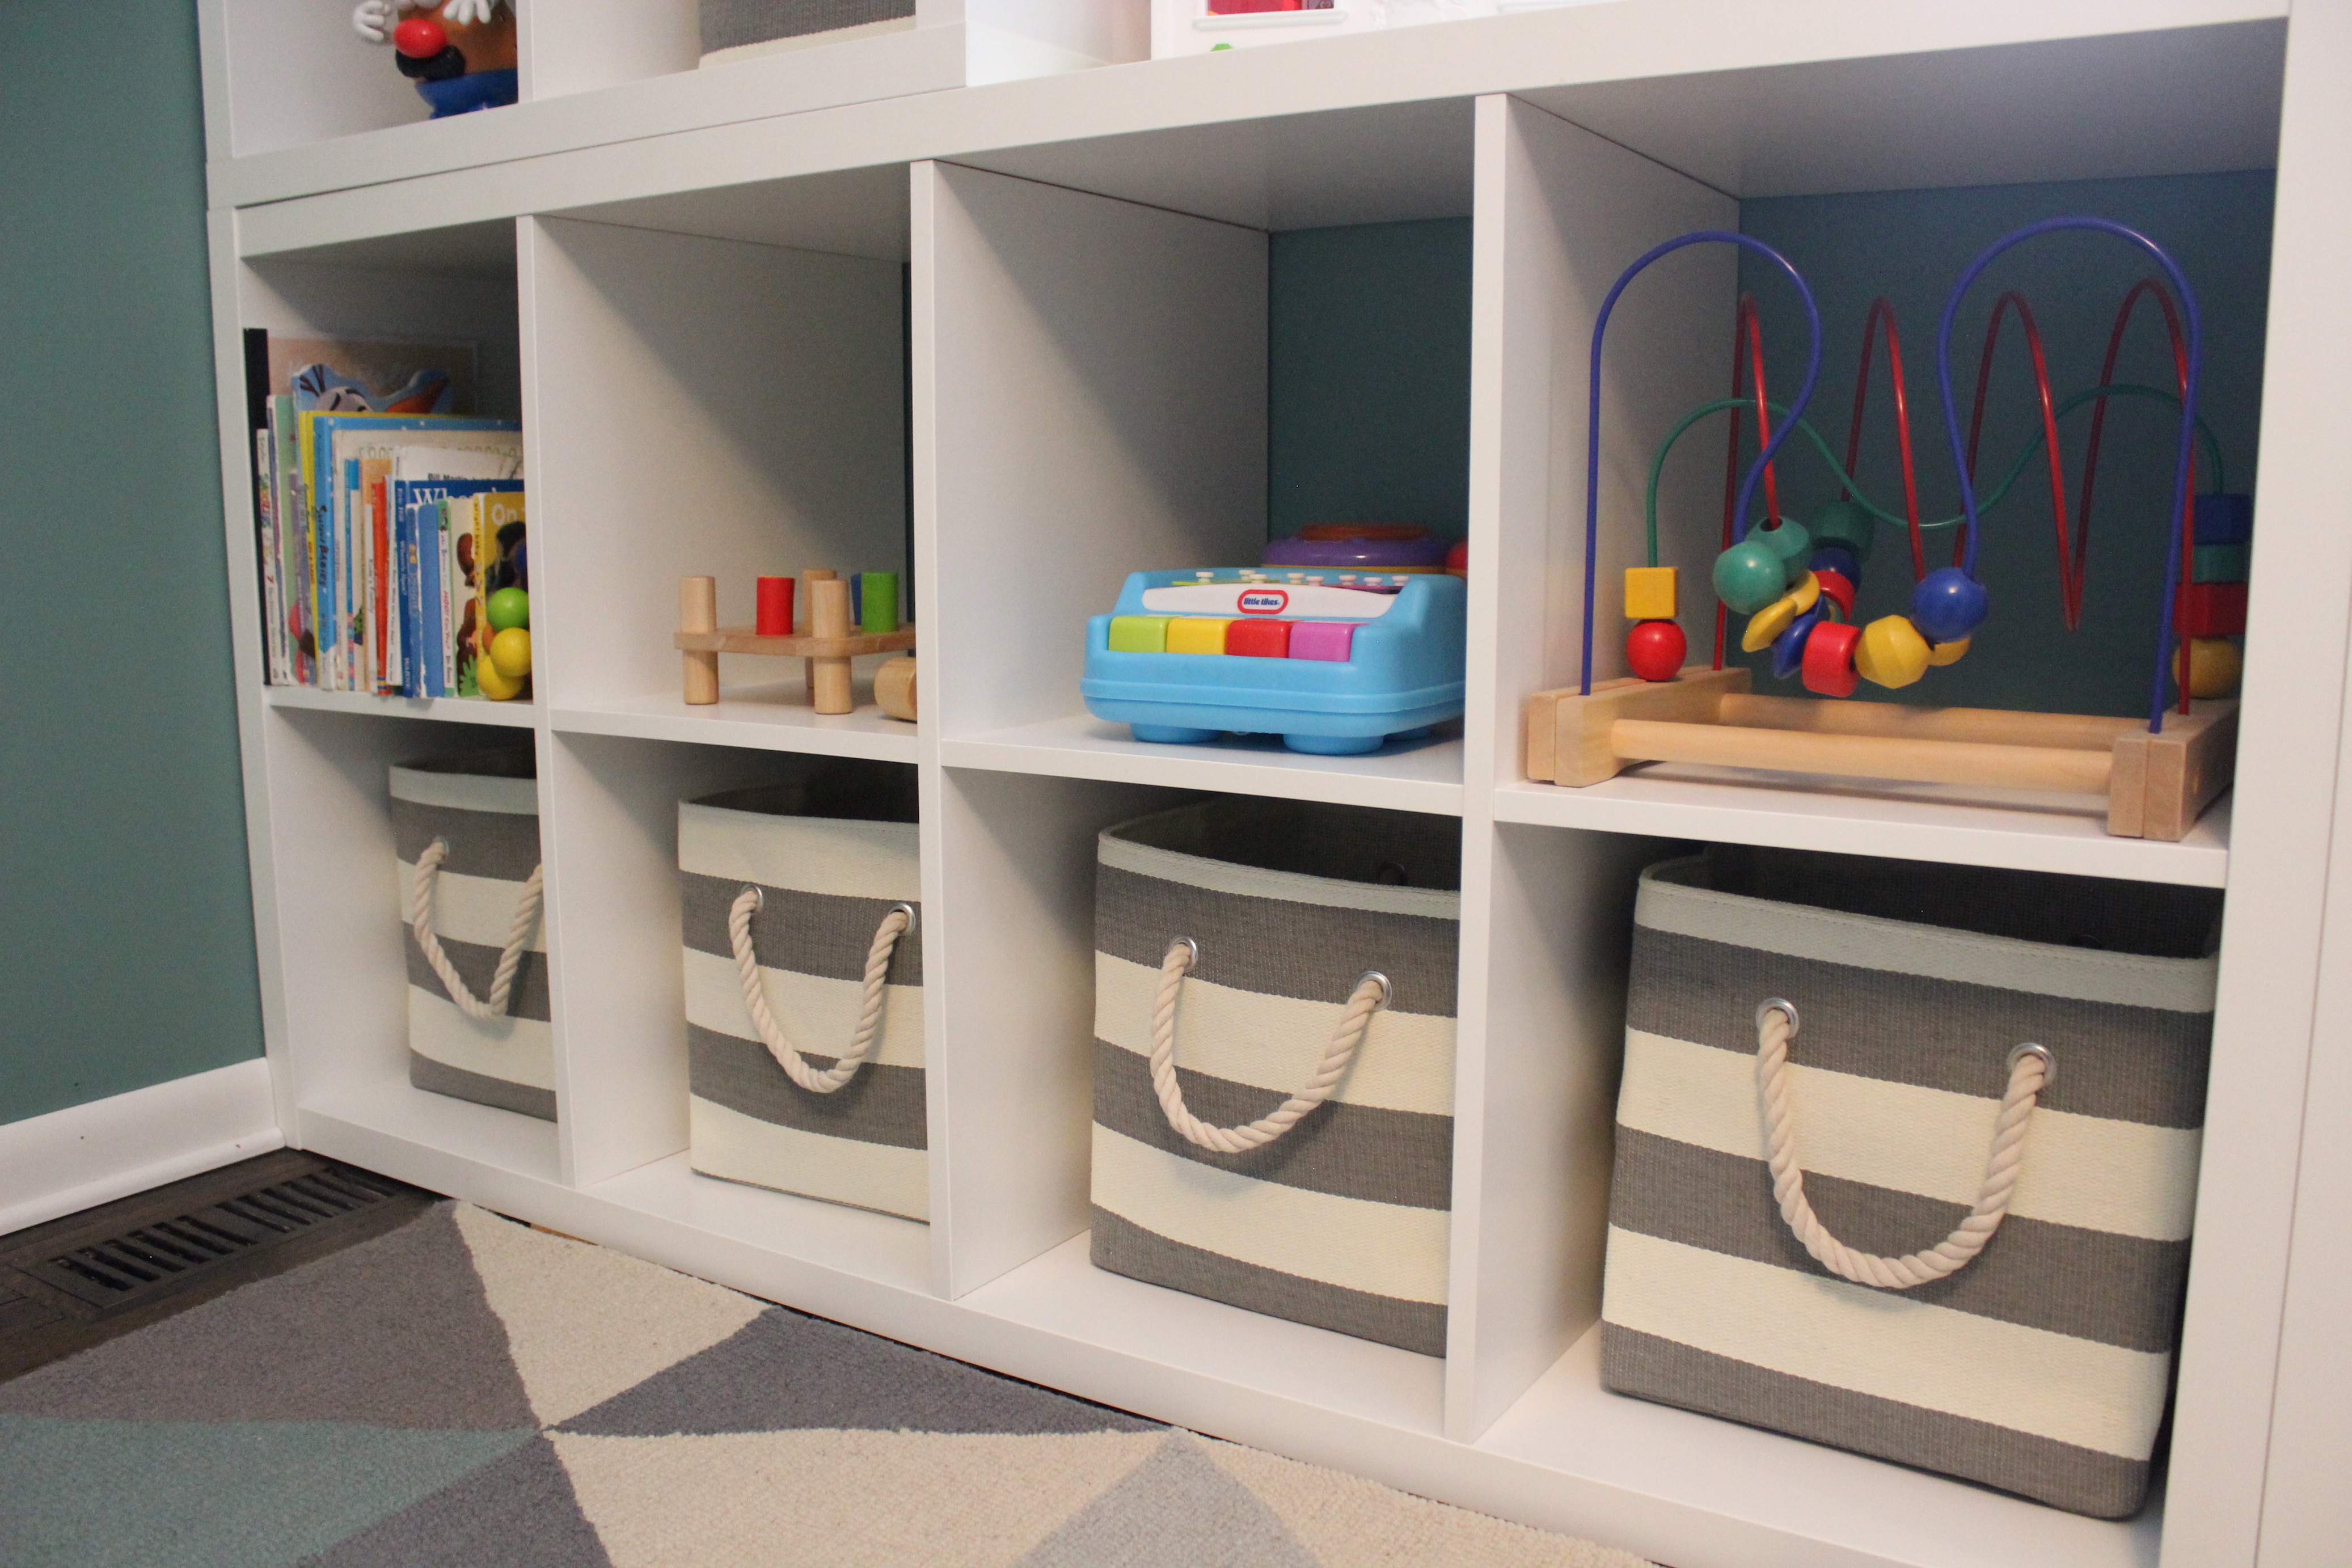
These are Ikea’s Kallax shelving unit. We put two 8 cubby units and one 4 cubby unit along the bottom, and then two 8 cubby units framing either side of the window.
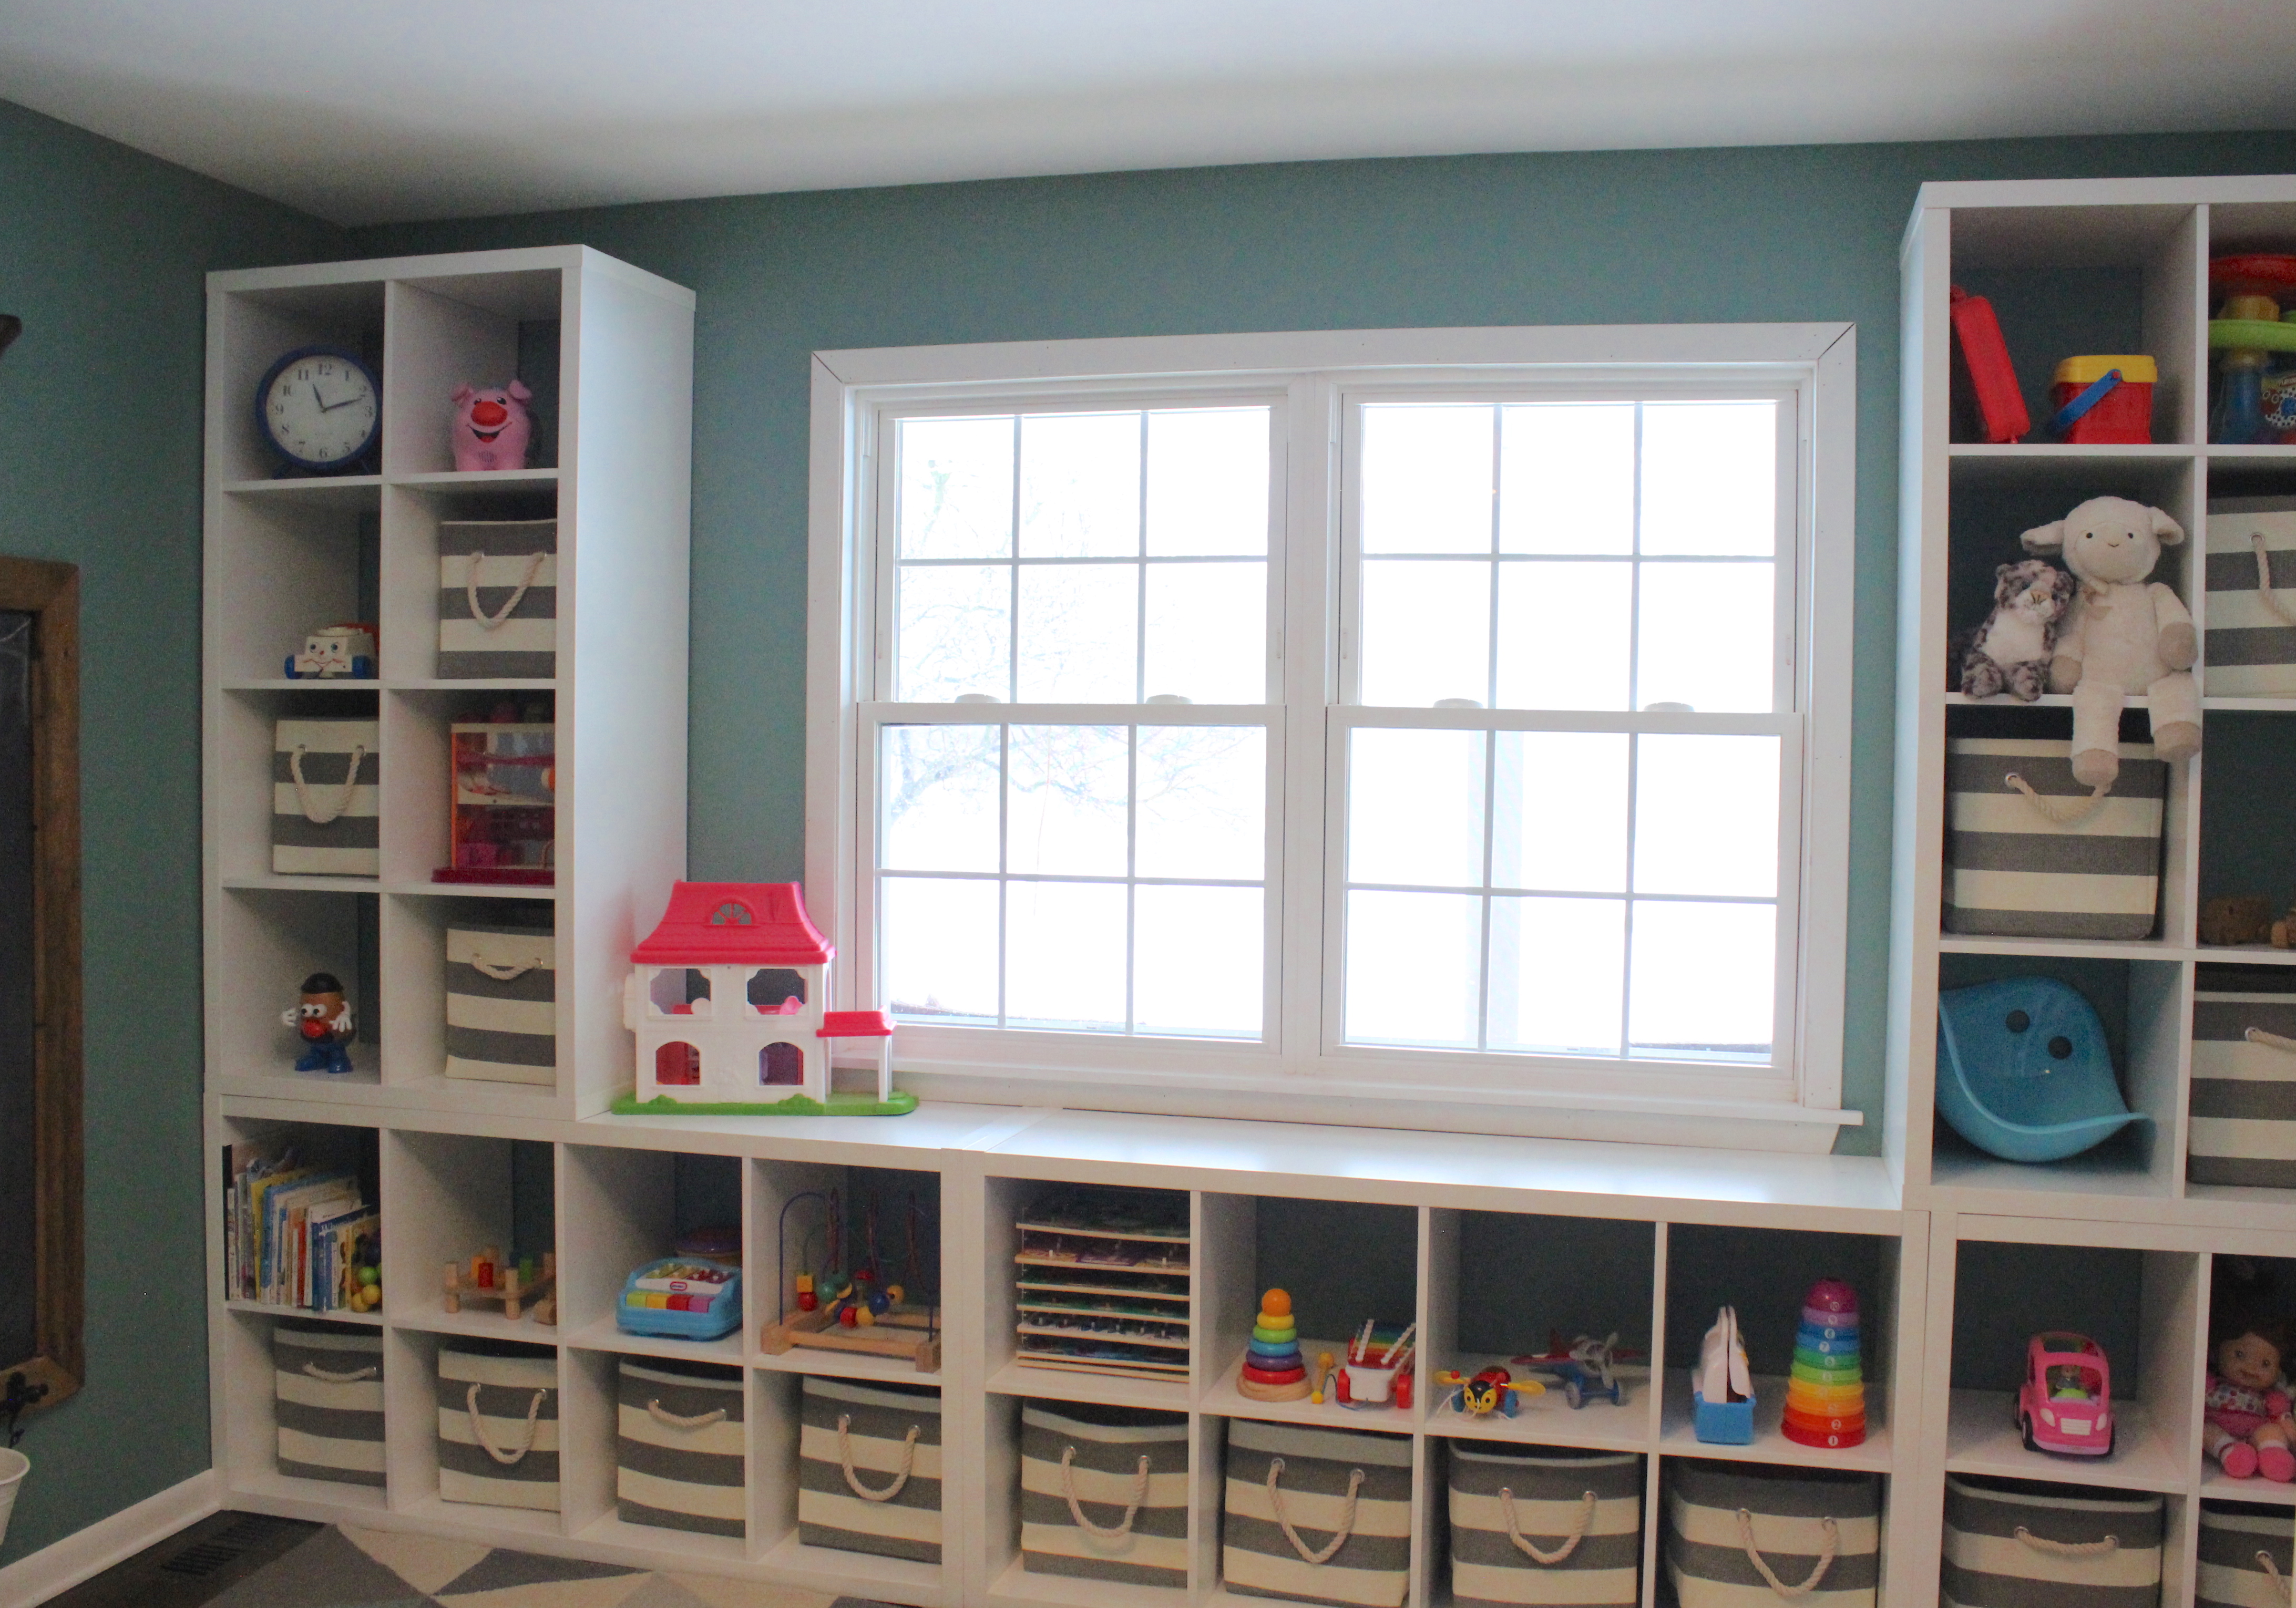
To conceal and organize a lot of the toys, I purchased these gray/white striped bins from Land of Nod. I have things like legos, playdoh, stickers and coloring books in them. Honestly, a few up top are empty so we have room to grow into them.
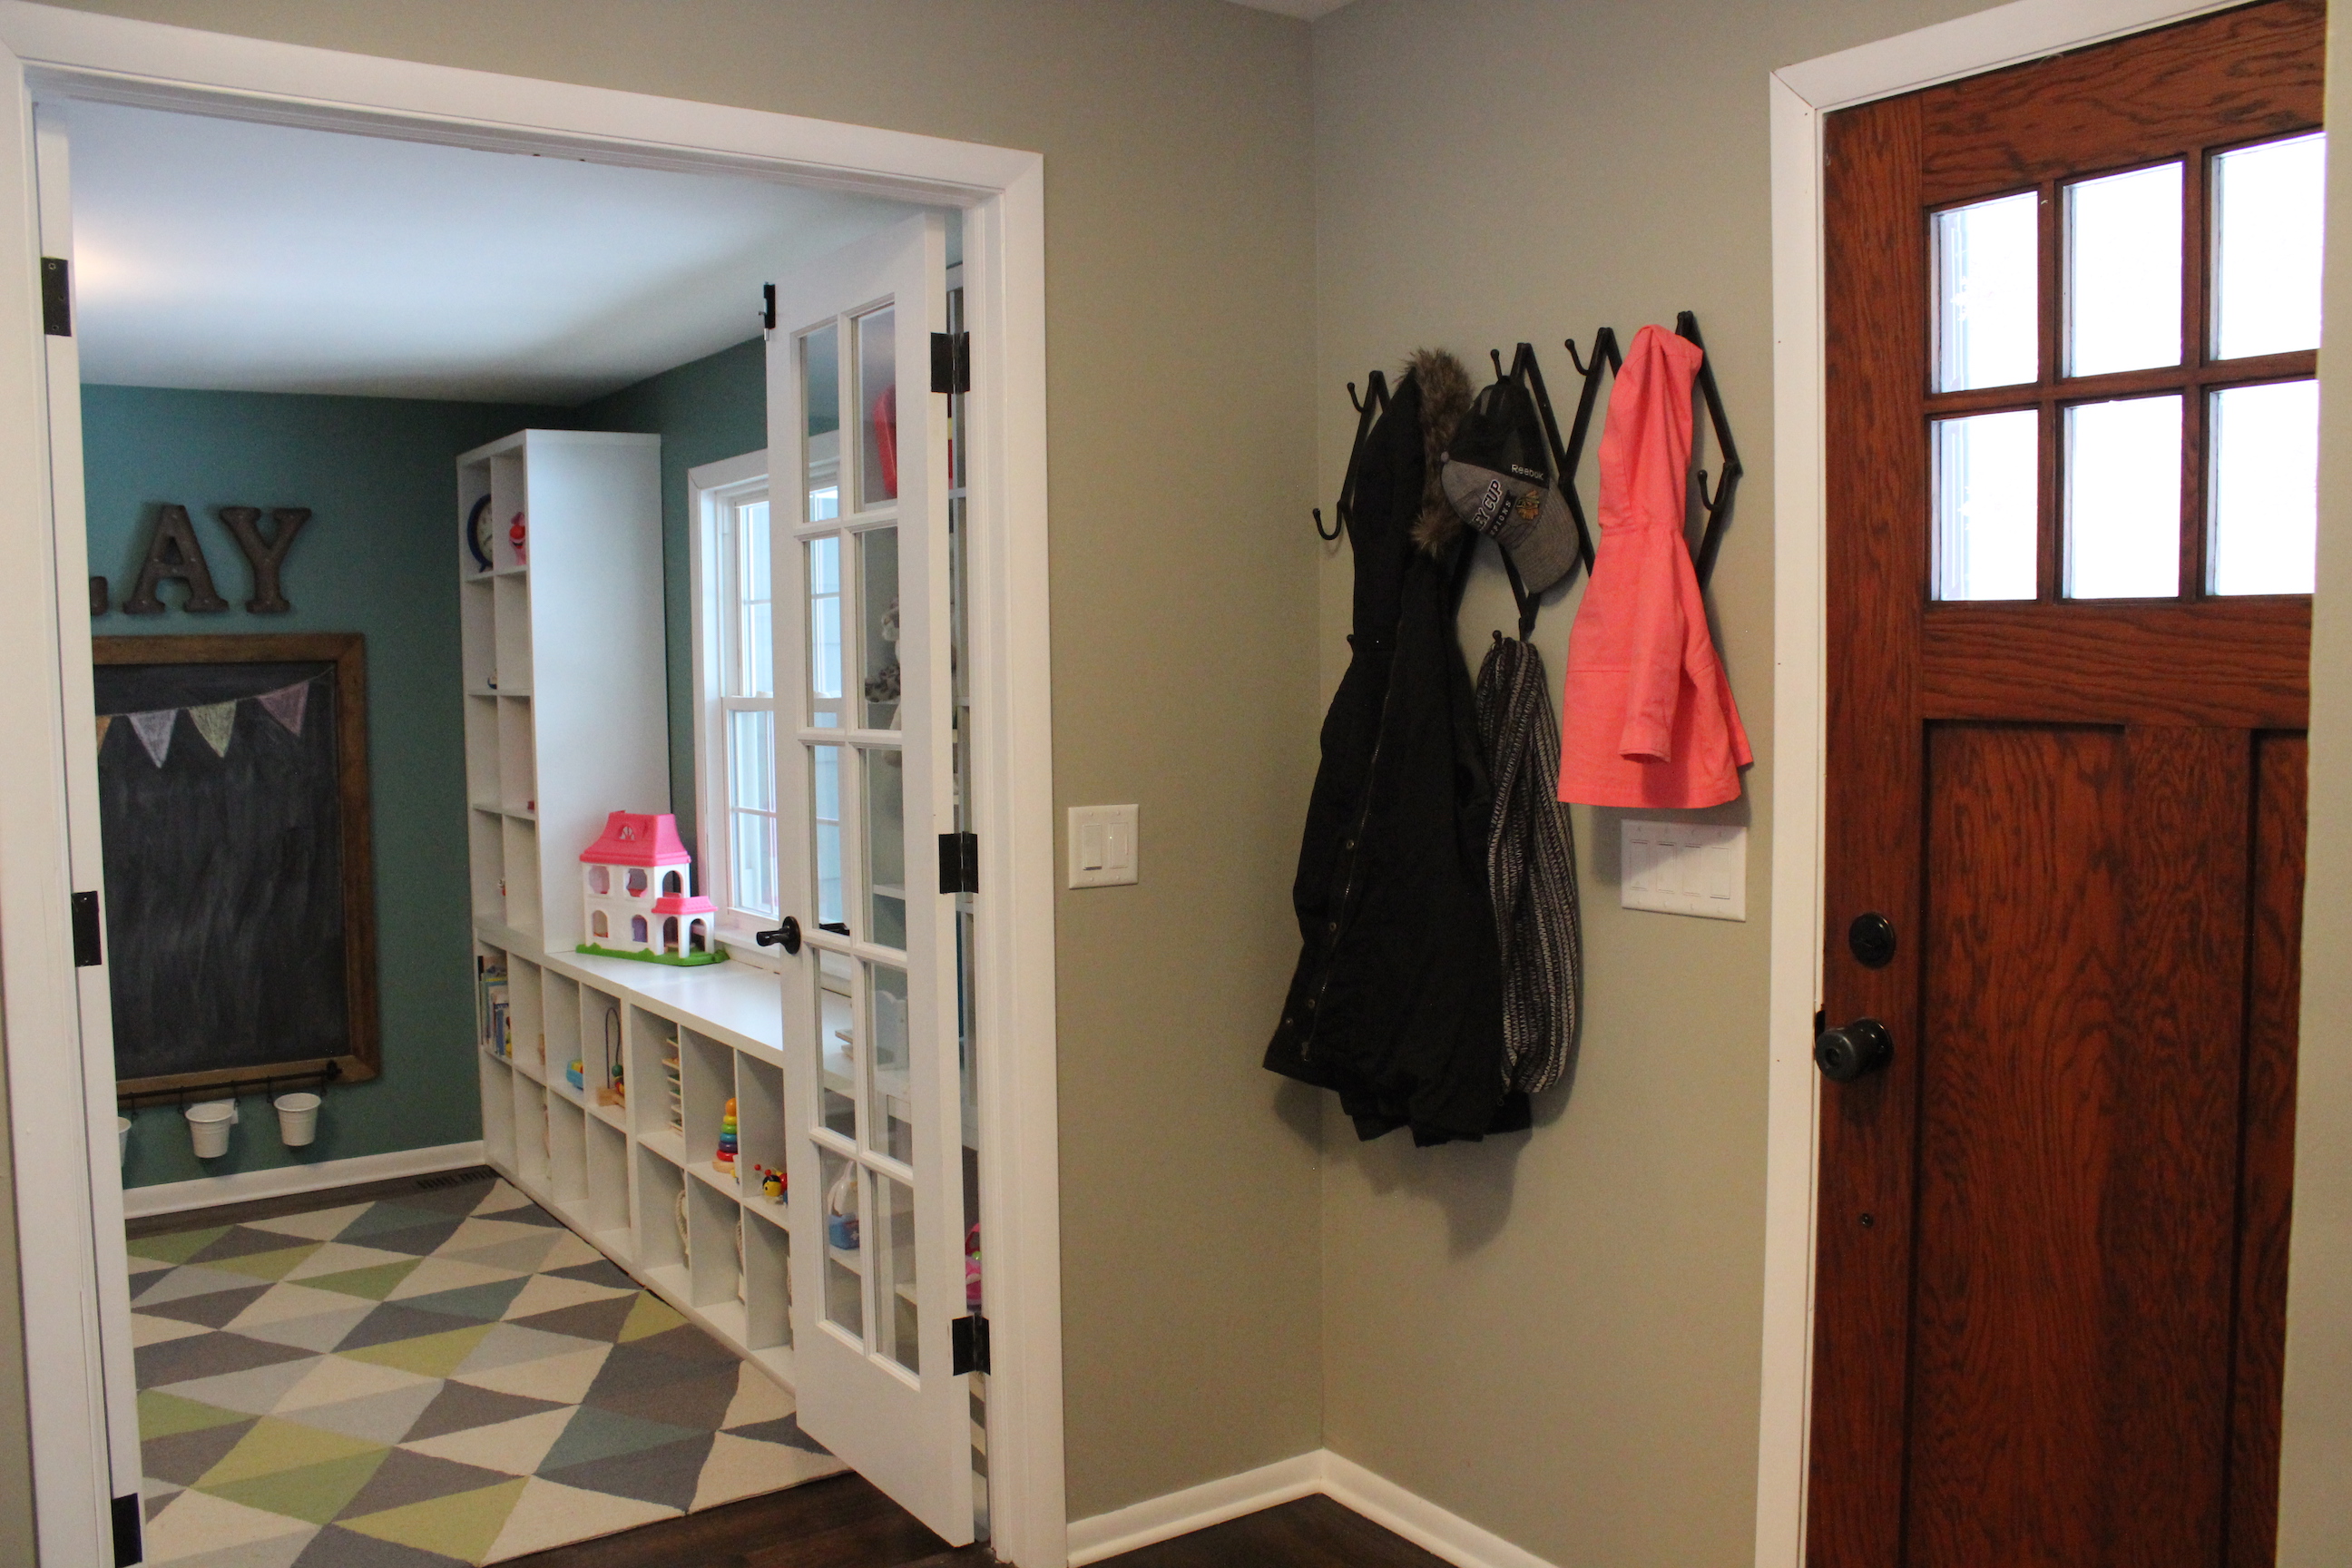
Here’s a look at the room from our foyer. We installed the french doors a couple of years ago after we removed a hall closet that used to be here.
Finally, here a couple before and after shots. This space is unrecognizable!


I can’t tell you how nice it is to get all of Kate’s toys out of the living room and rest of the house. We’re really enjoying have a dedicated playroom and spend so.much.time in here. Heck, Ben and I find ourselves hanging out in here even when Kate isn’t home or sleeping. Plus, we figure the room can easily turn into a cozy hang out/movie space or office down the line.
I hope to have an update on the mudroom in the next couple of weeks. It never ends….
47 Responses to “Playroom Reveal”