Archive | Bedrooms RSS feed for this section

Powder Room Reveal & Addition Update

5 Jun

Finishing off the four rooms of our new addition has been slowly coming along, and I can finally call the powder room part of it complete!

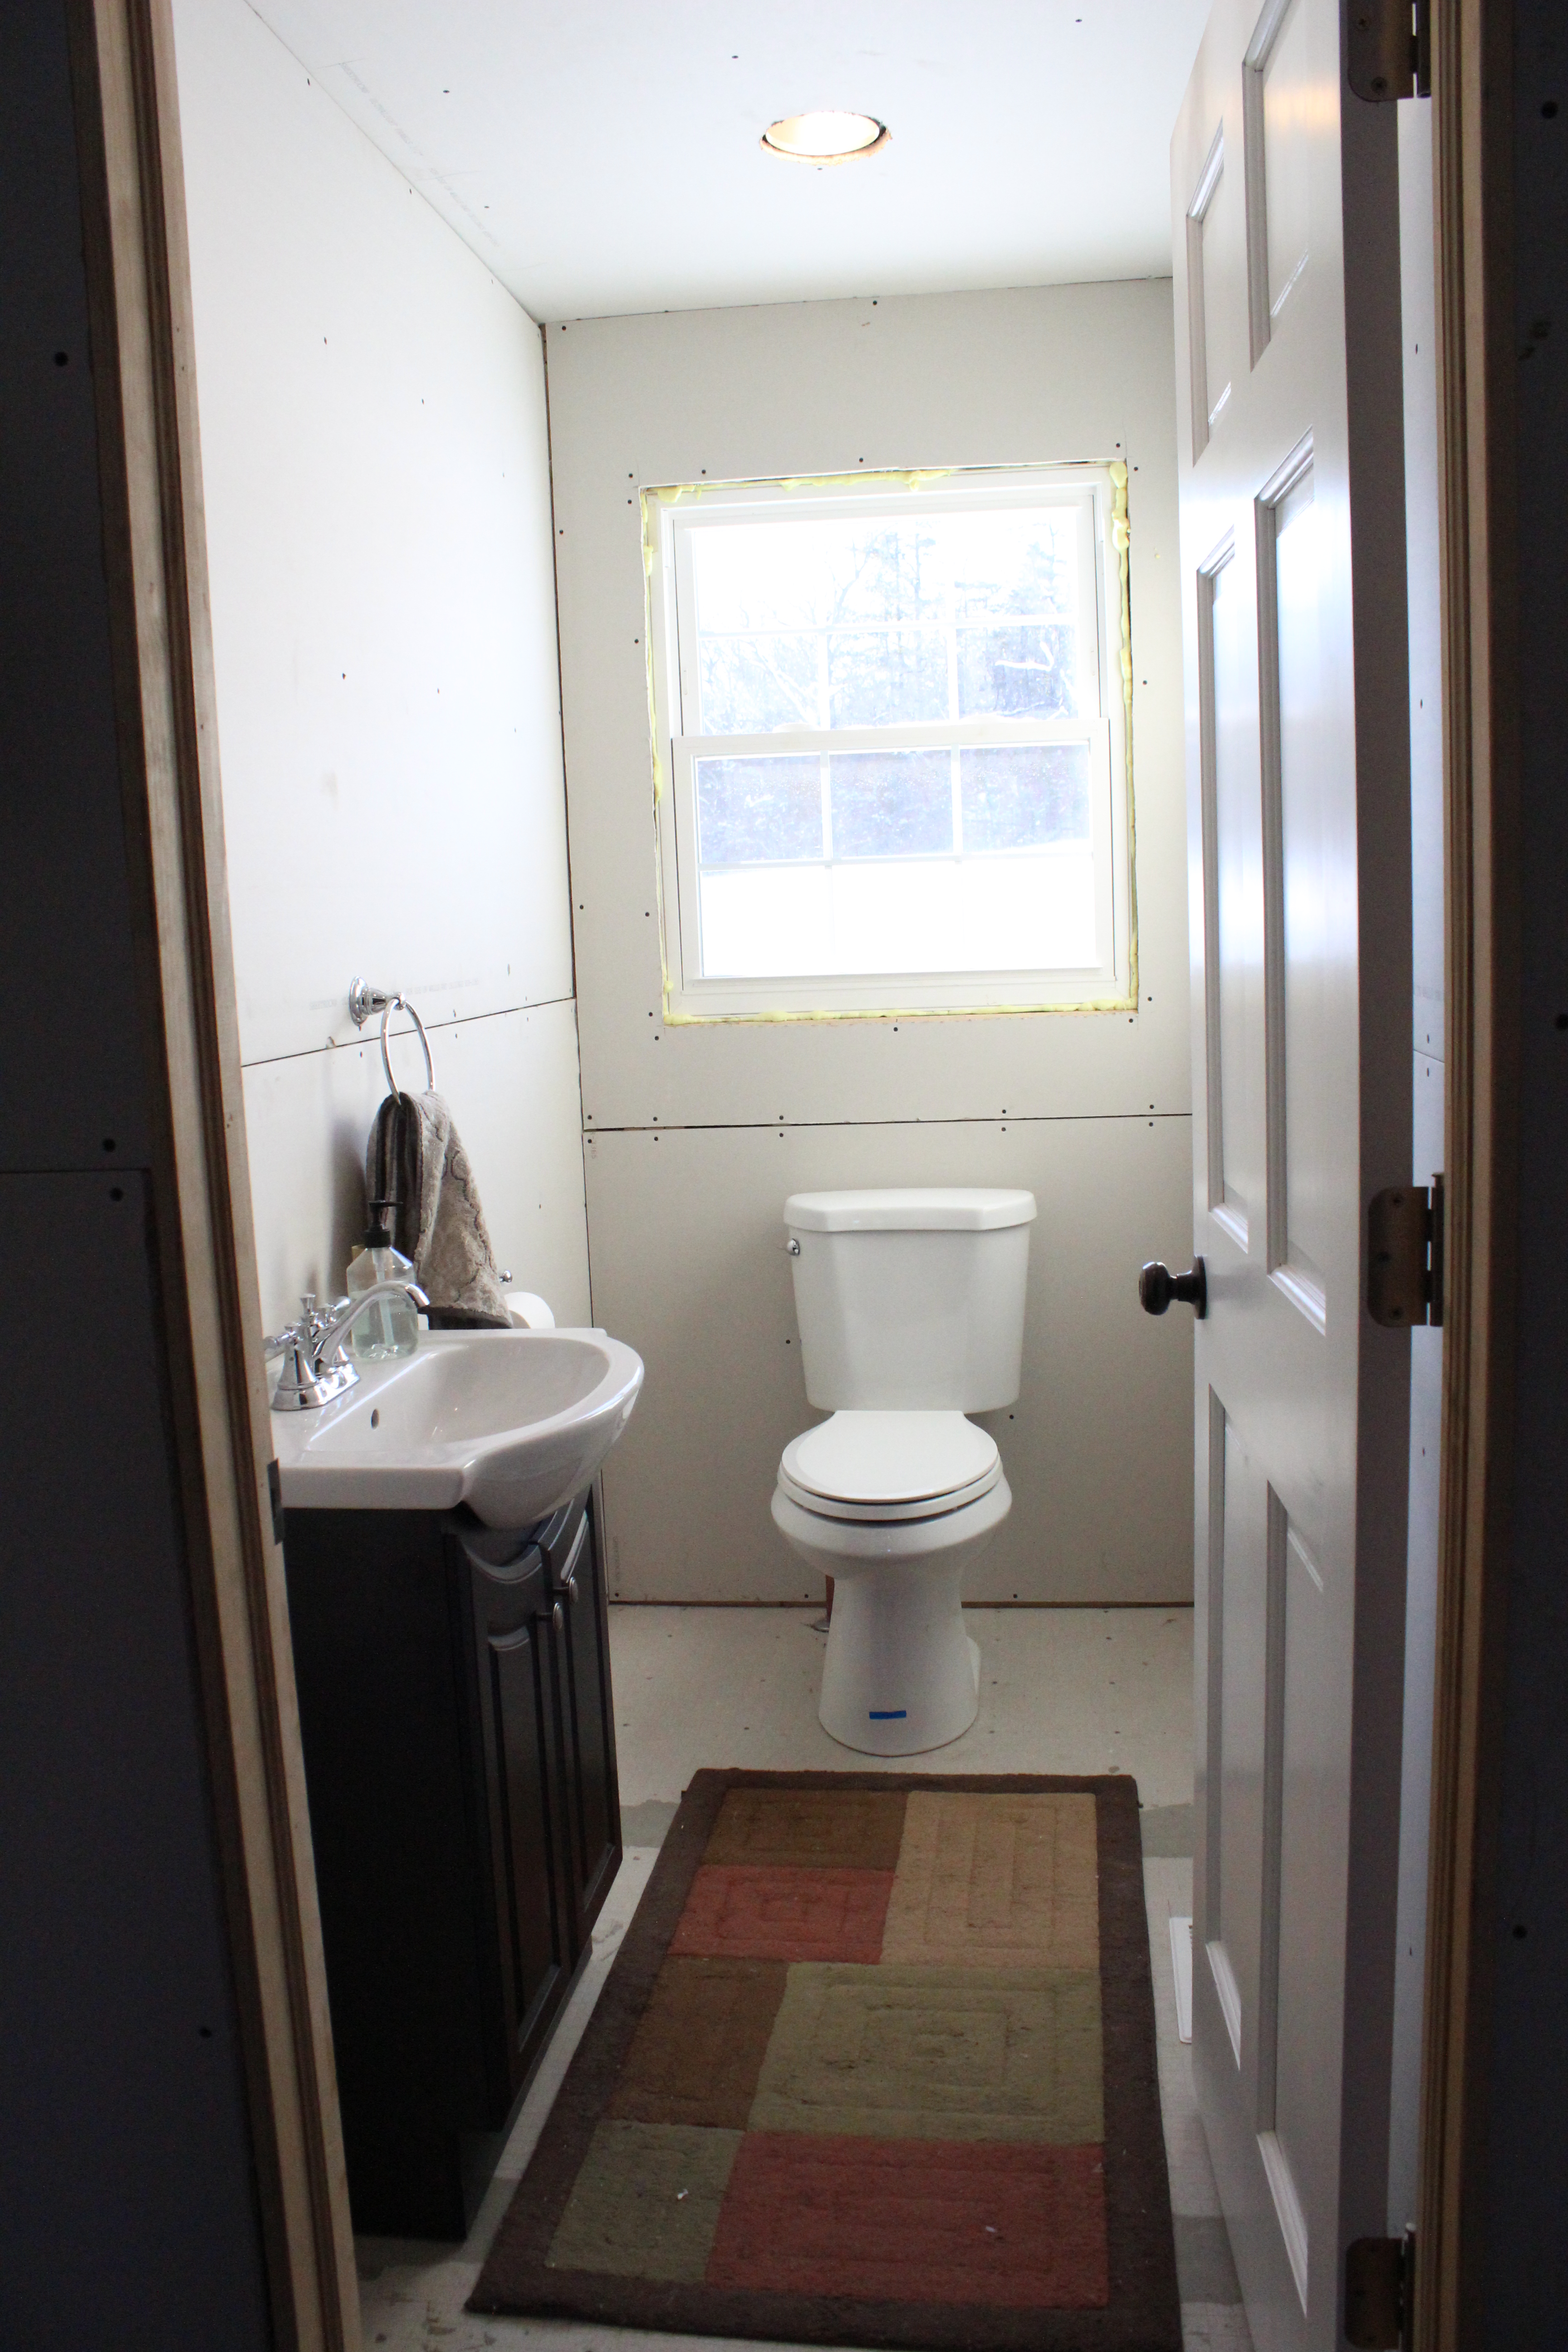
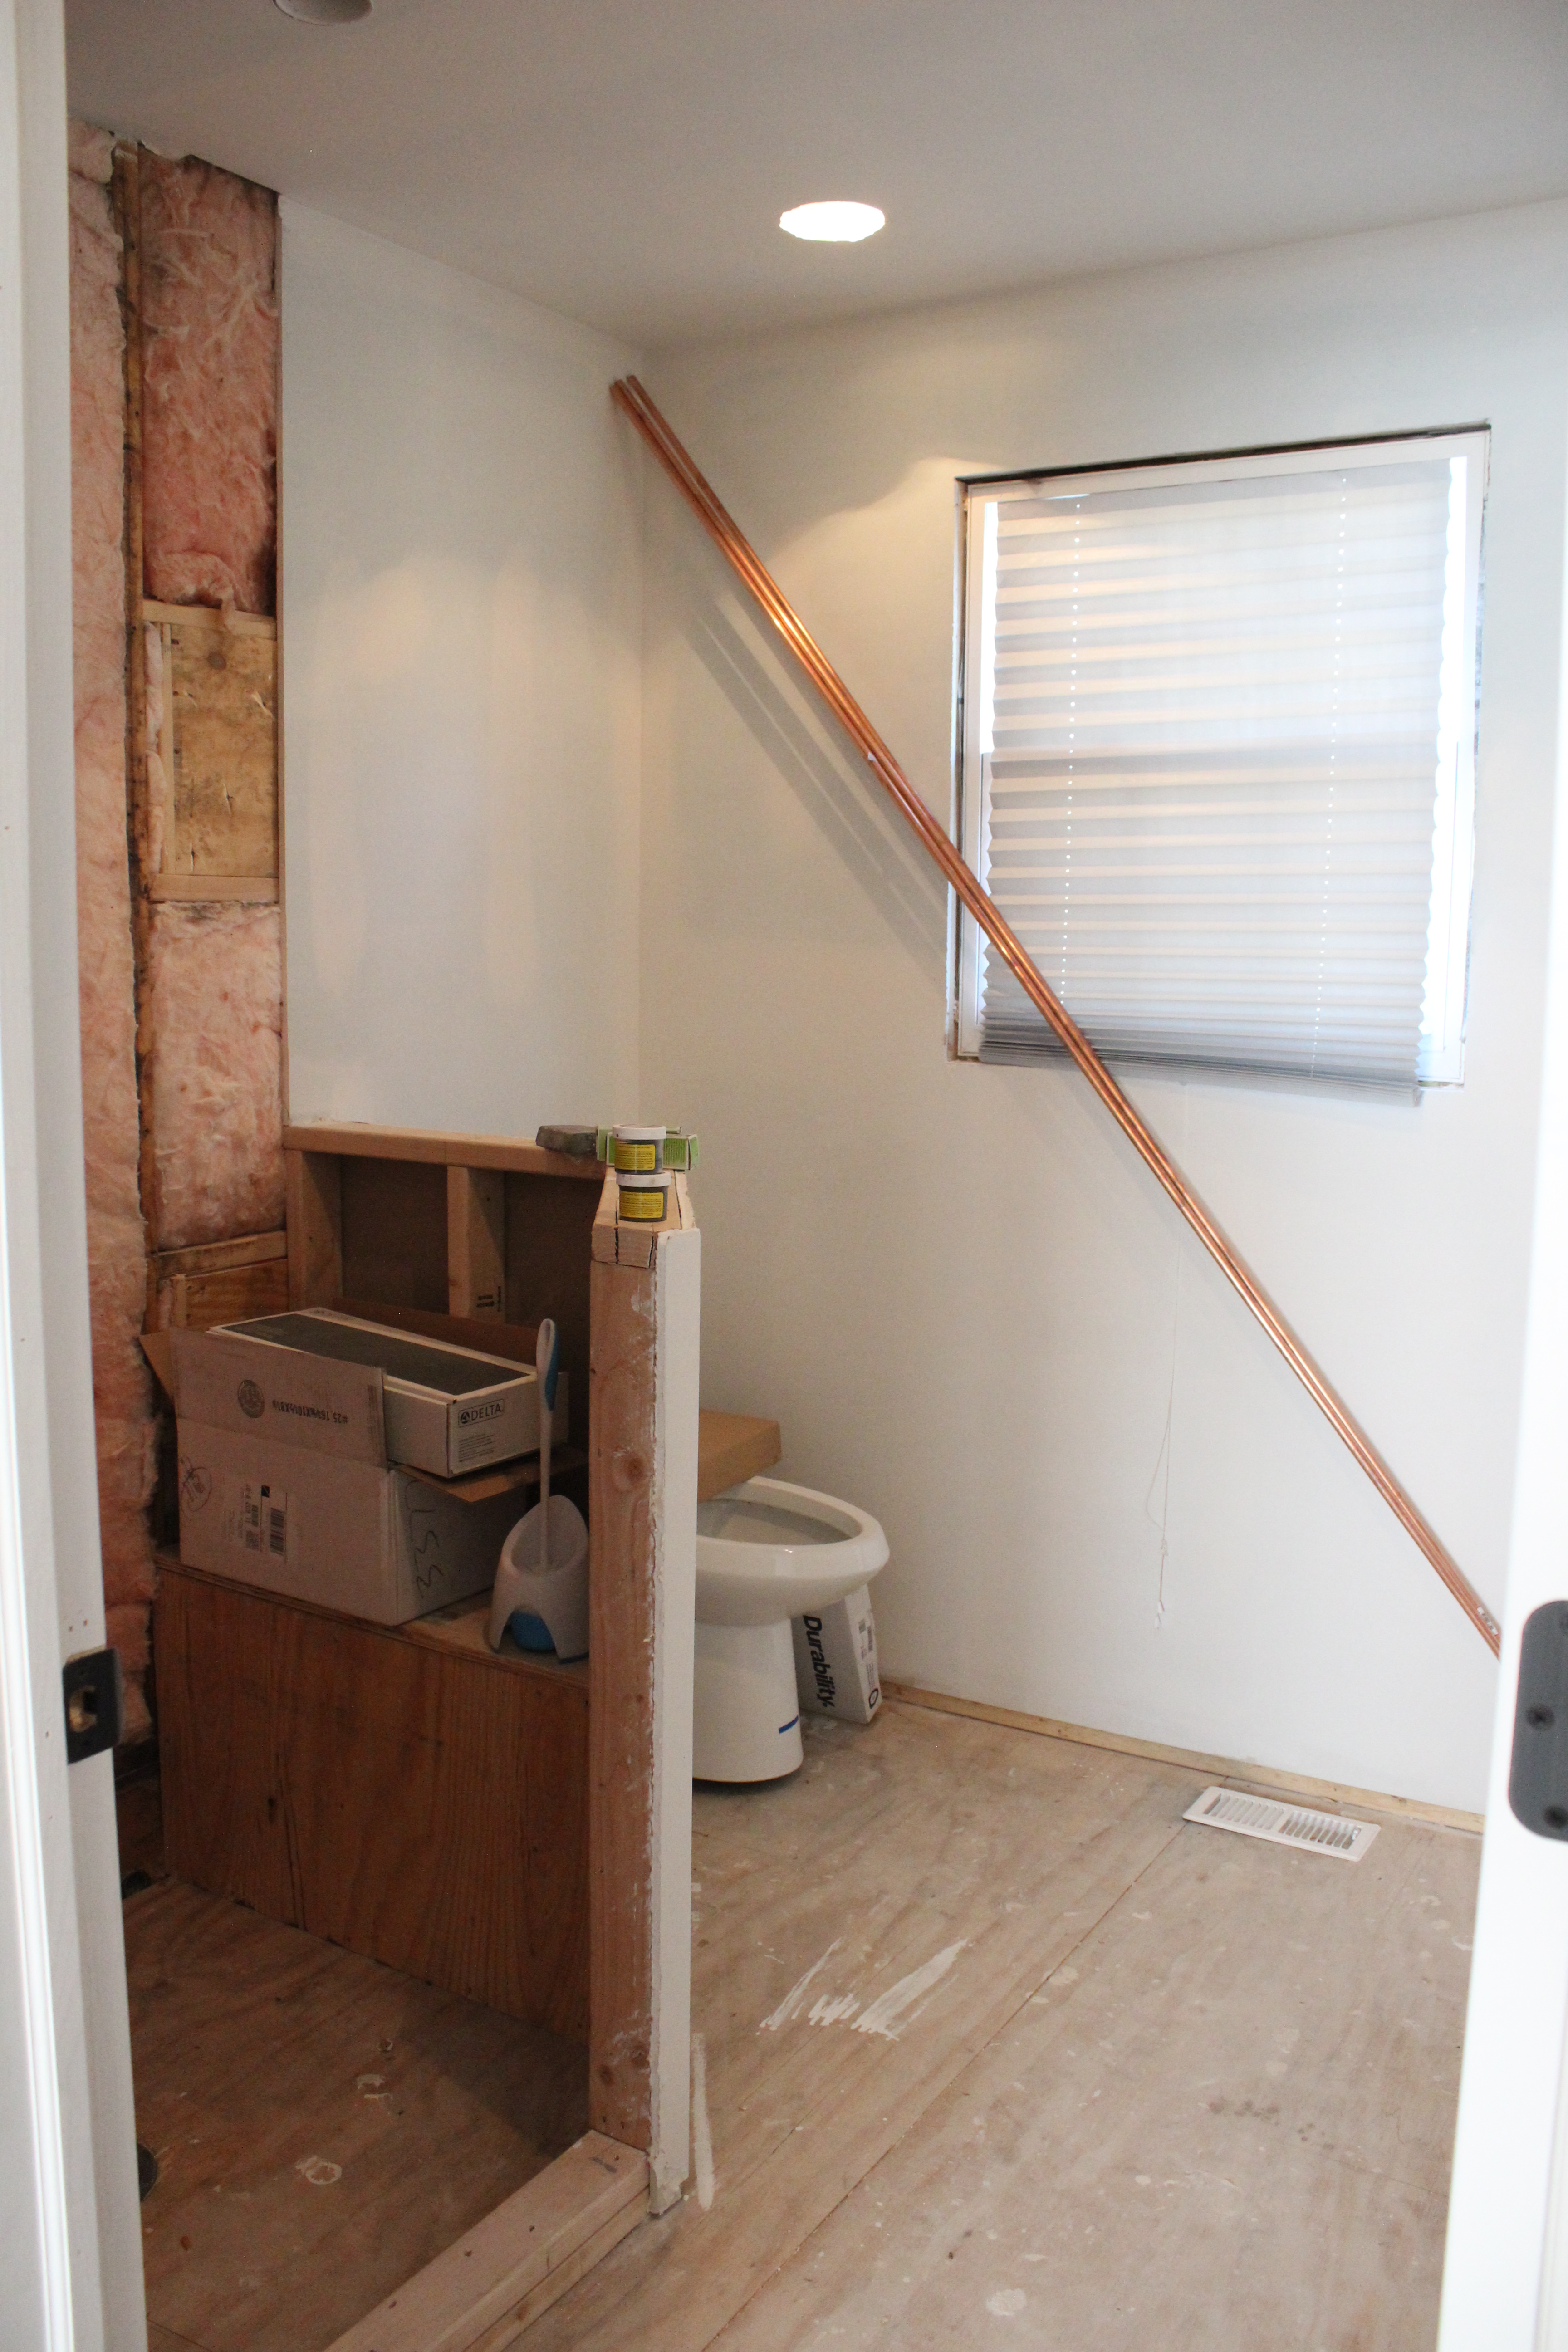
The last time I showed you the powder room it was in the early stages looking like this:
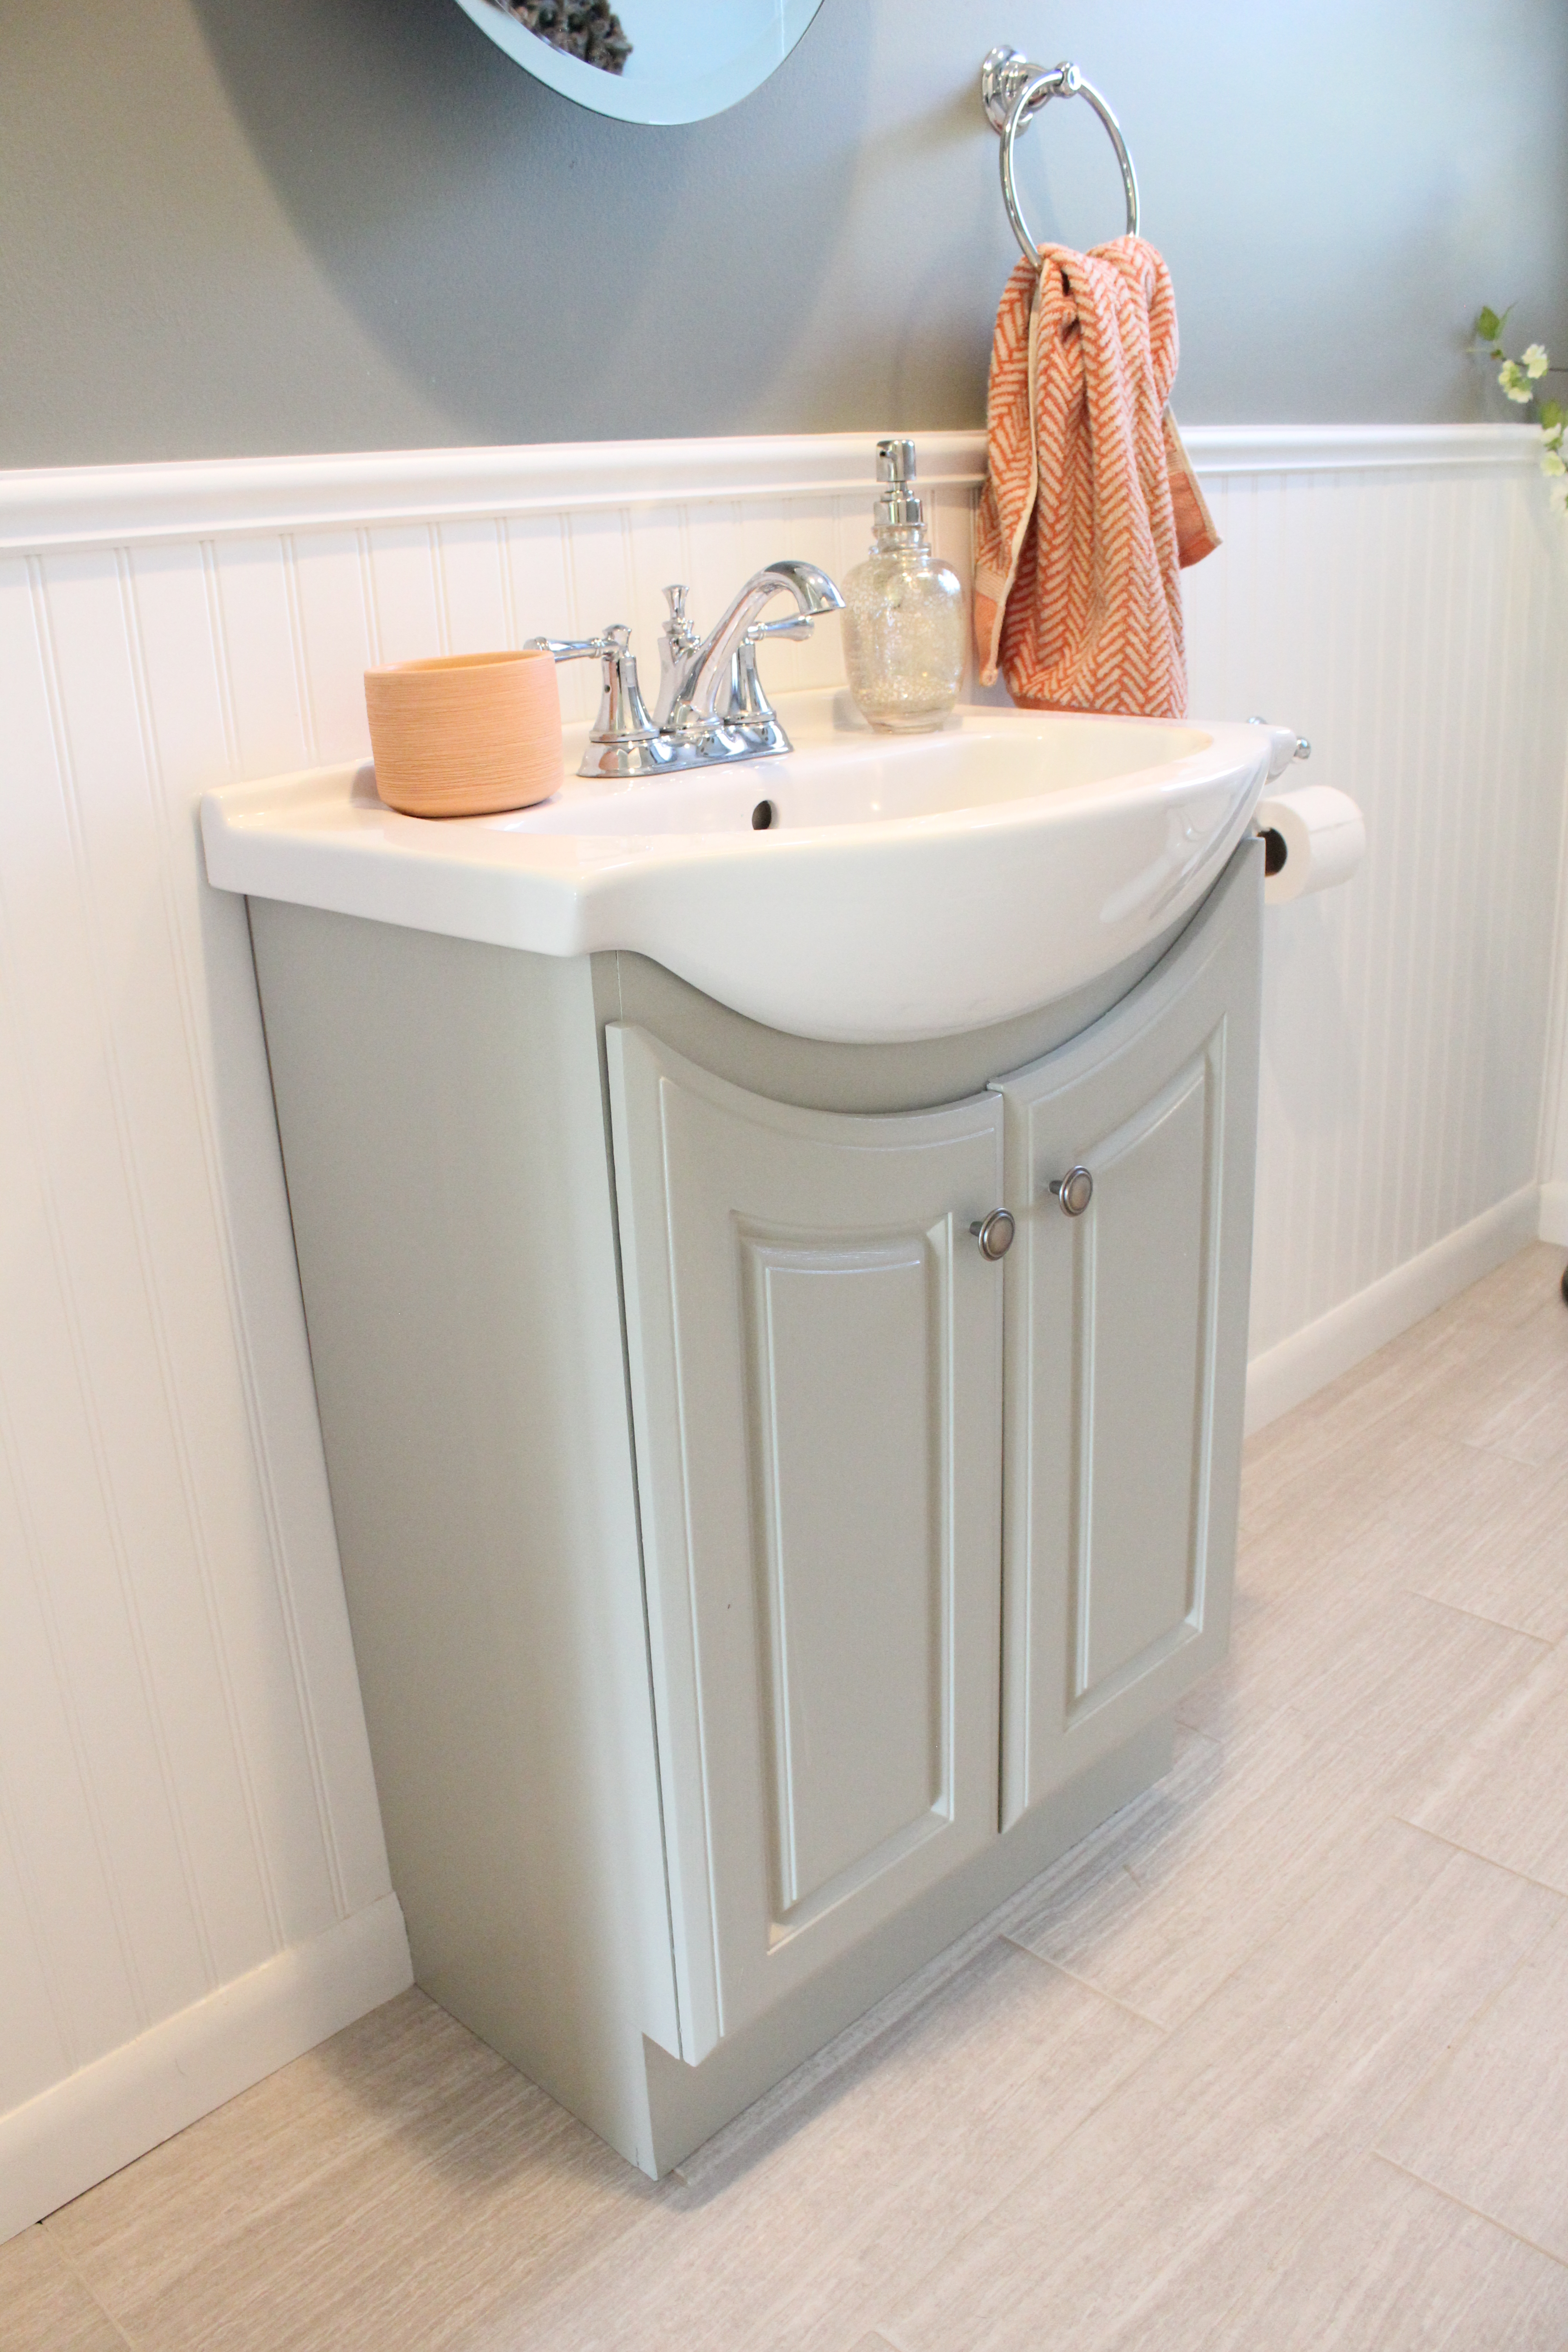
IMG_4191

And here it is now:

New Zealand 1028

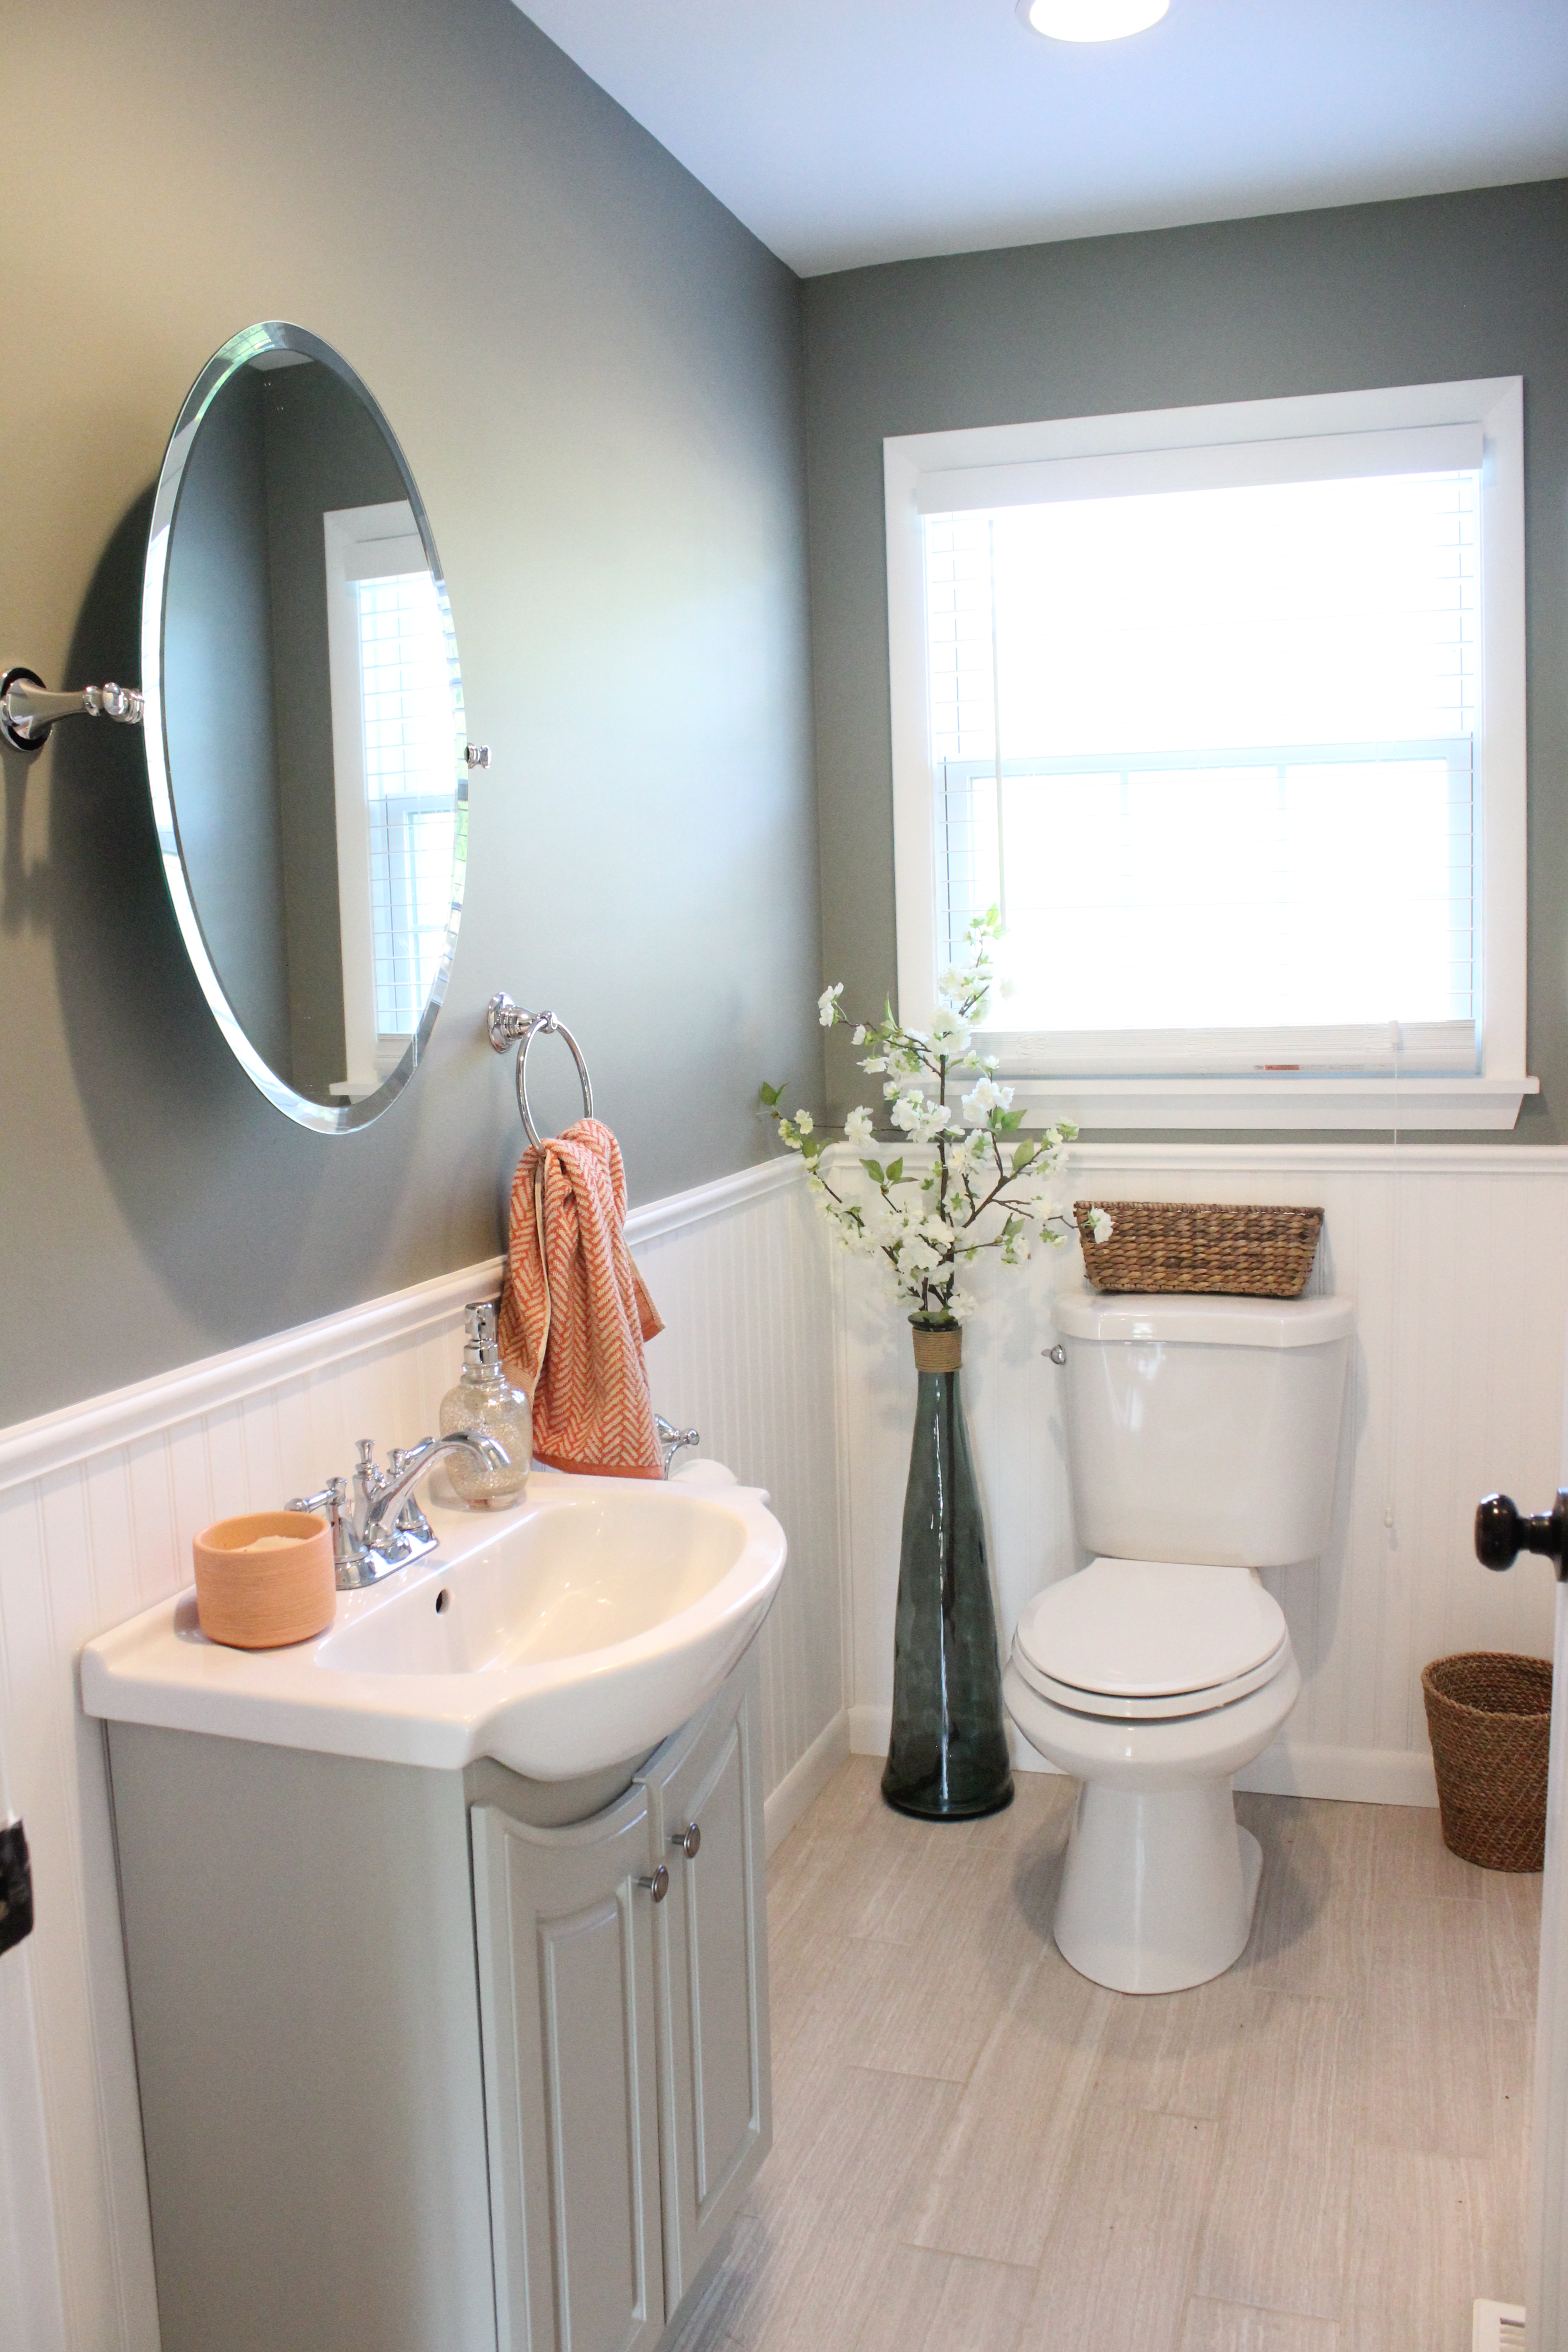
Starting at the bottom, we used a ceramic tile from Lowes called Leonia Silver. It was very reasonable at $2.50/square foot.

New Zealand 1025

We had a hard time finding a vanity since the room is so narrow at only four feet wide. We found a small black one at Menards that I gave a makeover with new knobs and a coat of Benjamin Moore Fieldstone paint. The candle, hand towel and mercury glass soap dispenser are all from Target.

New Zealand 1031
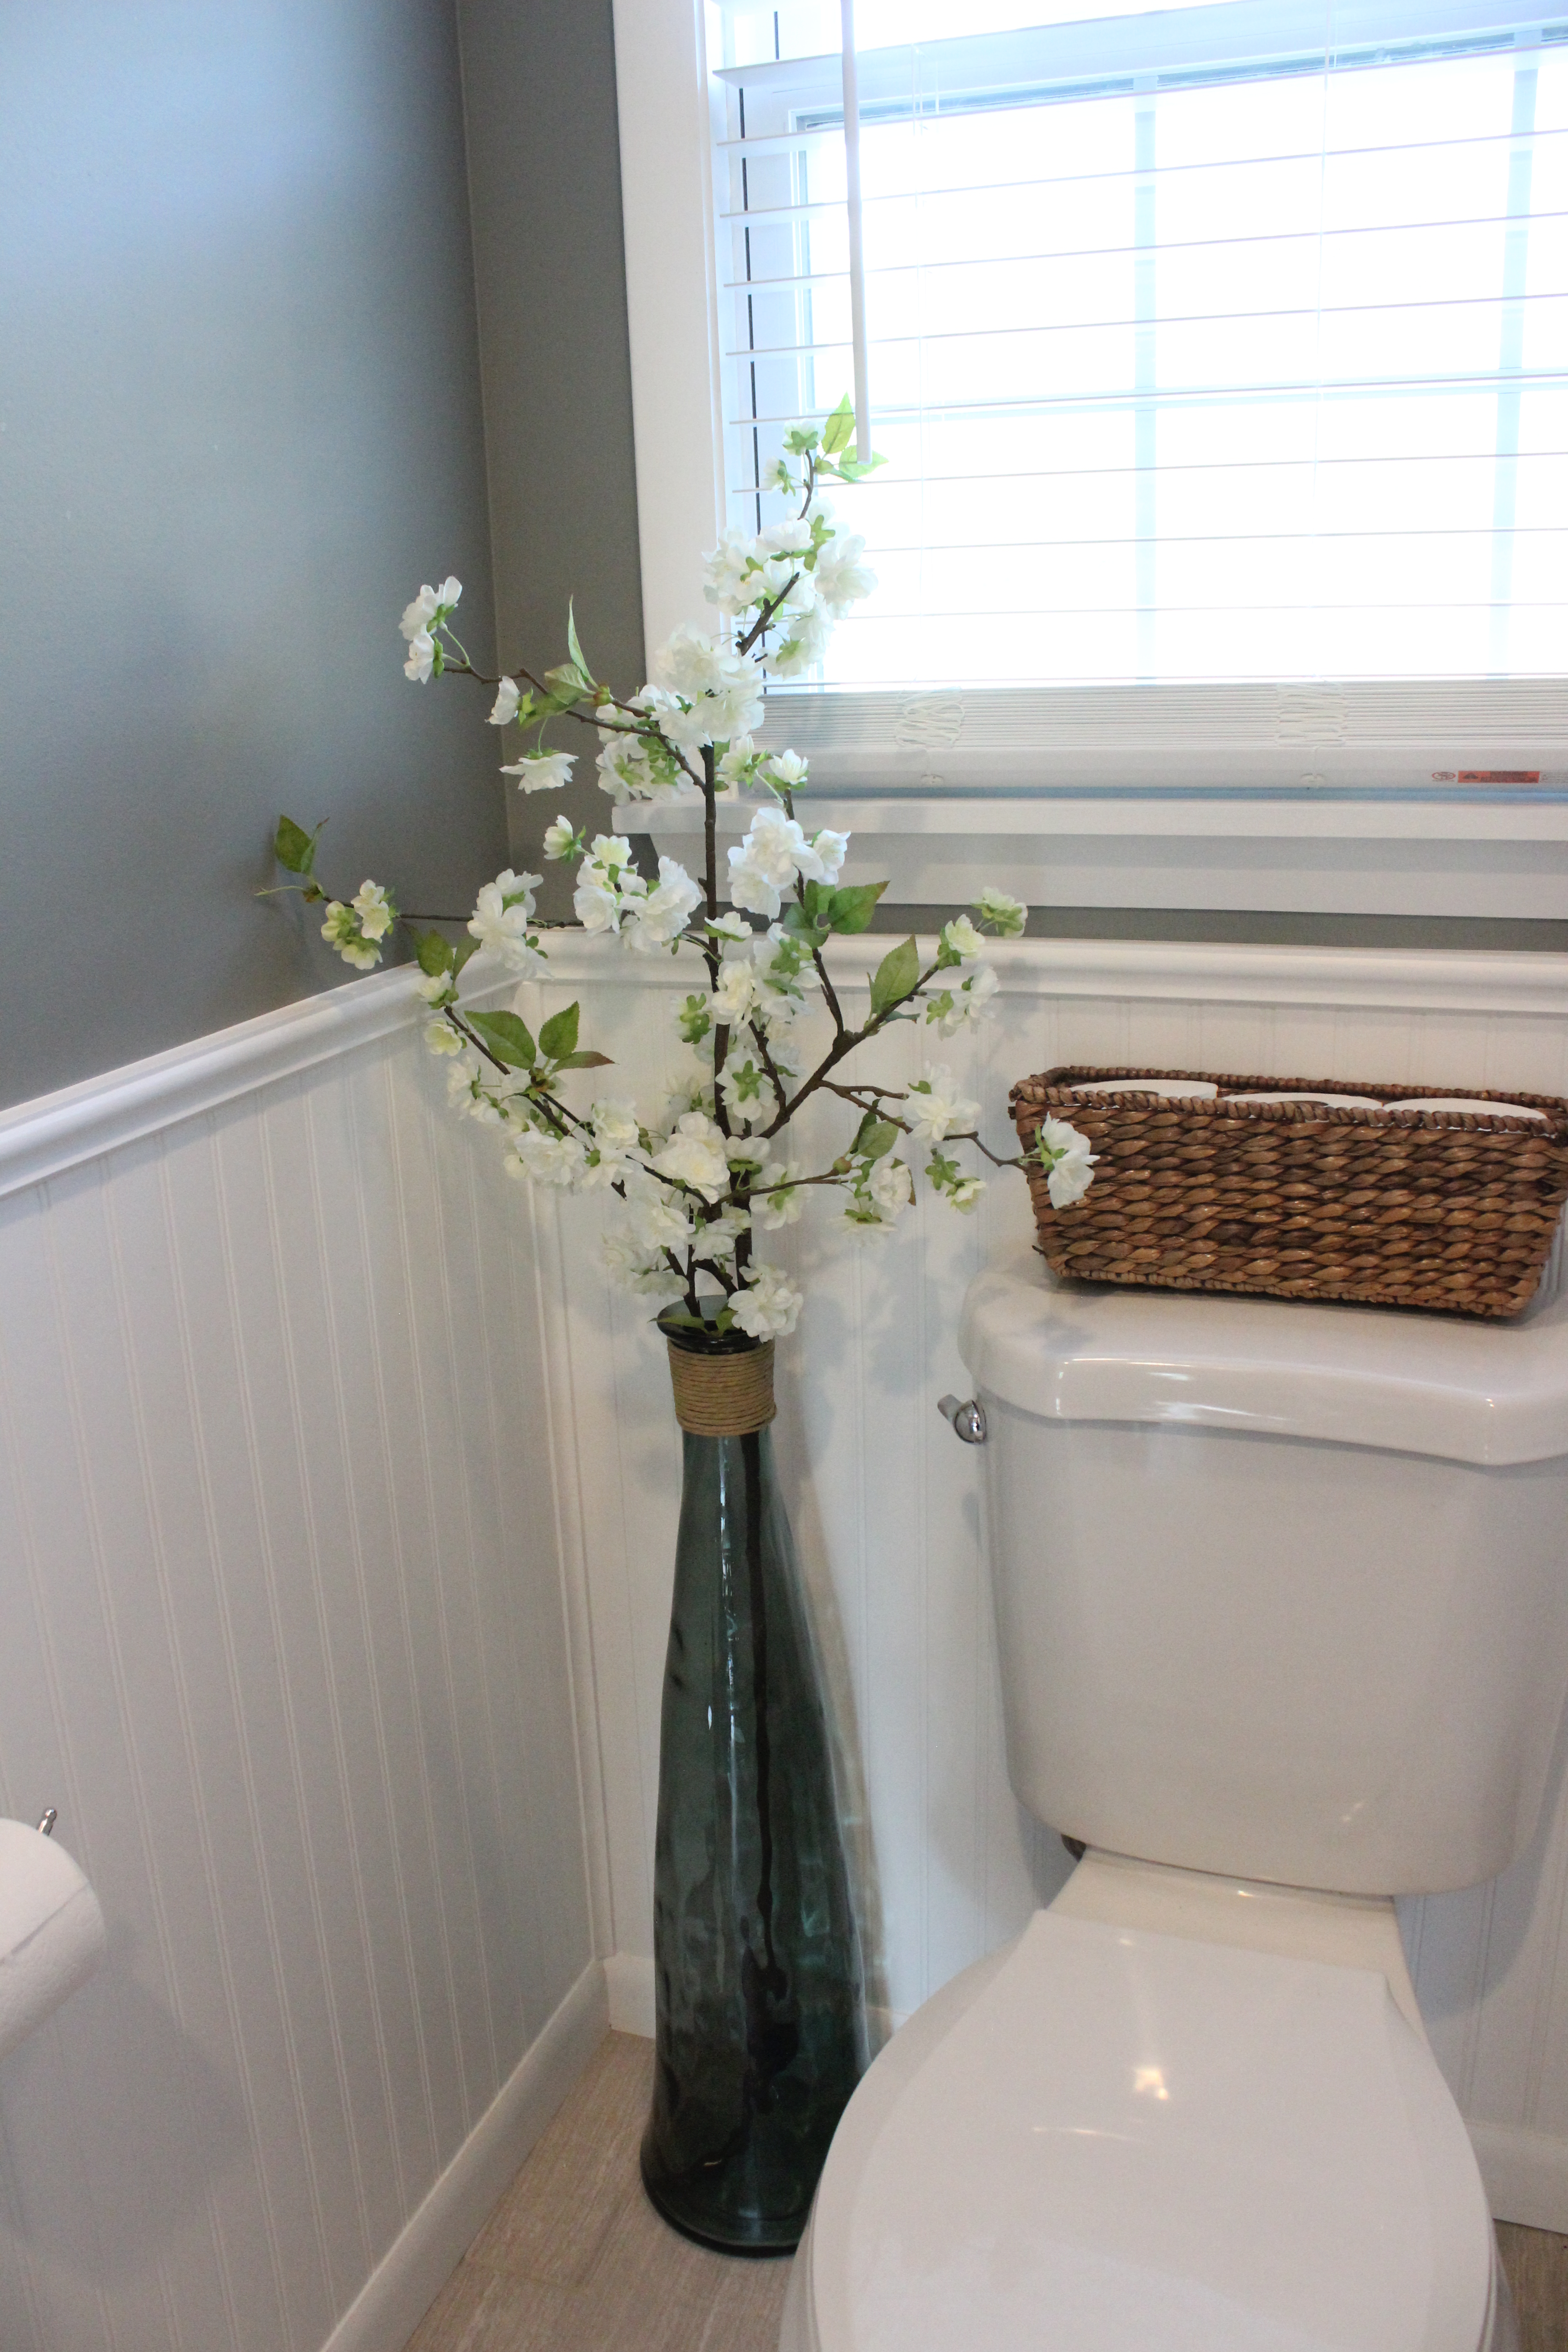
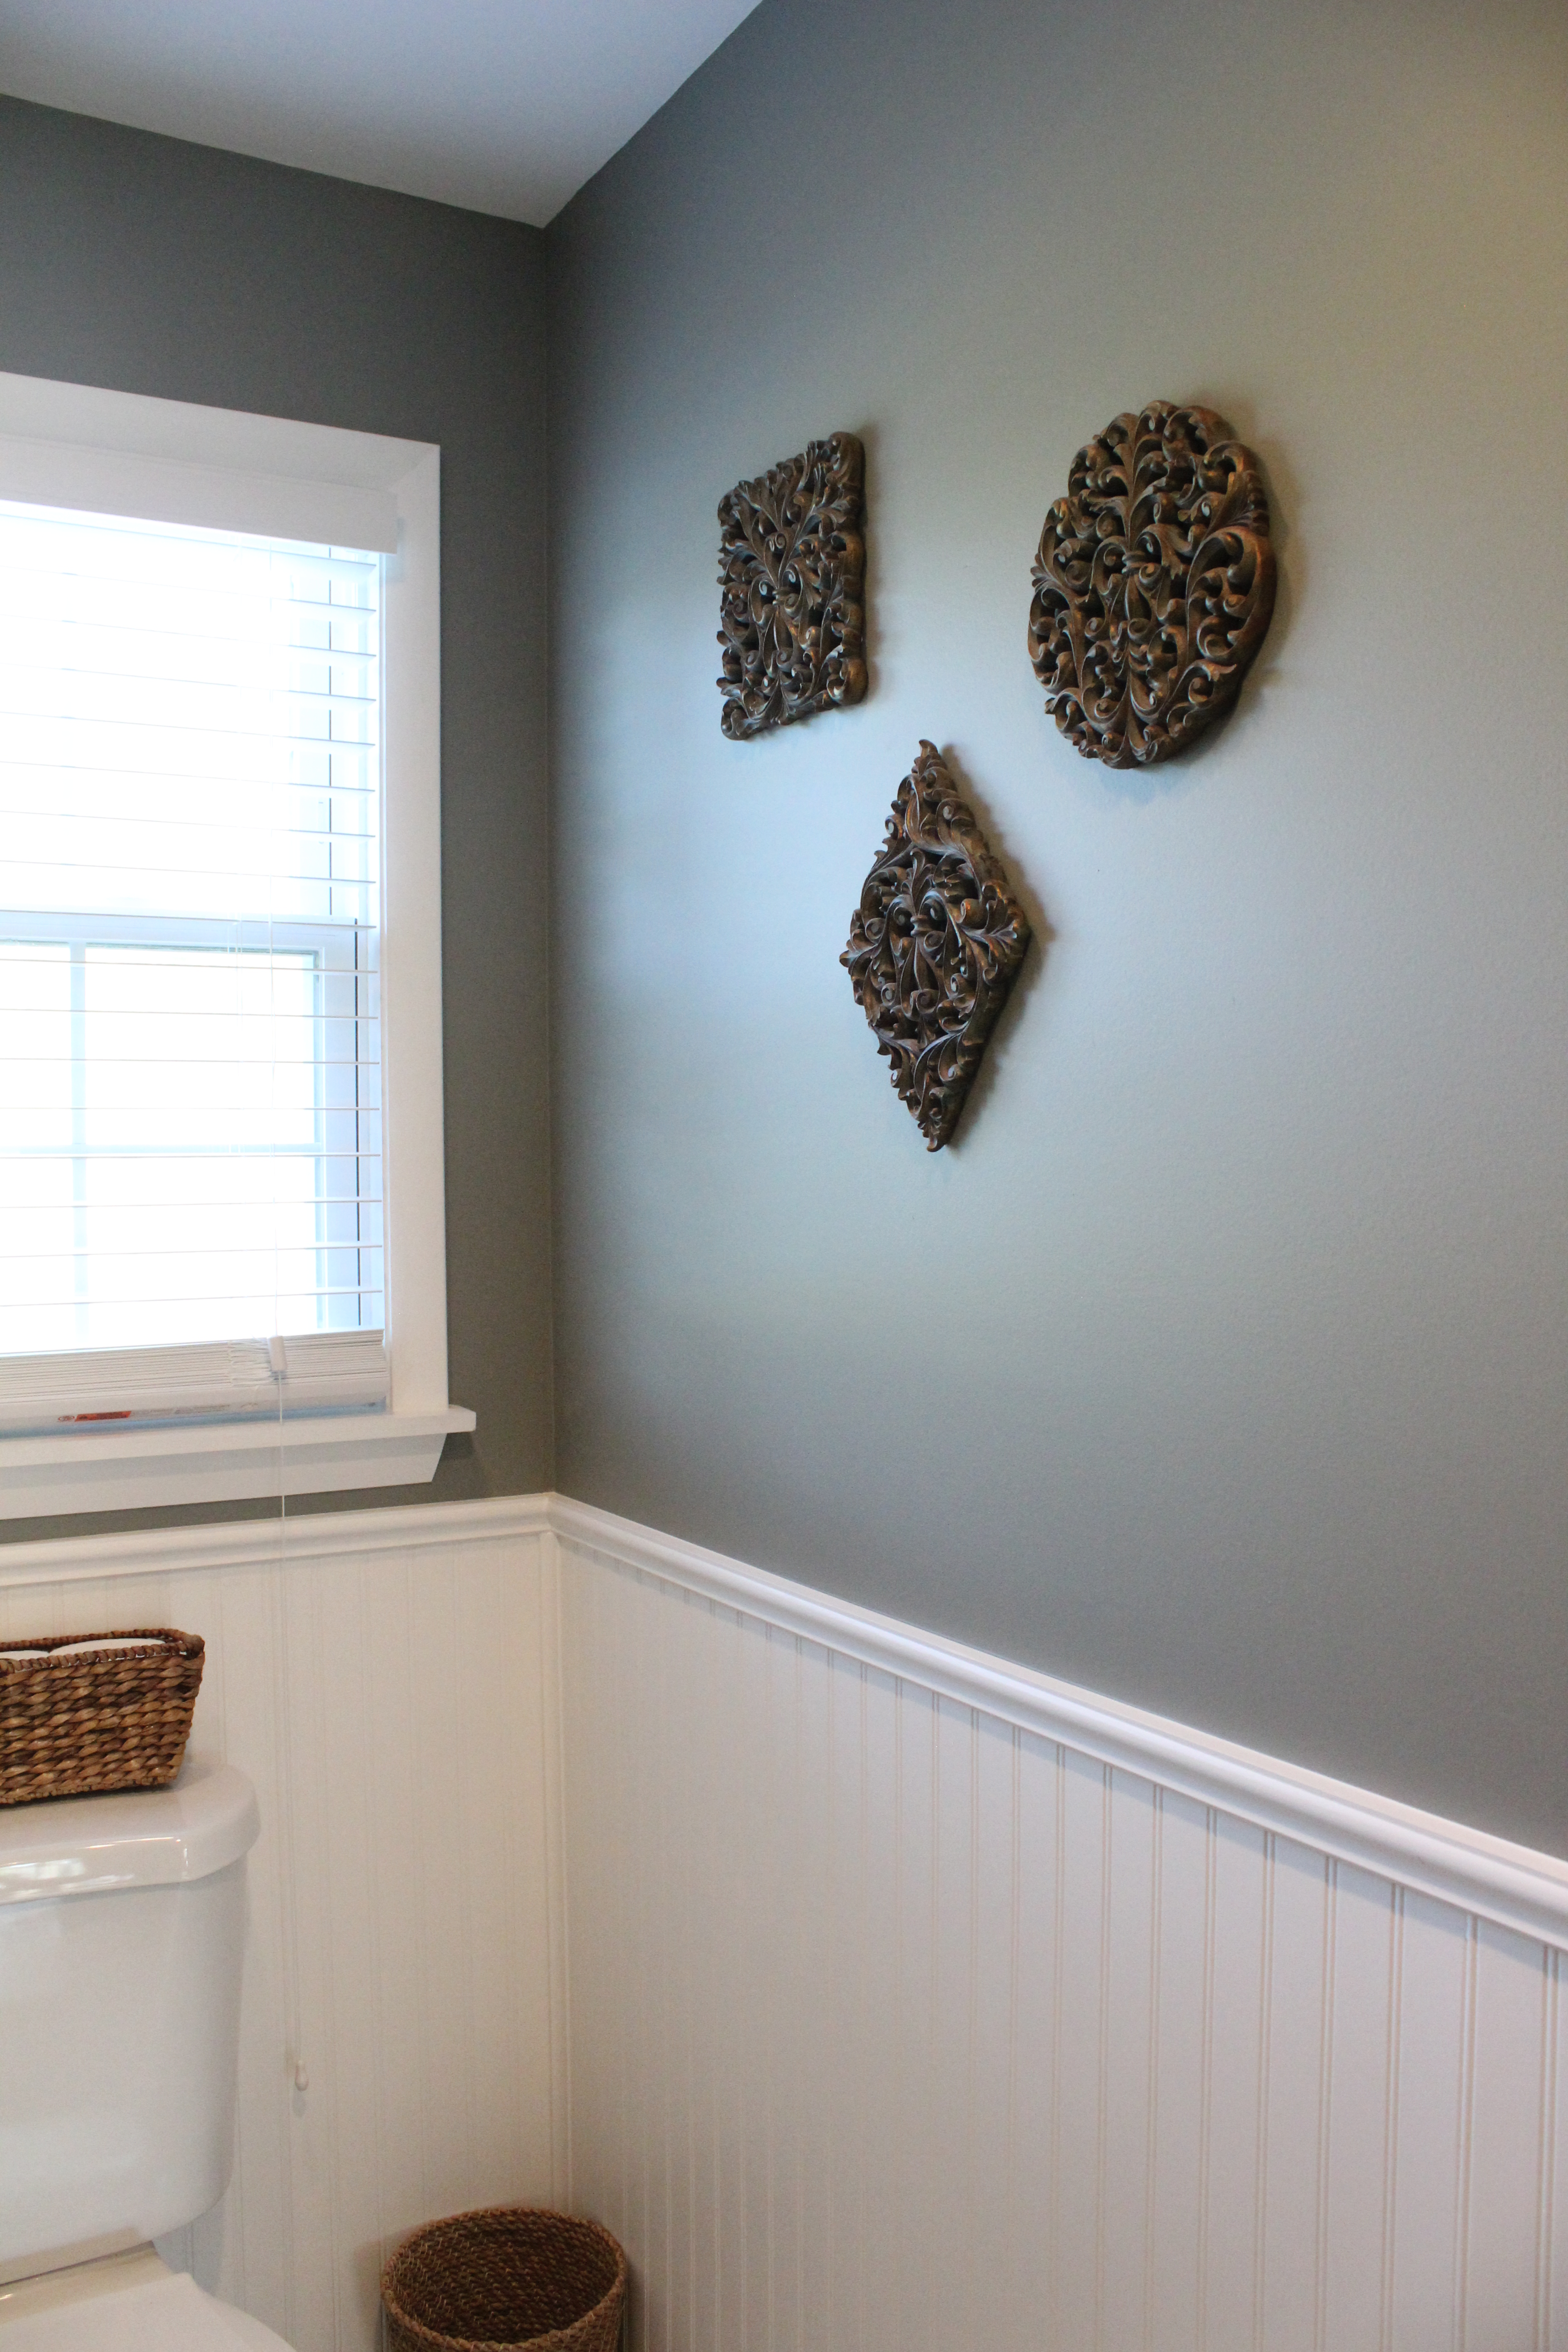
On the walls, you can see we did white beadboard on the bottom and the top half is Arctic Shadows by Benjamin Moore.

In such a small space, I didn’t have to much decorating to do, but I placed a large glass vase that we already had from Home Goods in the corner and purchased some tall, faux flowers from Pottery Barn.

New Zealand 1029

On the wall opposite the vanity I added some art from Garden Ridge that used to live in the bathroom at our old house.

New Zealand 1030

Moving next door to the new laundry room, last time it looked like this:

IMG_4193
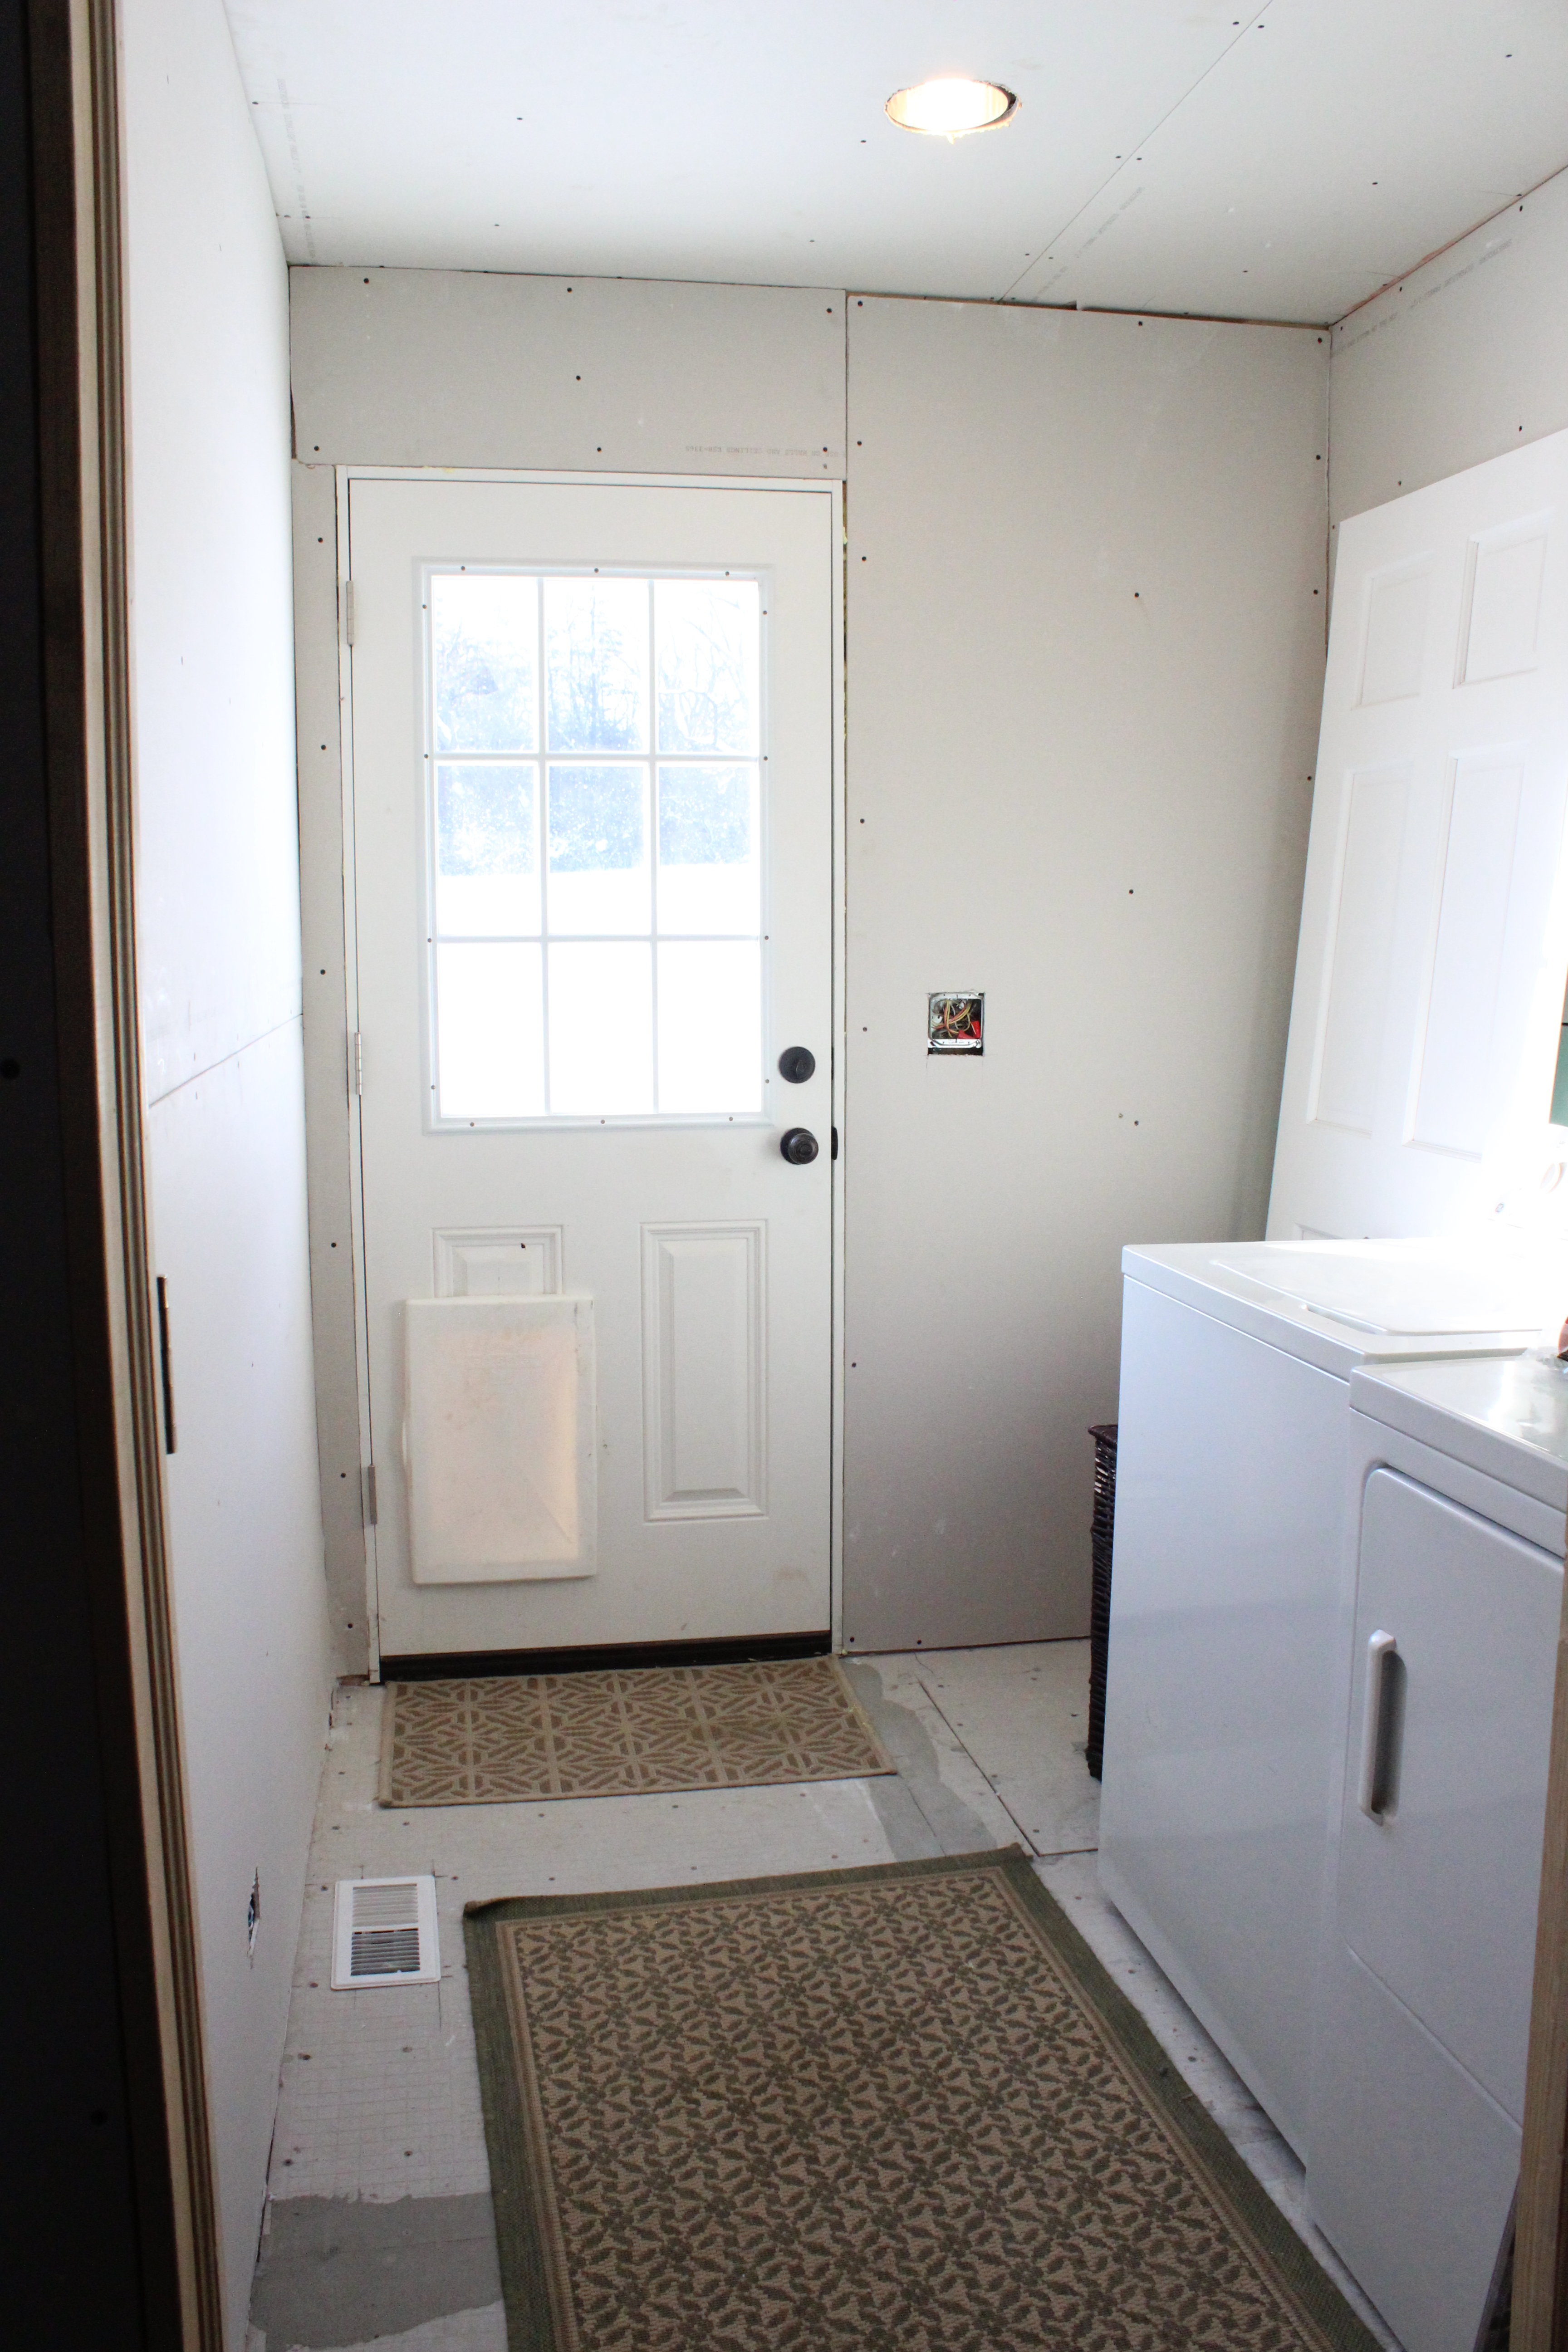
It is far from complete, but now it looks like this:

New Zealand 1032We used the same flooring as the power room in here (but ran it the opposite direction) and painted the walls Sea Salt by Sherwin Williams. The washer and dryer are new to us that we actually got used for $100/pair! This is the first time we’ve had front loaders and so far, so good.

We hung a cabinet over the washer/dryer that Ben had left over from one of his jobsites. I will probably end up painting it. Inside the cabinet Ben built a laundry chute that starts up in our future master bedroom closet.

photo-158

You can hardly see it in the photo but we made the front of the chute out of clear plexiglass so you can see what’s in there.

We plan to add a countertop (maybe butcher block?) and some shelving in here.

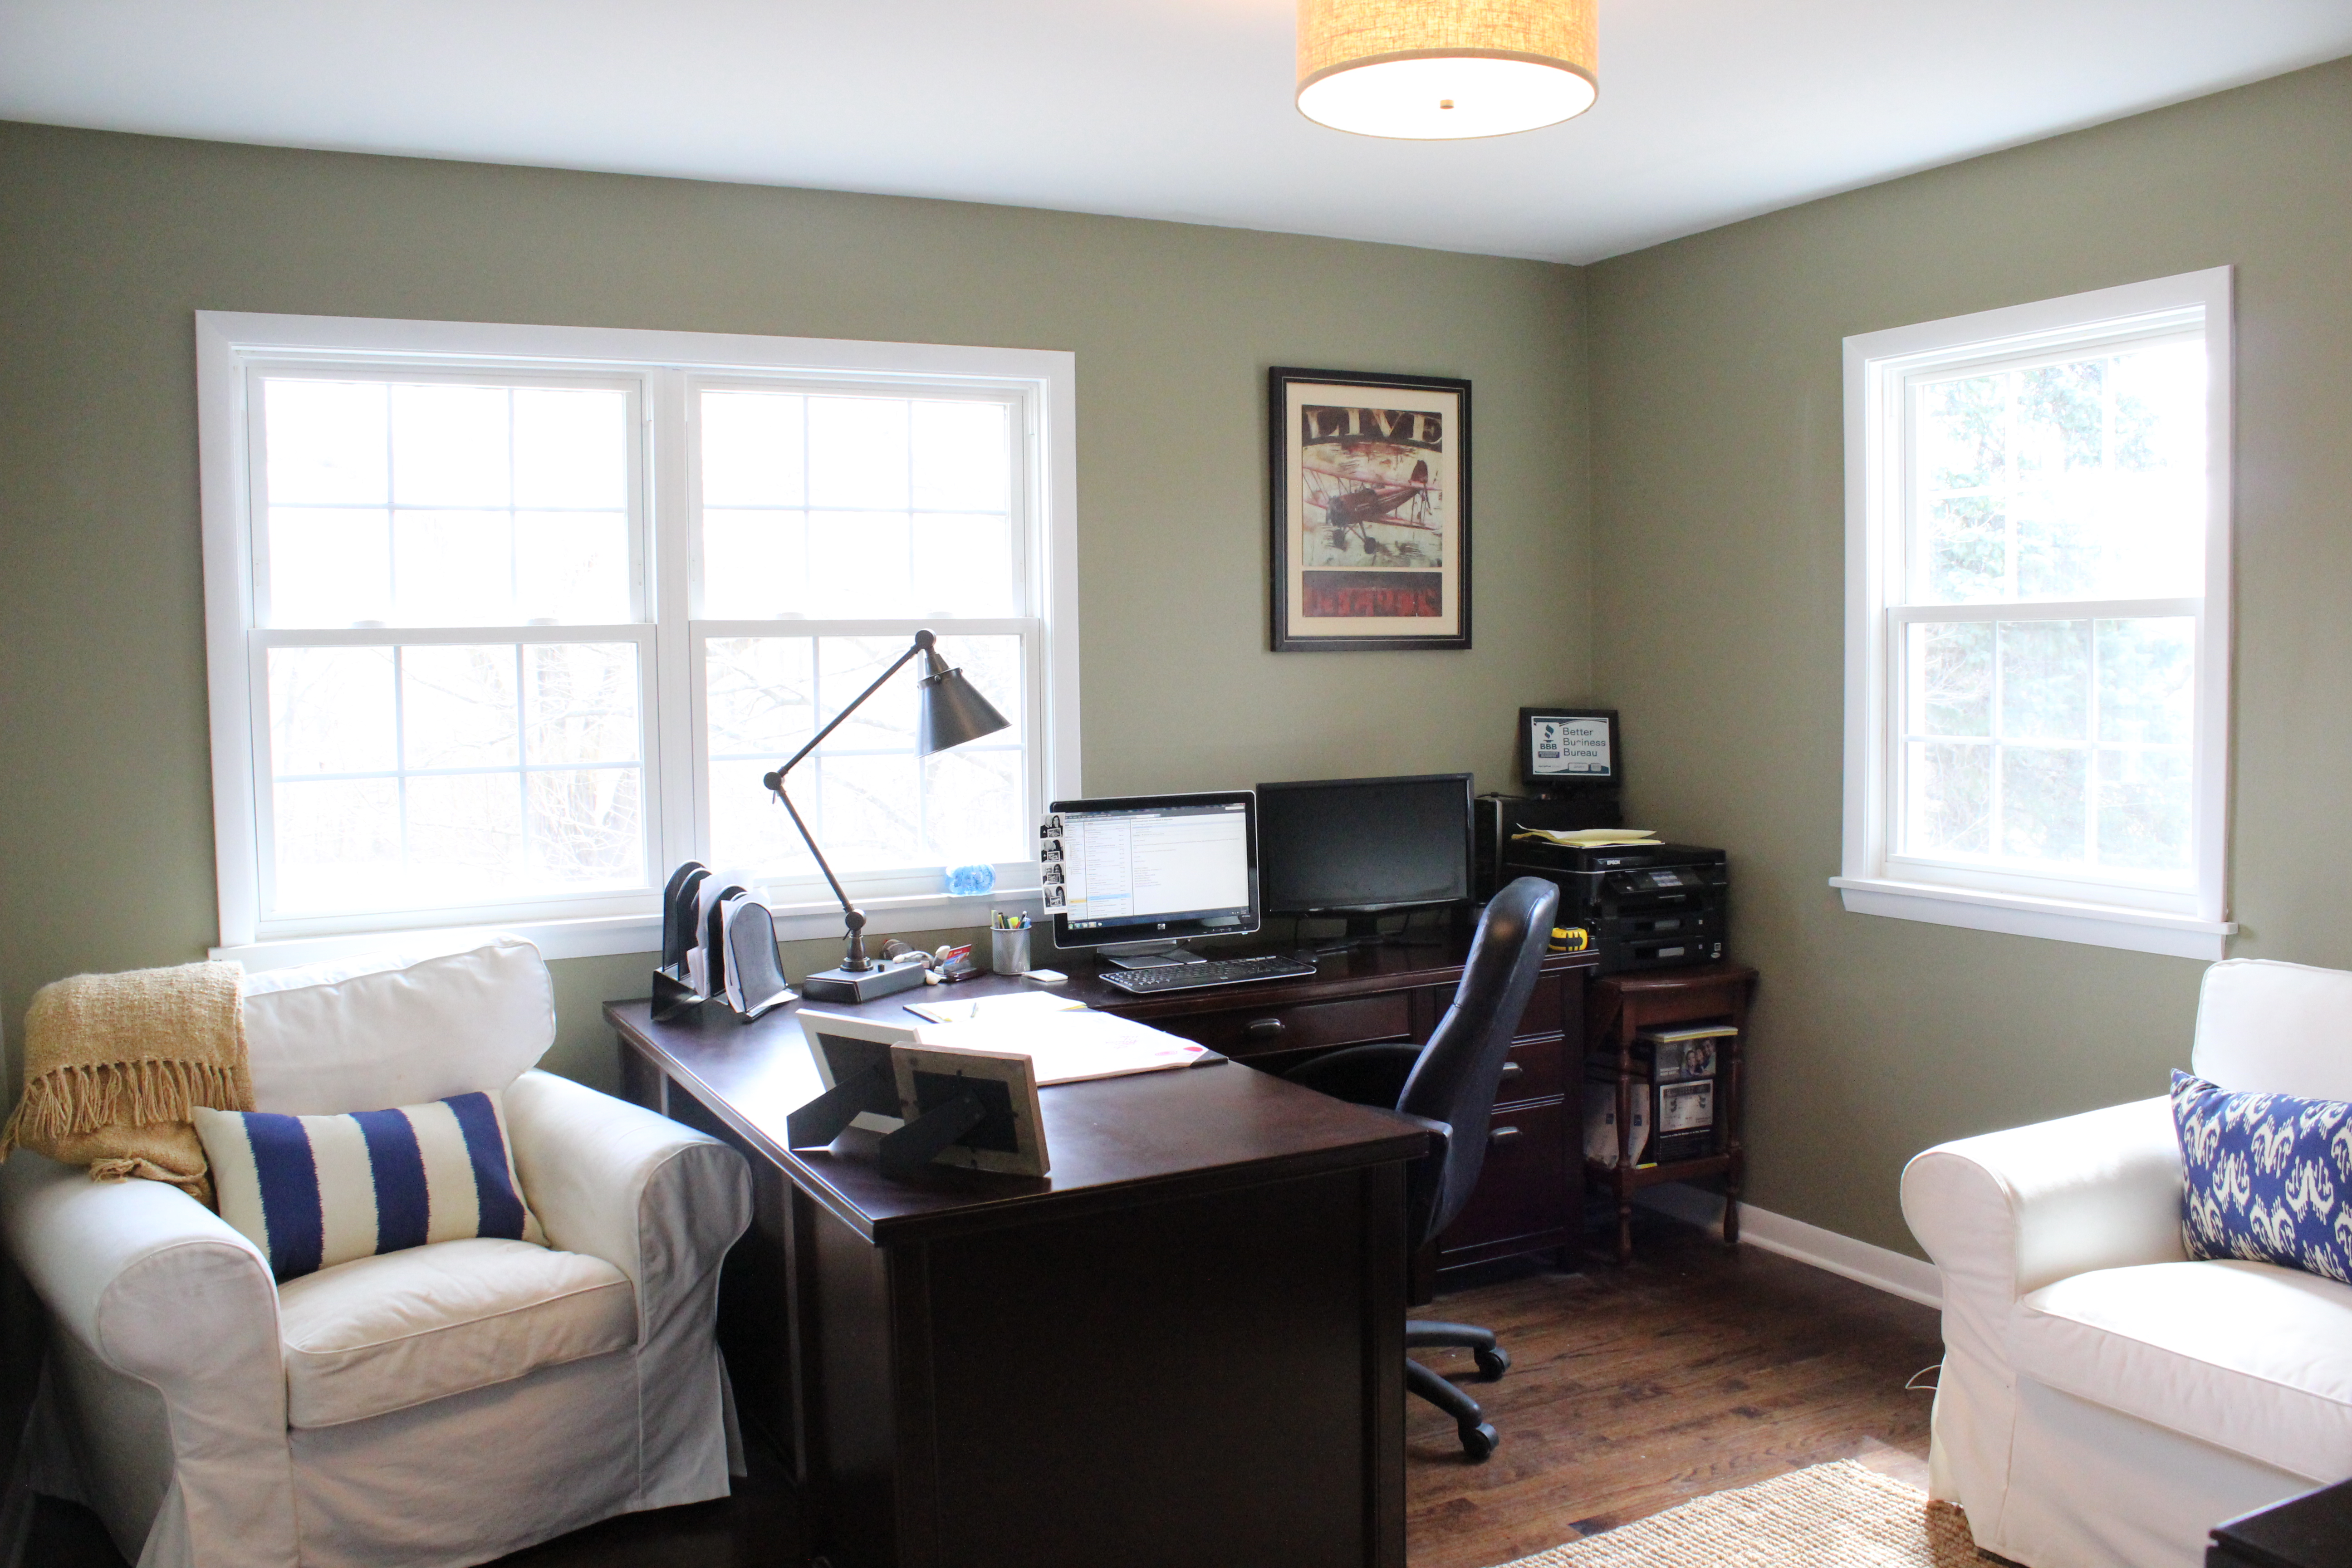
There has been much less progress on the addition rooms upstairs, but that isn’t a huge priority for us right now. Our main focus while the weather is nice is outside.

So here is the future master bathroom right now, which has drywall, framing, plumbing and electrical.

New Zealand 1038

And next to that is the master closet which is painted and carpeted.

New Zealand 1035

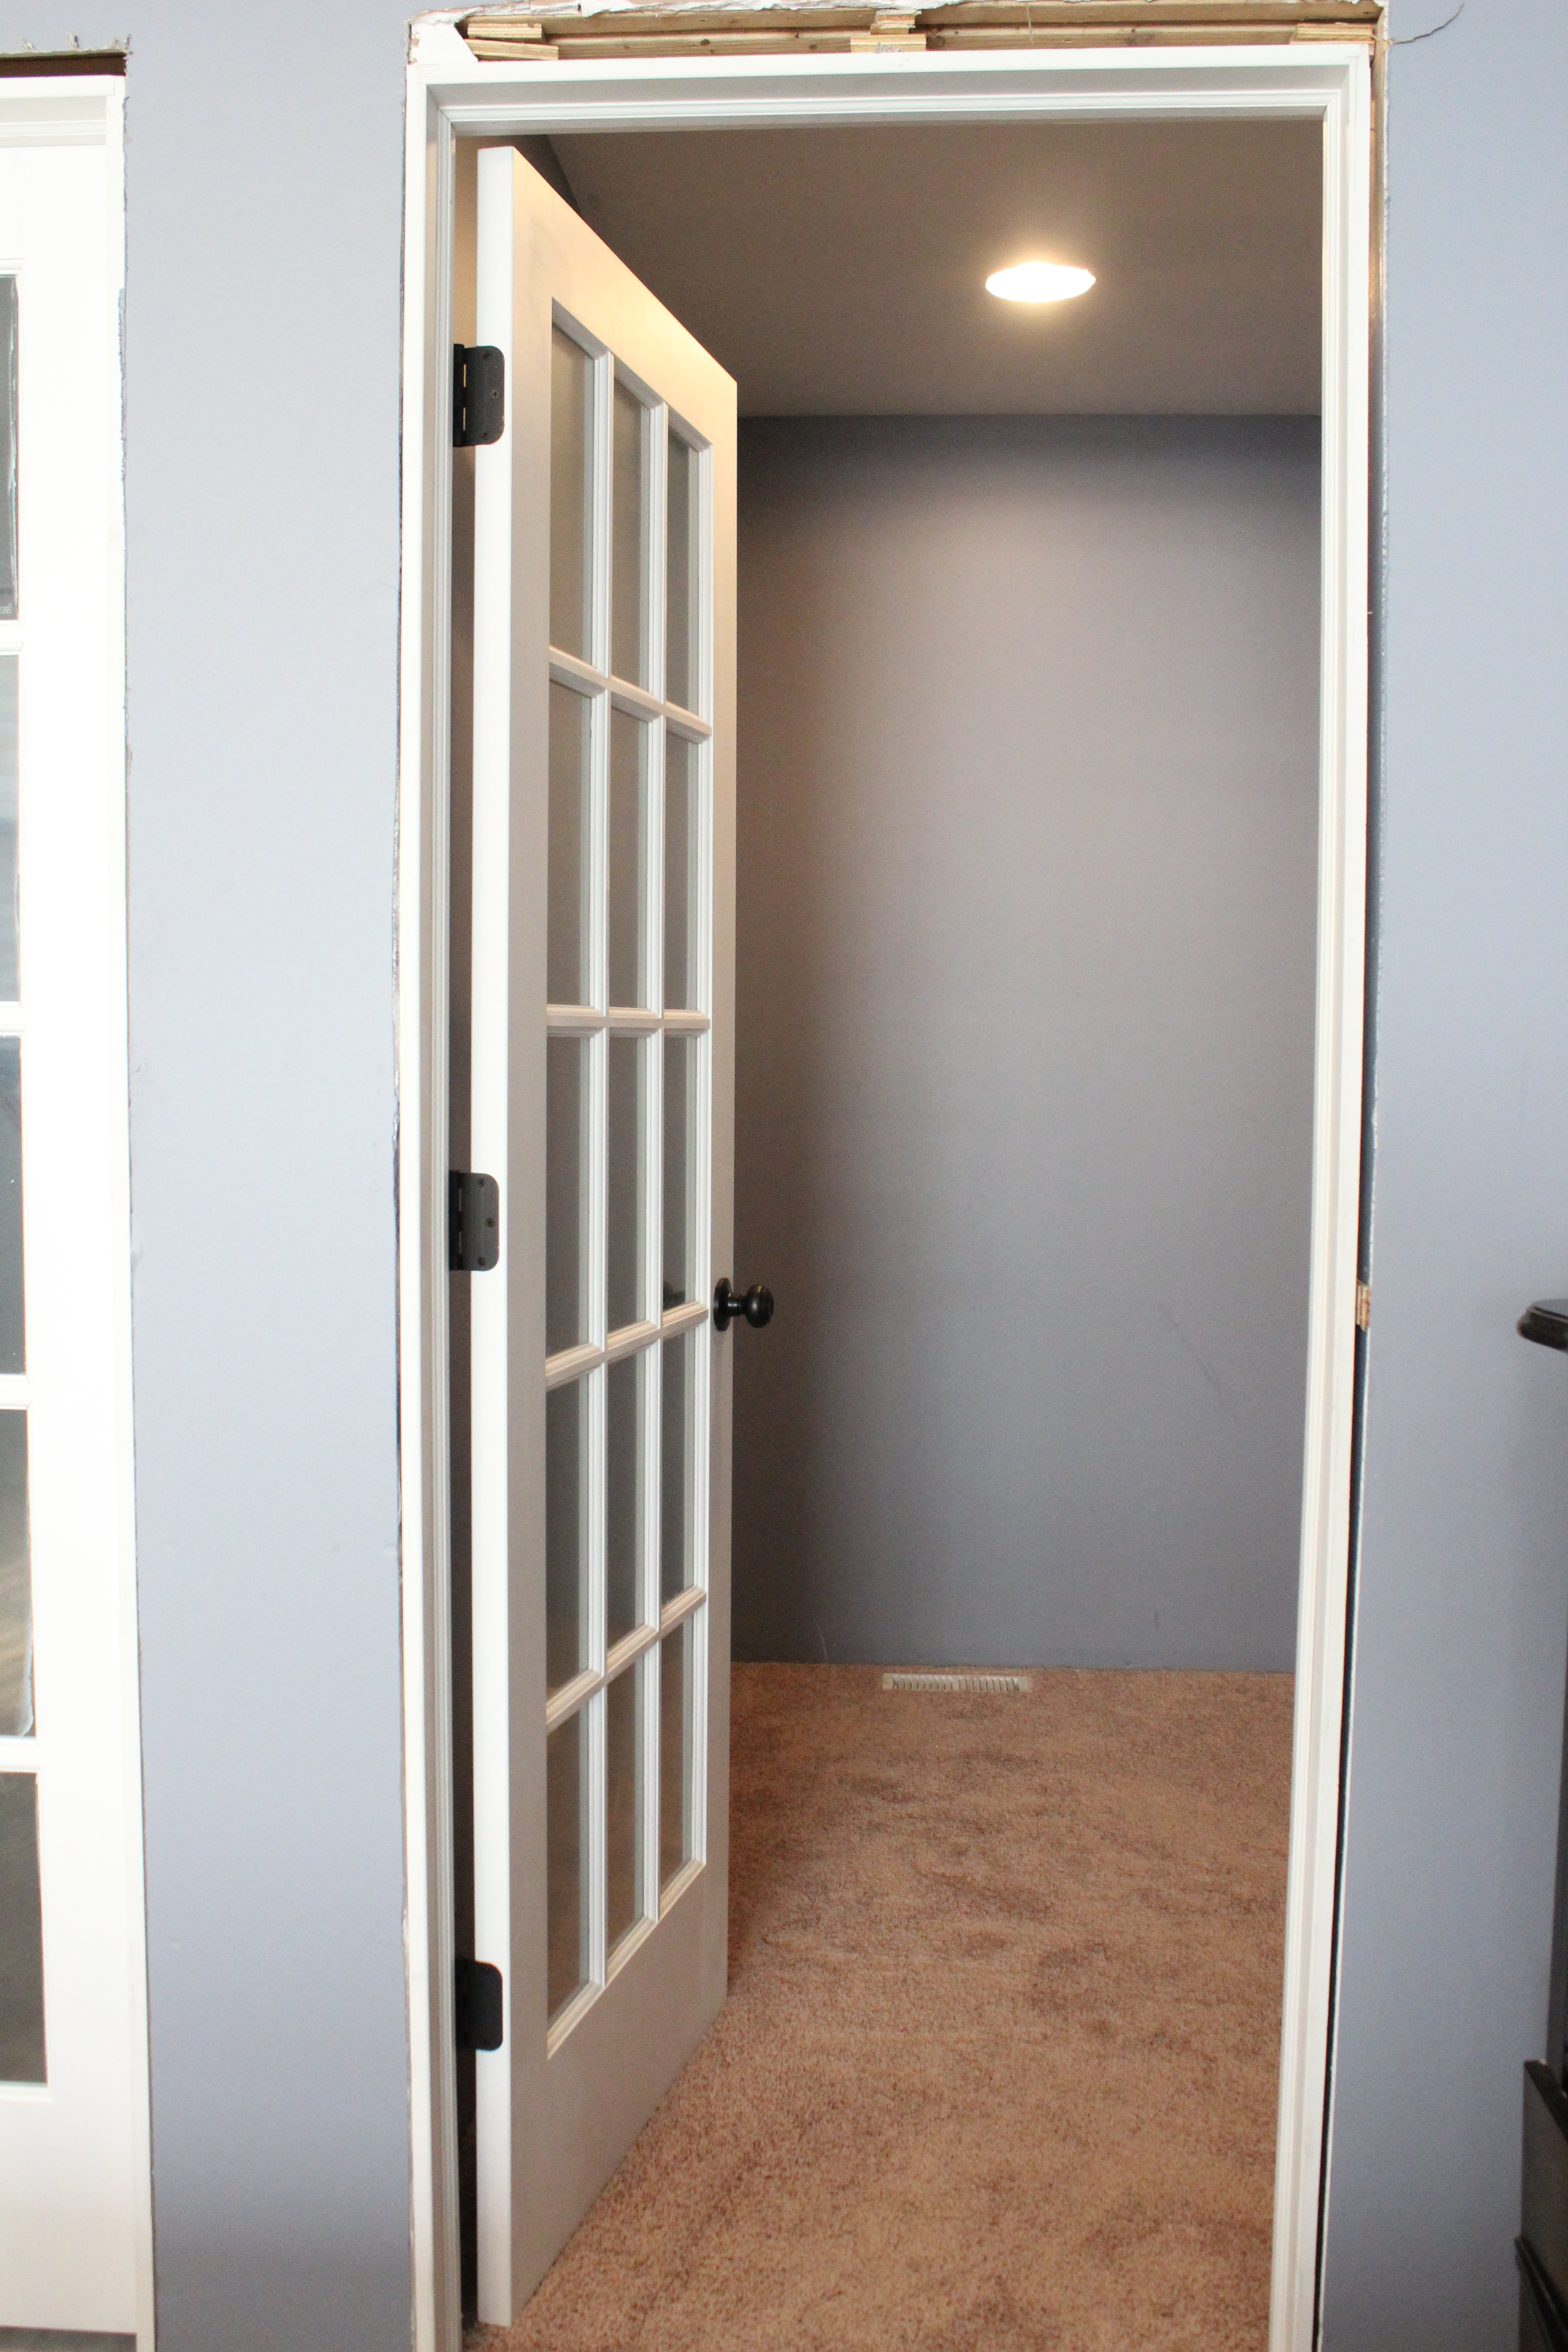
They aren’t finished yet but we hung french doors to these two rooms which we plan to frost.

New Zealand 1037

We plan to focus on these rooms after the summer and then move into our new master by the end of the year.

Next up on the blog… chickens! Yep, we had our chickens arrive in the mail yesterday and we built a beautiful coop for them to live in.

The Nursery Reveal

29 Jan

With only 5 days until my due date, it’s time to share the completed nursery! The room turned out even better than expected and is probably my favorite space in the whole house. We put a lot of love into this room and DIY’d most of it.

So without further ado, here is the grand tour….

IMG_4253

IMG_4258

IMG_4268

IMG_4255

Thanks to building out some shelves and buying some baskets, we have a beautifully organized closet with tons of storage.

Nursery Closet Revised

IMG_4225

I was able to fit so much in here that the dresser/changing table is less than half full. I labeled each of the baskets with chalkboard tags, so they are easily changeable.

IMG_4230

Now for a little more detail on all the different items in the room.

I shared here how we painted the stripes and built the crib. The two paint colors are Behr’s Powdered Snow and Perfect Taupe (lightened by 20%).

IMG_3853The changing table is a dresser we already had and we painted it with Annie Sloan’s chalk paint in Pure White. The dresser hardware we refinished using Rub-N-Buff (spanish copper mixed with ebony).

IMG_4249Hanging over the changing table is a musical sheep mobile from Pottery Barn. There are quite a few sheep in here as a nod to Ben’s childhood growing up on a sheep property in New Zealand. I’ll show you my favorite sheep soon.

IMG_4247I tried to include lots of other animals too including this adorable elephant laundry hamper from Home Decorators.

IMG_4256The art over the crib is homemade of course. For those non-New Zealanders, you may not recognize the animal, but it is a kiwi bird, the national symbol of New Zealand.

IMG_4241Ben built the wood sign out of some leftover barn wood that we used on the ceiling beams in the living room. I tried to freehand draw the bird but we agreed to just get a large copy made to use as a stencil. Then I painted it with white trim paint.

IMG_4278

Next to the crib is a shelf with some framed baby shower cards, baby blocks, a Harrod’s puppy from a Welsh friend, and a sock monkey which started in my hometown, Rockford IL.

IMG_4246

We installed a ceiling fan in the room to create some circulation and help prevent SIDS.IMG_4259The white Ikea Ektrop chair we already owned, except we retrofitted it so that it is now a rocker. We purchased a swivelling rocker base off of this website and then Ben created a plywood bottom and screwed it into that.

IMG_4103

I see lots of hours in this chair in my future.

IMG_4276

Above the chair are three wire baskets from World Market which hold a few books in quick reach.

IMG_4280

Next to the nursing chair is a distressed-wood floor lamp we already owned from Target and a new nightstand from Kirkland’s.

IMG_4275On the gallery wall are a few items off Etsy, a small mirror, clock and childhood pictures of both Ben and I.

IMG_4263

Can you spot my favorite sheep? On the right is 8-year-old Ben and his winning sheep, Lizzy.

IMG_4235

Also I love this hook on the back of the door from World Market to hang a towel or jacket. It’s the little things!

IMG_4234

And last but not least is the amazingly soft rug which came from Lowe’s. Seriously this is the the softest rug I’ve ever felt. Can’t wait to play on the floor with our little one.

IMG_4281

Here is a full source list:

Wall paint: Behr’s Powdered Snow and Perfect Taupe (lightened by 20%); Rug: Lowe’s; Rocker base: swivelchairparts.com‎; Chair: Ikea Ektorp already owned; Chair ottoman: Ikea Sandby; Nightstand: Kirkland’s; Ceiling Fan: Menards; Floor lamp: Target– already owned; Wire baskets: World Market; White shelf: Home Decorators Standard Cornice Shelf; Crib: Toy’s R Us Nursery Basics Crib; Changing table/Dresser: Already owned off Craigslist; Crib sheet and crib skirt: Oilo Taupe Modern Berries; Wood kiwi art: DIY; Bamboo blinds: Home Depot; Curtains and clips: Target; Changing pad cover: Carousel Designs; Giraffe art: Etsy; Alphabet art: Etsy; Frames: Target and Home Goods, most already owned; Baskets: Target; Chalkboard tags: World Market; Elephant laundry hamper: Home Decorators; Sheep mobile: Pottery Barn Harper Lamb Mobile; Closet shelving material: Menards

I can’t believe there will be a baby boy or girl living in here soon. Now we wait!

Nursery Wall Stripes

21 Oct

The nursery is starting to take shape! Over the weekend, we got the wall stripes painted, the crib built, and the first coat of paint on the changing table/dresser.

IMG_3879

The stripe colors are Behr’s Powdered Snow and Perfect Taupe (lightened by 20%). For obvious reasons we went with their No VOC, Low Odor paint, and it applied well and was affordable.

IMG_3313

It took two coats of the Powdered Snow to cover the previous greenish wall color, but only one coat of the taupe stripe.

The stripes were a little tricky, namely taping them all off, but Ben had a 360° laser level, so that made things much easier I think.

photo-143

There’s a bunch of tutorials on Pinterest about how to do the stripes but a key thing for us was removing the tape as soon as you were done painting the stripe. We would paint 1-2 stripes at a time and then pull off the tape towards the area you just painted.

IMG_3853Up close the lines are a little jagged, but unless you are eye level staring right at it, it looks pretty darn good.

IMG_3865Once the paint dried, we set up the crib. It is the Nursery Basics Classic Crib in white from Toys-R-Us. After ogling the $500-$1,000+ cribs at places like Restoration Hardware and Pottery Barn, we decided to go simple and scored this one for $129 on sale. I don’t think it looks cheap though and seems pretty sturdy, so we shall see.

IMG_3877It only took about 30 minutes to assemble and no bickering ensued so I would call it a success.

Next up is finishing the makeover of the changing table/old dresser that lived in this room before. We’re trying out Annie Sloan’s chalk paint for the first time.

Then, my favorite part which will be decorating with curtains, bedding, a plush rug, art, shelves, etc. It’s really happening!

Making Room For Baby

12 Oct

We did a little room switcheroo to make room for the nursery. The den is now the office, the office a spare bedroom, and the 2nd spare bedroom the soon-to- be nursery.

First, we decided to move the upstairs office downstairs to the den because we really weren’t using the den much and thought it would be nice since we both work from home quite a bit. So we sold our sectional on Craigslist and moved the office furniture down. This room is going to serve as storage for a little while until after we get the downstairs floors finished but here it is now.

IMG_3837

We went back and forth on what room to make the nursery but decided to use the smallest of the two. Then when the kid gets older it can move into the larger bedroom and we can keep the nursery as it is for future kiddos.

So we moved the spare bedroom furniture into the office and it now looks like this.

IMG_3832

IMG_3831Here is a reminder of the room as an office. I think it works much better as a bedroom.

IMG_2874So now the nursery is all cleared out and we put the first coat of paint on the walls- yay!IMG_3835It’s pretty boring right now but we will be painting stripes next, sort of like this:

stripes

Source: http://projectnursery.com/projects/kingsleys-kingdom/

Here is the mood board I made to give you a sense of what I’m hoping for the room. Very neutral (since we’re not finding out the sex) and calming, but also fun.

Nursery Mood Board_FINAL_edited-21; 2; 3; 4; 5; 6; 7; 8; 9

Can’t wait to start putting everything together! I am definitely feeling the nesting instinct–which is awesome.