Archive | Living Room RSS feed for this section

Living Room Built Ins: Plans & Progress

19 Oct

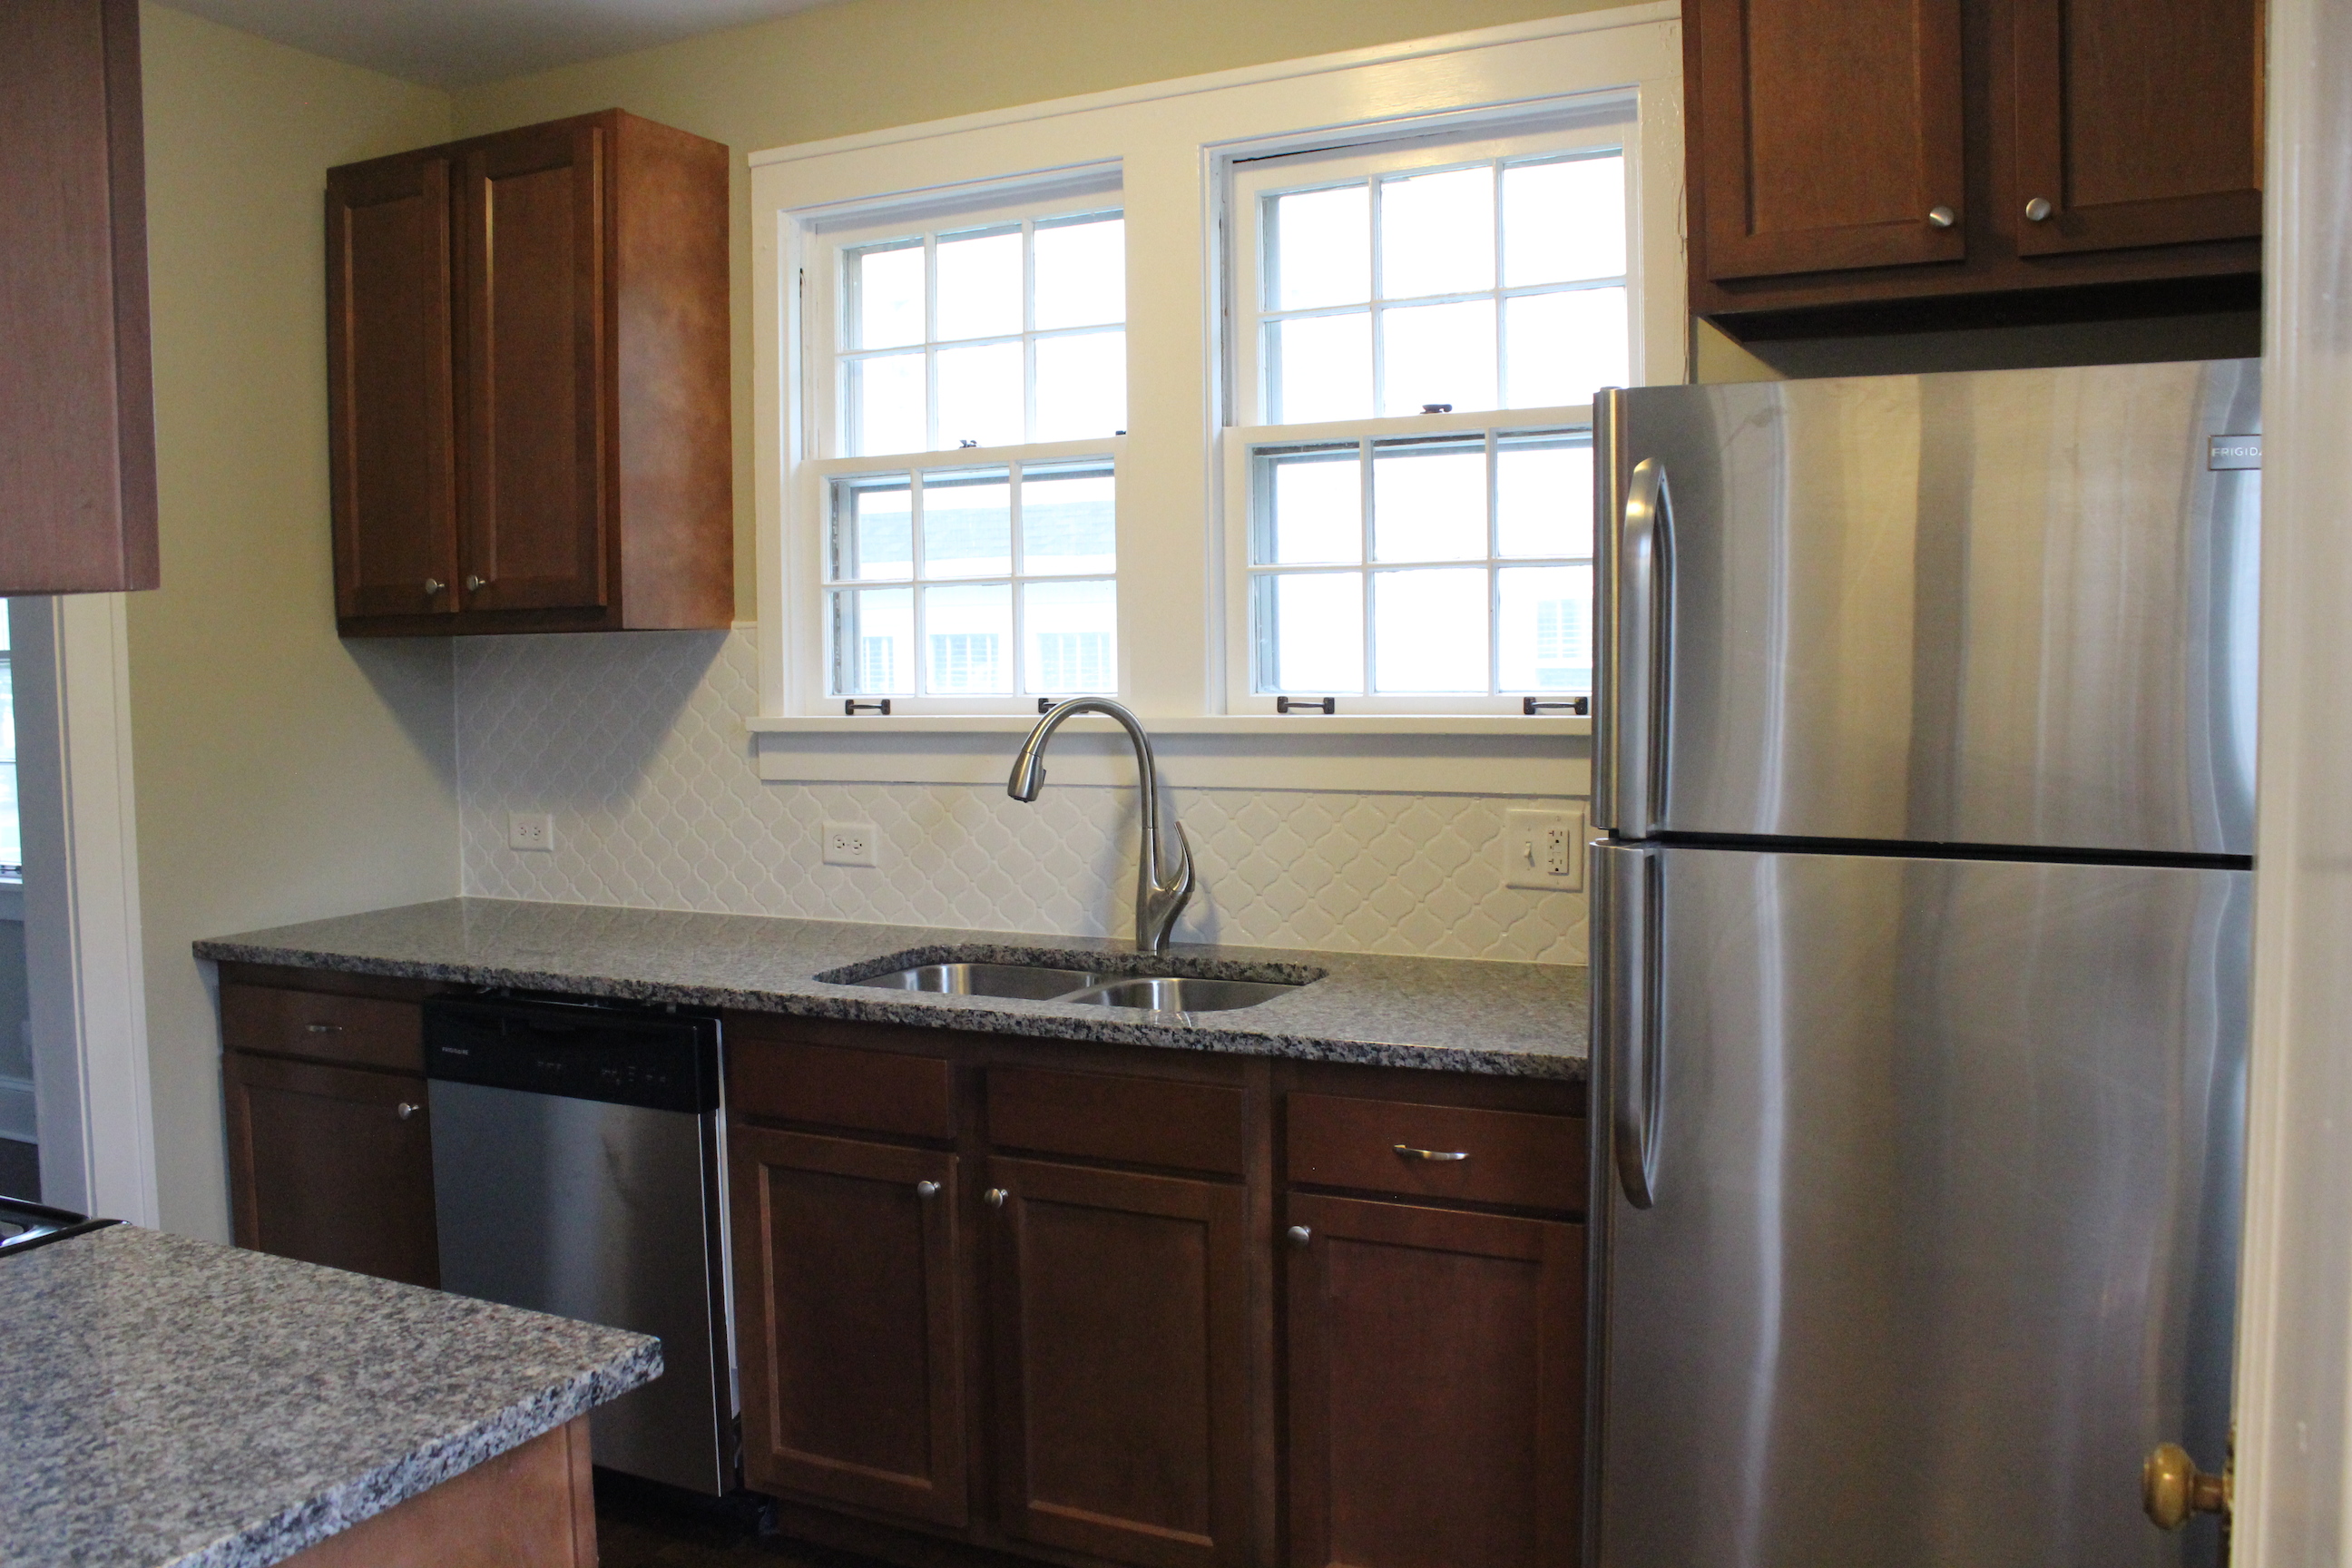
We’ve made some great progress on the living room built ins, so here is an update.

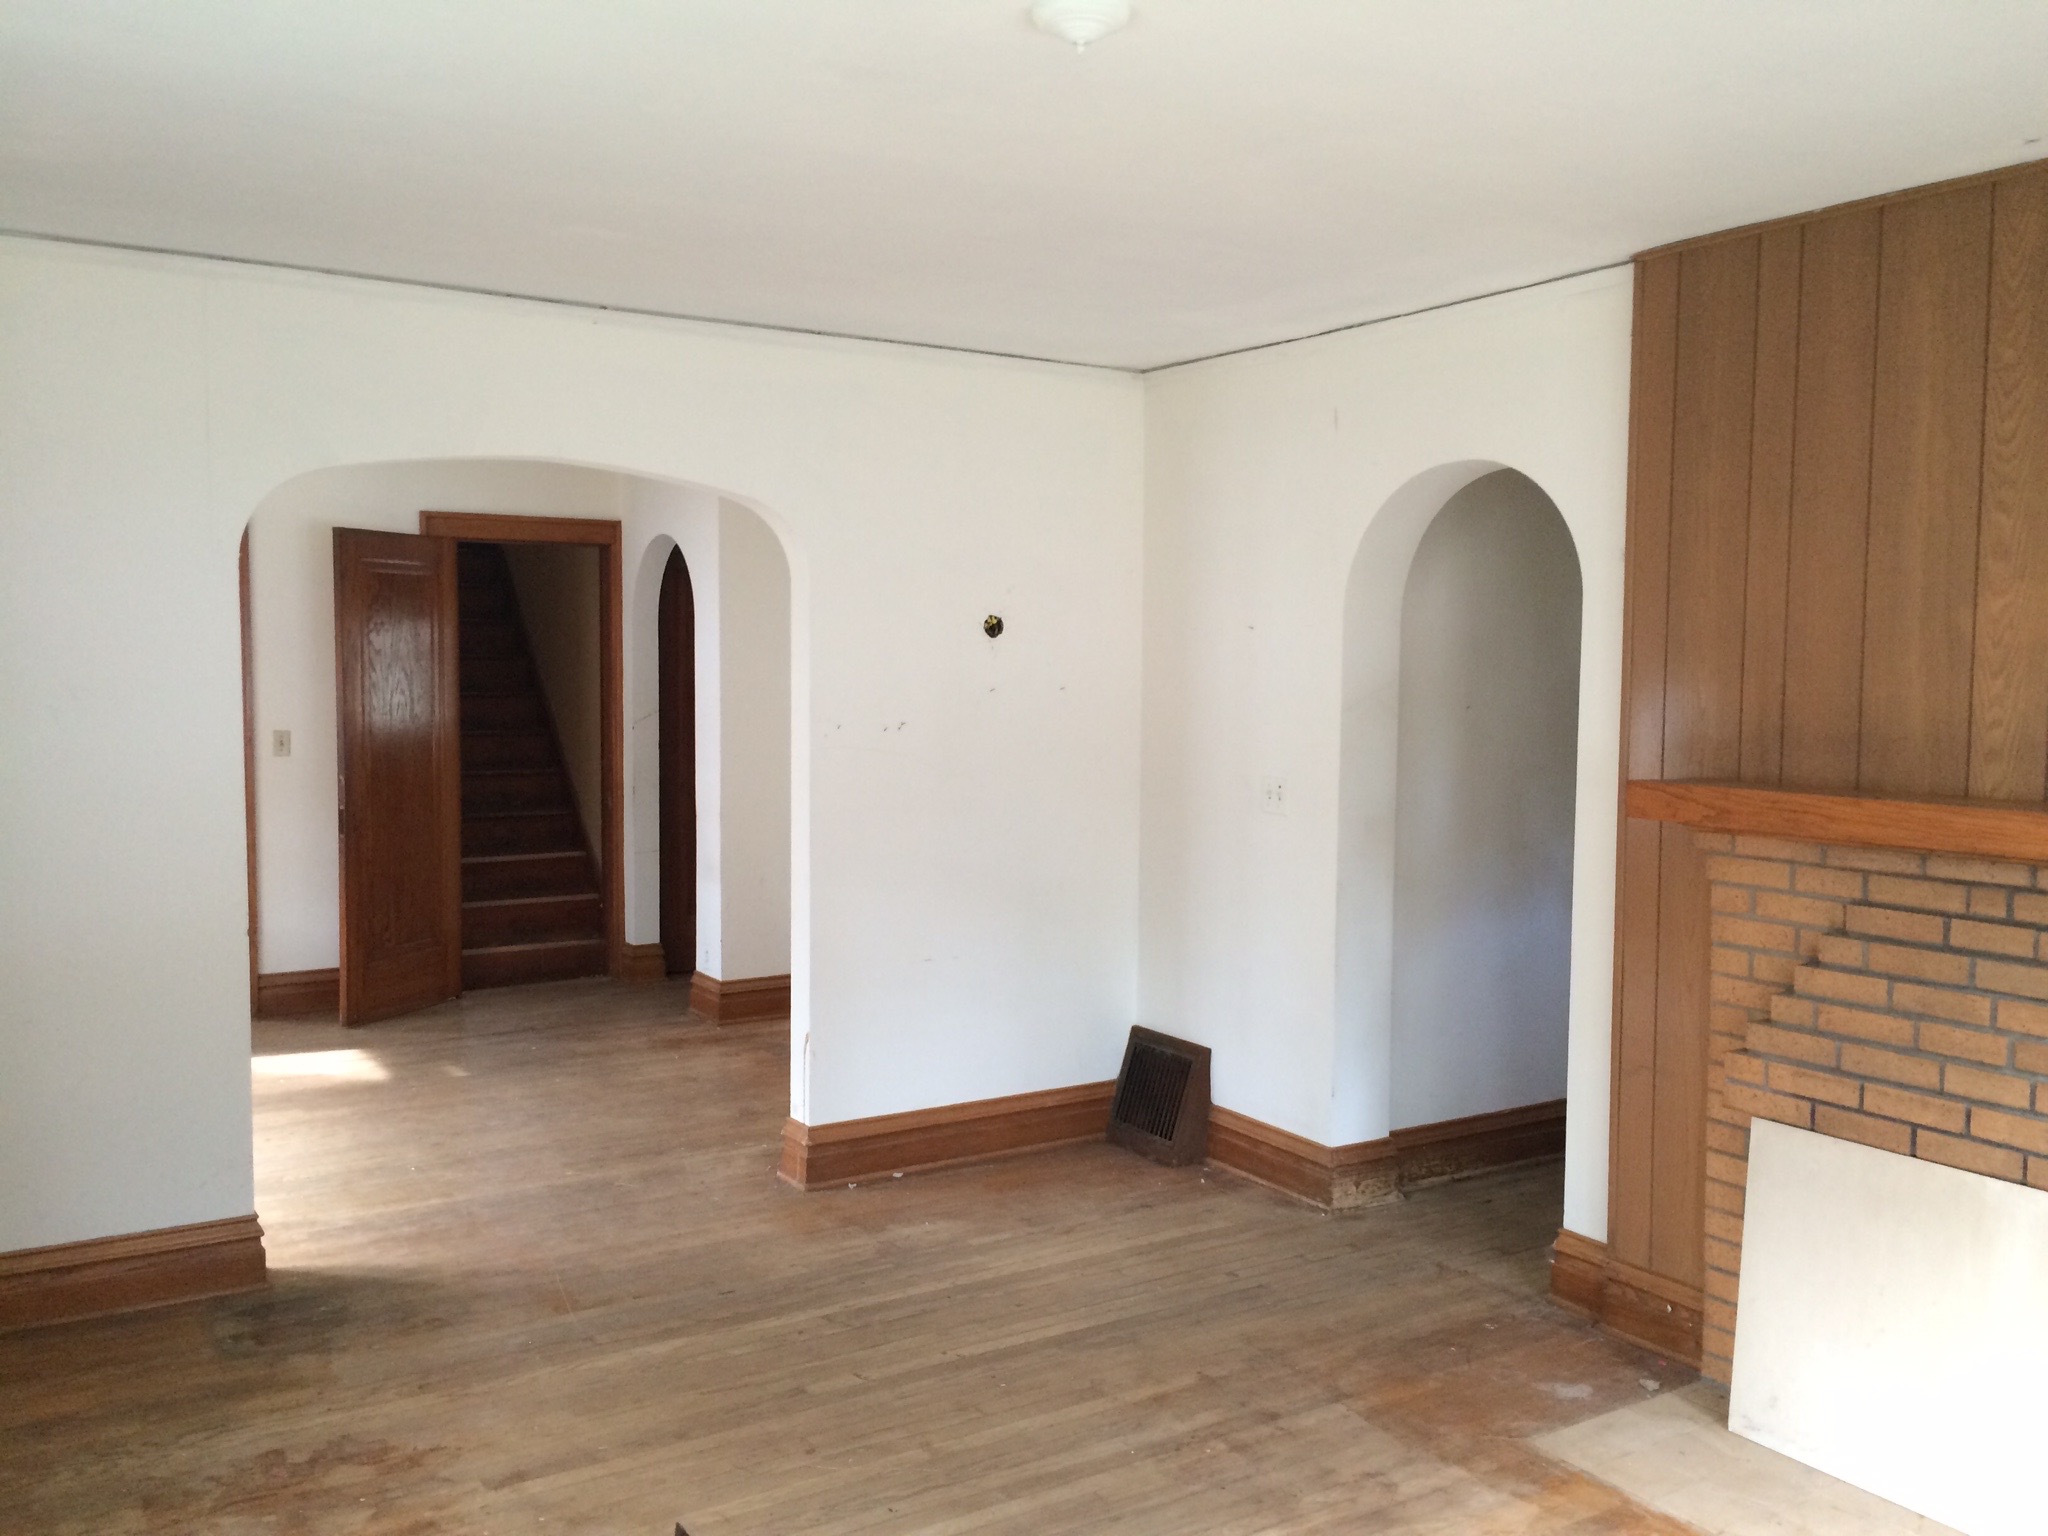
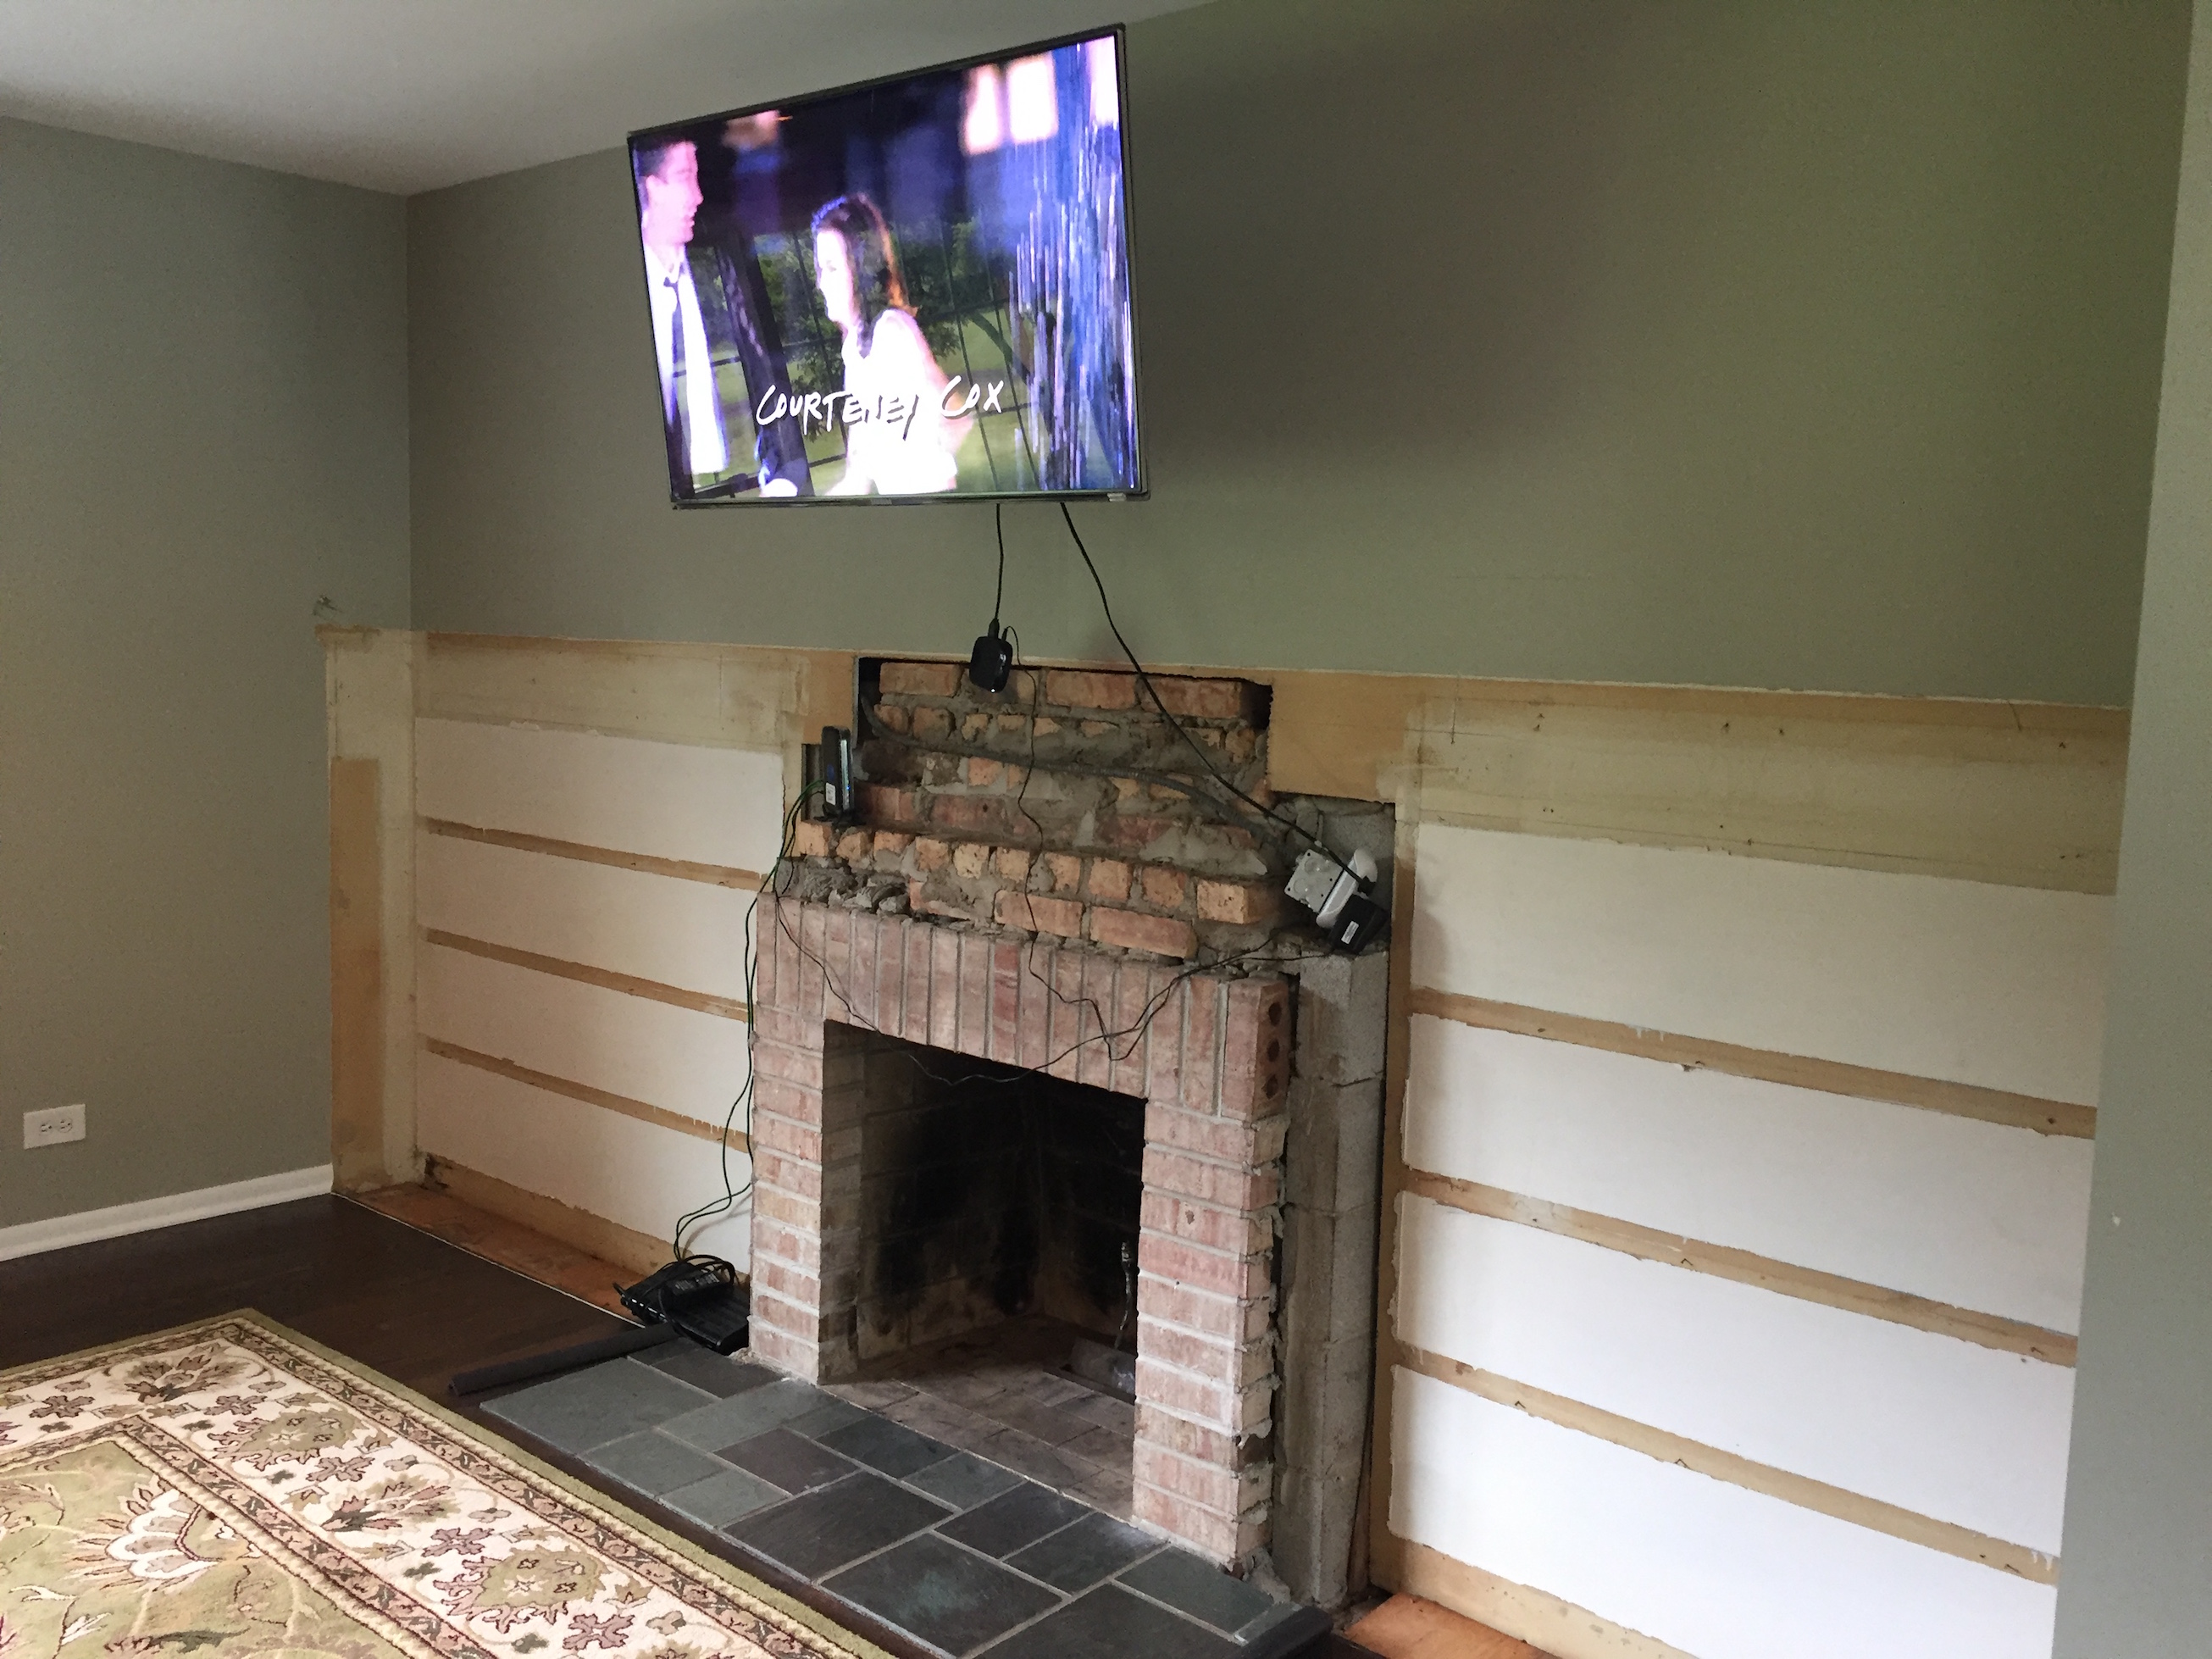
Here’s a look at the fireplace and built ins before we started:
fullsizerender

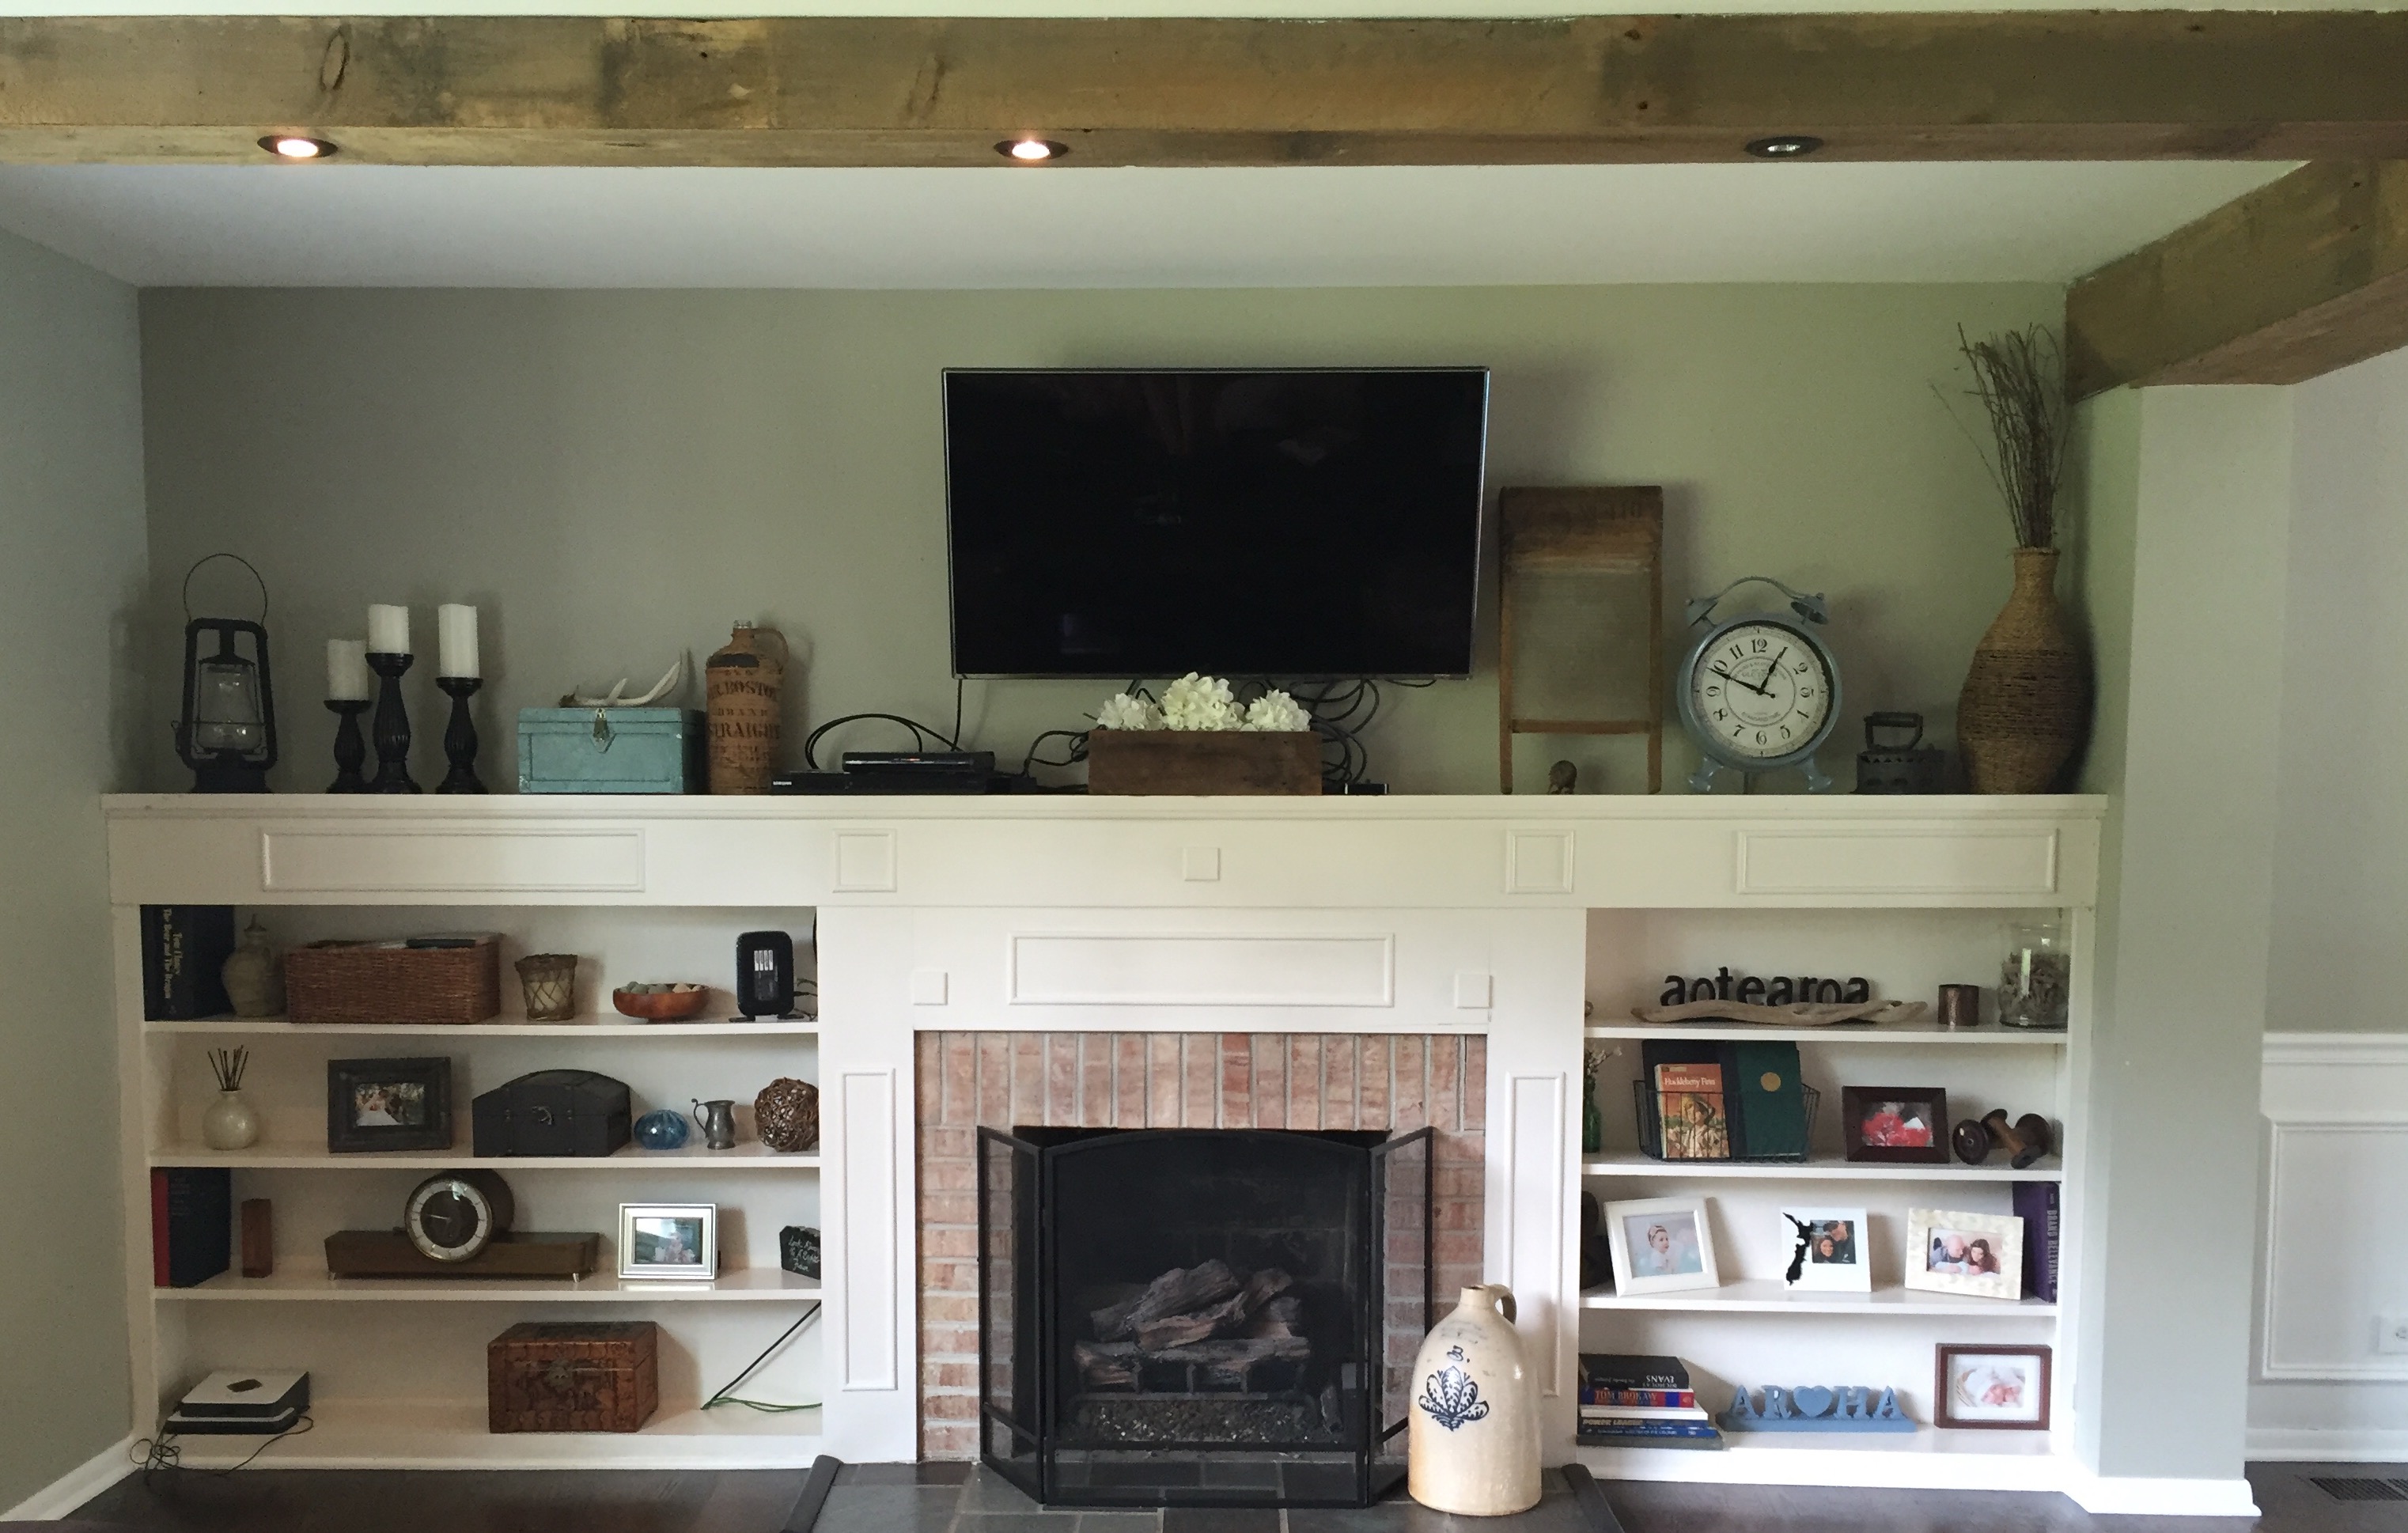
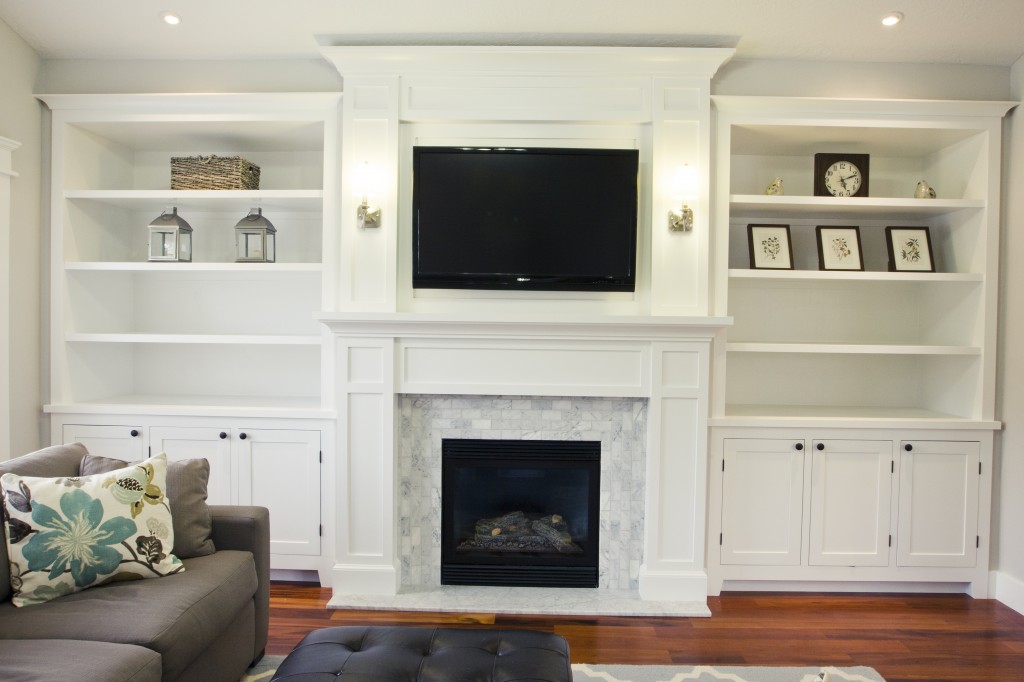
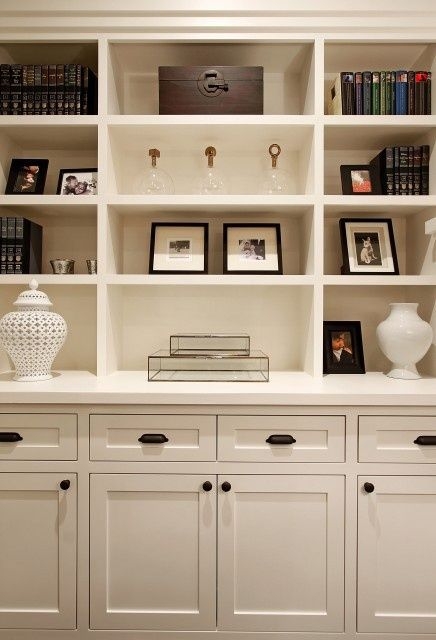
They weren’t terrible by any means, but we wanted them to be more updated and functional. The plan was to do lower cabinets and then shelves up to the ceiling, sort of like this:
living-room-built-ins-inspiration

We also decided to do drawers above the cabinets like this for even more functional storage:

living-room-drawers

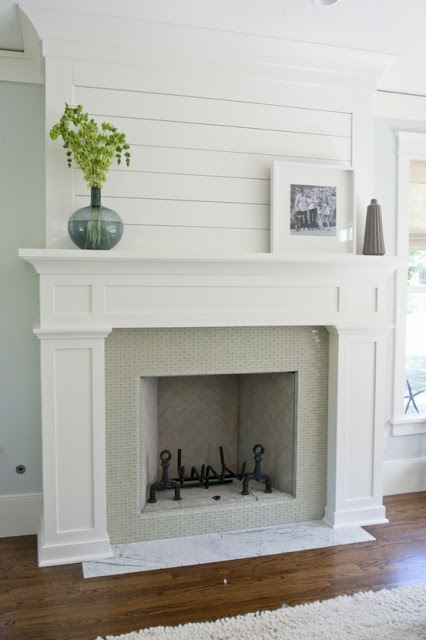
Here was our inspiration for the fireplace surround and planking above the fireplace, which we also decided to continue behind the upper shelves.

fireplace

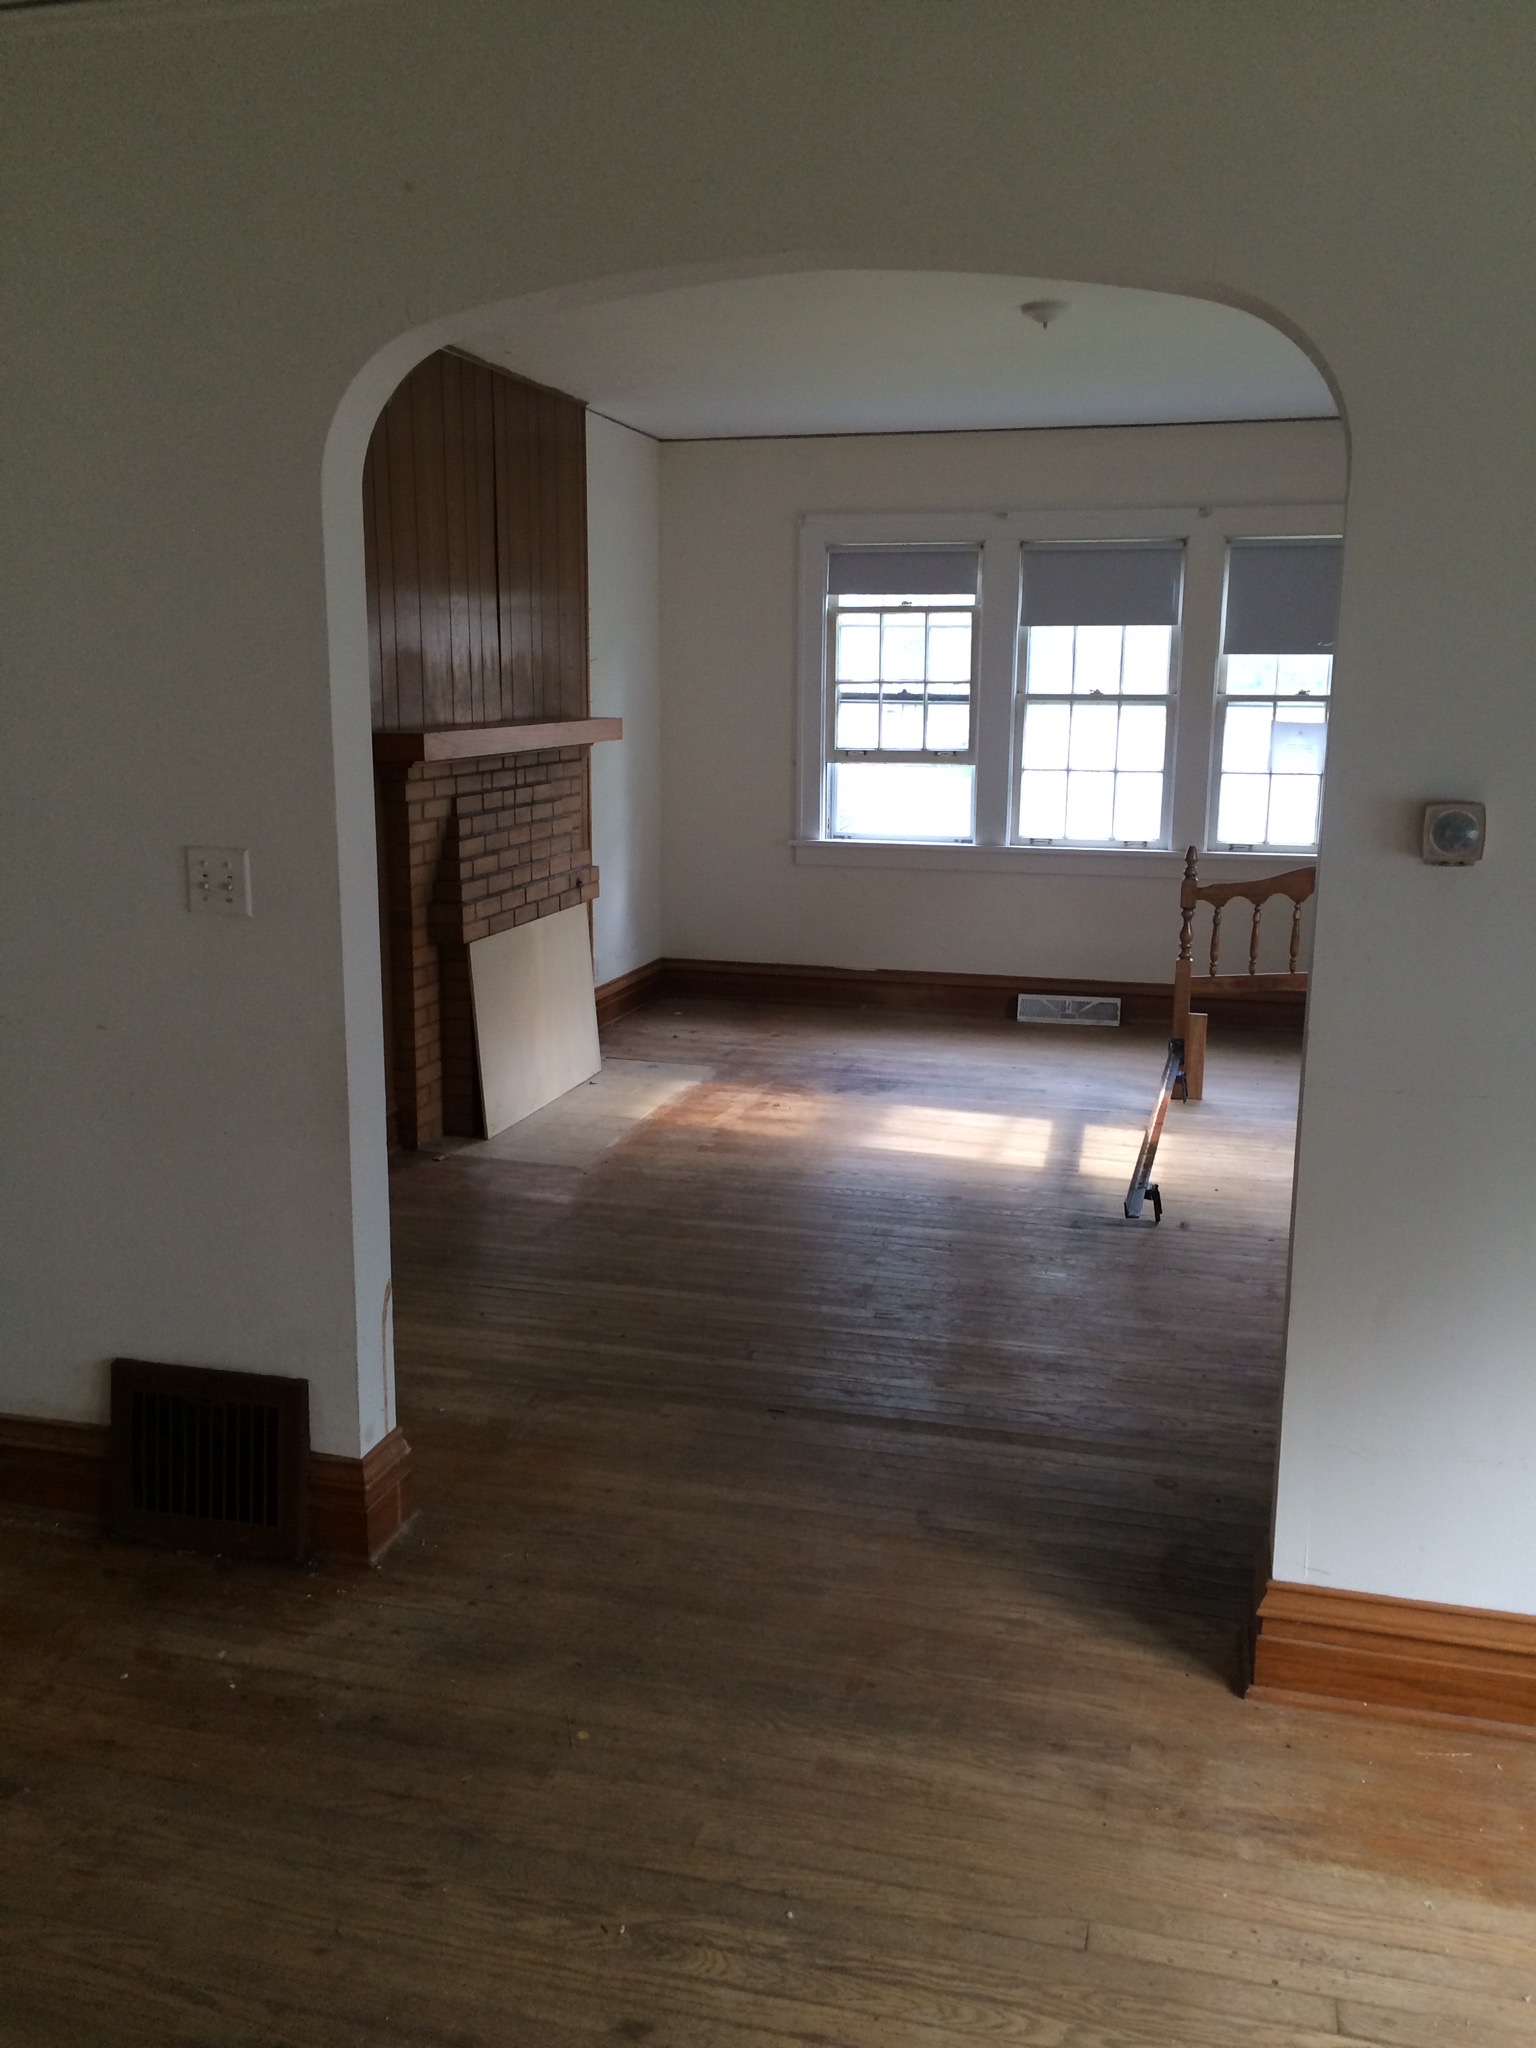
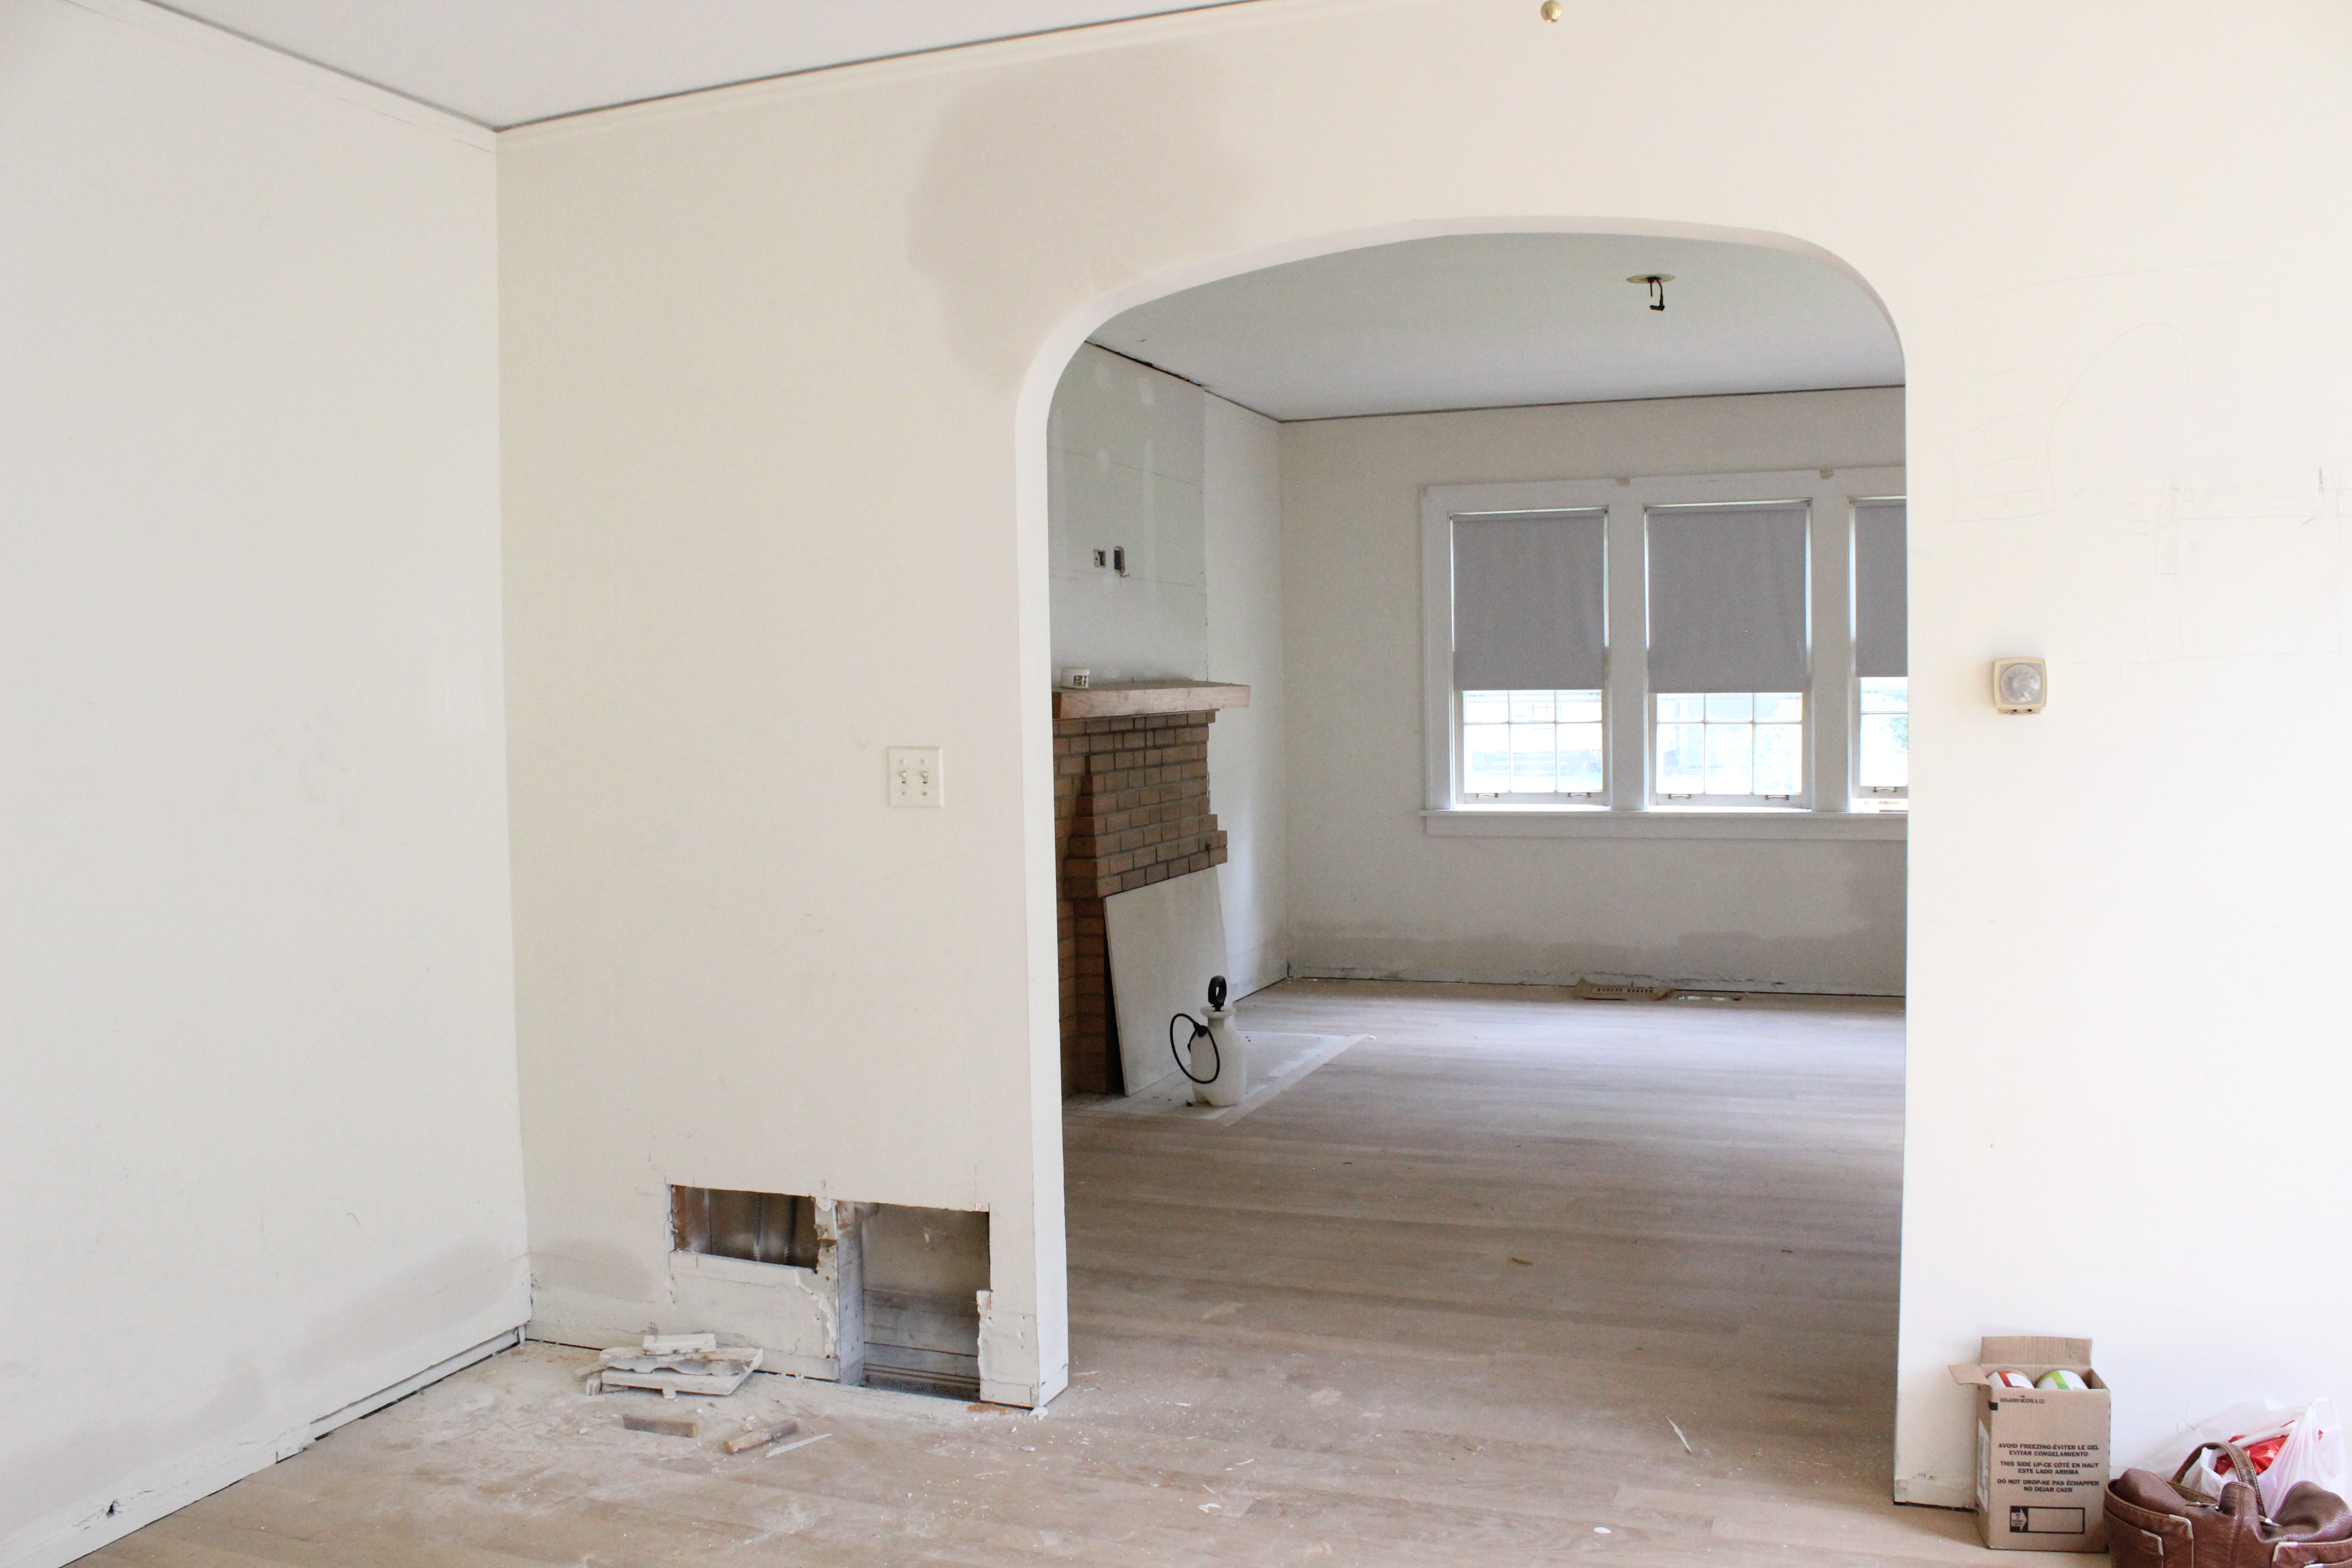
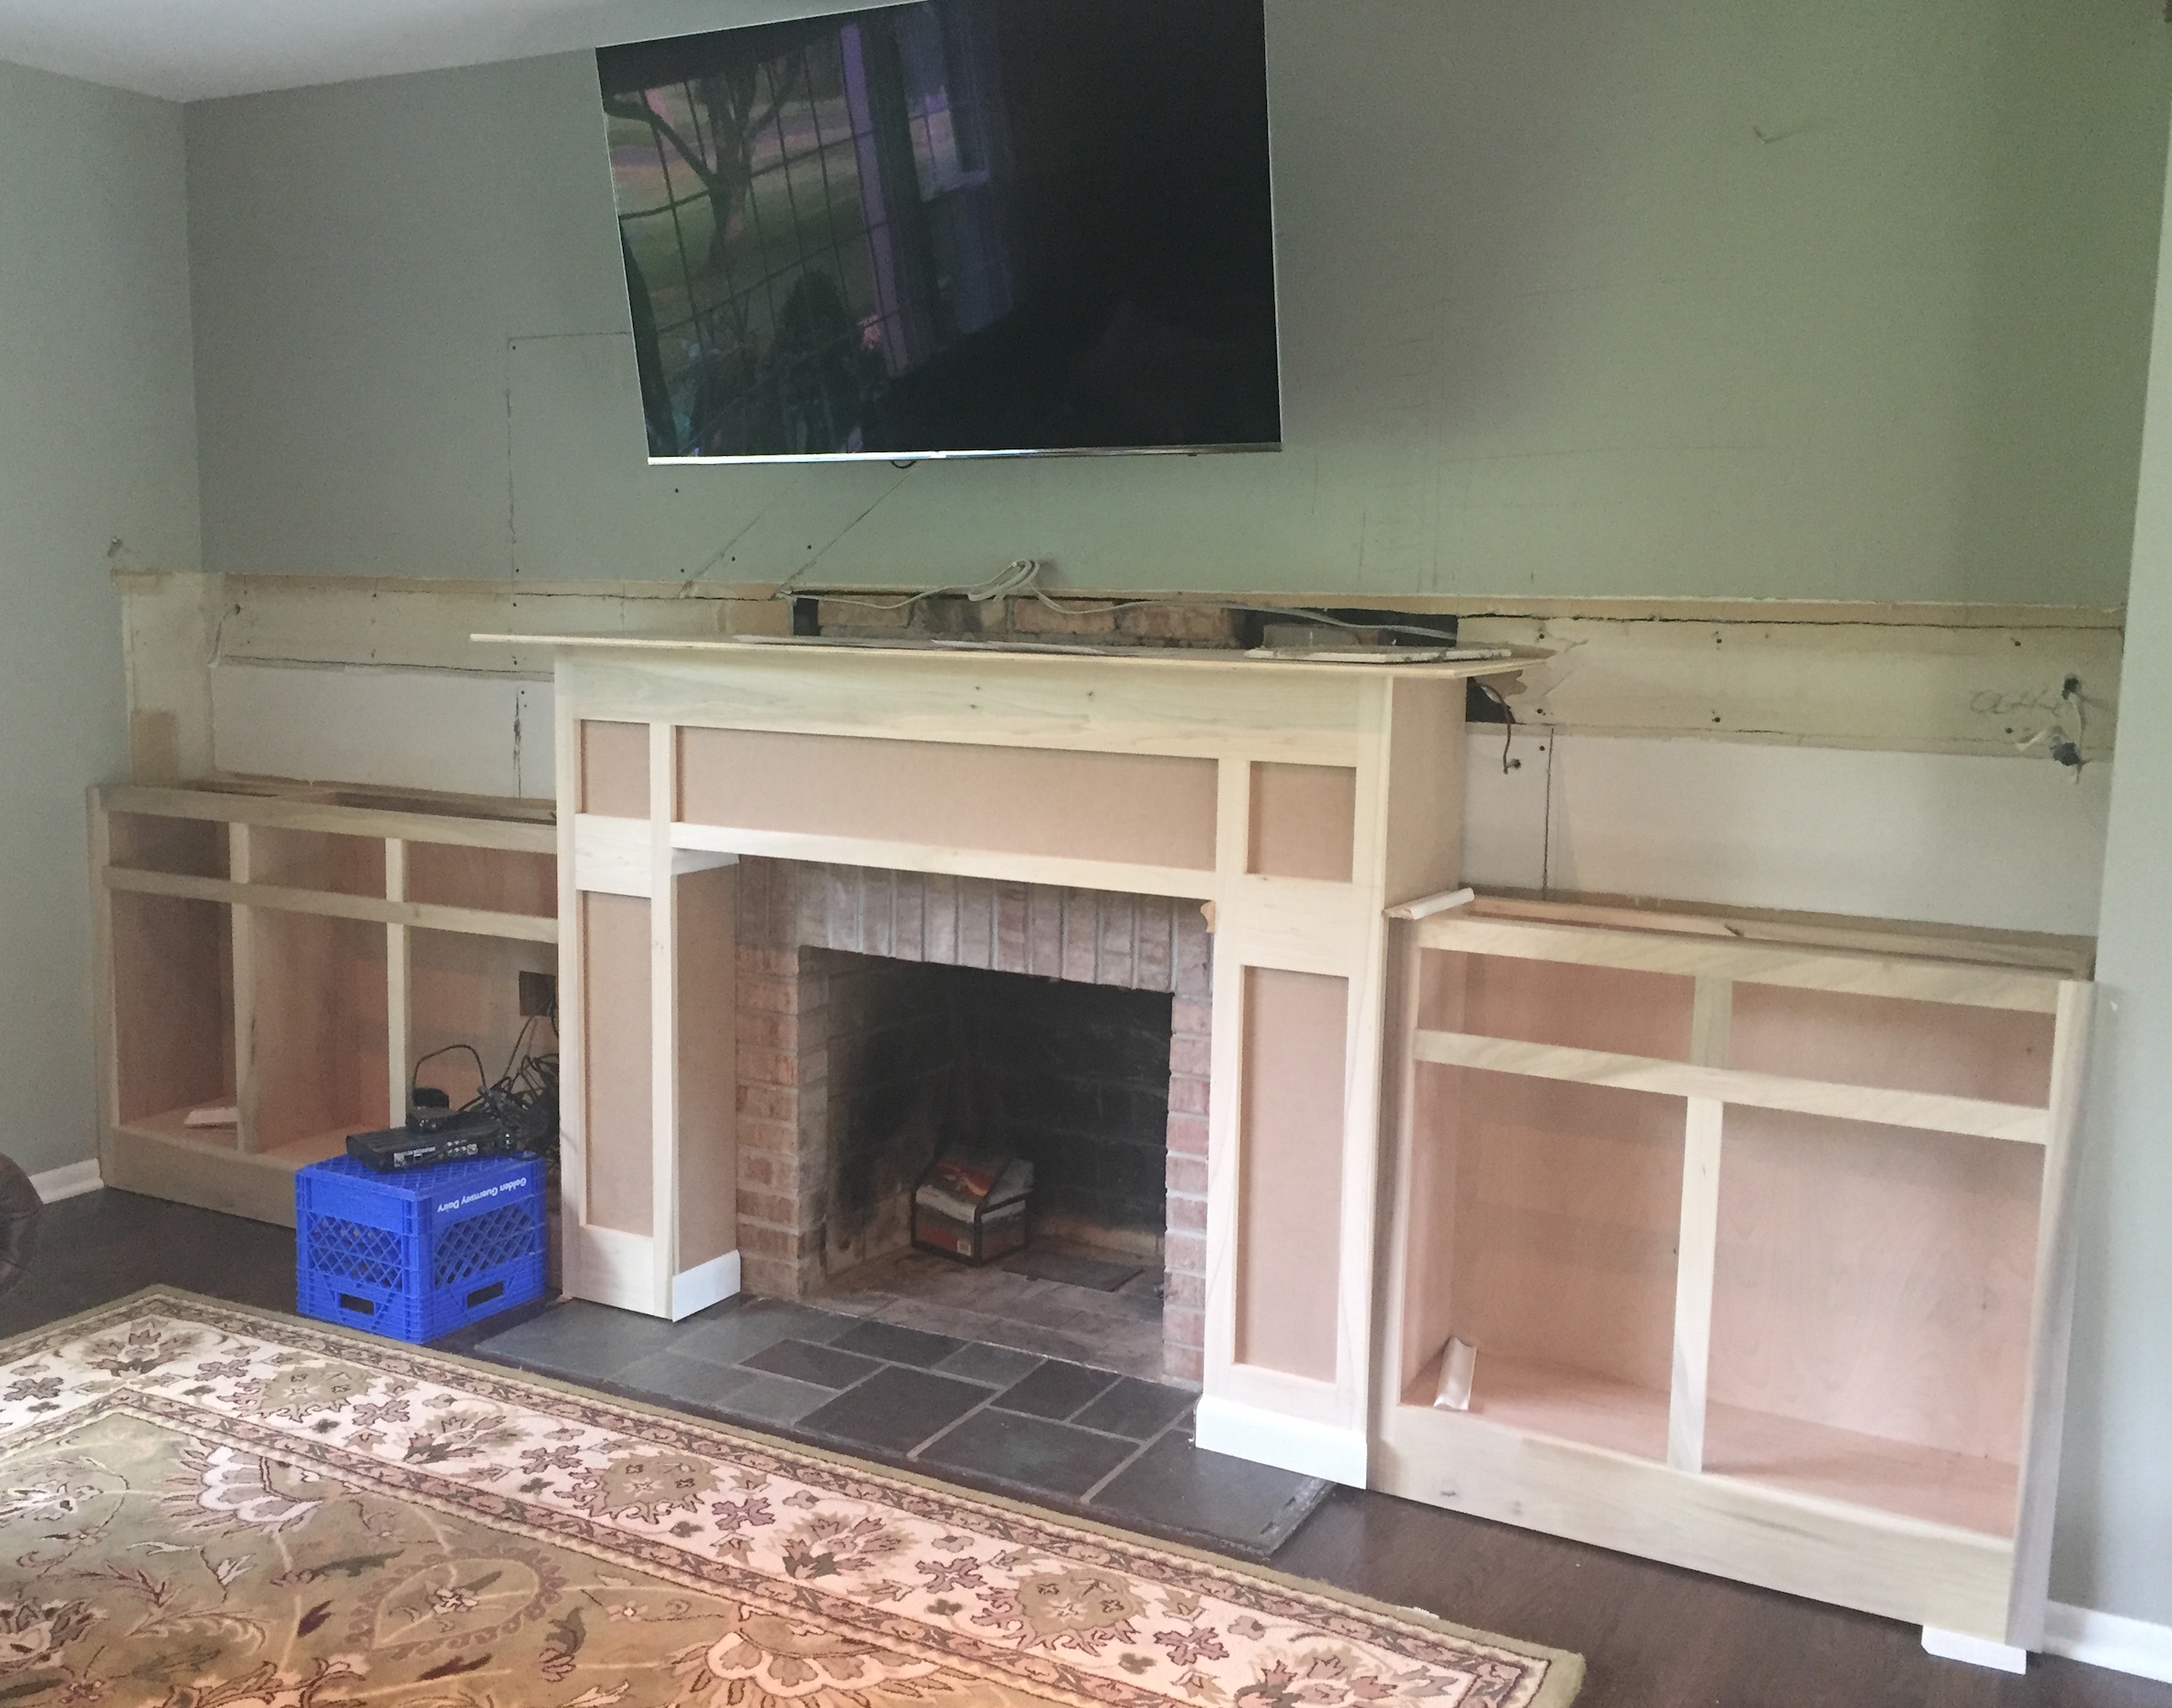
If you follow us on Instagram you saw photos of Ben ripping everything out. Here was our blank slate (leaving the TV, of course):

living-rooms-clearedout

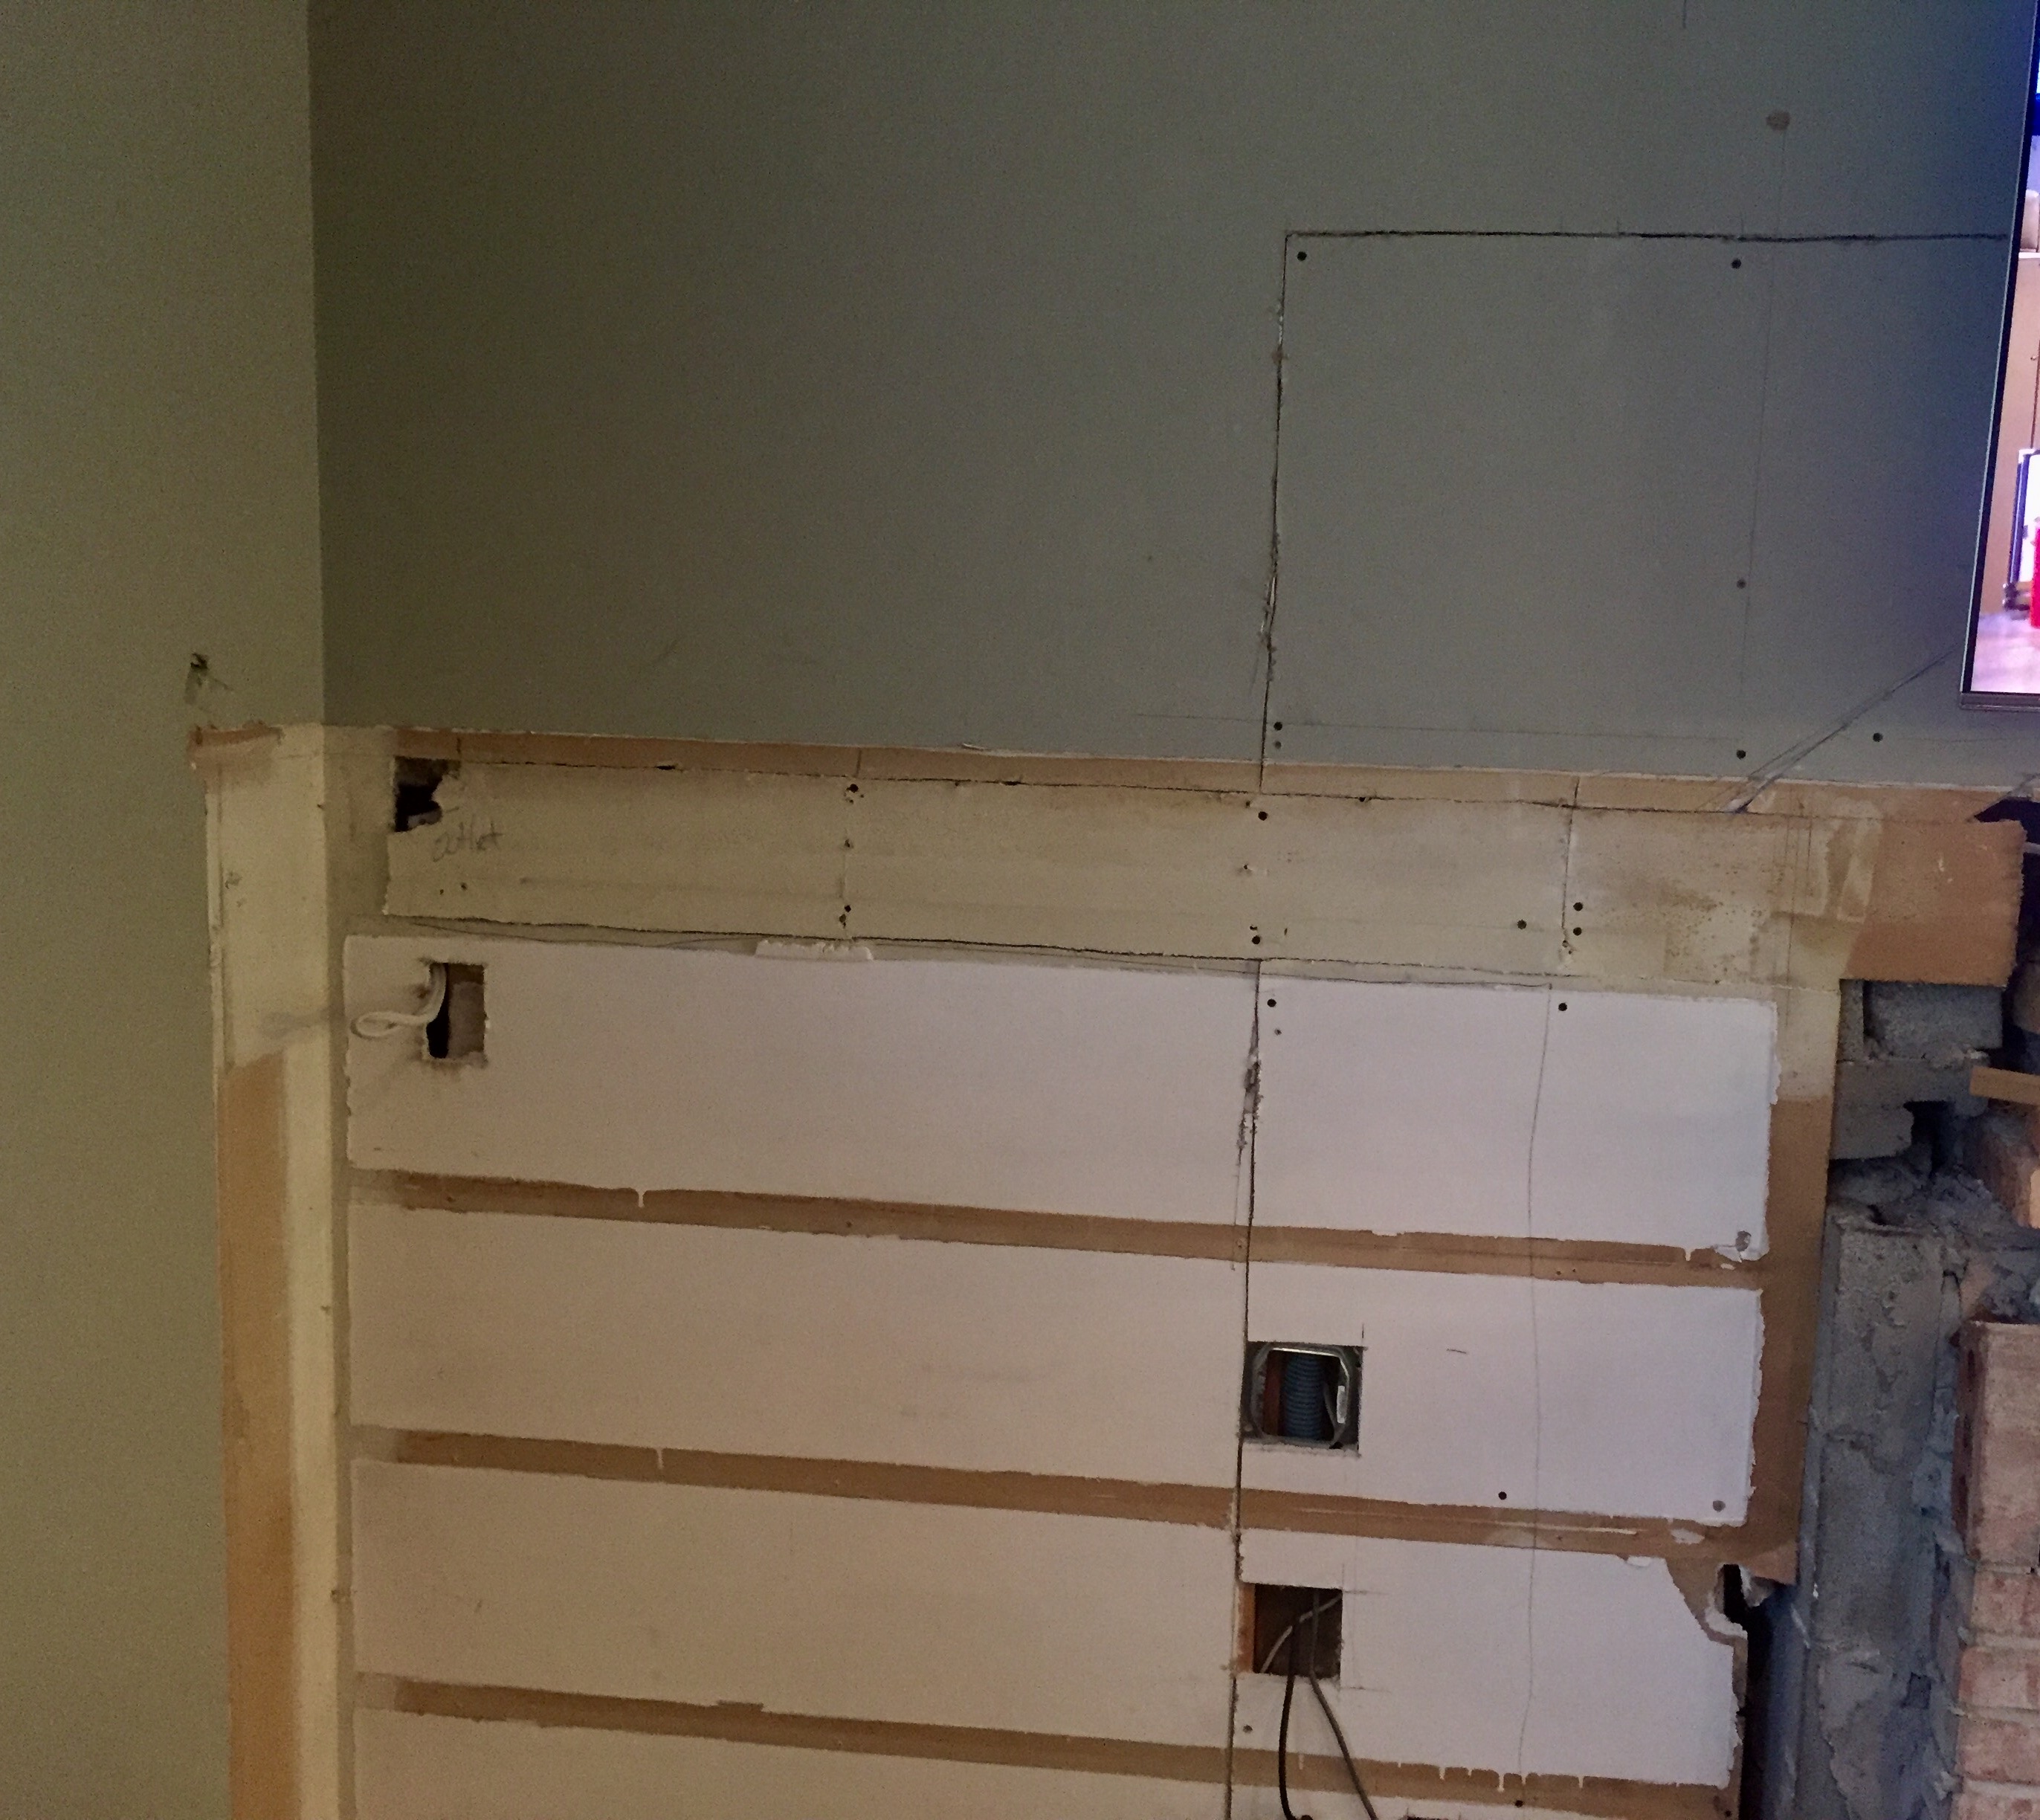
While it was open Ben installed new electrical outlets, a switch for the gas fireplace, and a chase for TV cords so all cords will be hidden.

fullsizerender

Full disclosure, we decided to hire out the building of the built ins to Ben’s cabinetmaker at work. 2-3 guys have spent 4 whole days on it so far, so I’m glad we did.

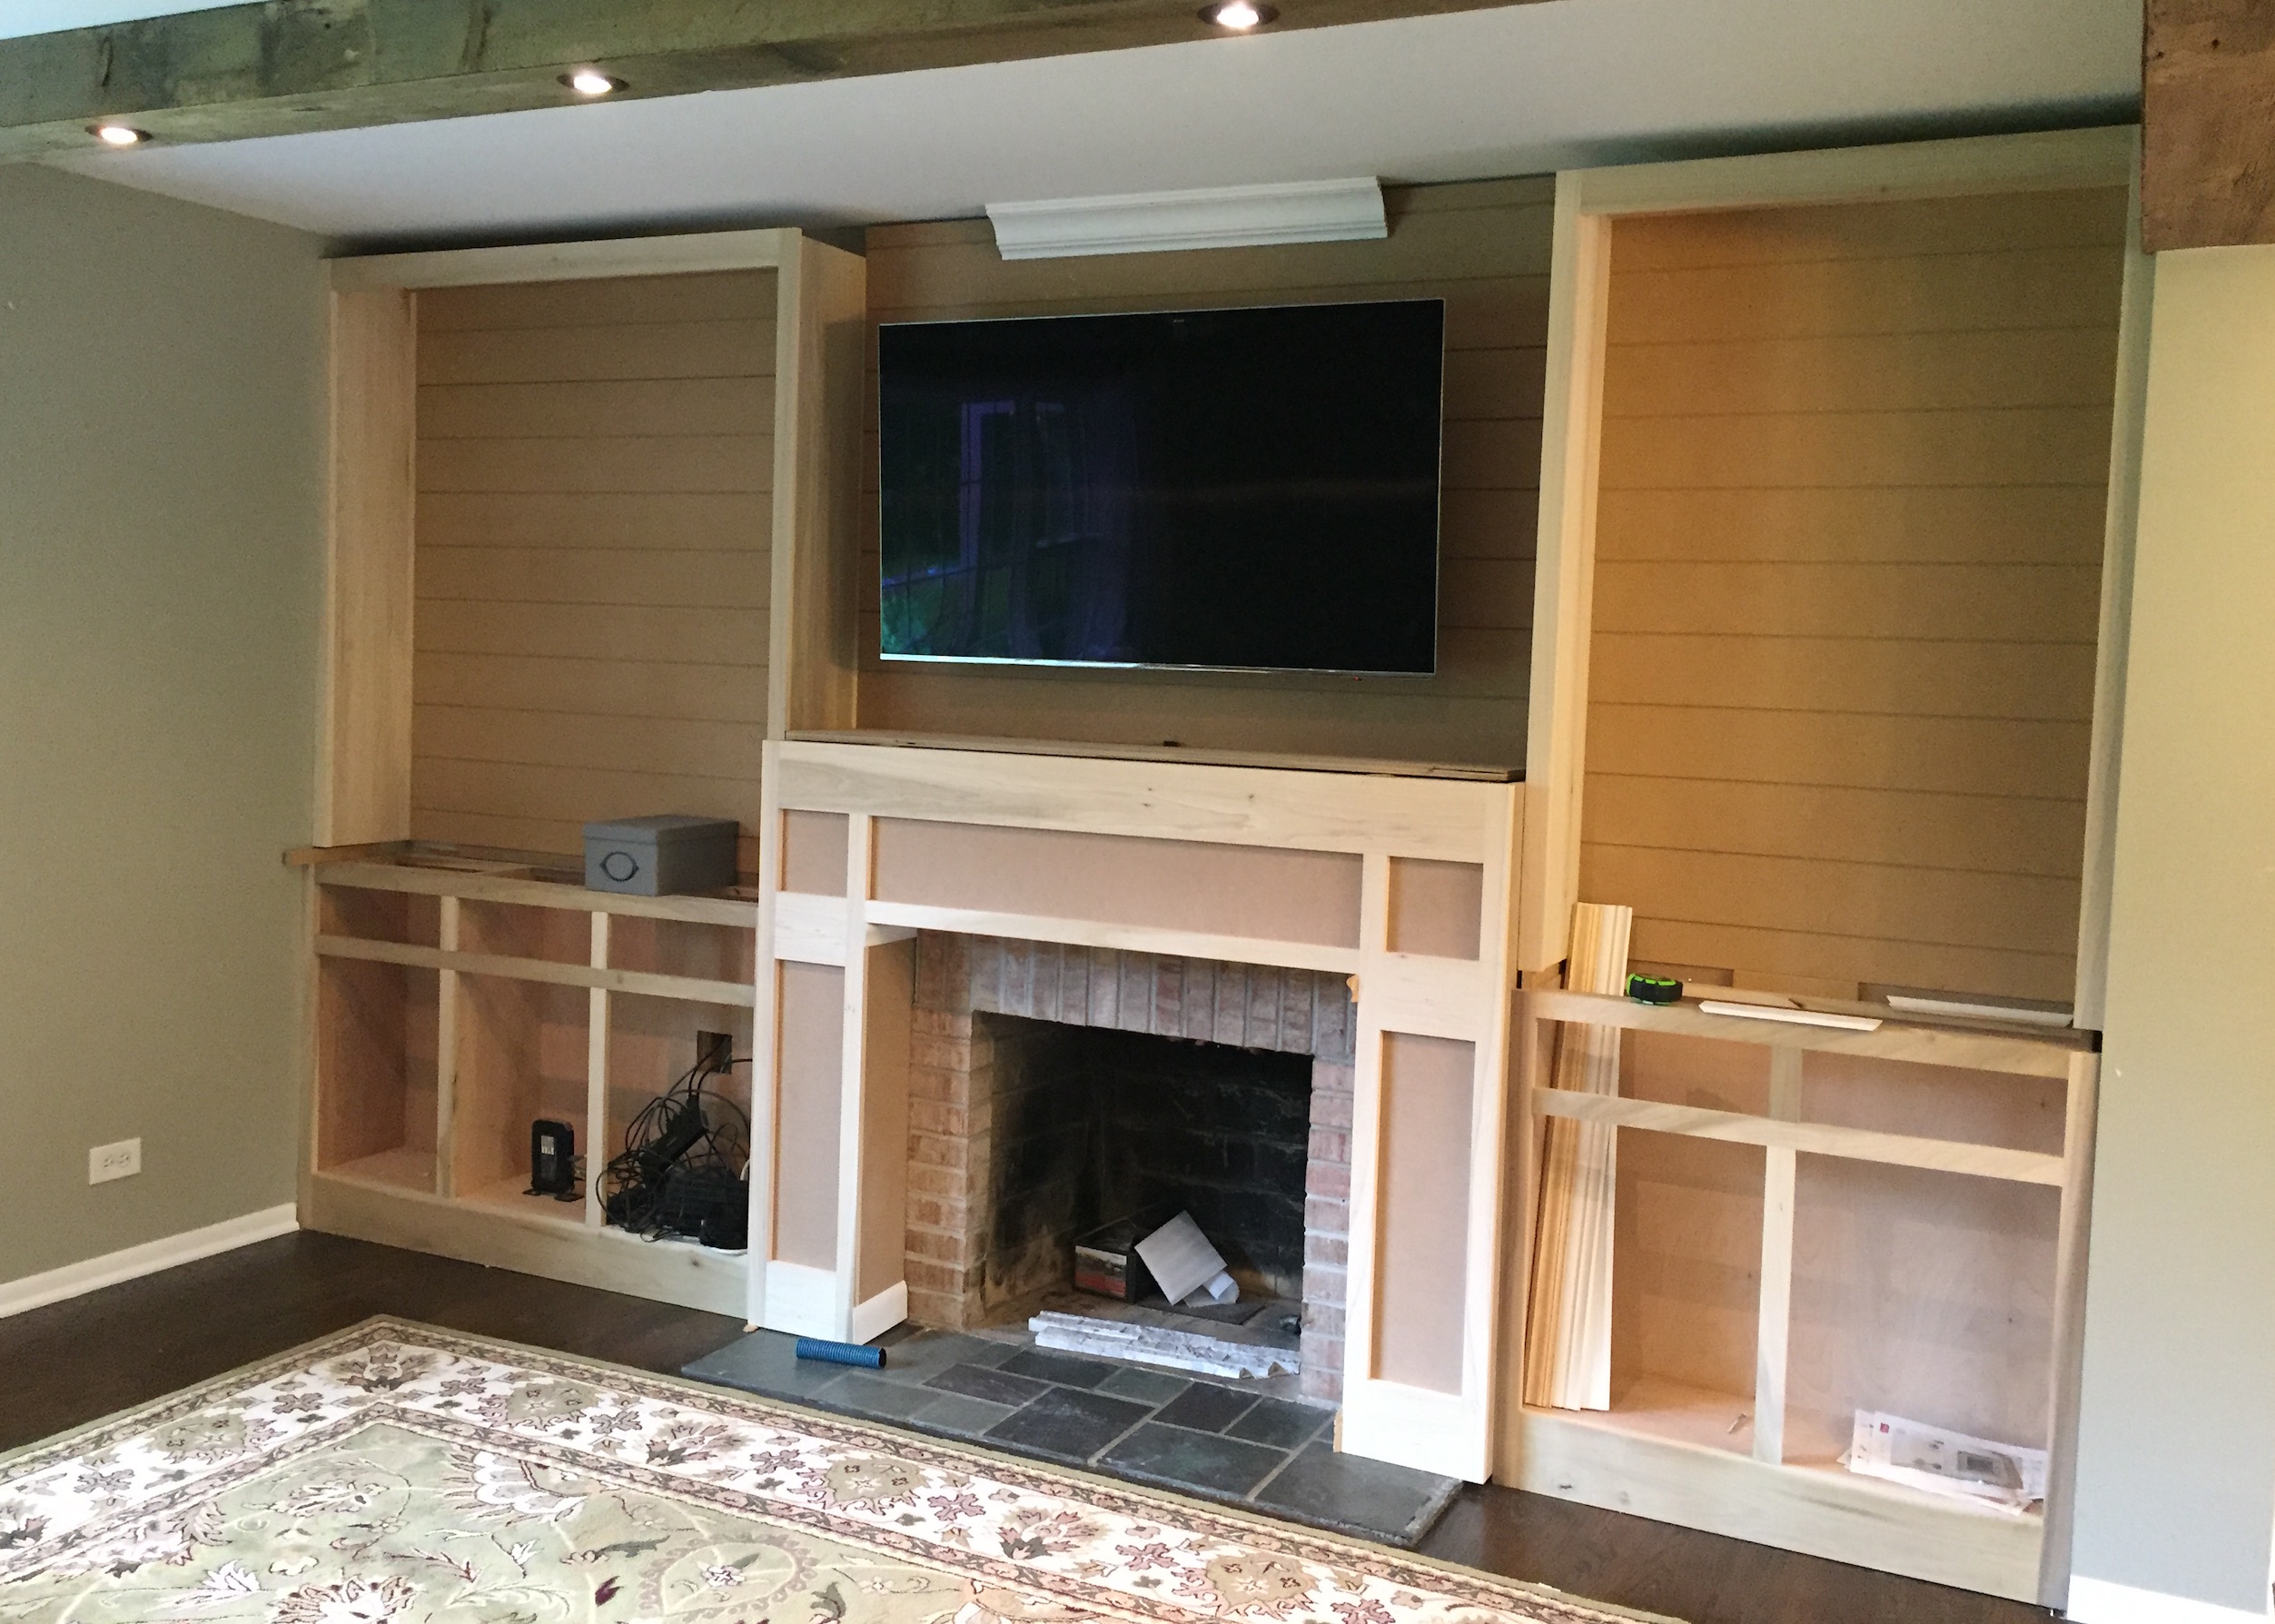
On the first day they built the cabinet bases and fireplace surround:

cabinet-bases

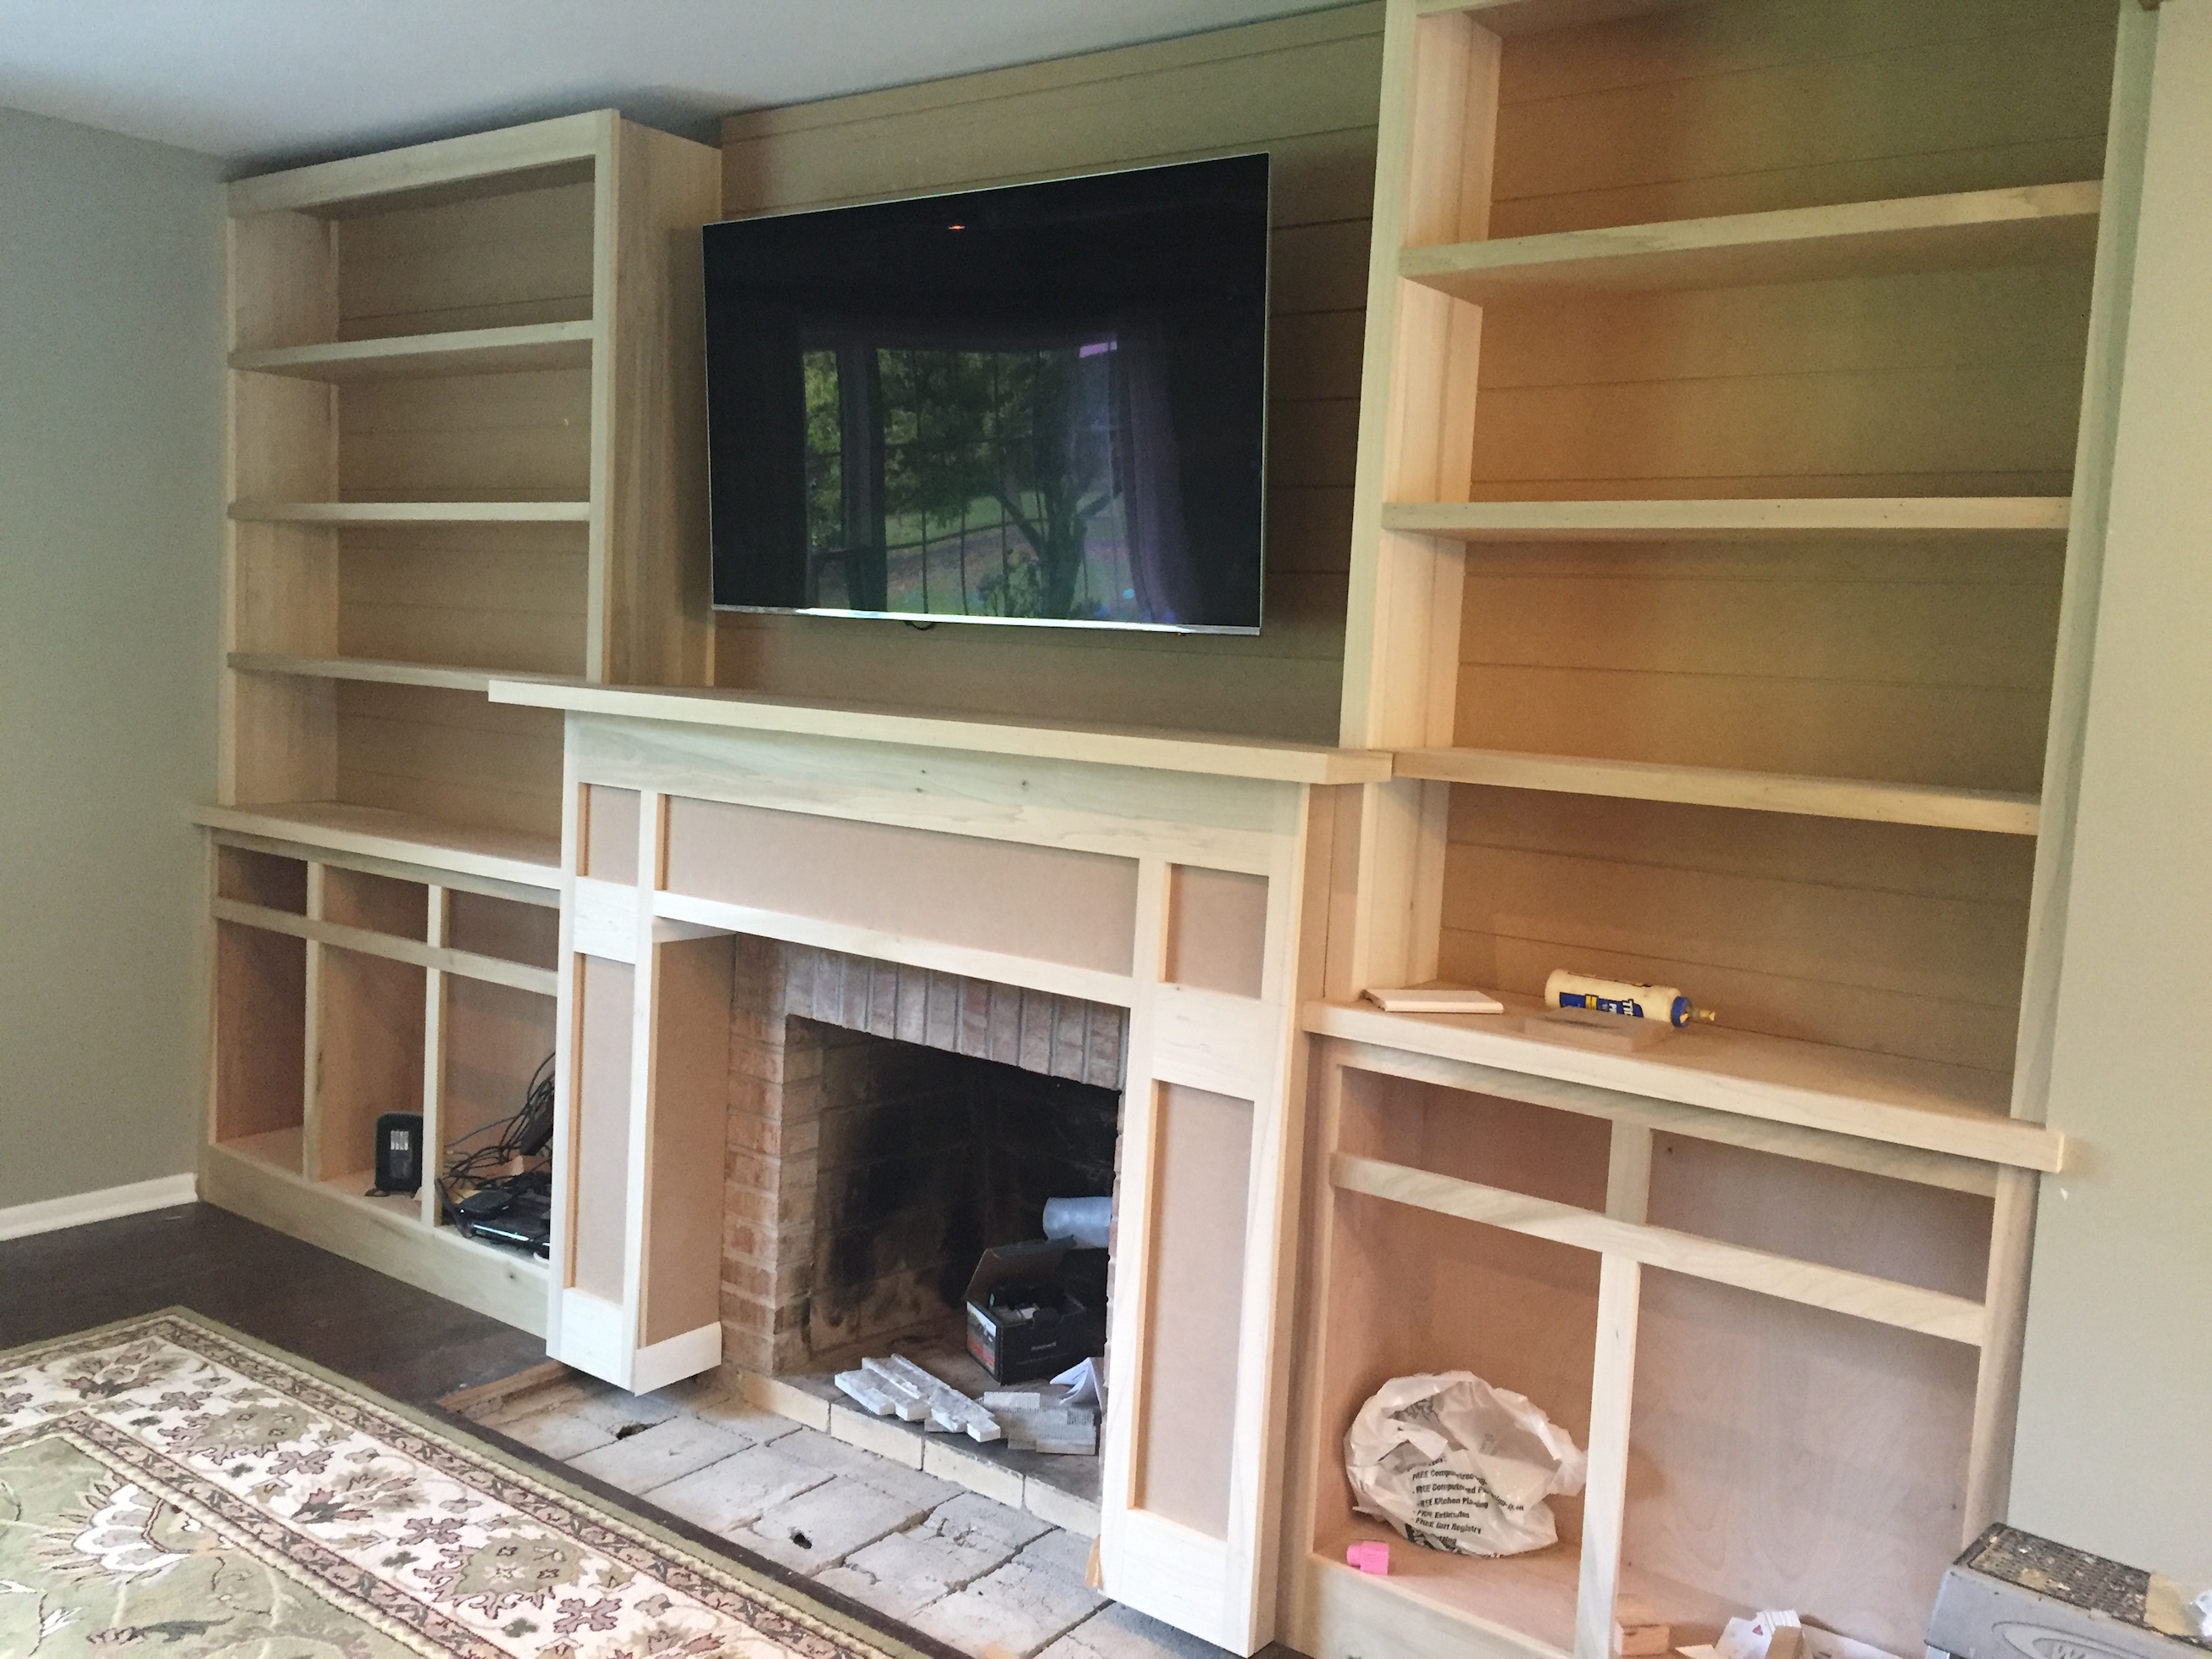
And then the upper boxes and planking:

uppers

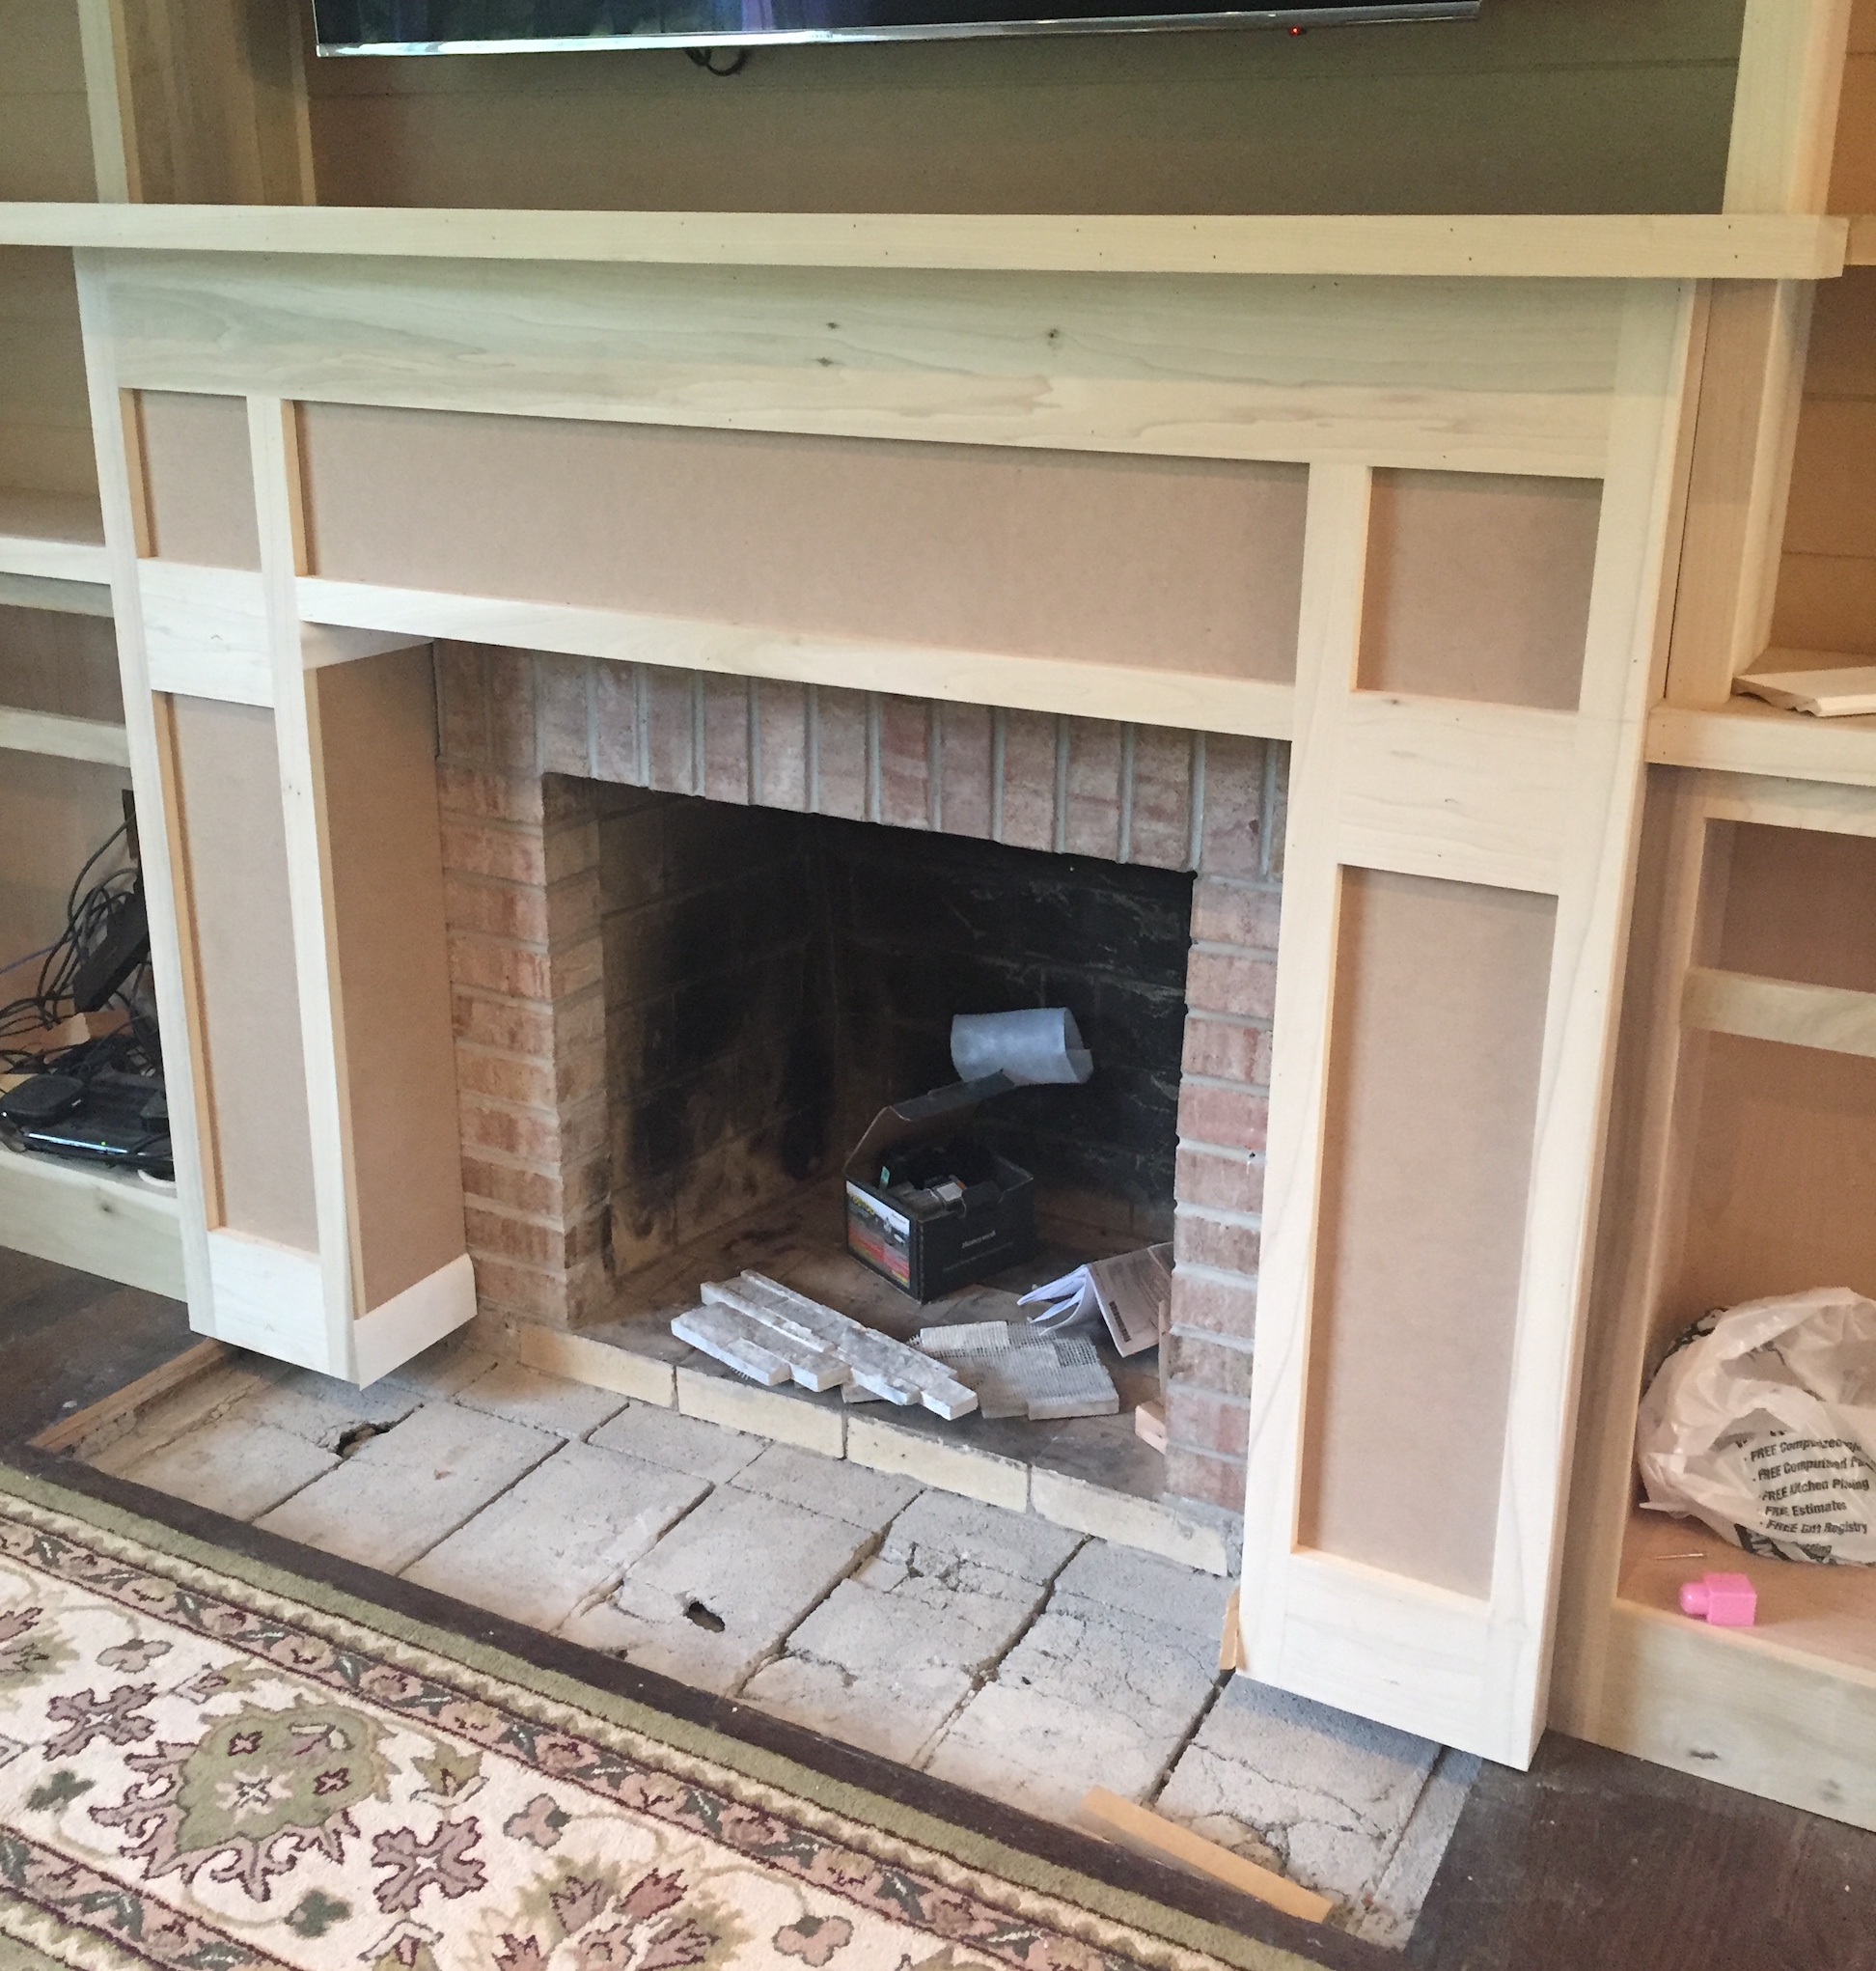
And then here’s the latest with the shelves, counter and mantle:

upper-shelves

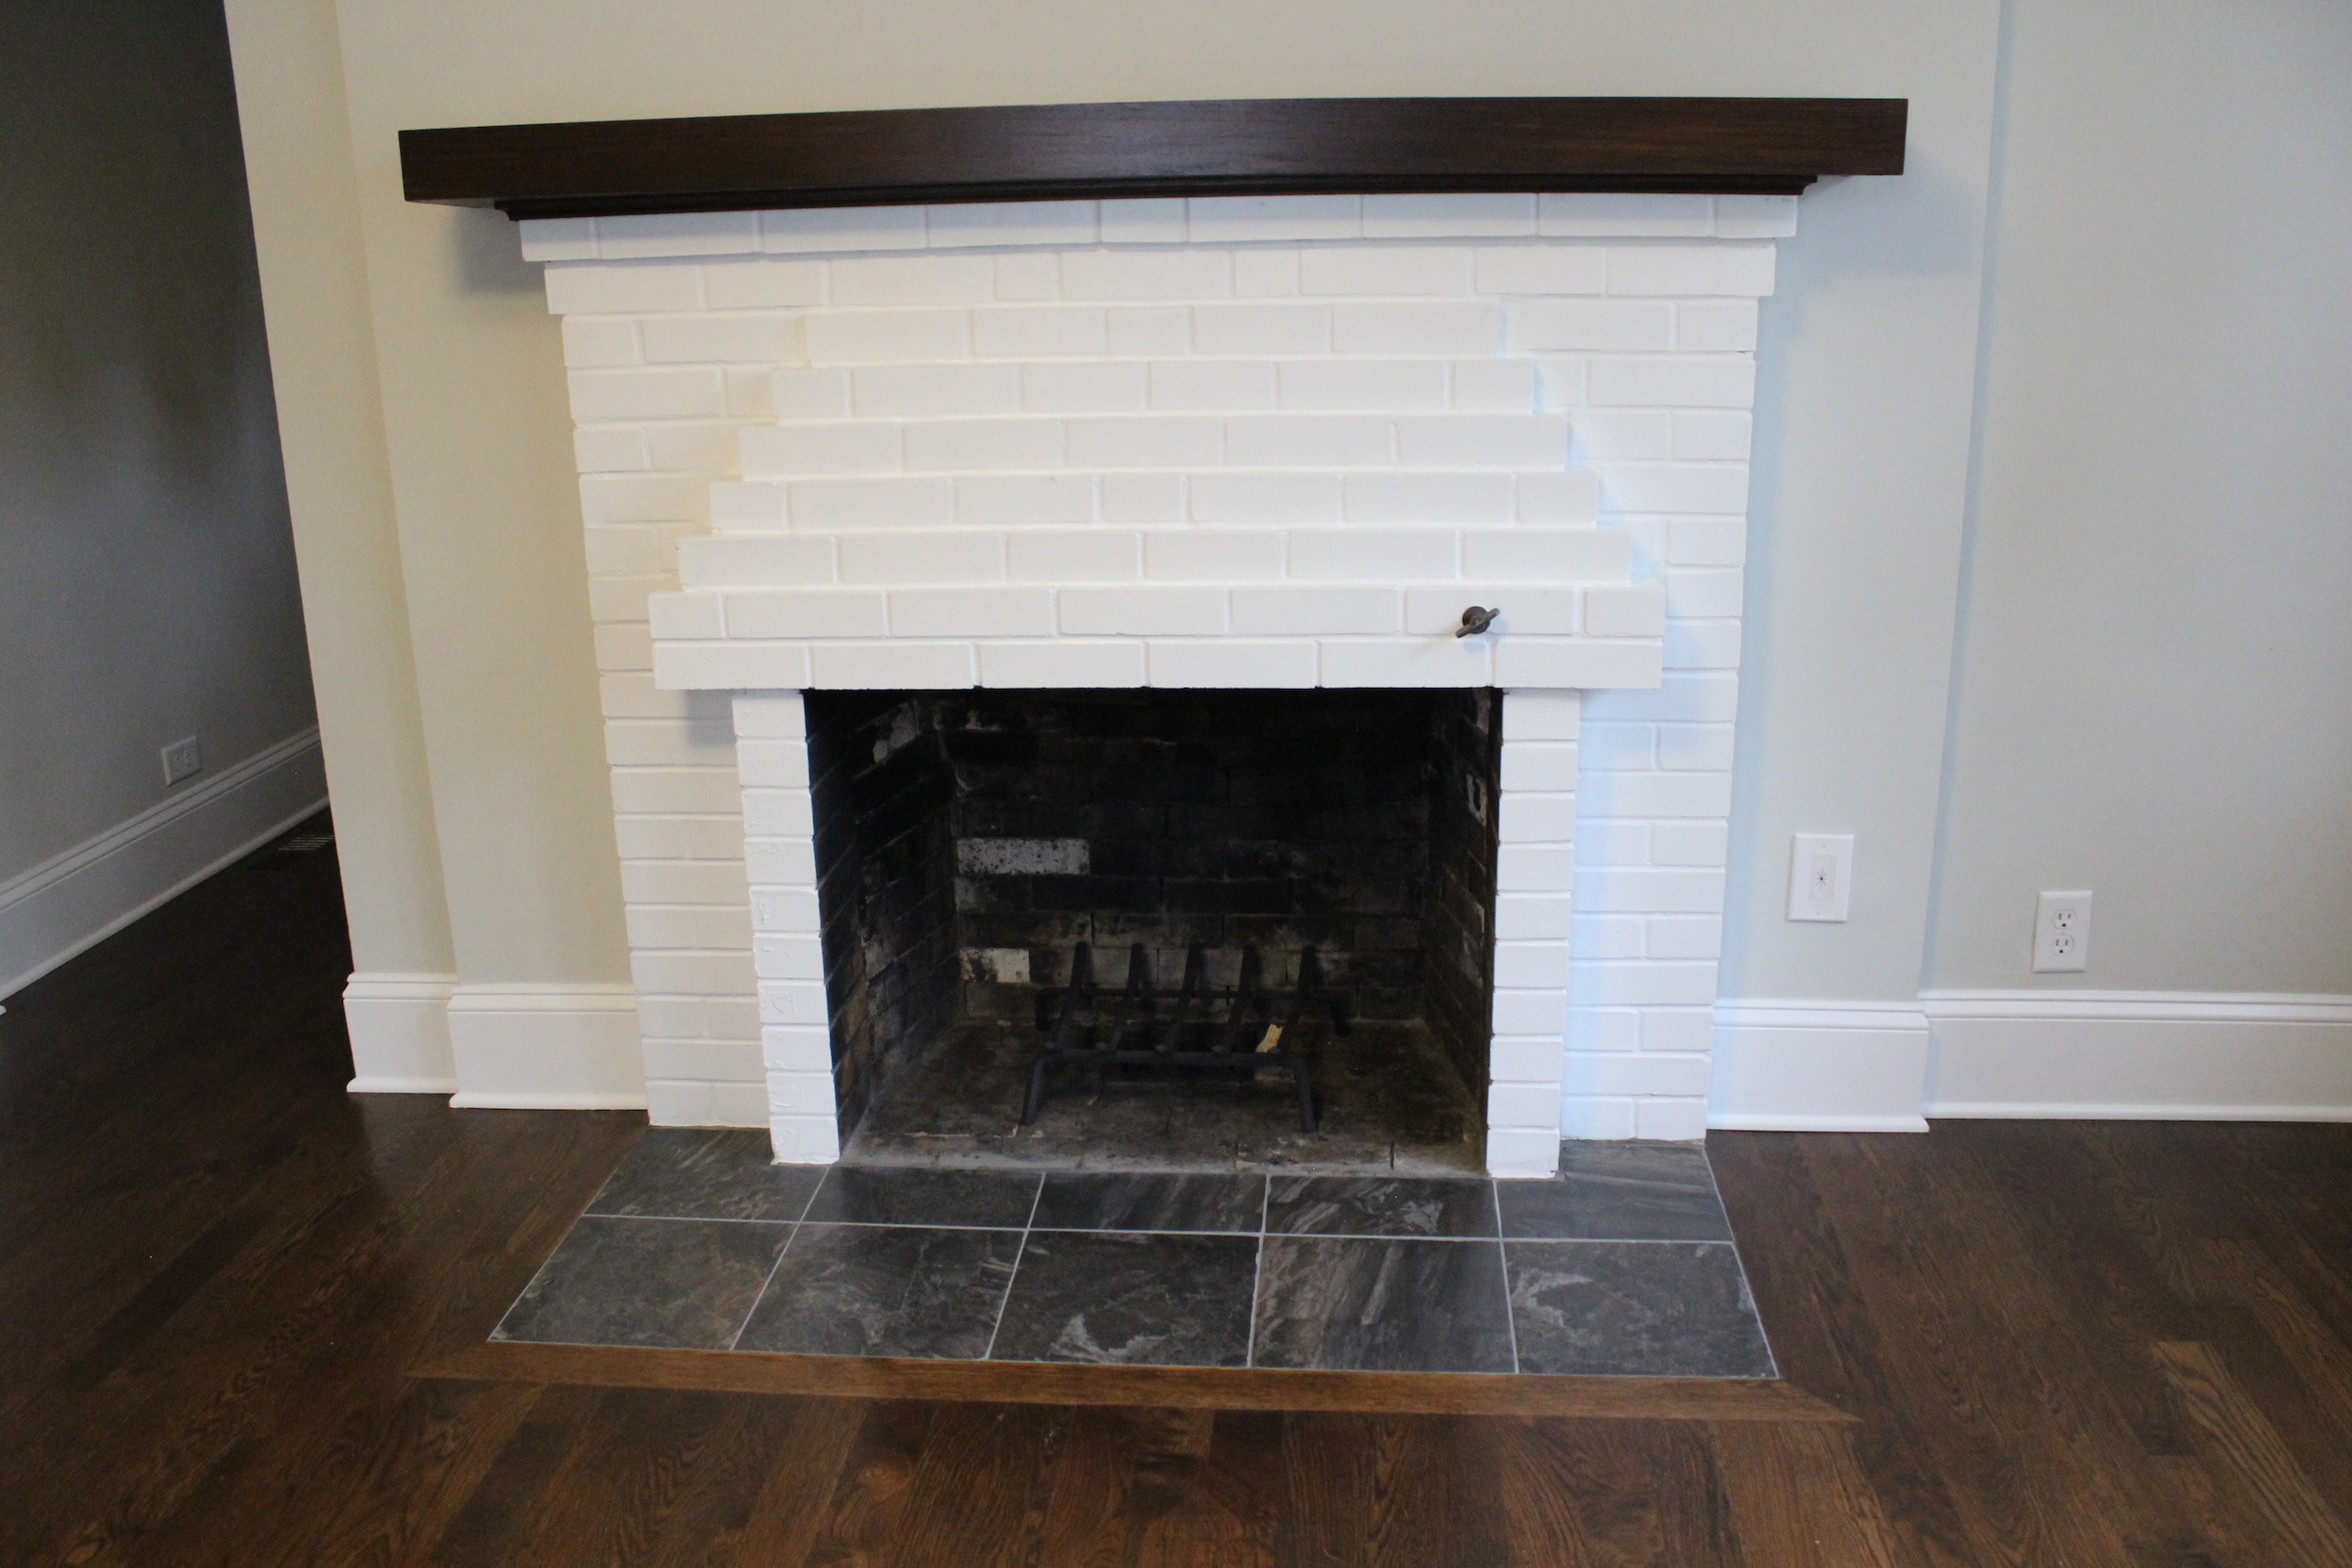
Ben also ripped out the ugly tile hearth which we are going to replace with a piece of black granite.

img_4345

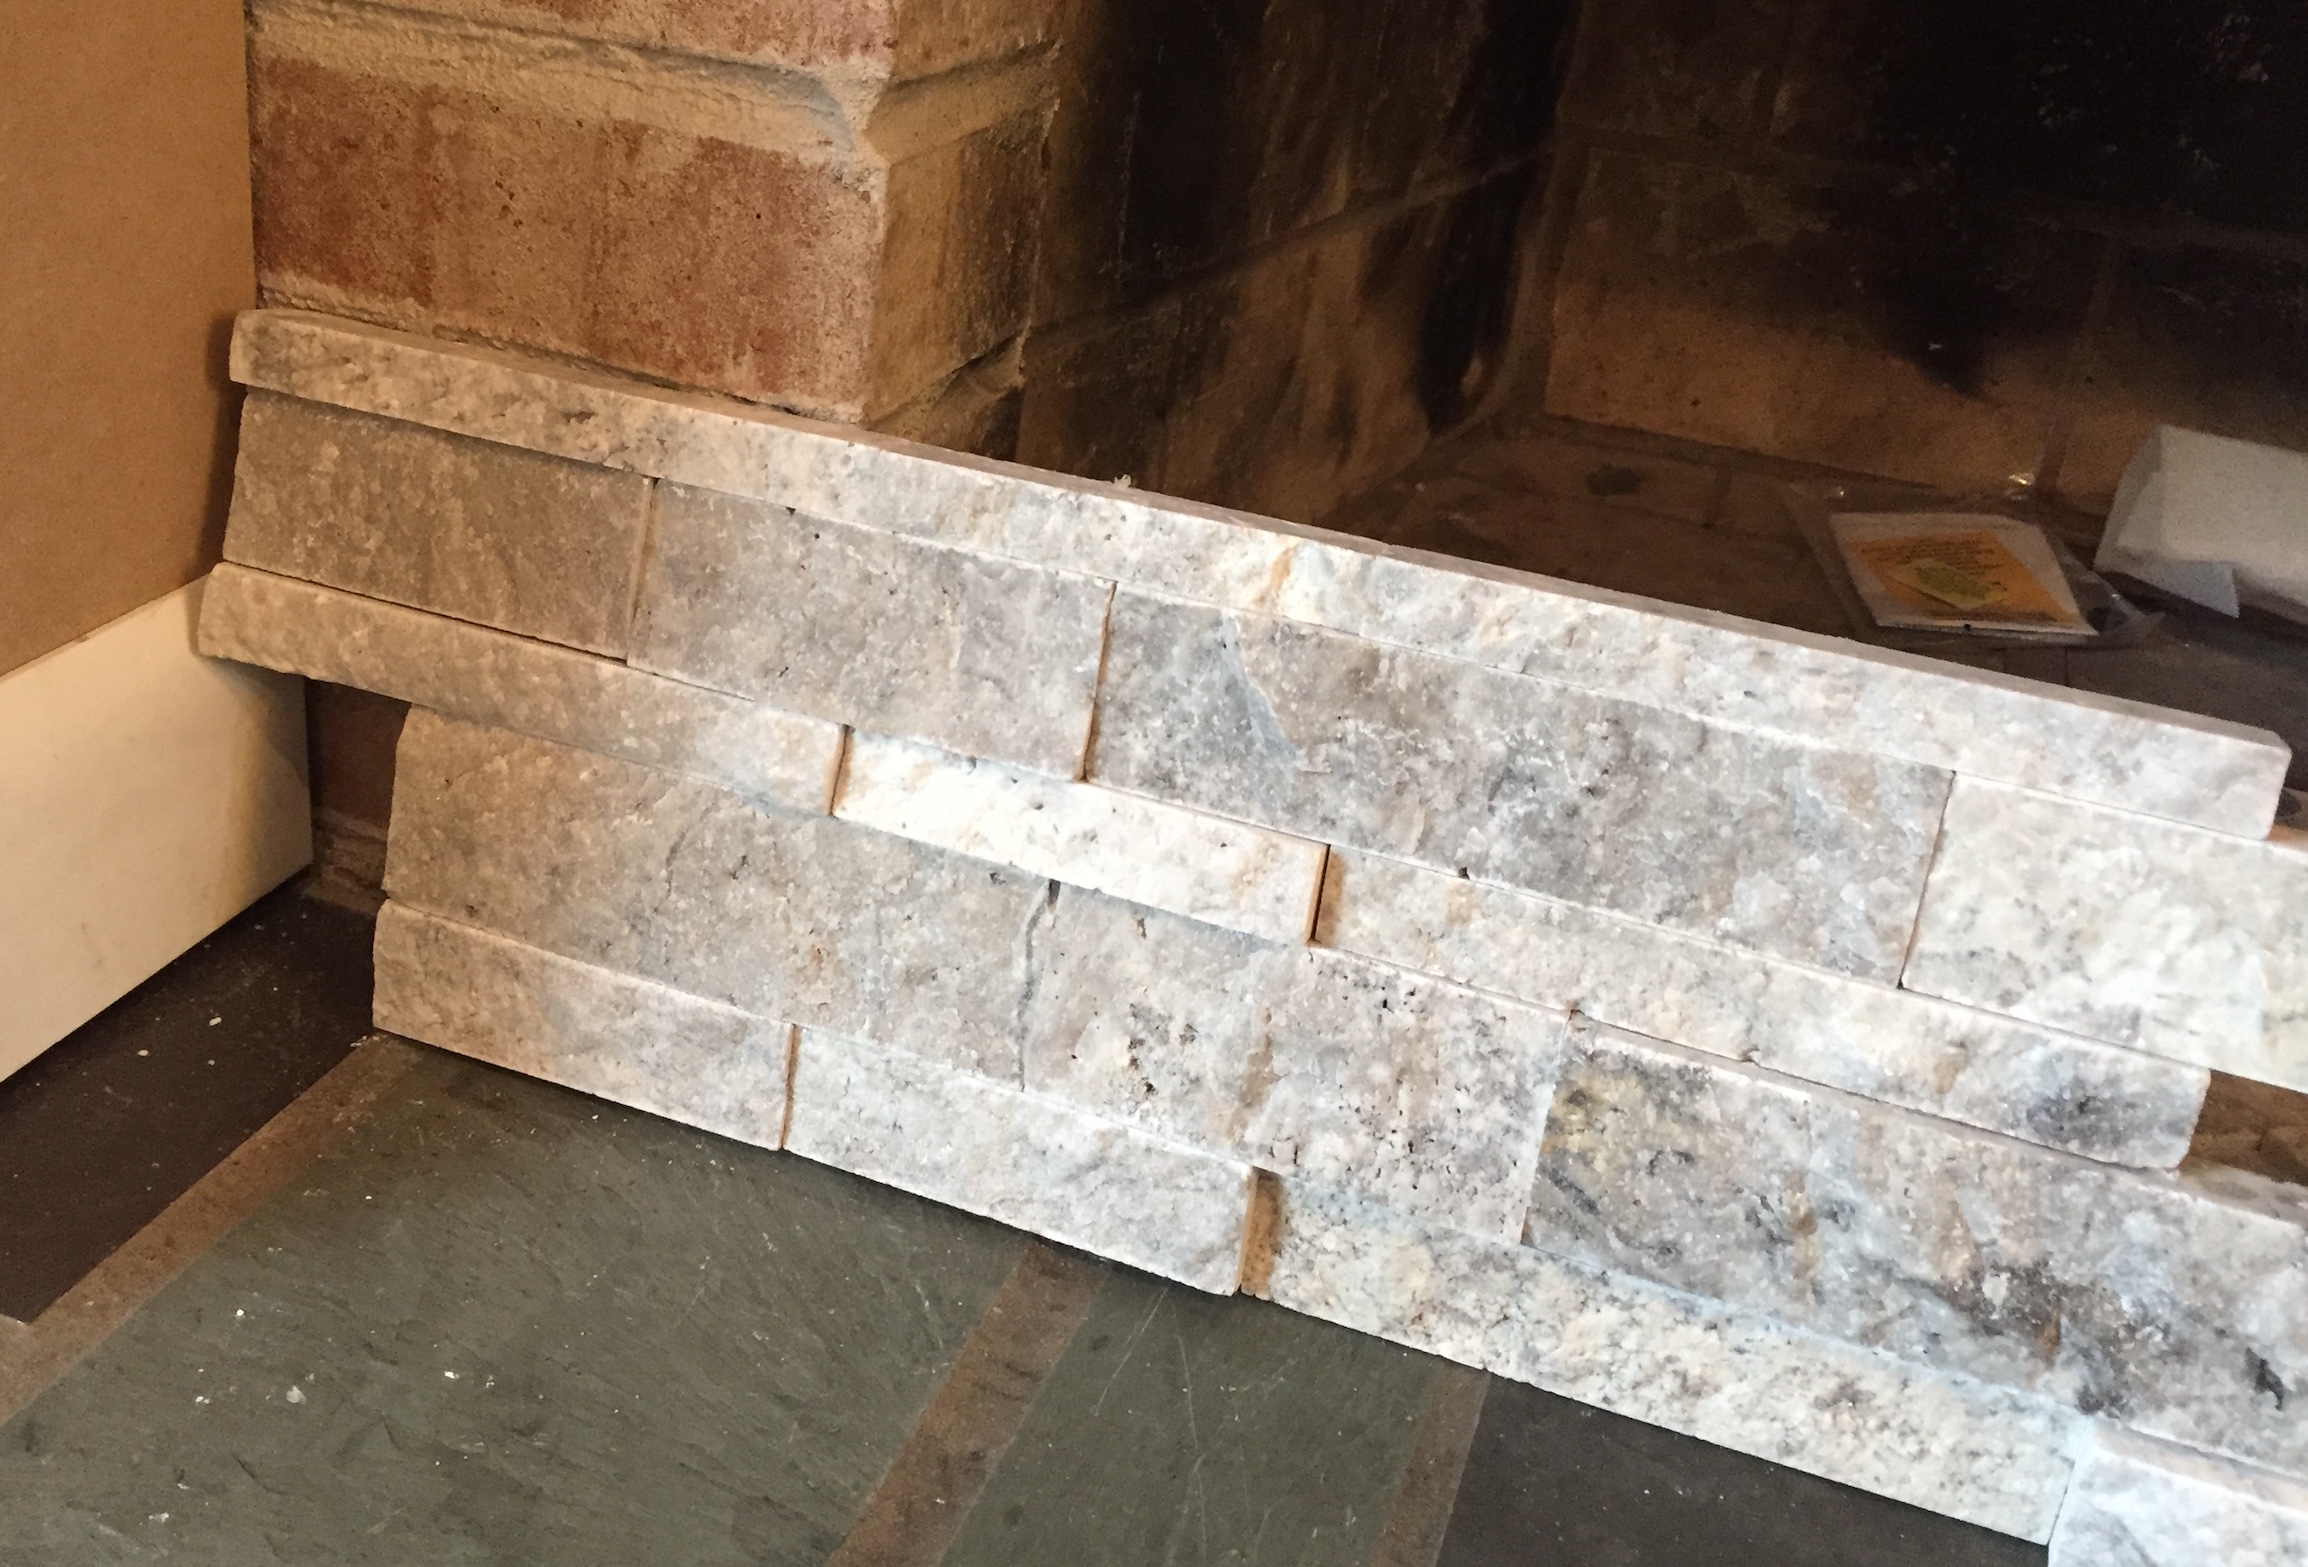
For the fireplace, we are going to cover the pink-ish brick with this gray-ish stacked stone from Tile Shop:

img_4251

Next up will be the doors and trim, installing the stone and hearth, and then painting everything. It will all go a crisp, clean white called Chantilly Lace by Benjamin Moore. Hope to have it all finished in the next few weeks!

How We Did in 2015 + Goals for 2016

13 Jan

Each year we set out a list of the things we want to accomplish on the house. Here’s how we did with our 2015 goals…

  1. Finish master bathroom and closet and move in to our new master. Done (mostly). We moved into the new master bedroom early in 2015 and I shared the master bathroom reveal here. We also had custom closet shelves built out and now the only thing left to do is paint them. Hope to share soon!
  2. carrera marble showerBuild out a playroom, including adding a wall and covering up a fireplace. Done! I just shared the playroom reveal this week. It is my favorite.
  3. right corner goodBuild mudroom cabinets on the opposite side of the new playroom wall. We started the cabinets, but it’s nowhere near complete. At least the mudroom is semi-functional right now. Put this one on the top of the list for 2016.
  4. IMG_0676Renovate the final bathroom upstairs. Done! You can see the full reveal here.
  5. IMG_5533Add window boxes to the front of the house. No progress made here. This may have to wait.
  6. Landscape back yard. Some progress was made here, but it is nowhere near done. I will share some photos come spring.
  7. Finish pergola on the back deck. Done! I still need to share photos of this. We love it. Again, I will share some photos in spring.
  8. Build a fire pit. Nope. We have some adirondack chairs around a fire ring, but we really want to build one in with stone. Add it to 2016!

Overall not too shabby, considering we also spent 3 months renovating an entire income property.

For 2016 our goals are to:

  1. Finish the mudroom.
  2. Paint master bedroom closet.
  3. Finish the pool fence and re-stain the deck.
  4. Install pavers around the pool.
  5. Update the living room built-ins.
  6. Finish the shed.
  7. Build a fire pit.
  8. Create a big girl room for Kate.

By the end of 2016, we will be nearly finished with major updates to the house. So exciting!

P.S. I just launched an Instagram account for the blog. Find us at 12oaksblog for progress and reveal photos! 

Income Property Reveal

1 Oct

We’re officially landlords! We put the finishing touches on our rental property this week and have tenants moving in today. We are SO pleased with how the home turned out and thankfully had an easy time finding good tenants.

Here is a before look at the front exterior of the home:

IMG_6935

And now it looks like this:

IMG_5535 resized

Admittedly, not much of a transformation, but we did rip out all the overgrown bushes and plant some boxwoods and other plants. We also replaced the light over the front door, had a new screen door custom built, and stained the front door.

IMG_5536 resized

The home desperately needs an exterior paint job, which is on our radar for next year.

The back yard was also very overgrown and there was a hole in the garage roof.

IMG_6941

After replacing the garage roof and ripping out those bushes, it looks like this:

IMG_5538

Moving inside is where the big transformation happened. The kitchen looked like this before:

IMG_6942

And now after new stainless steel appliances, cabinets, granite countertops, arabesque tile backsplash, new hardwood floors, paint (Analytical Gray by Sherwin Williams), lighting and more:

IMG_5542

Here’s the other side of the kitchen.


And view from the dining room.

IMG_5545

Here was the dining room before:


IMG_6954

And now after new paint (Gray Owl by Benjamin Moore), crown molding, lighting, hardwood floors, baseboards, and more:

IMG_5546

The other side of the dining room looking into the living room used to look like this:

IMG_6957

And now:

IMG_5547

Into the living room, it used to look like this:

IMG_6952

We updated the fireplace, added sconces (from Home Depot), an overhead drum light, and continued the paint, crown, baseboards and new floors.

IMG_5548

For the fireplace, we replaced the paneling with new drywall, painted the brick white, stained the mantle, and updated the tile on the hearth.

IMG_5549

The other side of the living room looked like this.

IMG_6951

And now:

IMG_5551

I just love all the arches throughout the home.

Here’s a before & after of the hallway leading to the bathroom and bedrooms:

hallway Coolidge

The bathroom looked like this before:

IMG_6946

And now after adding a subway tiled shower, refinishing the bathtub, adding a new black vanity (from Home Depot), toilet, lighting, beadboard, and more:

IMG_5554

We were able to save the vintage floor tile, which fits the home perfectly. Here’s a look at the other side of the bathroom.

IMG_5555

The two bedrooms looked like this before:

IMG_6949

And now with new ceiling fans, paint, baseboards and hardwood floors:

IMG_5557

IMG_5558

Upstairs used to be unfinished:

IMG_6944

We made it into a 3rd bedroom or bonus space by adding new lighting, HVAC, carpet, paint (Gray Owl as well), baseboards, and more.

IMG_5563


IMG_5564

It is a huge space and nearly doubles the square footage of the home.

Before:

IMG_6943

After:

IMG_5562


We absolutely loved bringing this old home back to life and look forward to having this income property for many, many years to come.

Update on the Rental

15 Jul

There has been lots of progress on the rental property over the past three weeks and one major setback. I’ll get to that.

Starting out front, we ripped out all of the overgrown bushes, planted boxwoods and day lilies and laid mulch. The plants are still small but should grow in nicely to cover the foundation.

FullSizeRender

The back looks totally different with the bushes ripped out. The yard almost doubled in size. We laid grass seed so it will just be all lawn back here. The neighbor is going to continue his fence so that will be nice too. The garage roof is new as well. It had huge holes in it.

IMG_5501

Moving inside is where our big setback occurred. It broke our hearts (and pocketbook), but we had to replace all of the hardwood floors due to pet odor/stains from the previous owner. We learned from neighbors that the previous owner had 30 cats! We had to replace all of the baseboards throughout the house as well. But it had to be done, and now no smell!

Here are the new red oak floors in the living room and dining room. Ben is finishing up the baseboards in here and then the walls and trim will get painted and floors stained.

IMG_5508

Here is one of the bedrooms with the new baseboards installed. We went with a chunky baseboard to keep with the style of the home.

IMG_7108

In the bathroom we ran the plumbing to add an overhead shower (it was only a bathtub before), installed new chrome fixtures, and tiled the shower with white subway tile, a black rope pencil tile and dark gray grout.

IMG_5503

Upstairs looks totally different! We added new electrical and HVAC, framing, drywall and a primer coat of paint. It’s going to be a really nice space up there.

IMG_7105

IMG_7106

This week kitchen cabinets are going in and painting continues. With having to replace the floors and baseboards, our Aug 1 deadline is shot. But we’ve had more than a dozen calls and stop bys from people interested, so we shouldn’t have a problem renting regardless of the school year.

In case you missed the before tour, you can see all the before photos here.