Living Room Built Ins: Plans & Progress

19 Oct

We’ve made some great progress on the living room built ins, so here is an update.

Here’s a look at the fireplace and built ins before we started:
fullsizerender

They weren’t terrible by any means, but we wanted them to be more updated and functional. The plan was to do lower cabinets and then shelves up to the ceiling, sort of like this:
living-room-built-ins-inspiration

We also decided to do drawers above the cabinets like this for even more functional storage:

living-room-drawers

Here was our inspiration for the fireplace surround and planking above the fireplace, which we also decided to continue behind the upper shelves.

fireplace

If you follow us on Instagram you saw photos of Ben ripping everything out. Here was our blank slate (leaving the TV, of course):

living-rooms-clearedout

While it was open Ben installed new electrical outlets, a switch for the gas fireplace, and a chase for TV cords so all cords will be hidden.

fullsizerender

Full disclosure, we decided to hire out the building of the built ins to Ben’s cabinetmaker at work. 2-3 guys have spent 4 whole days on it so far, so I’m glad we did.

On the first day they built the cabinet bases and fireplace surround:

cabinet-bases

And then the upper boxes and planking:

uppers

And then here’s the latest with the shelves, counter and mantle:

upper-shelves

Ben also ripped out the ugly tile hearth which we are going to replace with a piece of black granite.

img_4345

For the fireplace, we are going to cover the pink-ish brick with this gray-ish stacked stone from Tile Shop:

img_4251

Next up will be the doors and trim, installing the stone and hearth, and then painting everything. It will all go a crisp, clean white called Chantilly Lace by Benjamin Moore. Hope to have it all finished in the next few weeks!

Mudroom Reveal!

13 Sep

The mudroom is finally complete, and it’s as functional as it is beautiful.

Before I share the finished photos, here’s a look back at what it used to be. It was all one open room that served as a mostly unused den/office:

IMG_5599

Then we added a wall and divided it into a playroom on one side and mudroom on the other.

IMG_5602

We hung some temporary coat hooks for a little while:

IMG_0676

And then most recently, I shared this progress photo:

mudroom vertical 2

And now, here is the finished mudroom:

mudroom-whole-view

We painted the cabinets Galveston Gray by Benjamin Moore, and stained the Mahogany seat Dark Walnut by Minwax. It turned out stunning!

mudroom-bench

We also painted the back door Abyss by Benjamin Moore, which is a really dark navy color.

The upper cubbies have lined wicker baskets from Target and they hold hats, gloves, scarves, umbrellas and more. mudroom-baskets

The bottom cubbies we decided to keep open so that it is easy to kick off your shoes and keep things tidy.

mudroom-cubbies

We installed these corbels from Home Depot and these brass hooks from Amazon.

mudroom-hooks

The cabinets on each side give us a ton of great storage.

mudroom-left-side

We filled the lower cabinet by the back door with shoe shelves:

mudroom-shoe-shelf

mudroom-right-side

The other lower cabinet holds our vacuum, mop and step ladder:

mudroom-vacuum-cabinet

And then the upper cabinets hold mail, sunglasses, paper towels and more. And we have empty room to hold even more.

The knobs on the cabinets are these beaded antique brass knobs from ATG.

close-up-knobs

Lastly, here’s a view of it from the garage, showing how it leads into the kitchen.

mudroom-toward-kitchen

We really love it and are so happy with how it turned out! Now, onto the living room built ins which we recently ripped out.

The Big Backyard Reveal: So Many Updates

24 Aug

Our backyard area has undergone A TON of changes over the past 2 summers. I last shared an update after we built the deck and retaining wall in May/June 2014.

Here is a view of it from then:

IMG_4611

Here it is now:

back of house from diving board


pool view retaining wall

back deck white pergola

back deck and garbage enclosure

Yeah.. we’ve been busy.

One of the biggest changes was installing that extra concrete by the back door and a stone path that leads all the way around to the driveway.

arbor blooming

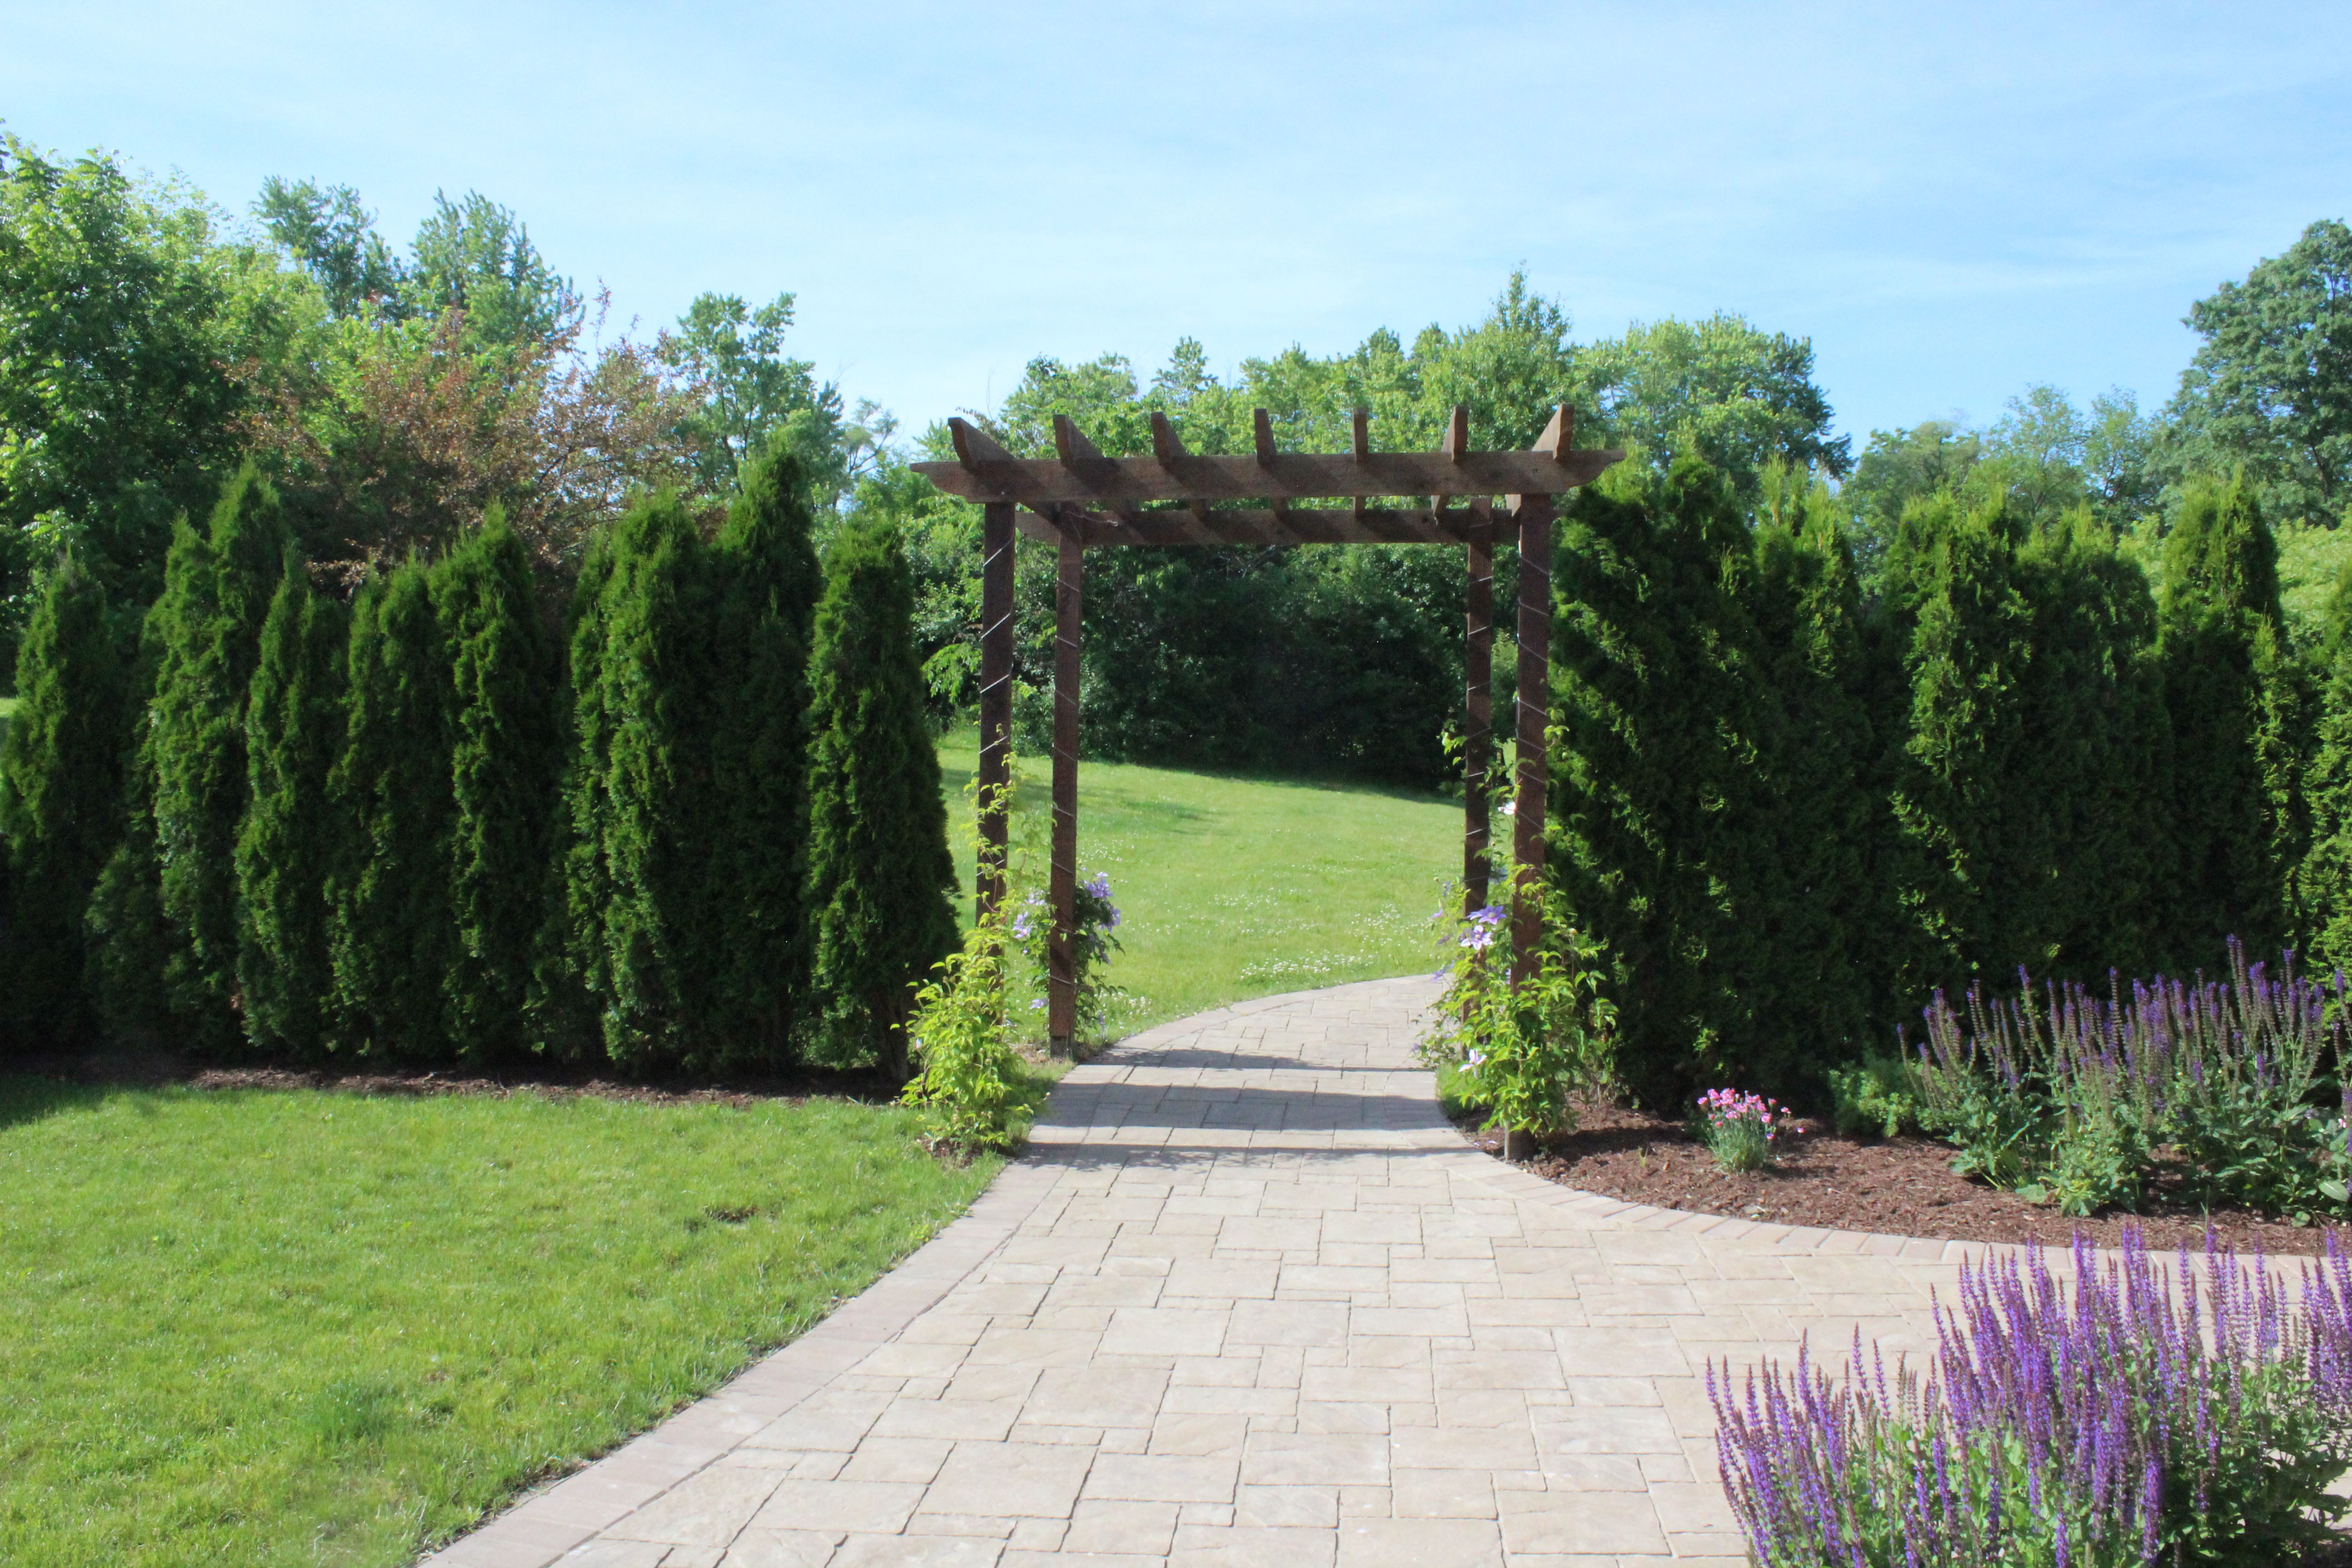
Ben put up the arbor which he built prior to our wedding and we got married under. I was so happy to see it get a new life here.

view from other side of arbor

We also planted several arborvitae on either side to really divide the backyard area.

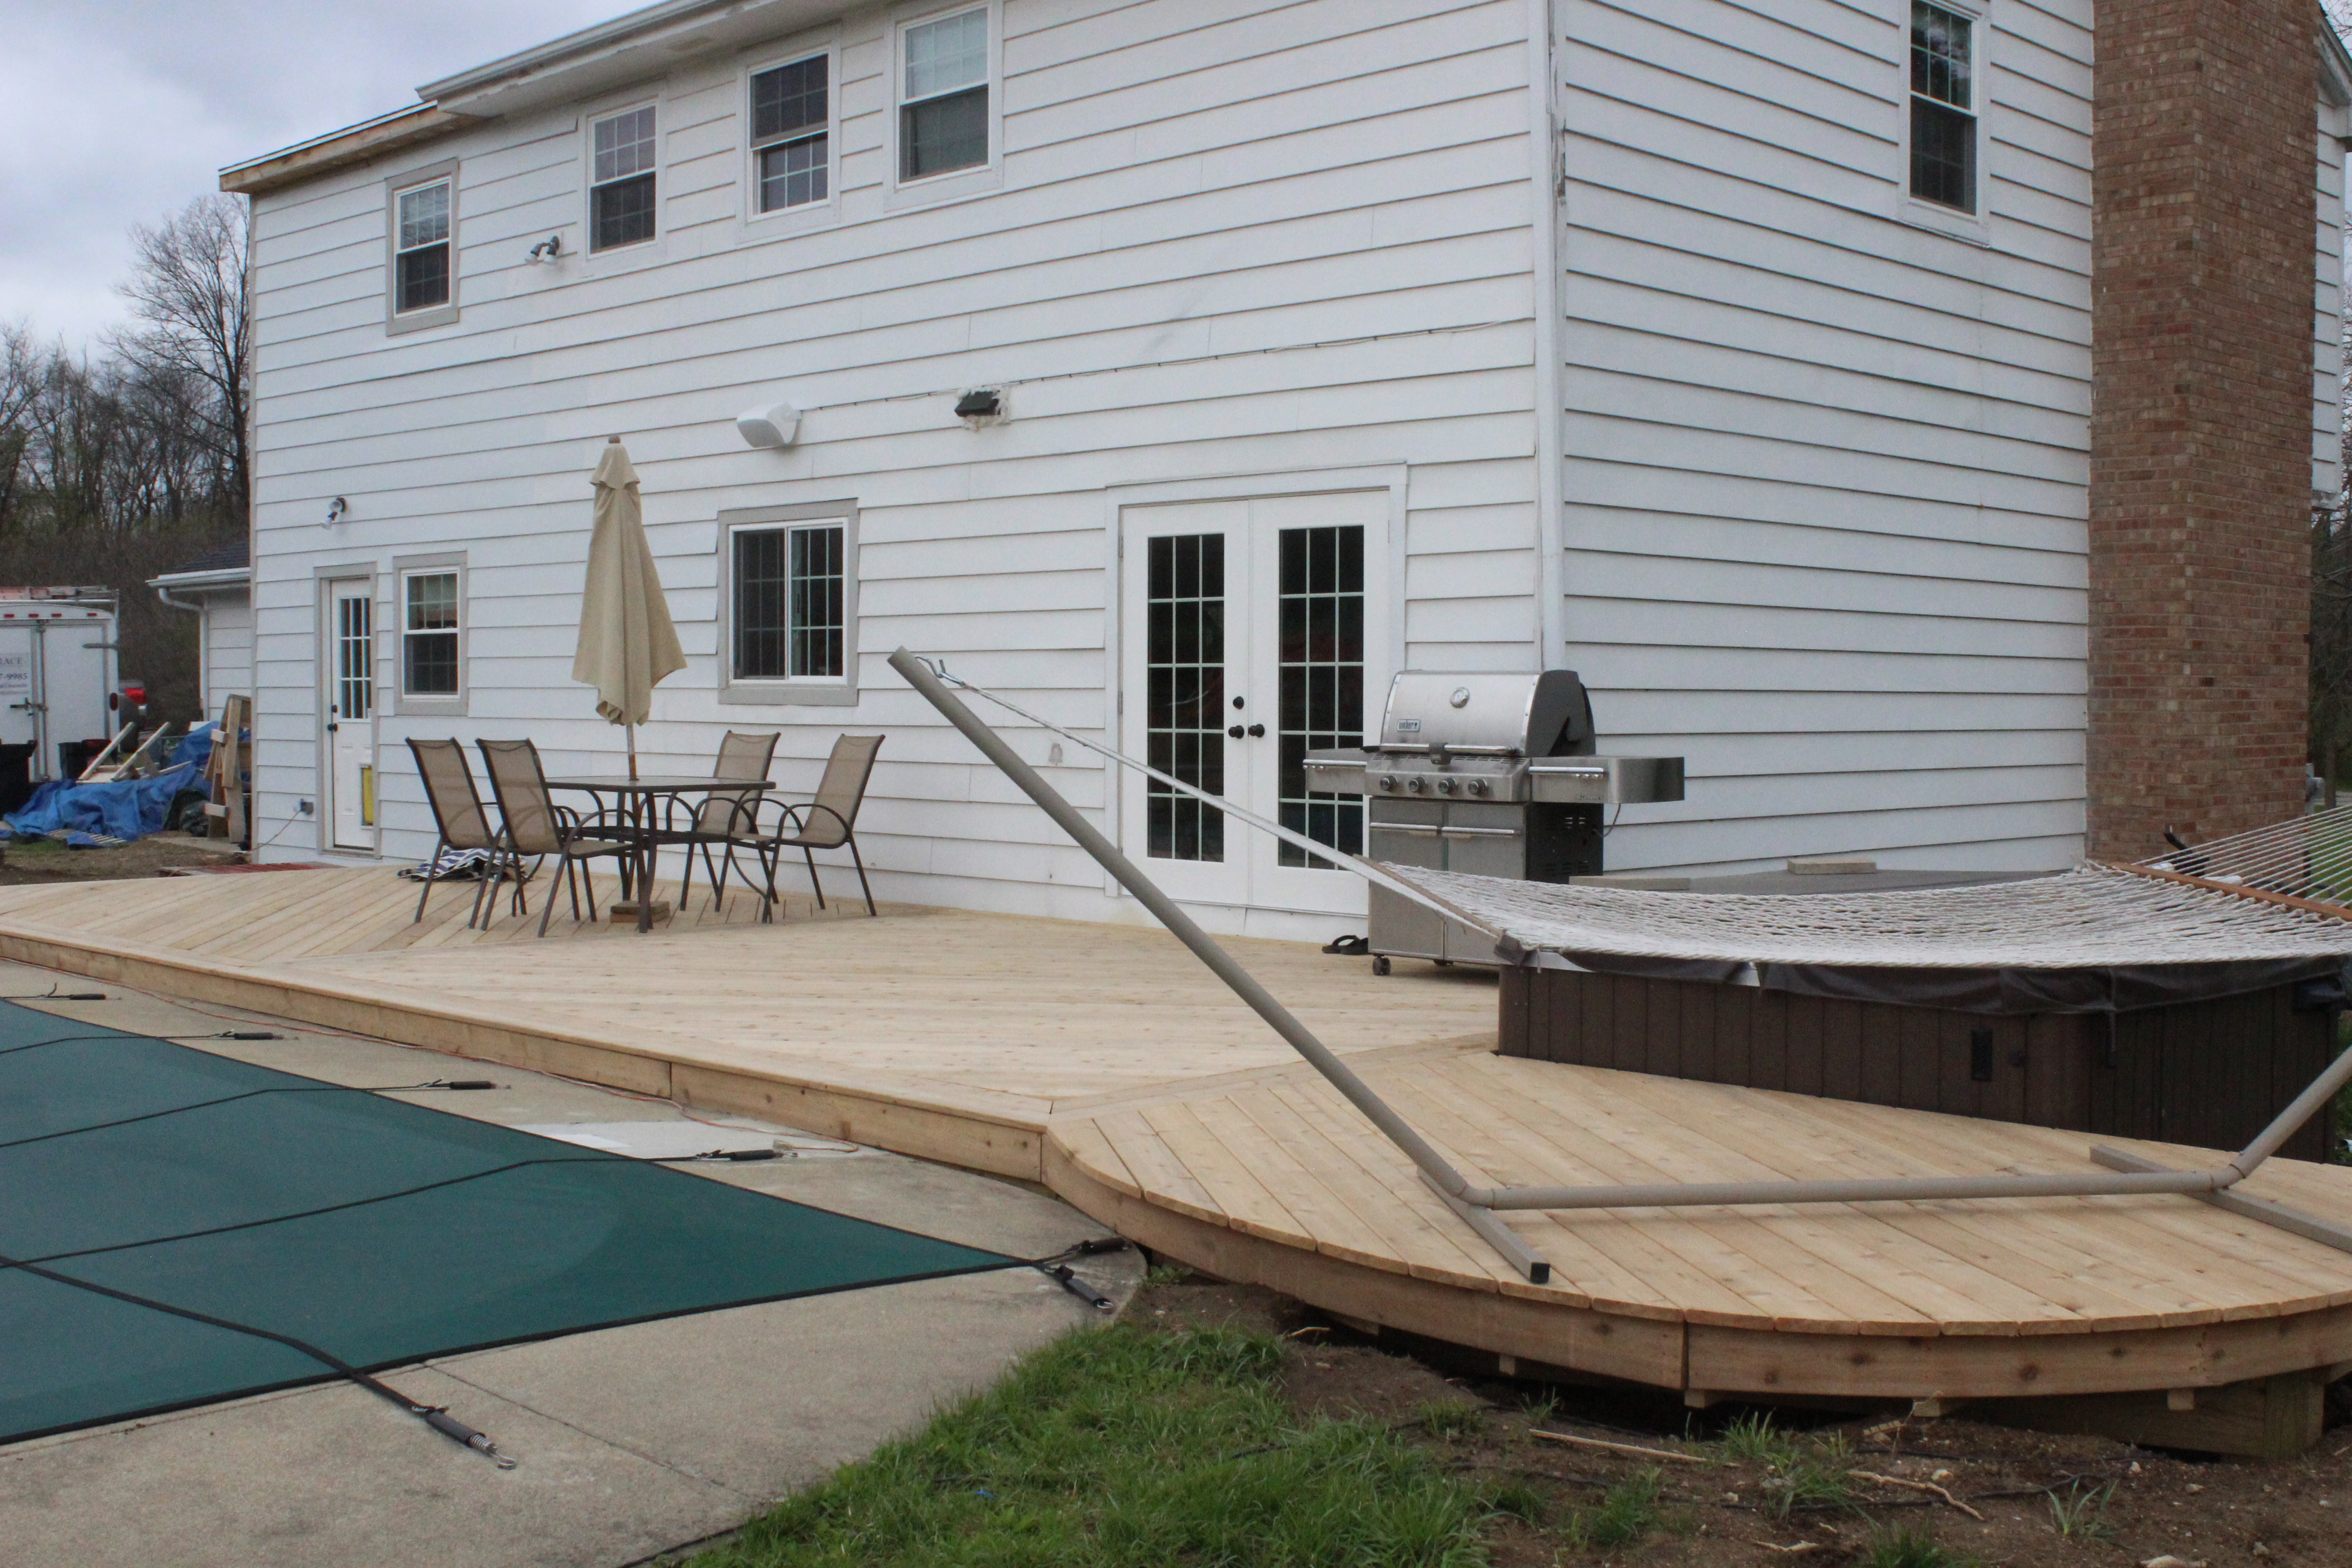
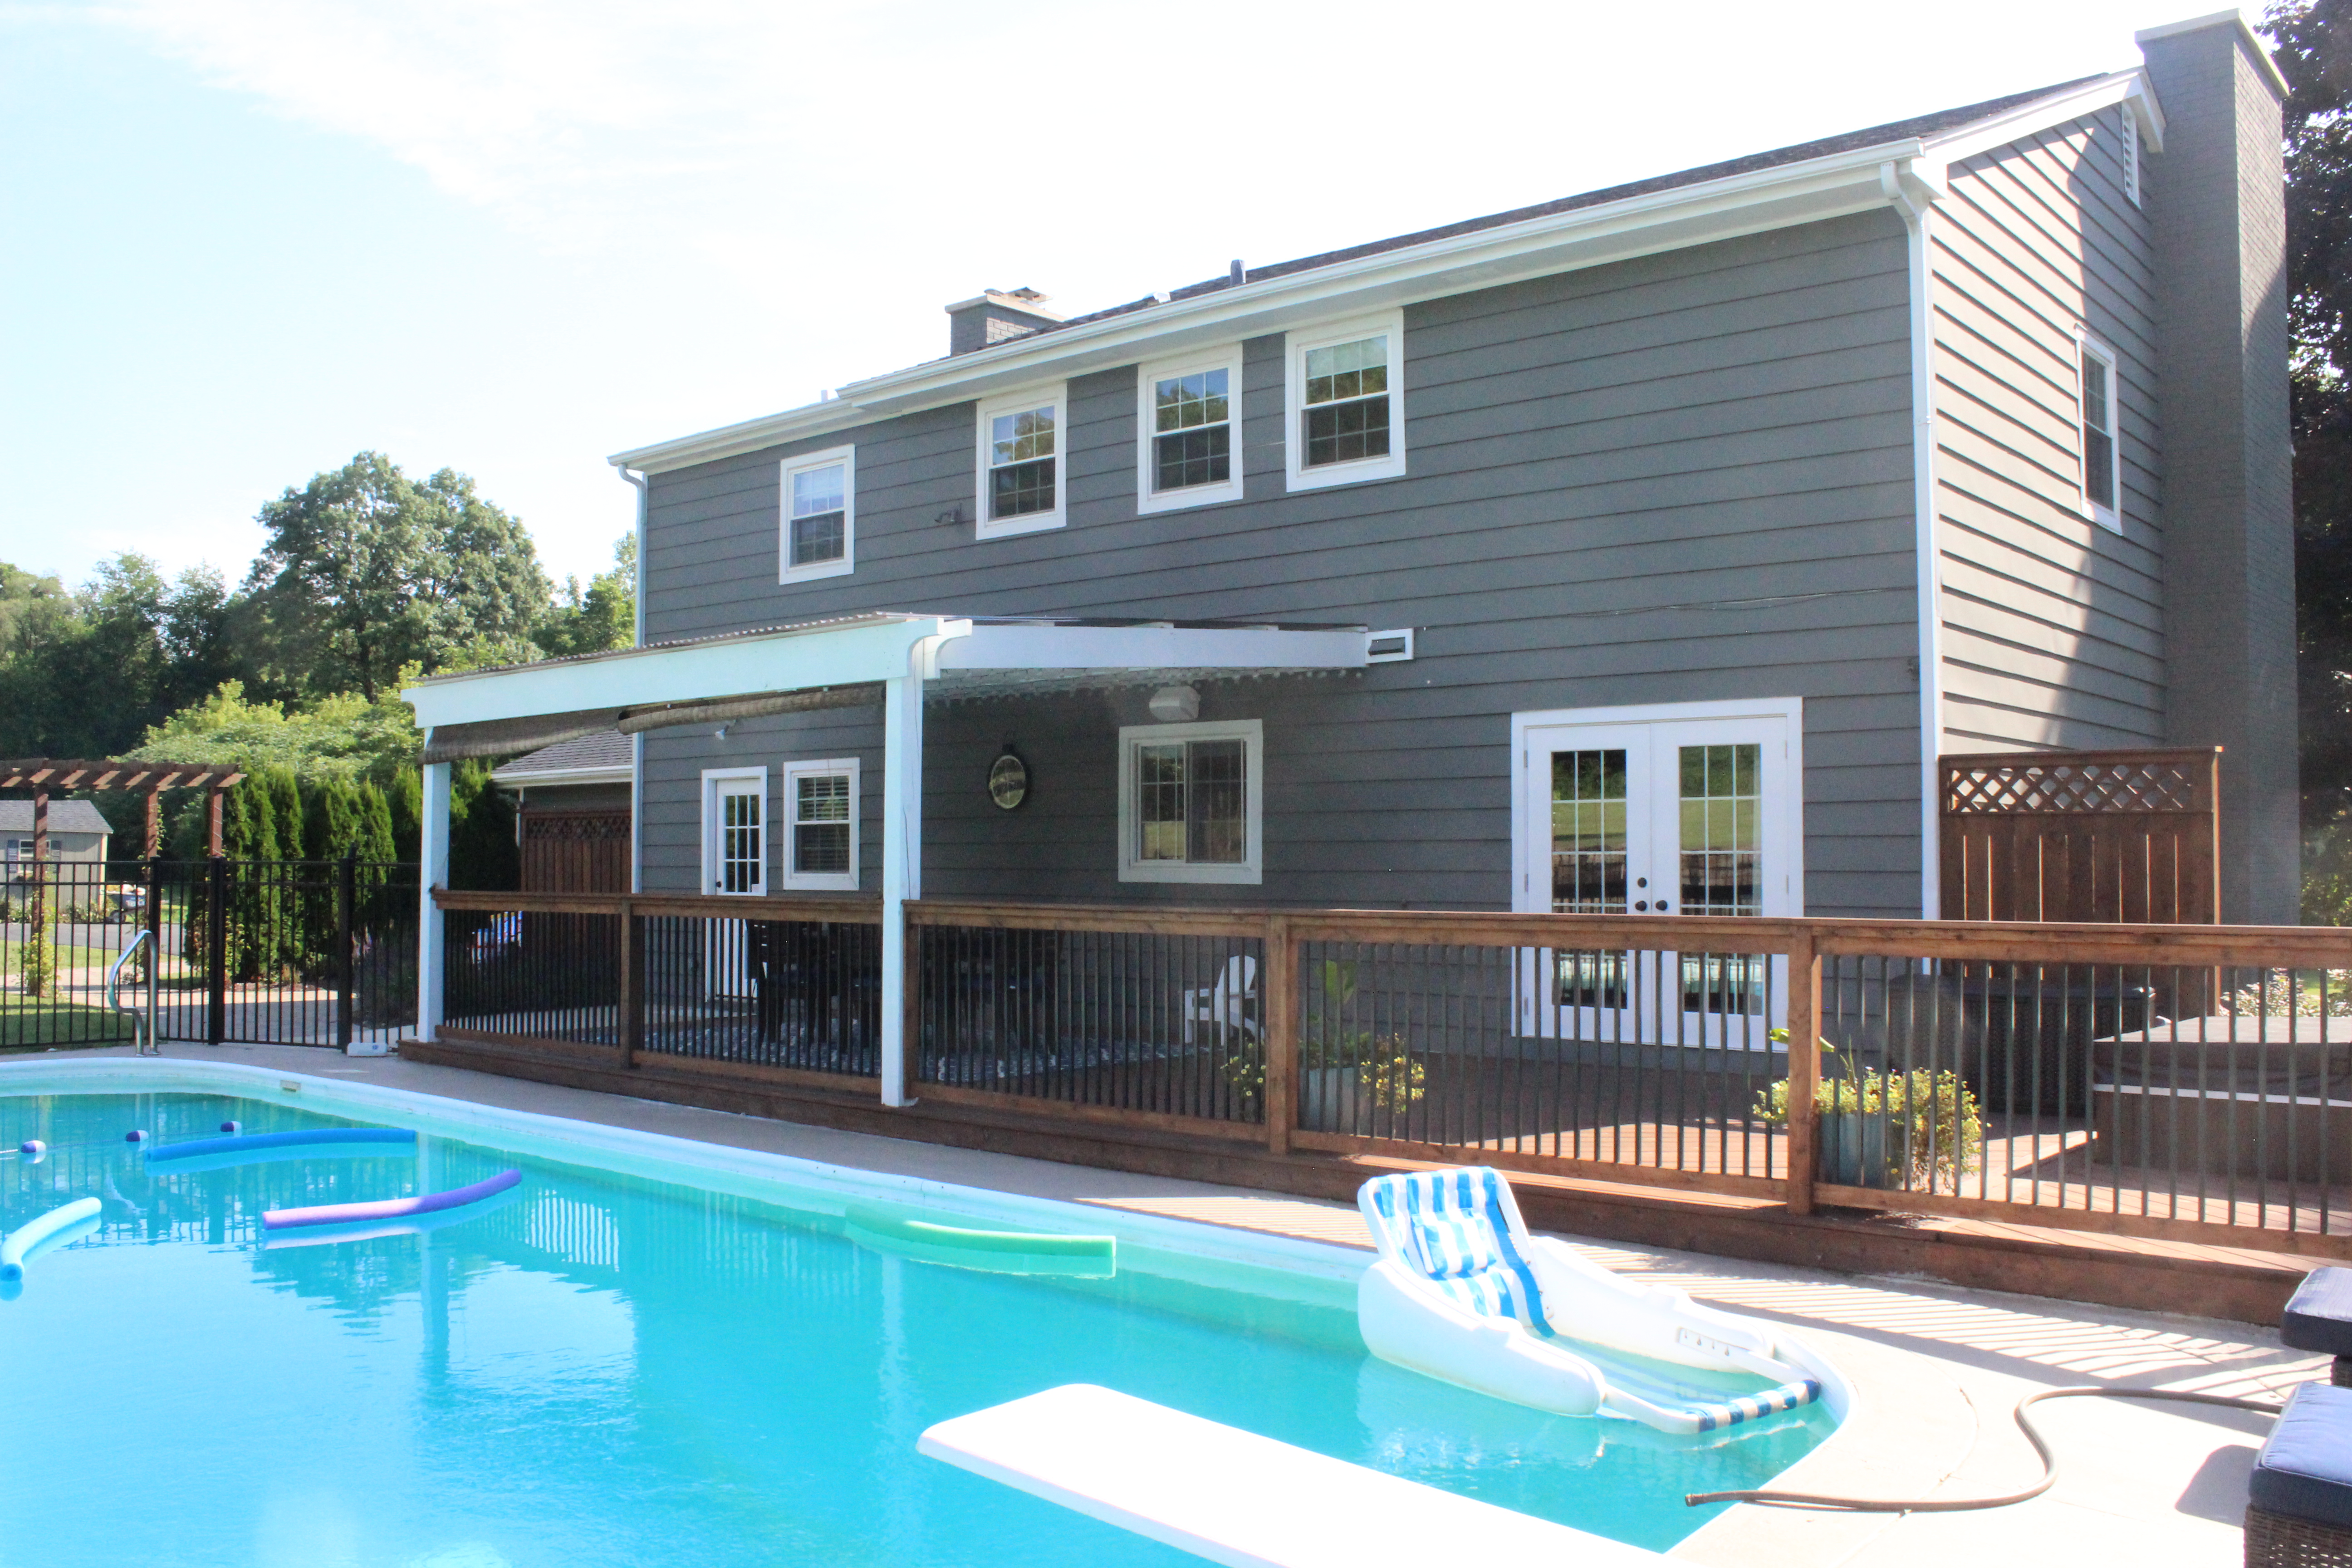
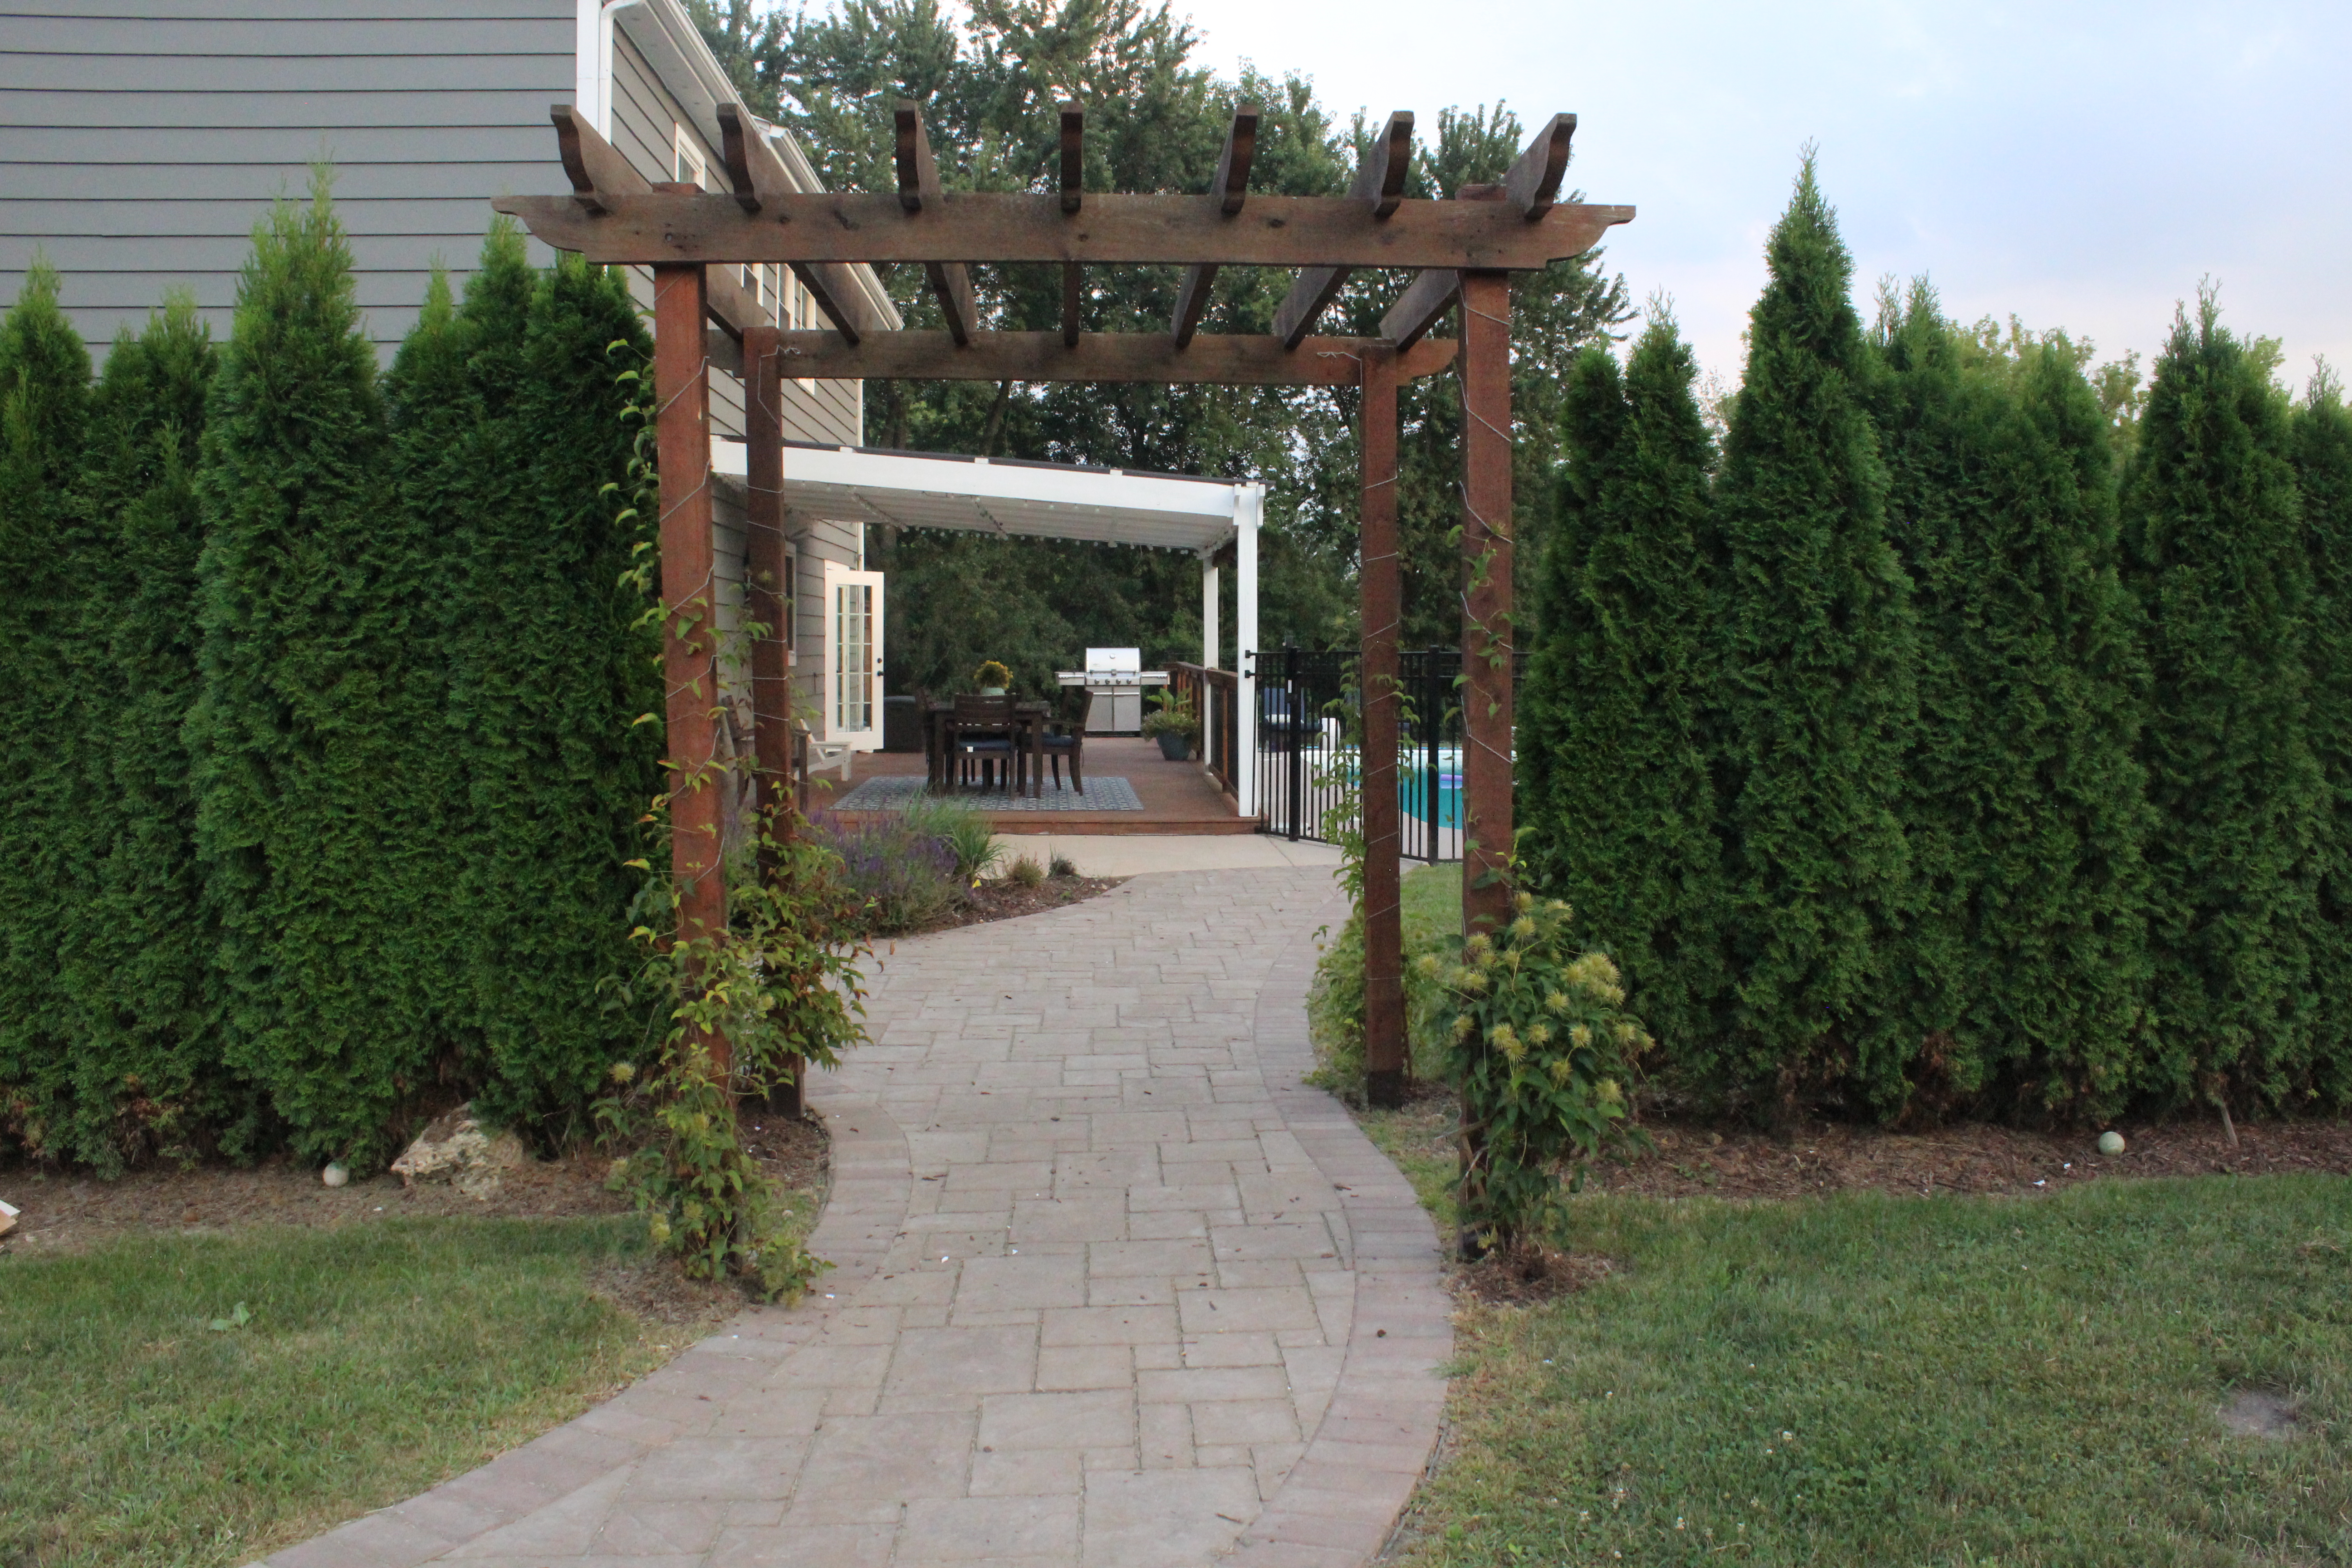
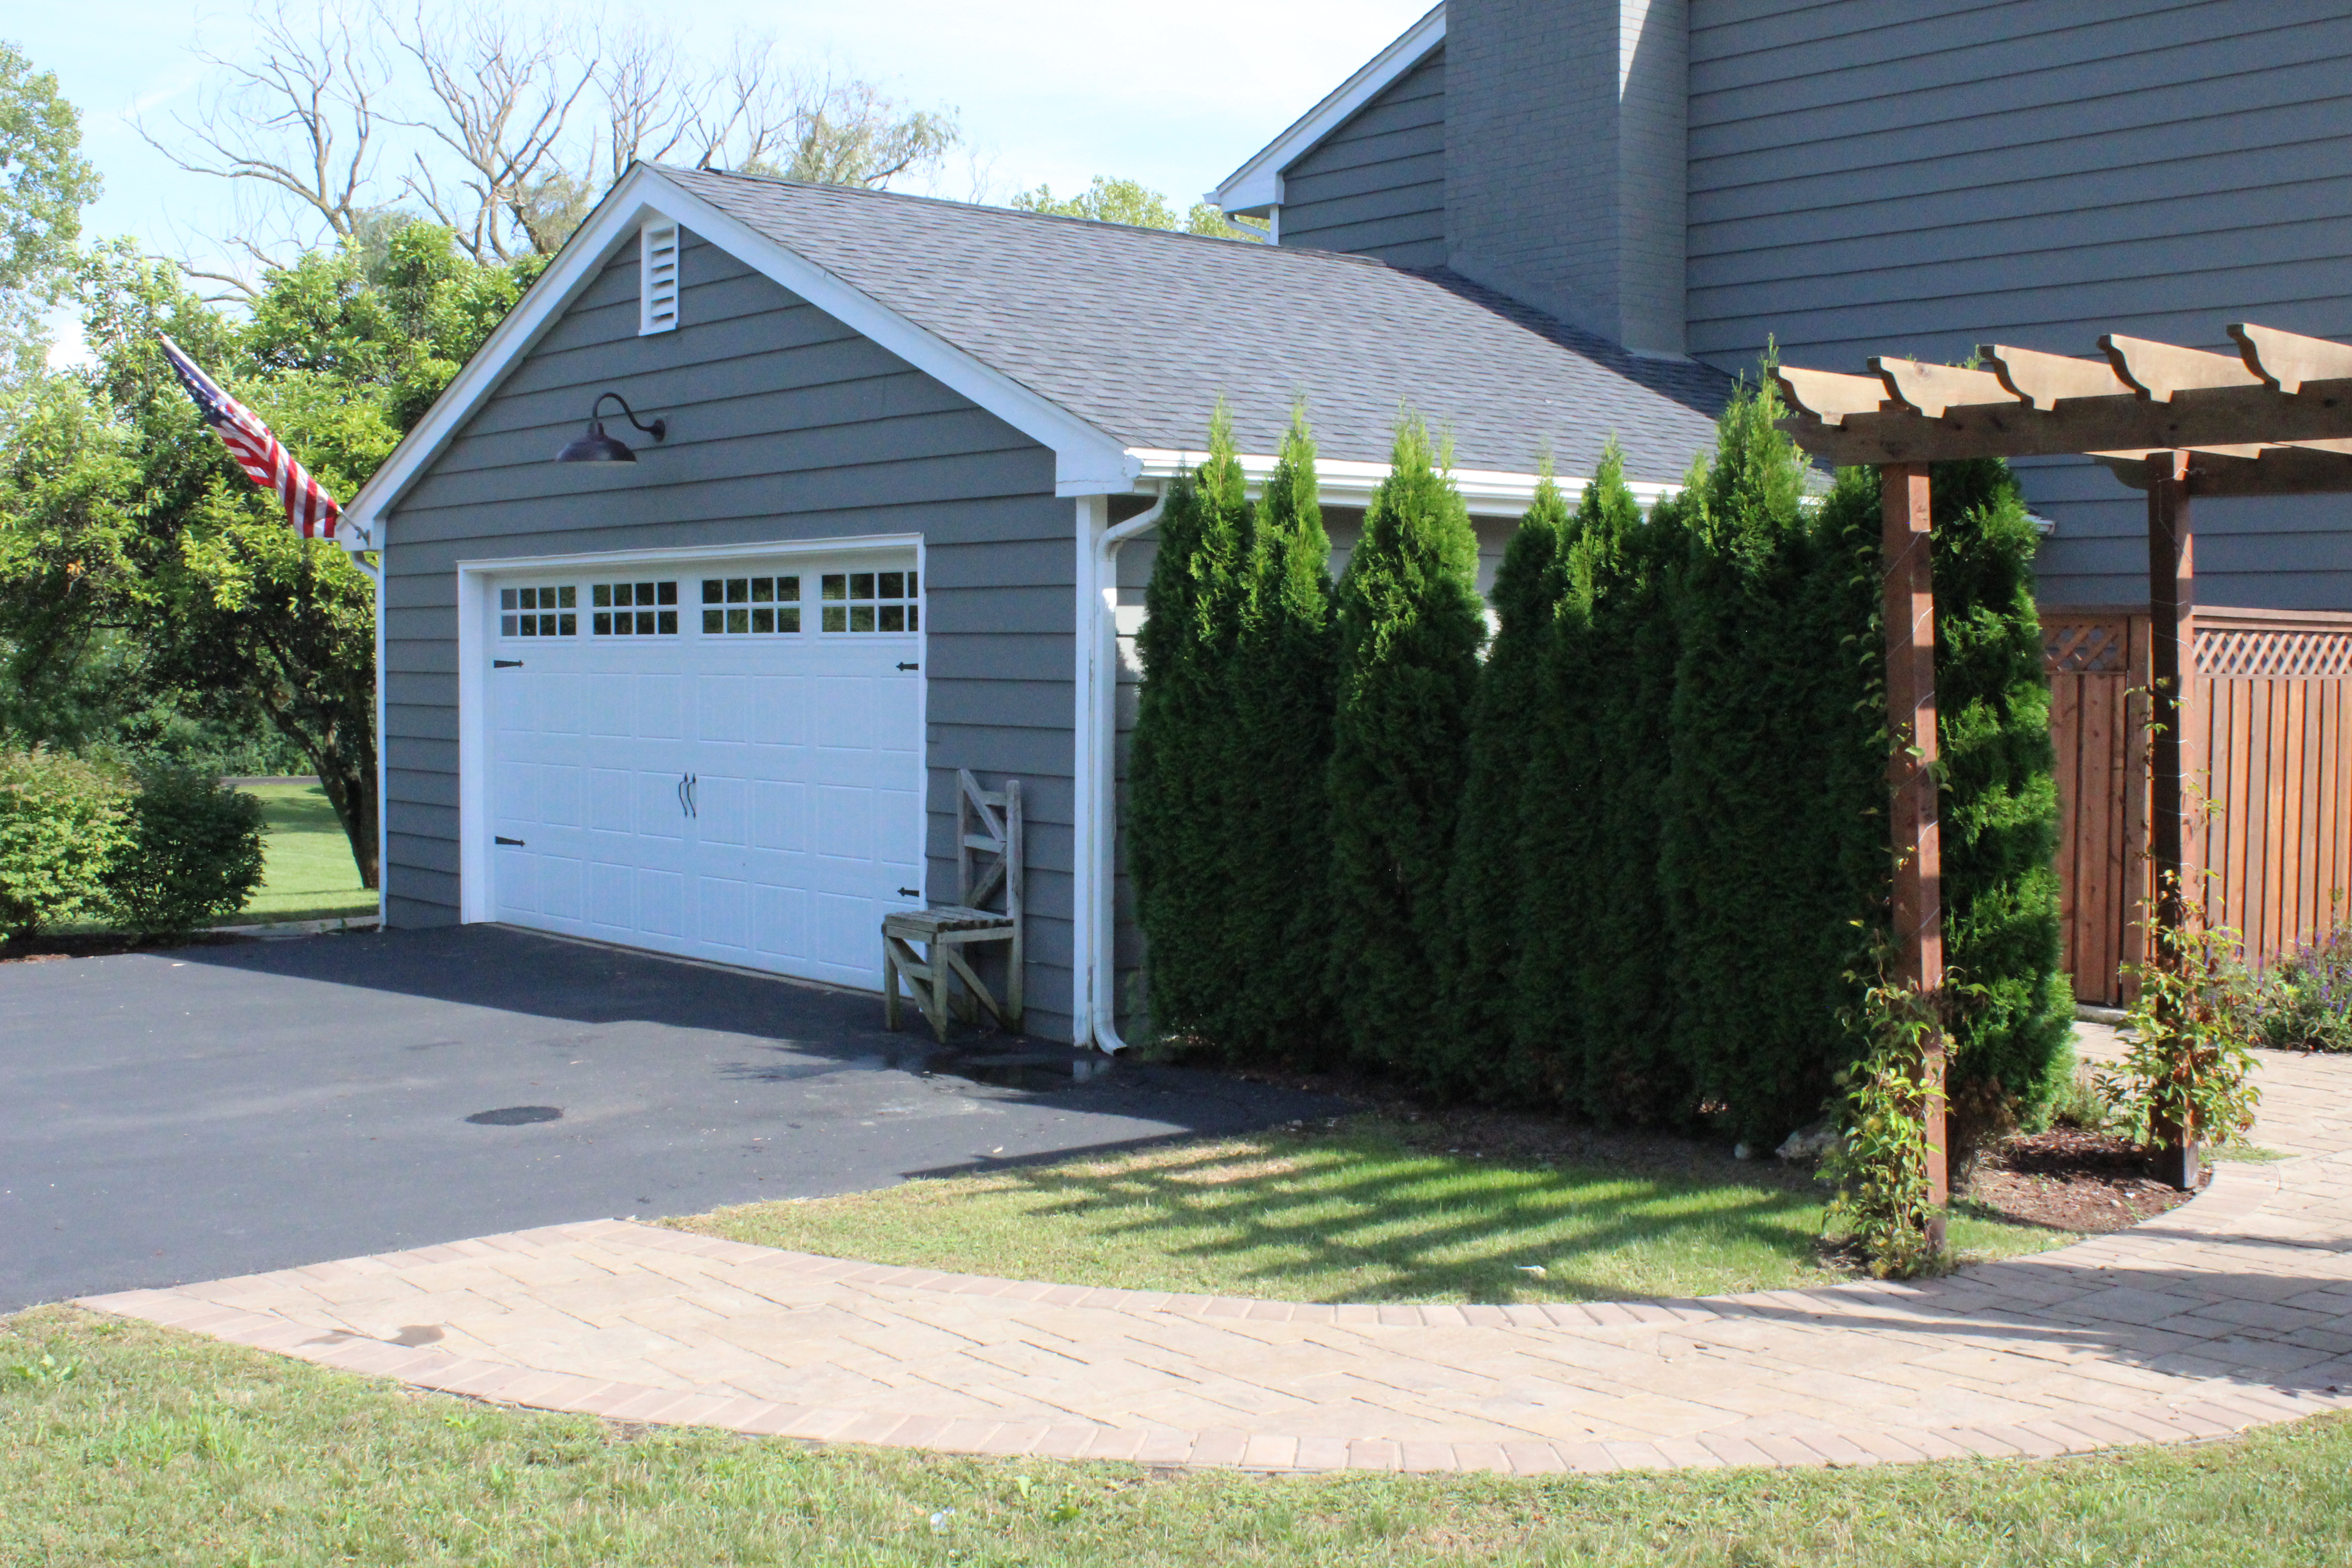
Here’s a farther away look, including a look at our new garage door:

IMG_5949

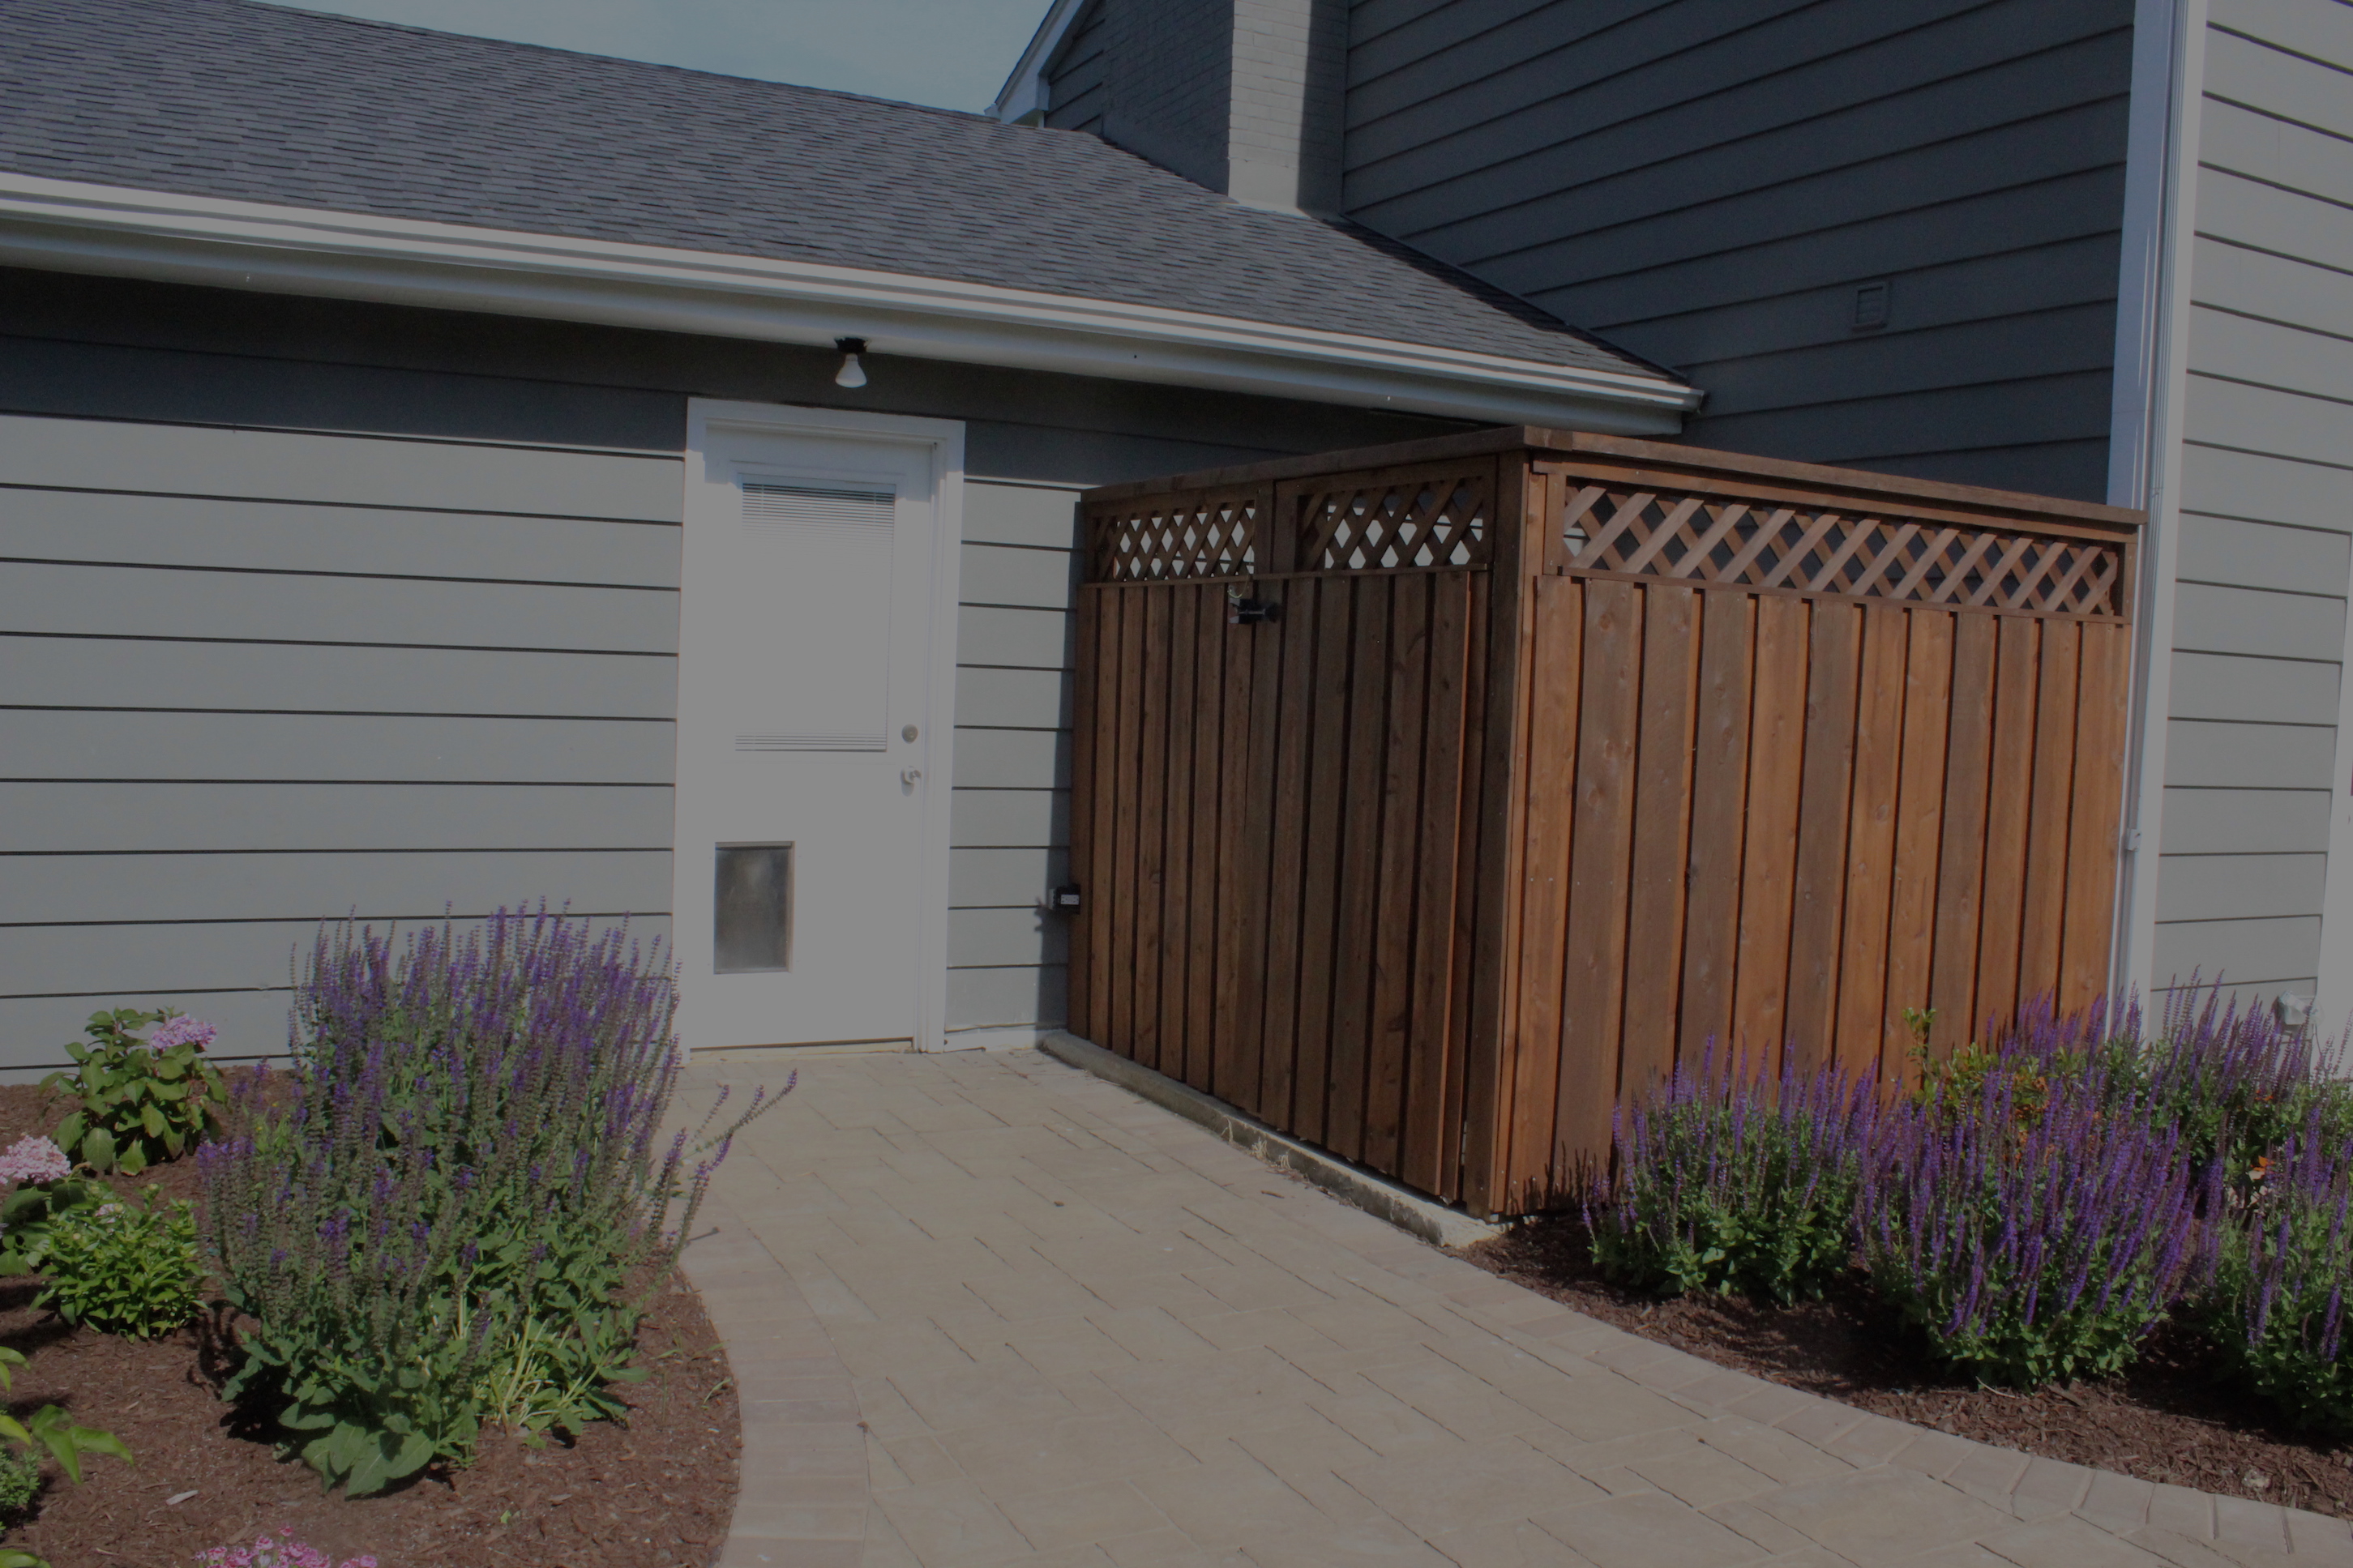
We also built this garbage enclosure which is so functional and keeps our dog out of the trash.

garbage enclosure 2

gabage enclosure

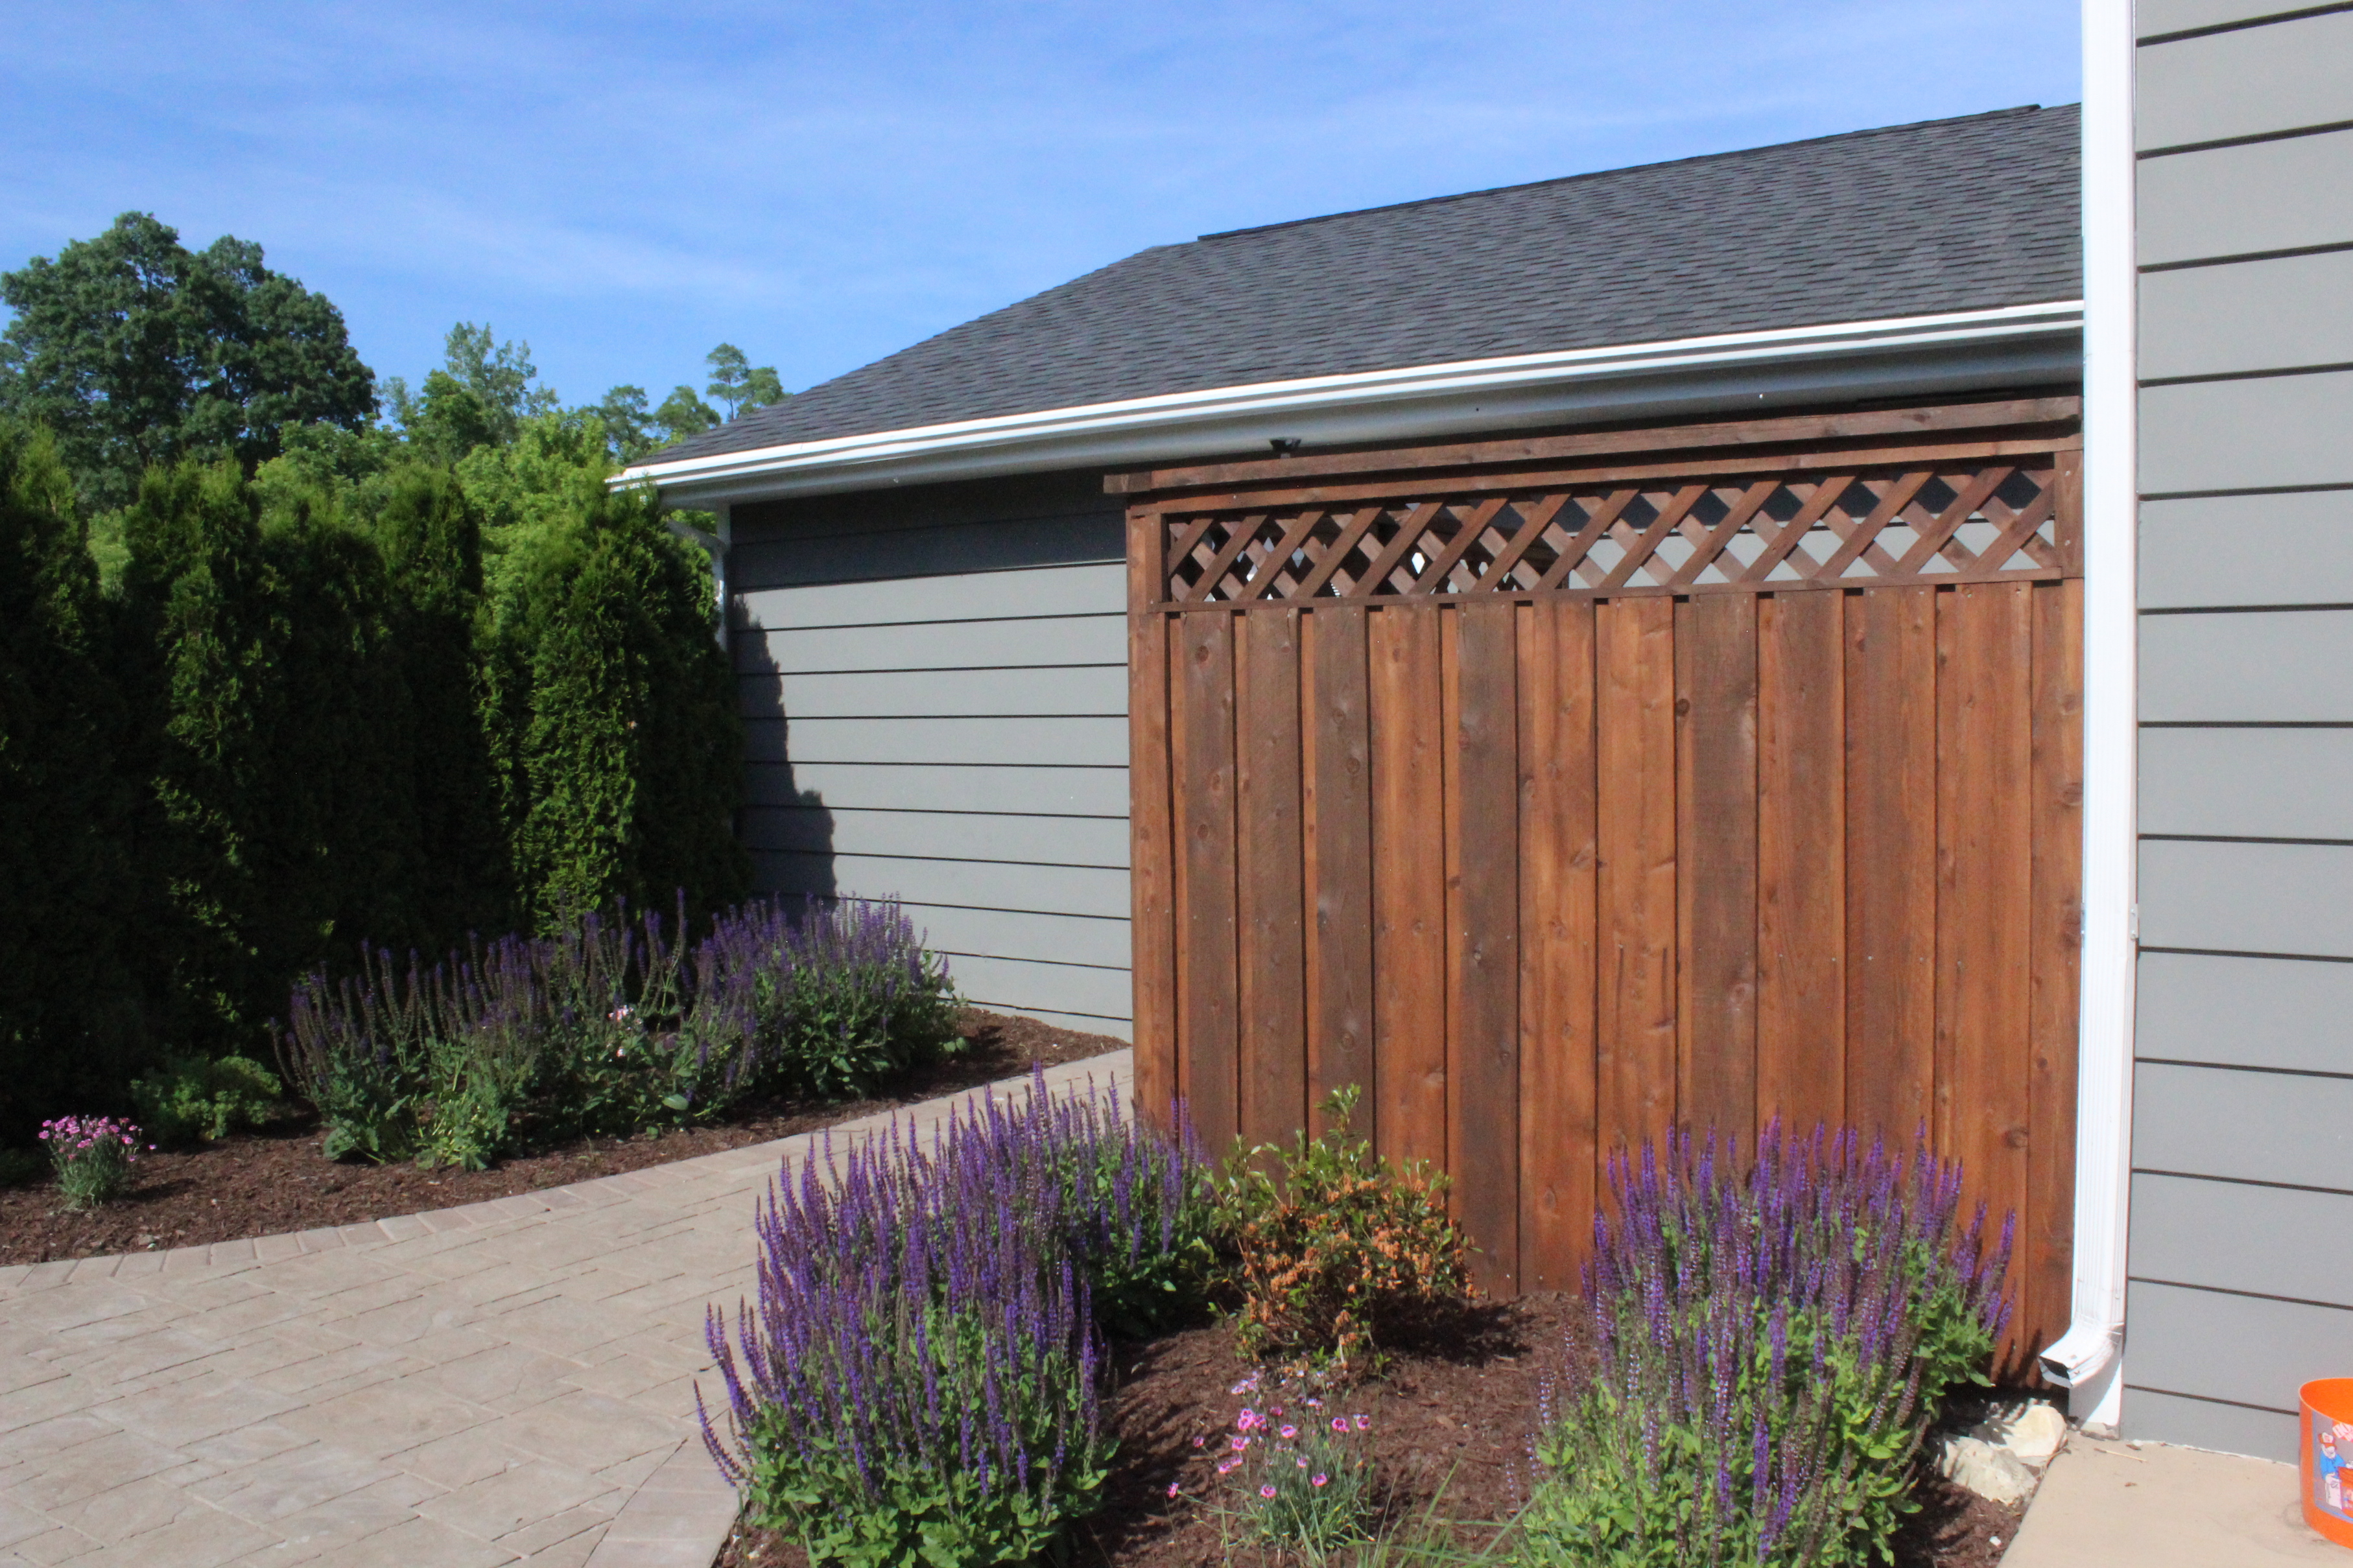
The deck, garbage enclosure and wood part of the fence were all stained the same color, which is a custom color mixing two Rymar Xtreme Weather colors (Hickory Bark and Sienna 50/50). This is supposed to be the best deck stain on the market and should last us many, many years.

Here’s a close up of the fence, which Ben built by mixing cedar railings and aluminum fence posts from Home Depot.

close up of fence

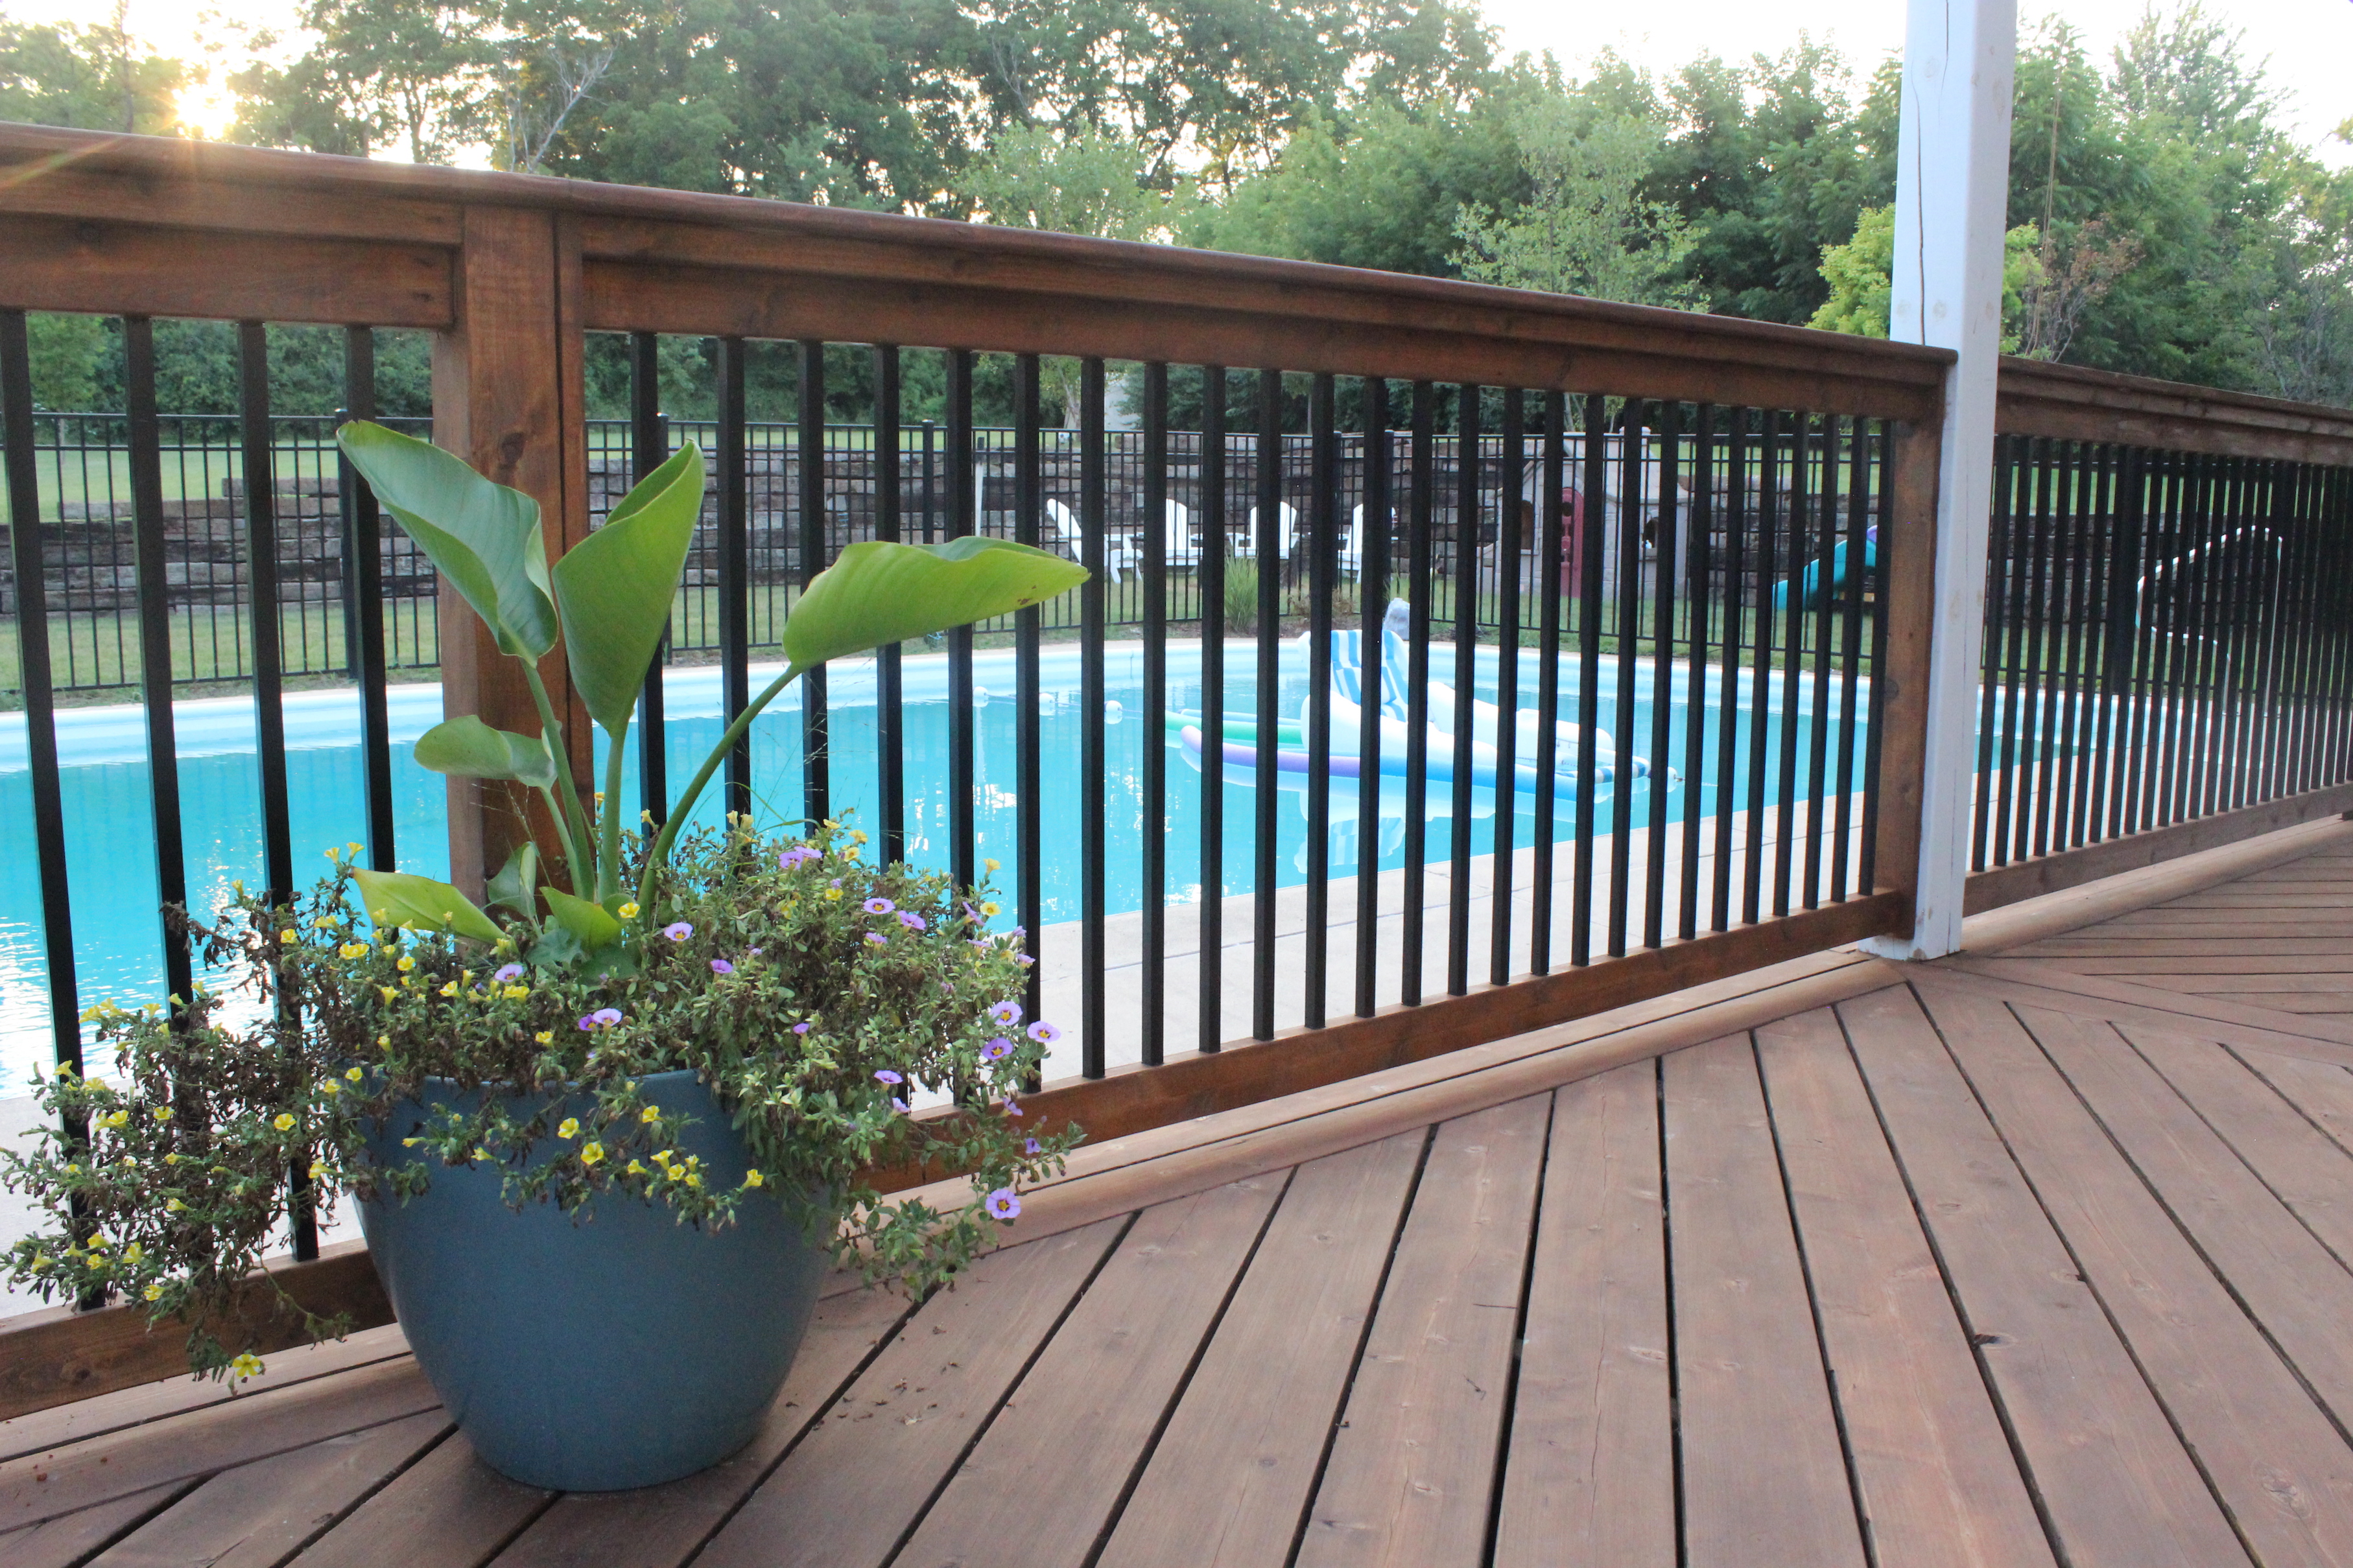
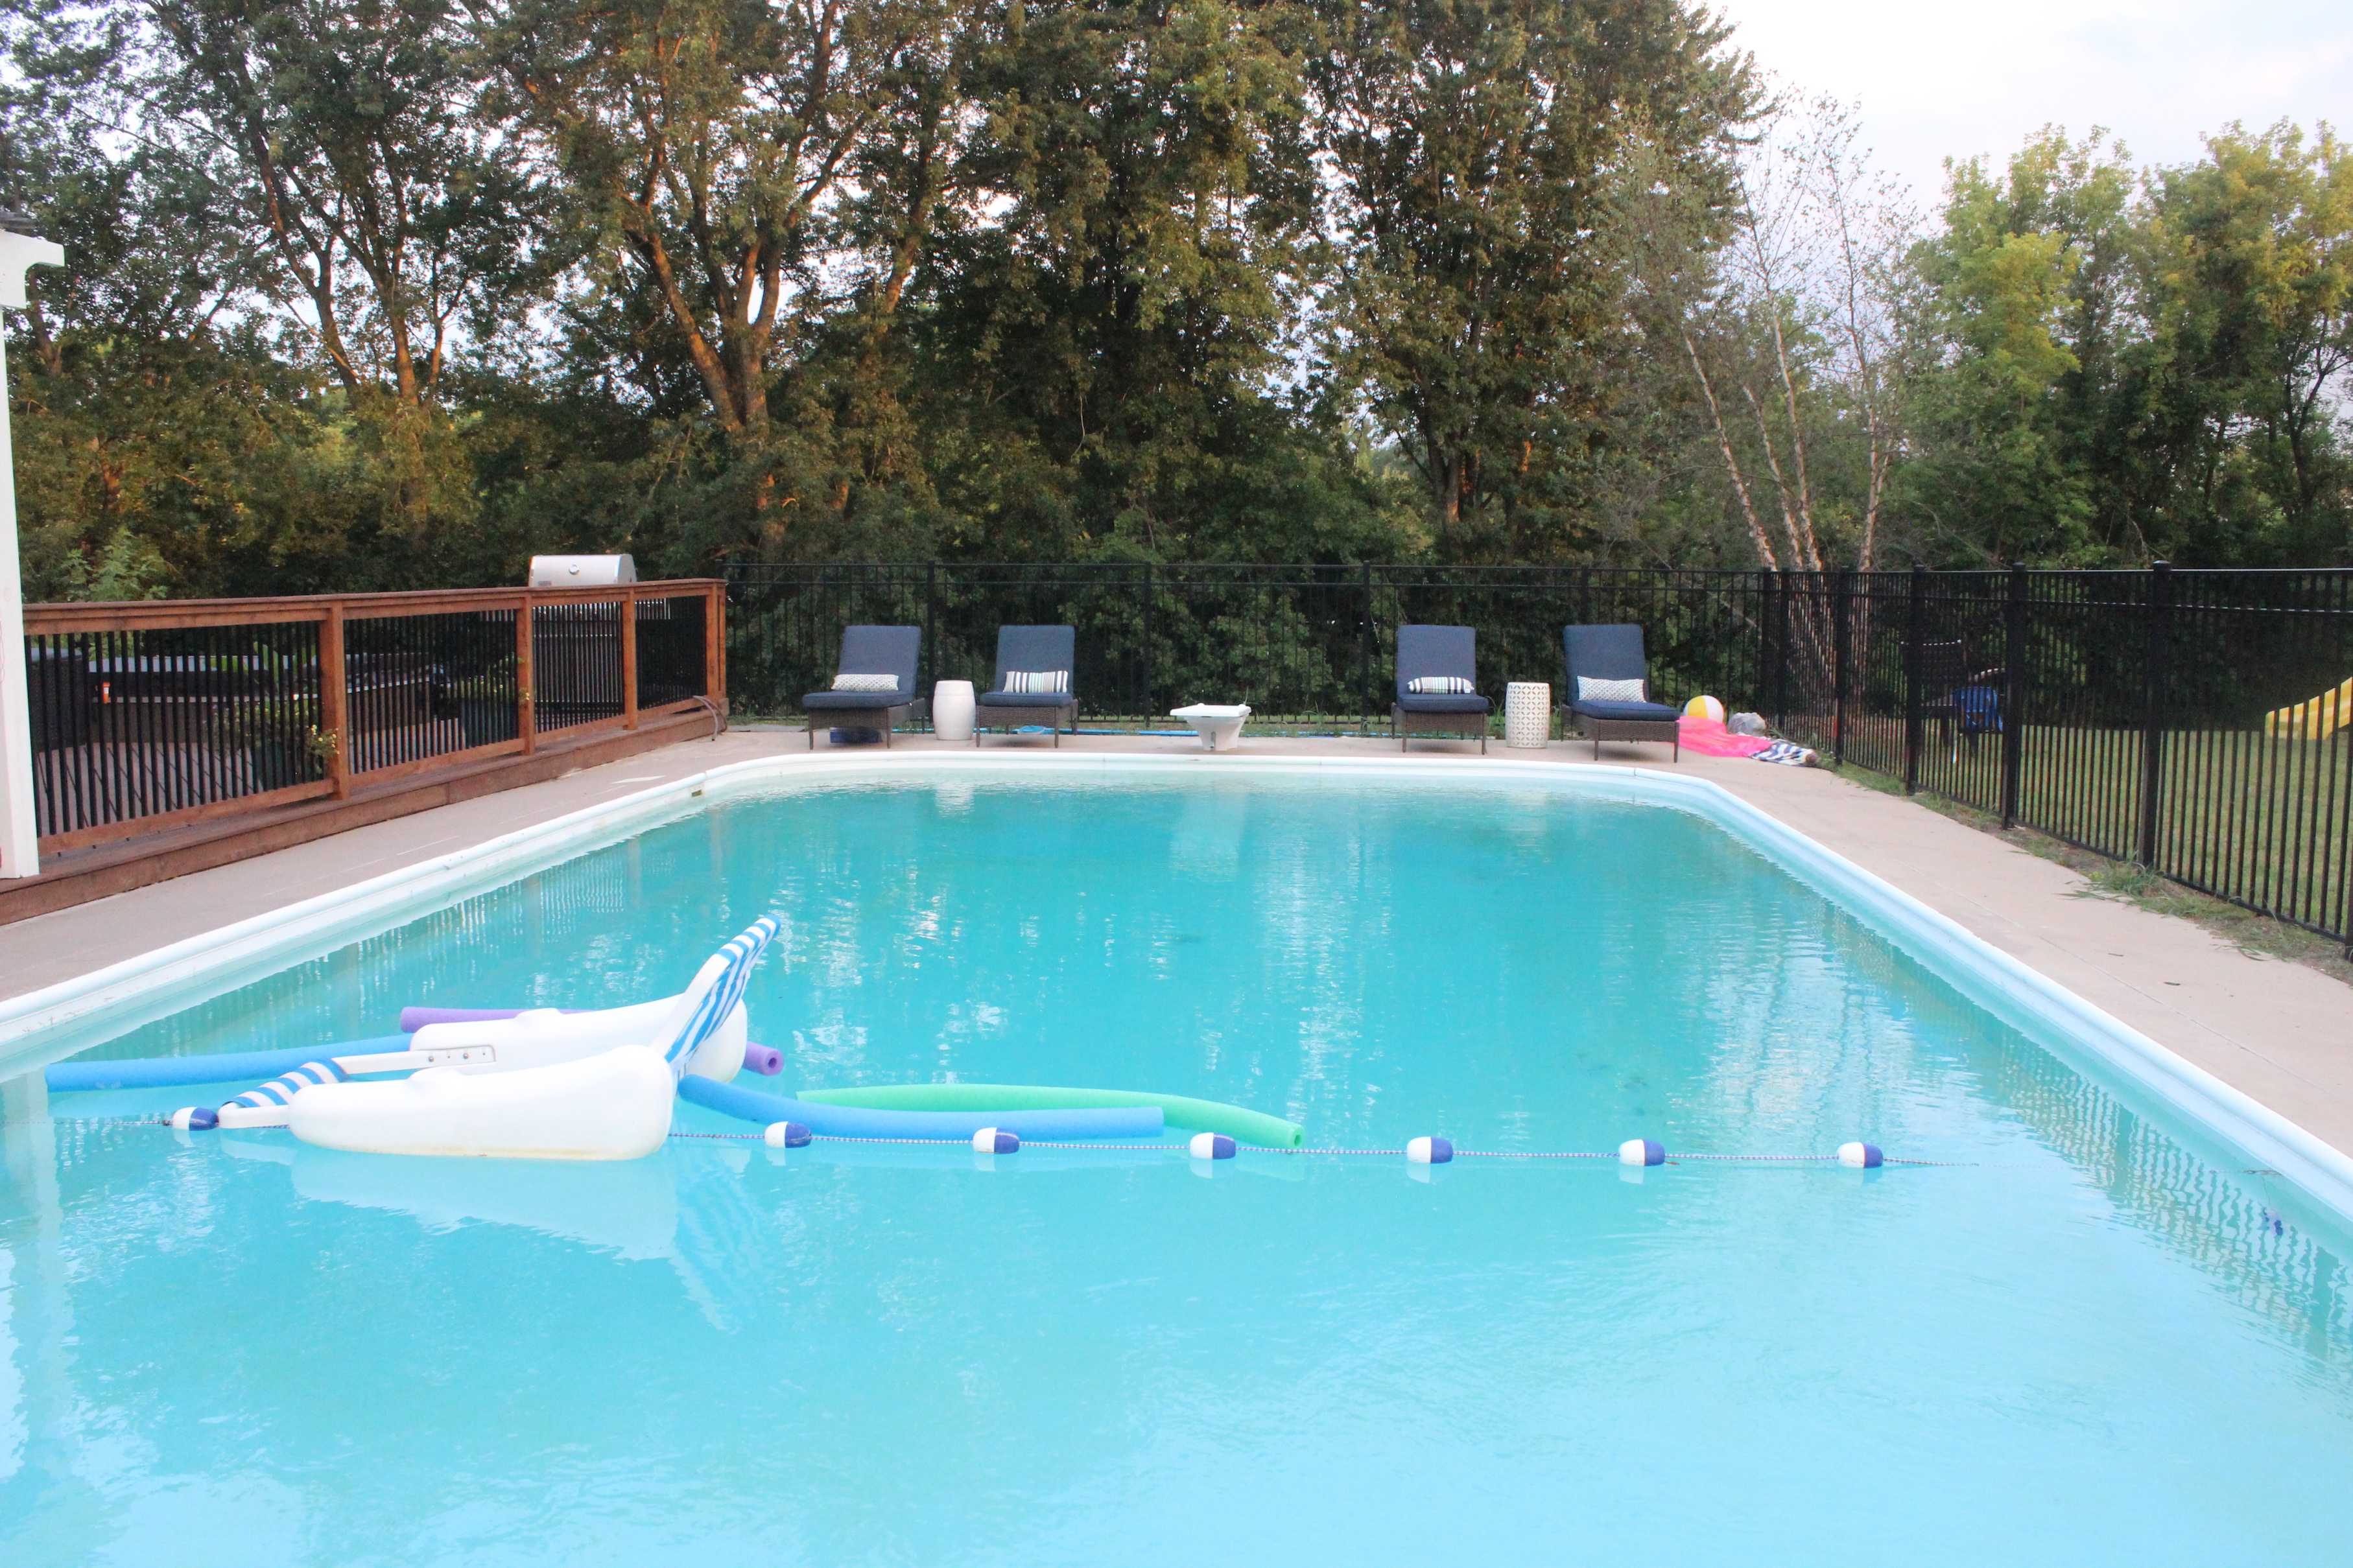
The plain aluminum part on the other three sides of the pool we hired a local company for.

IMG_5894

view from diving board across pool

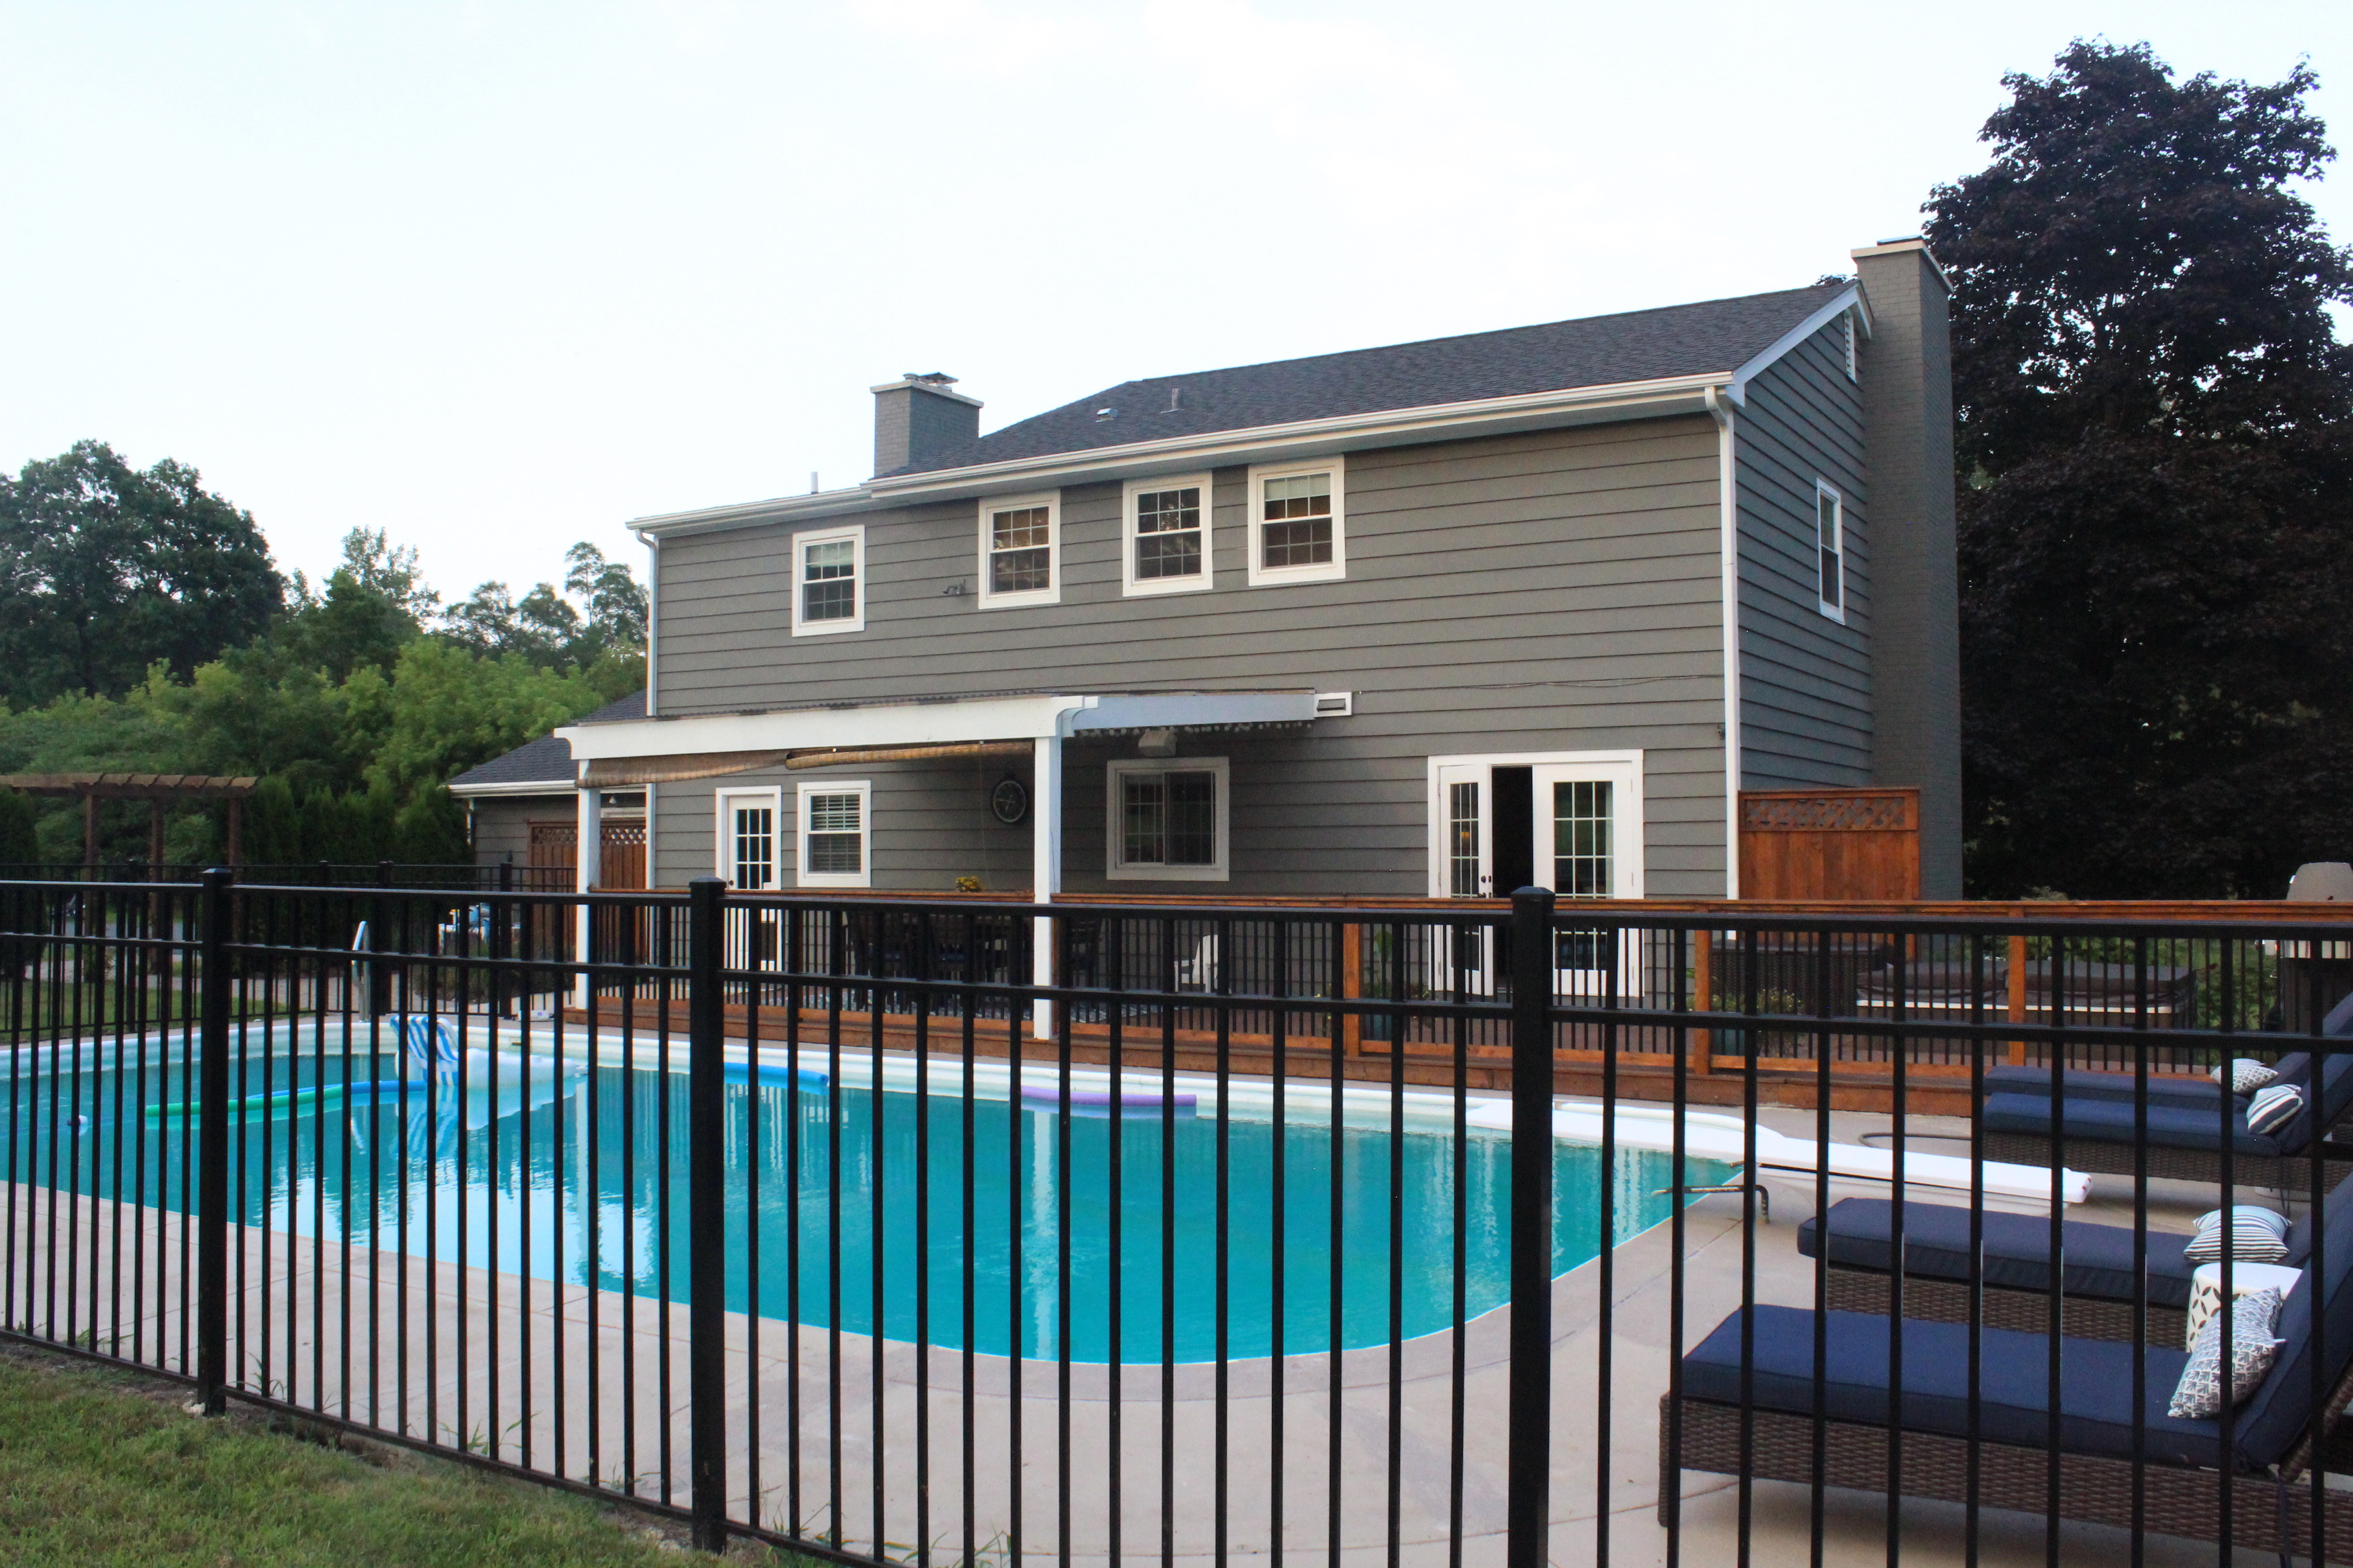
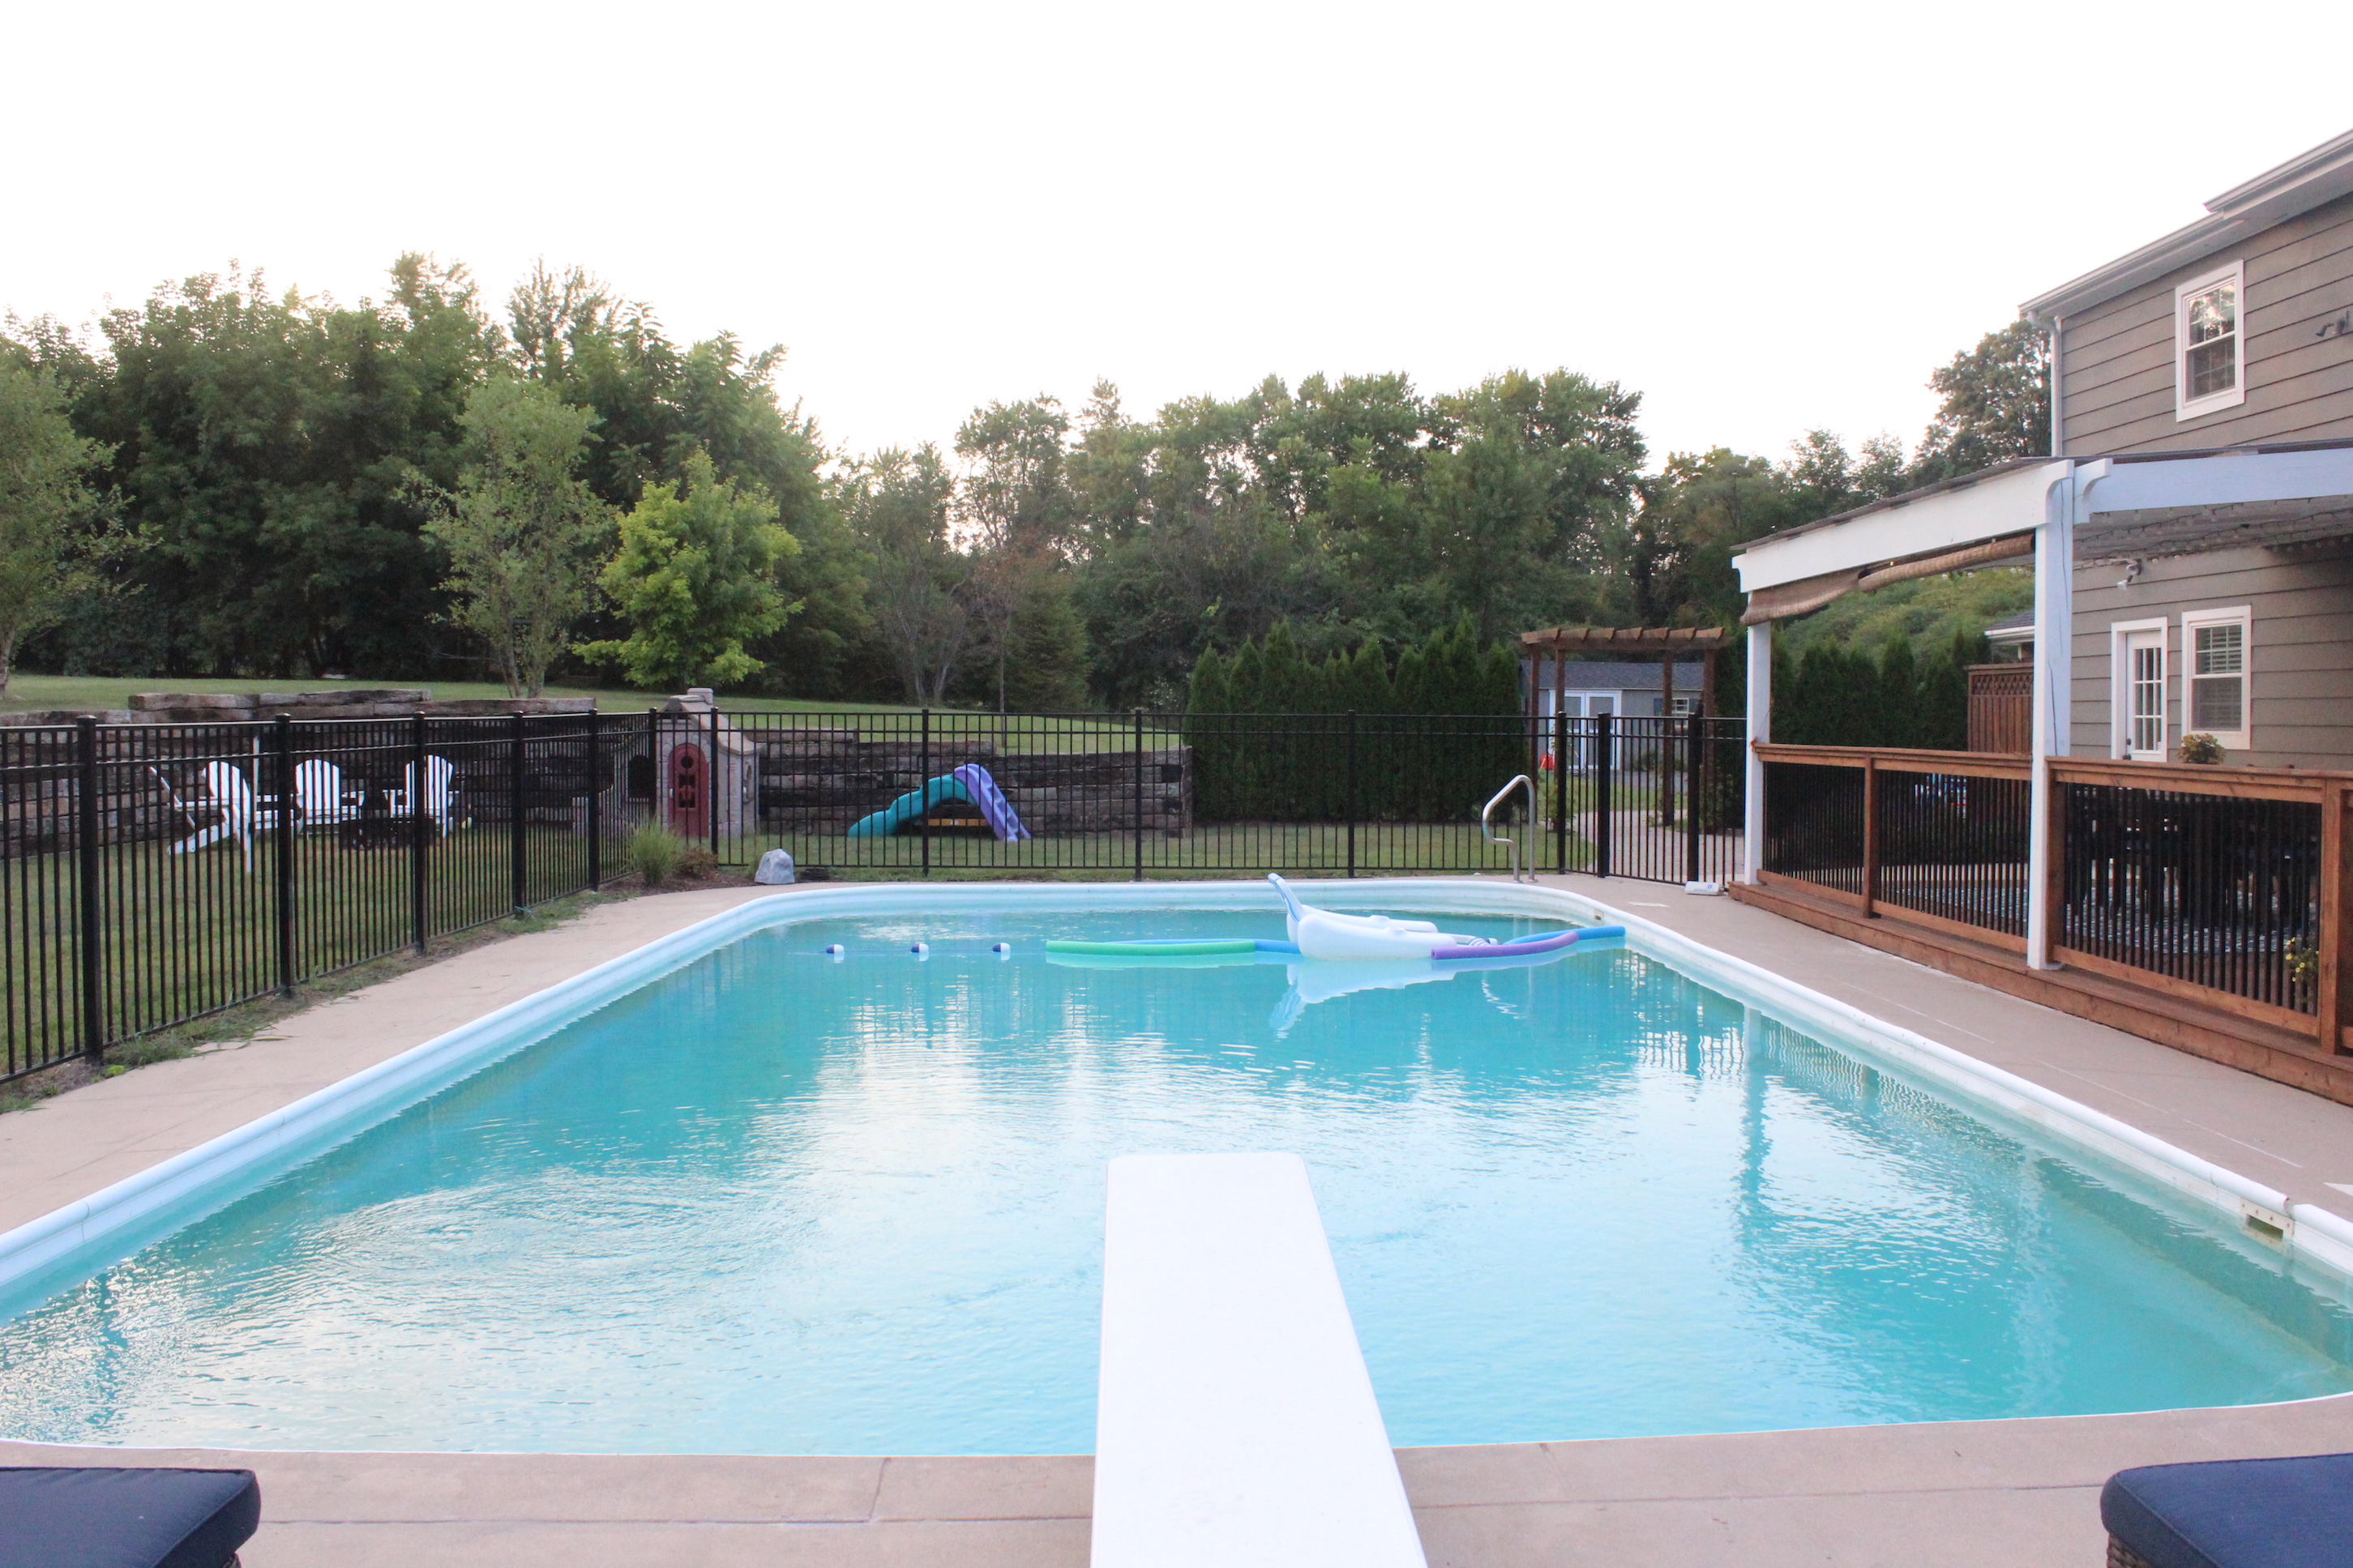
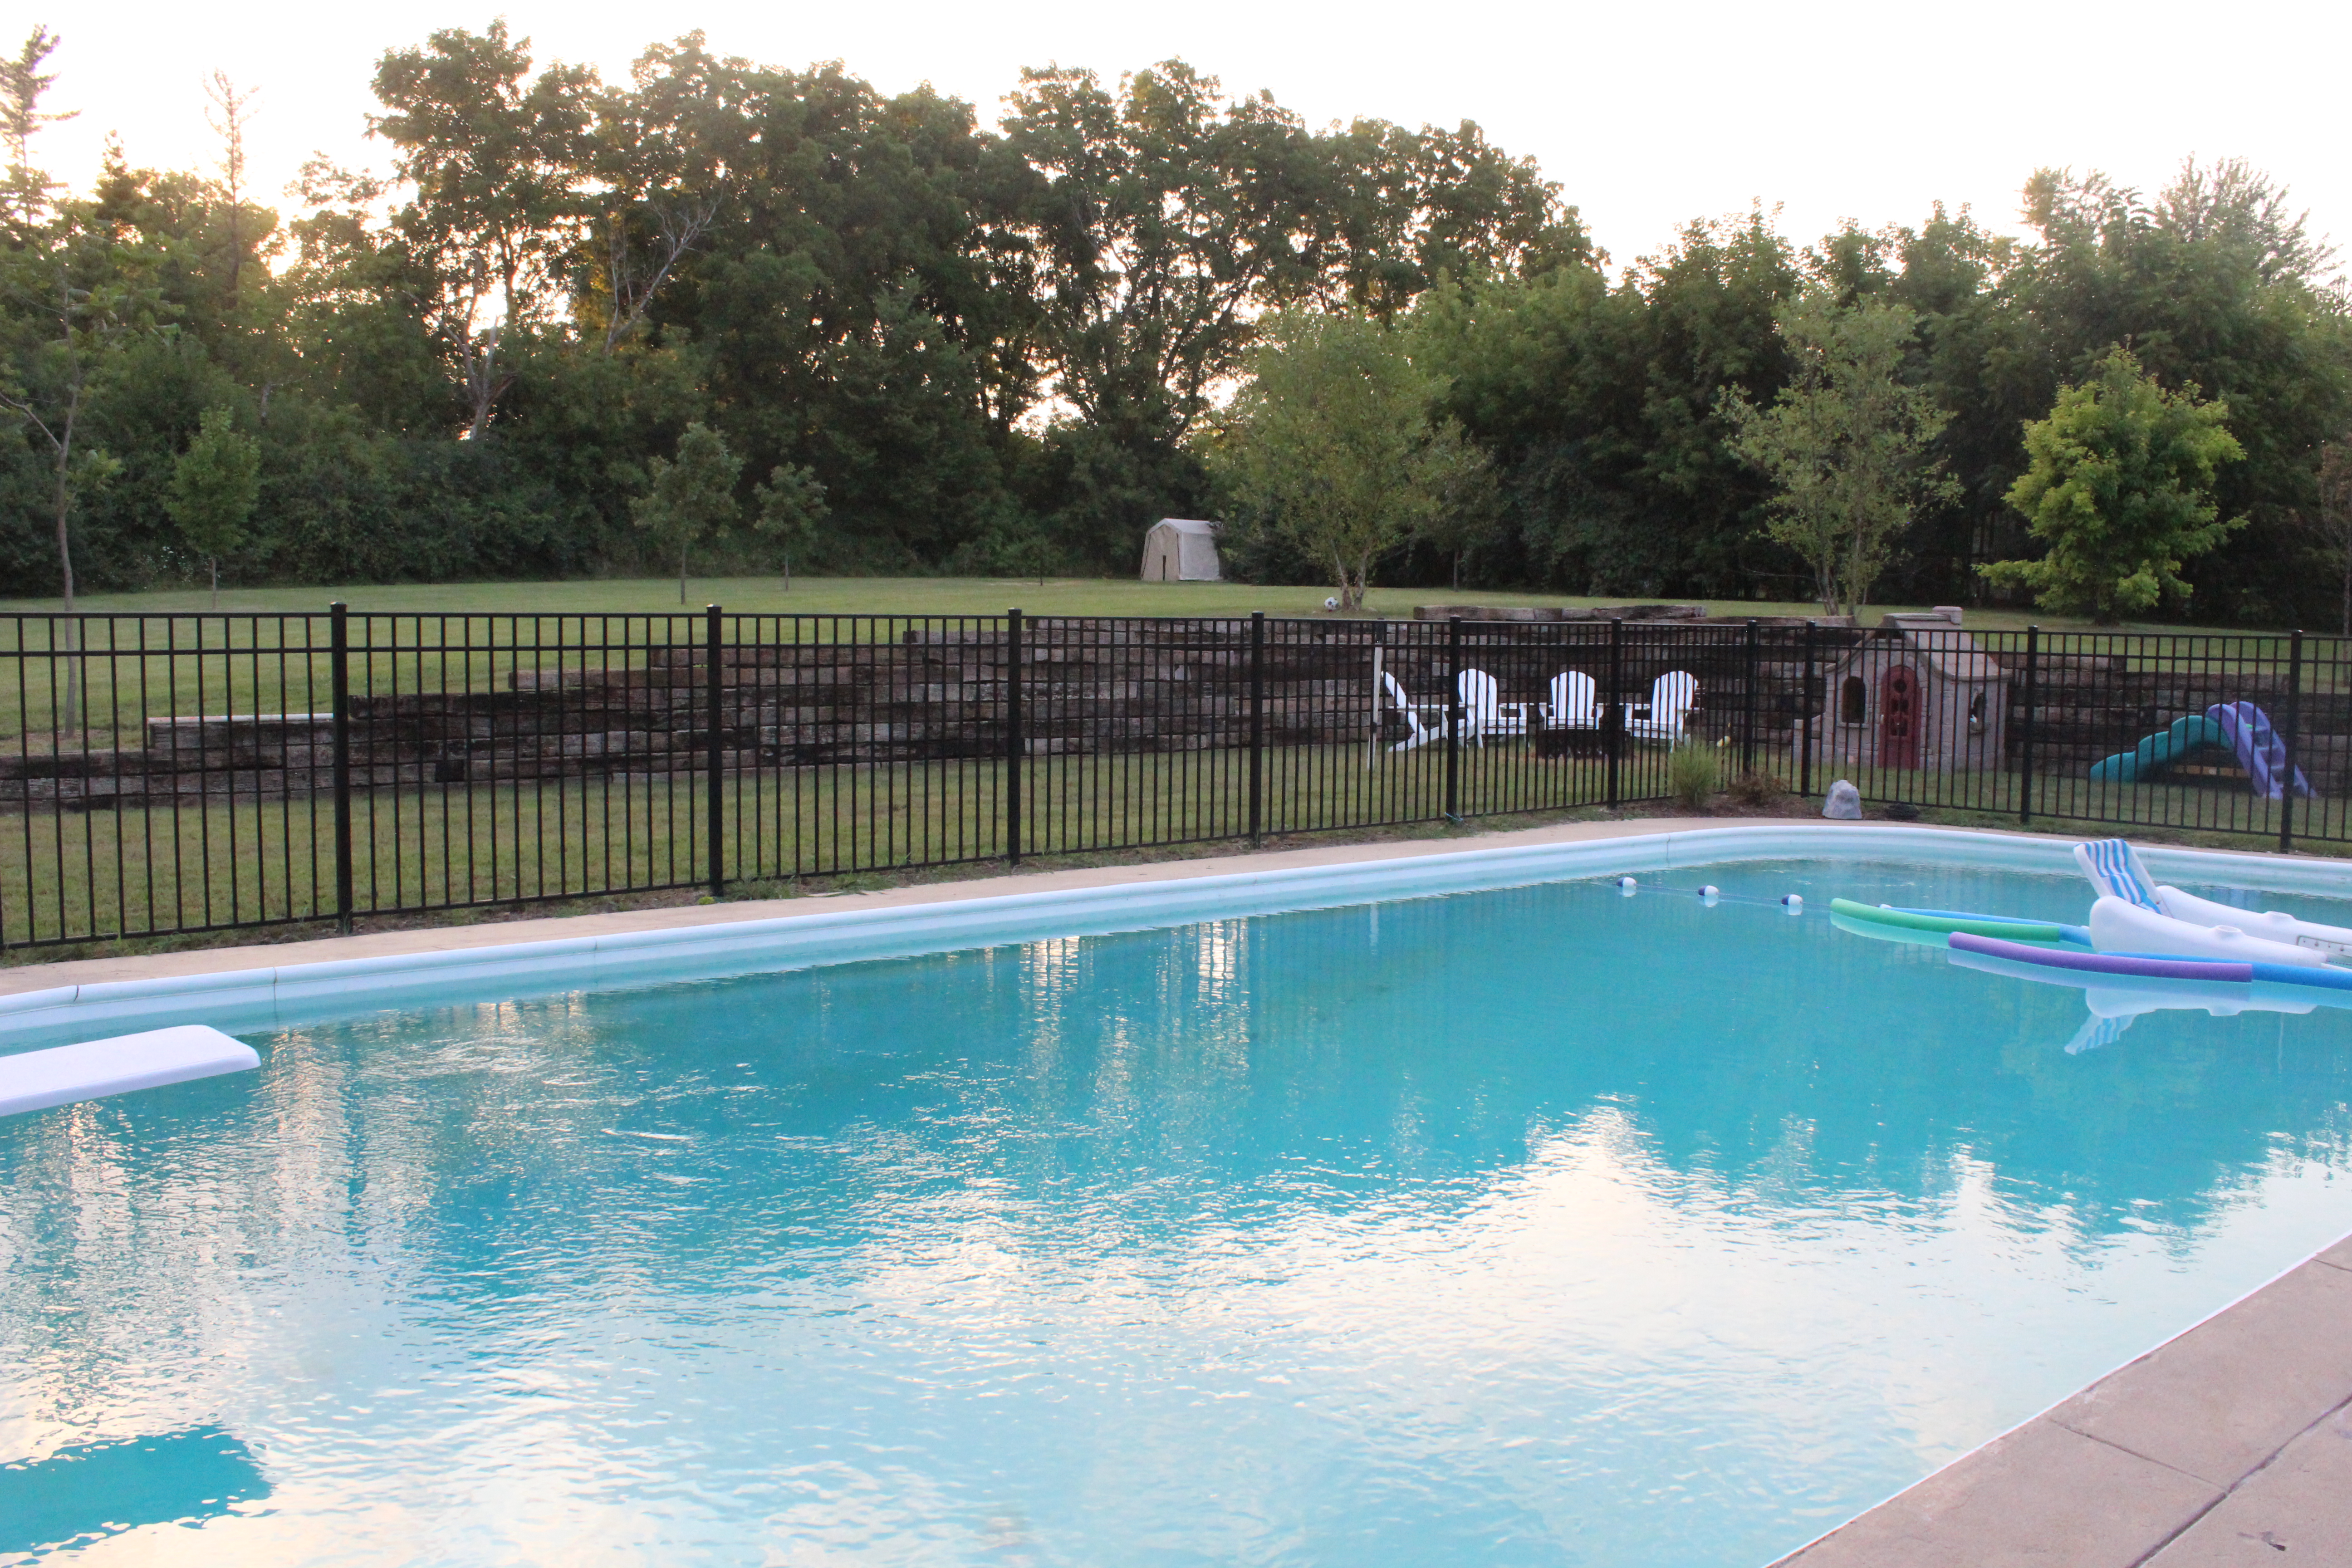
Here’s a view of the other side of the pool, and a close up of our new chaise lounges from Target (found here in 6 colors) and a new diving board.

pool long toward chairs

Target chaise loungers

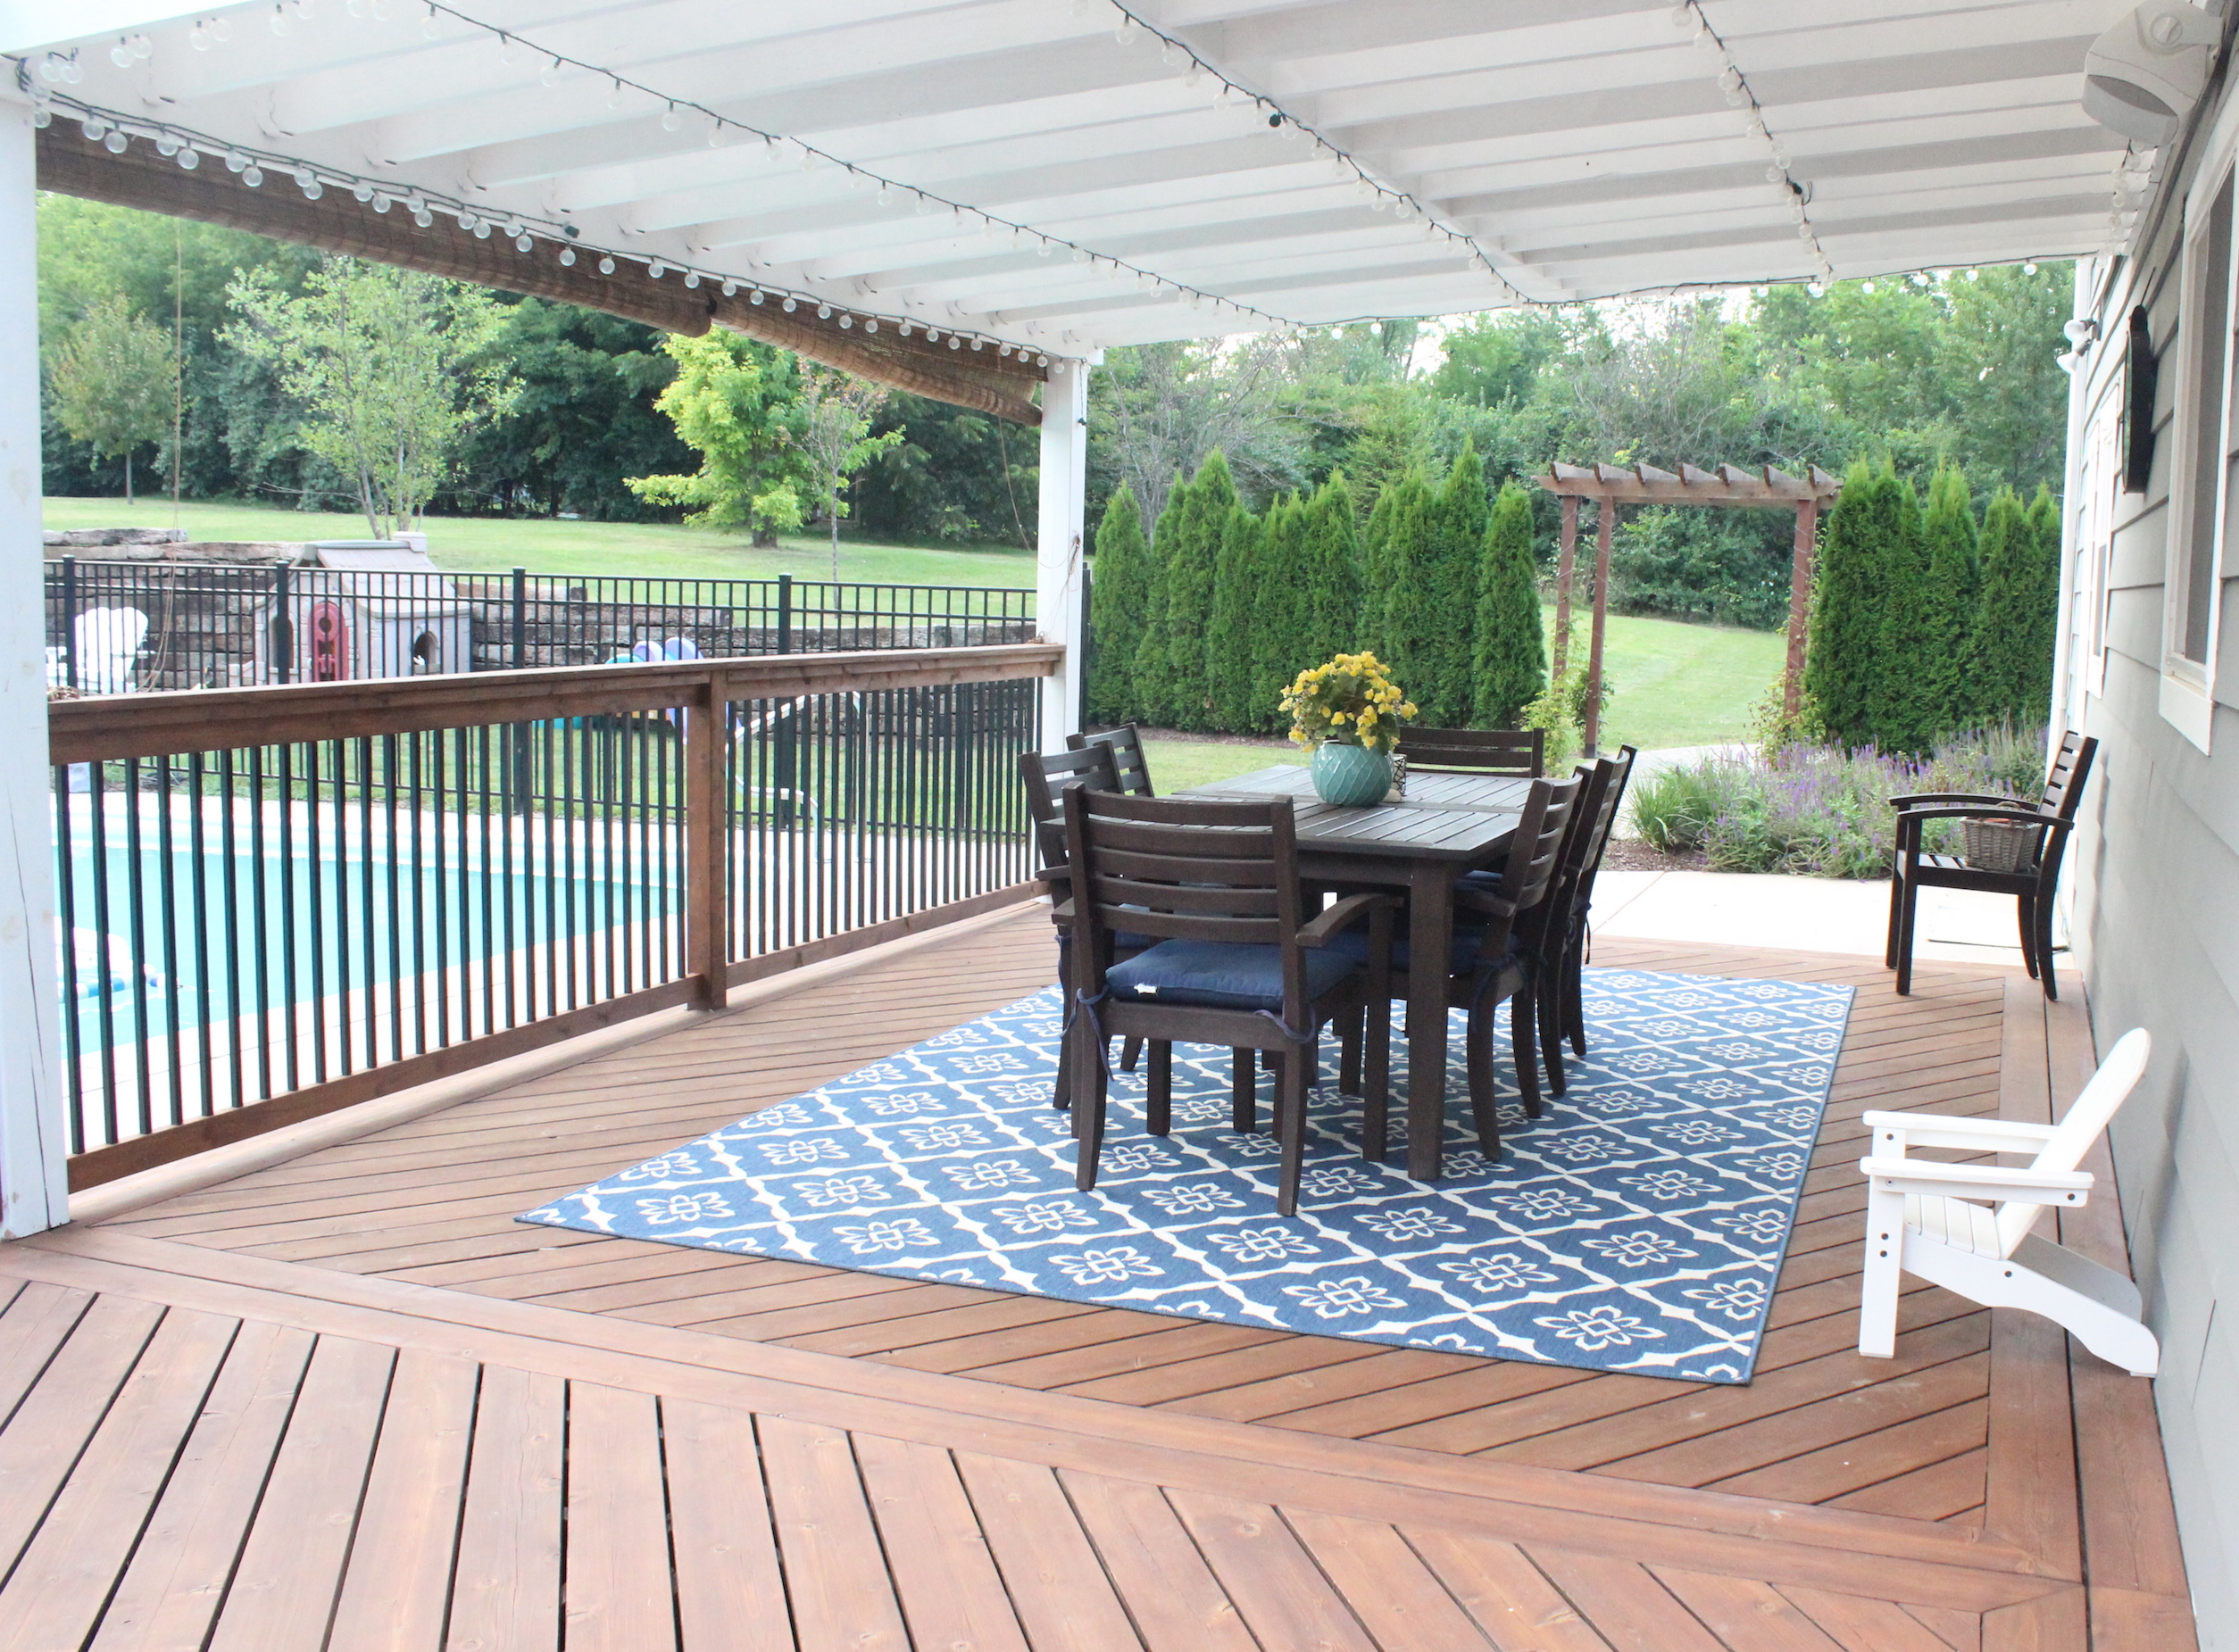
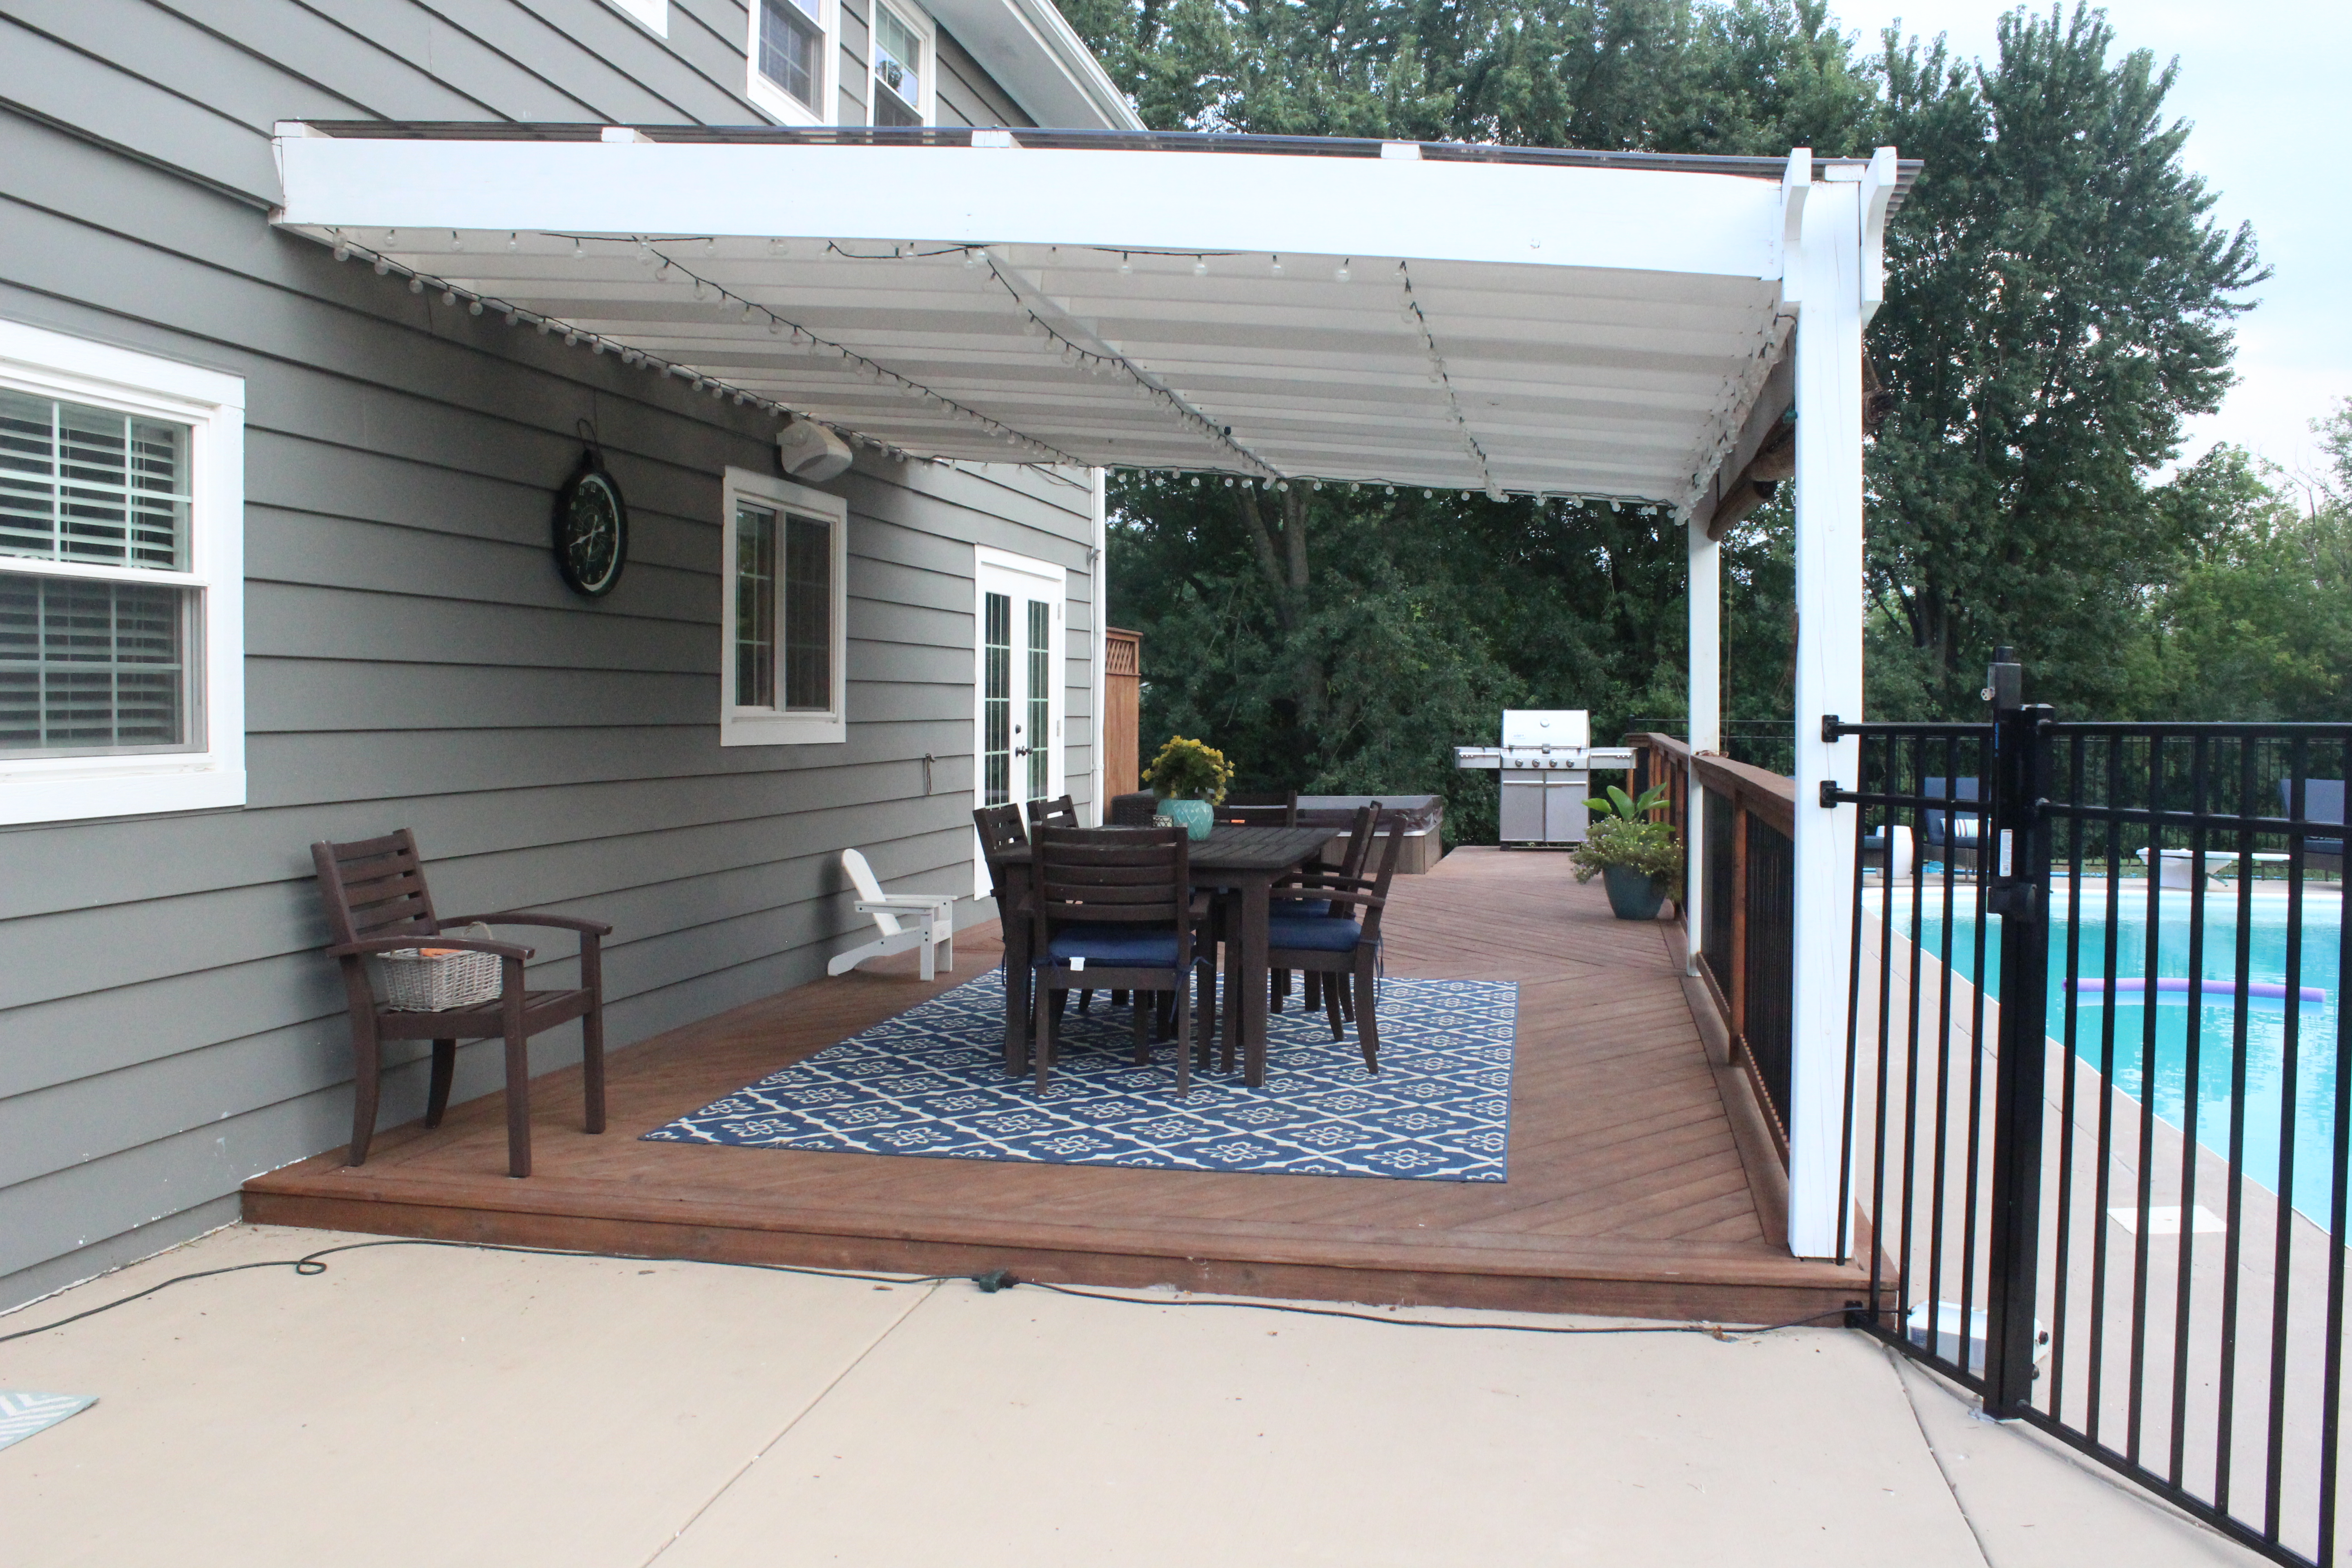
Ben also built a pergola over the back deck which provides much needed shade in the afternoon.

back deck

We strung up cafe lights under the pergola (similar here) which provide the perfect amount of ambiance in the evenings.

string lights on pergola

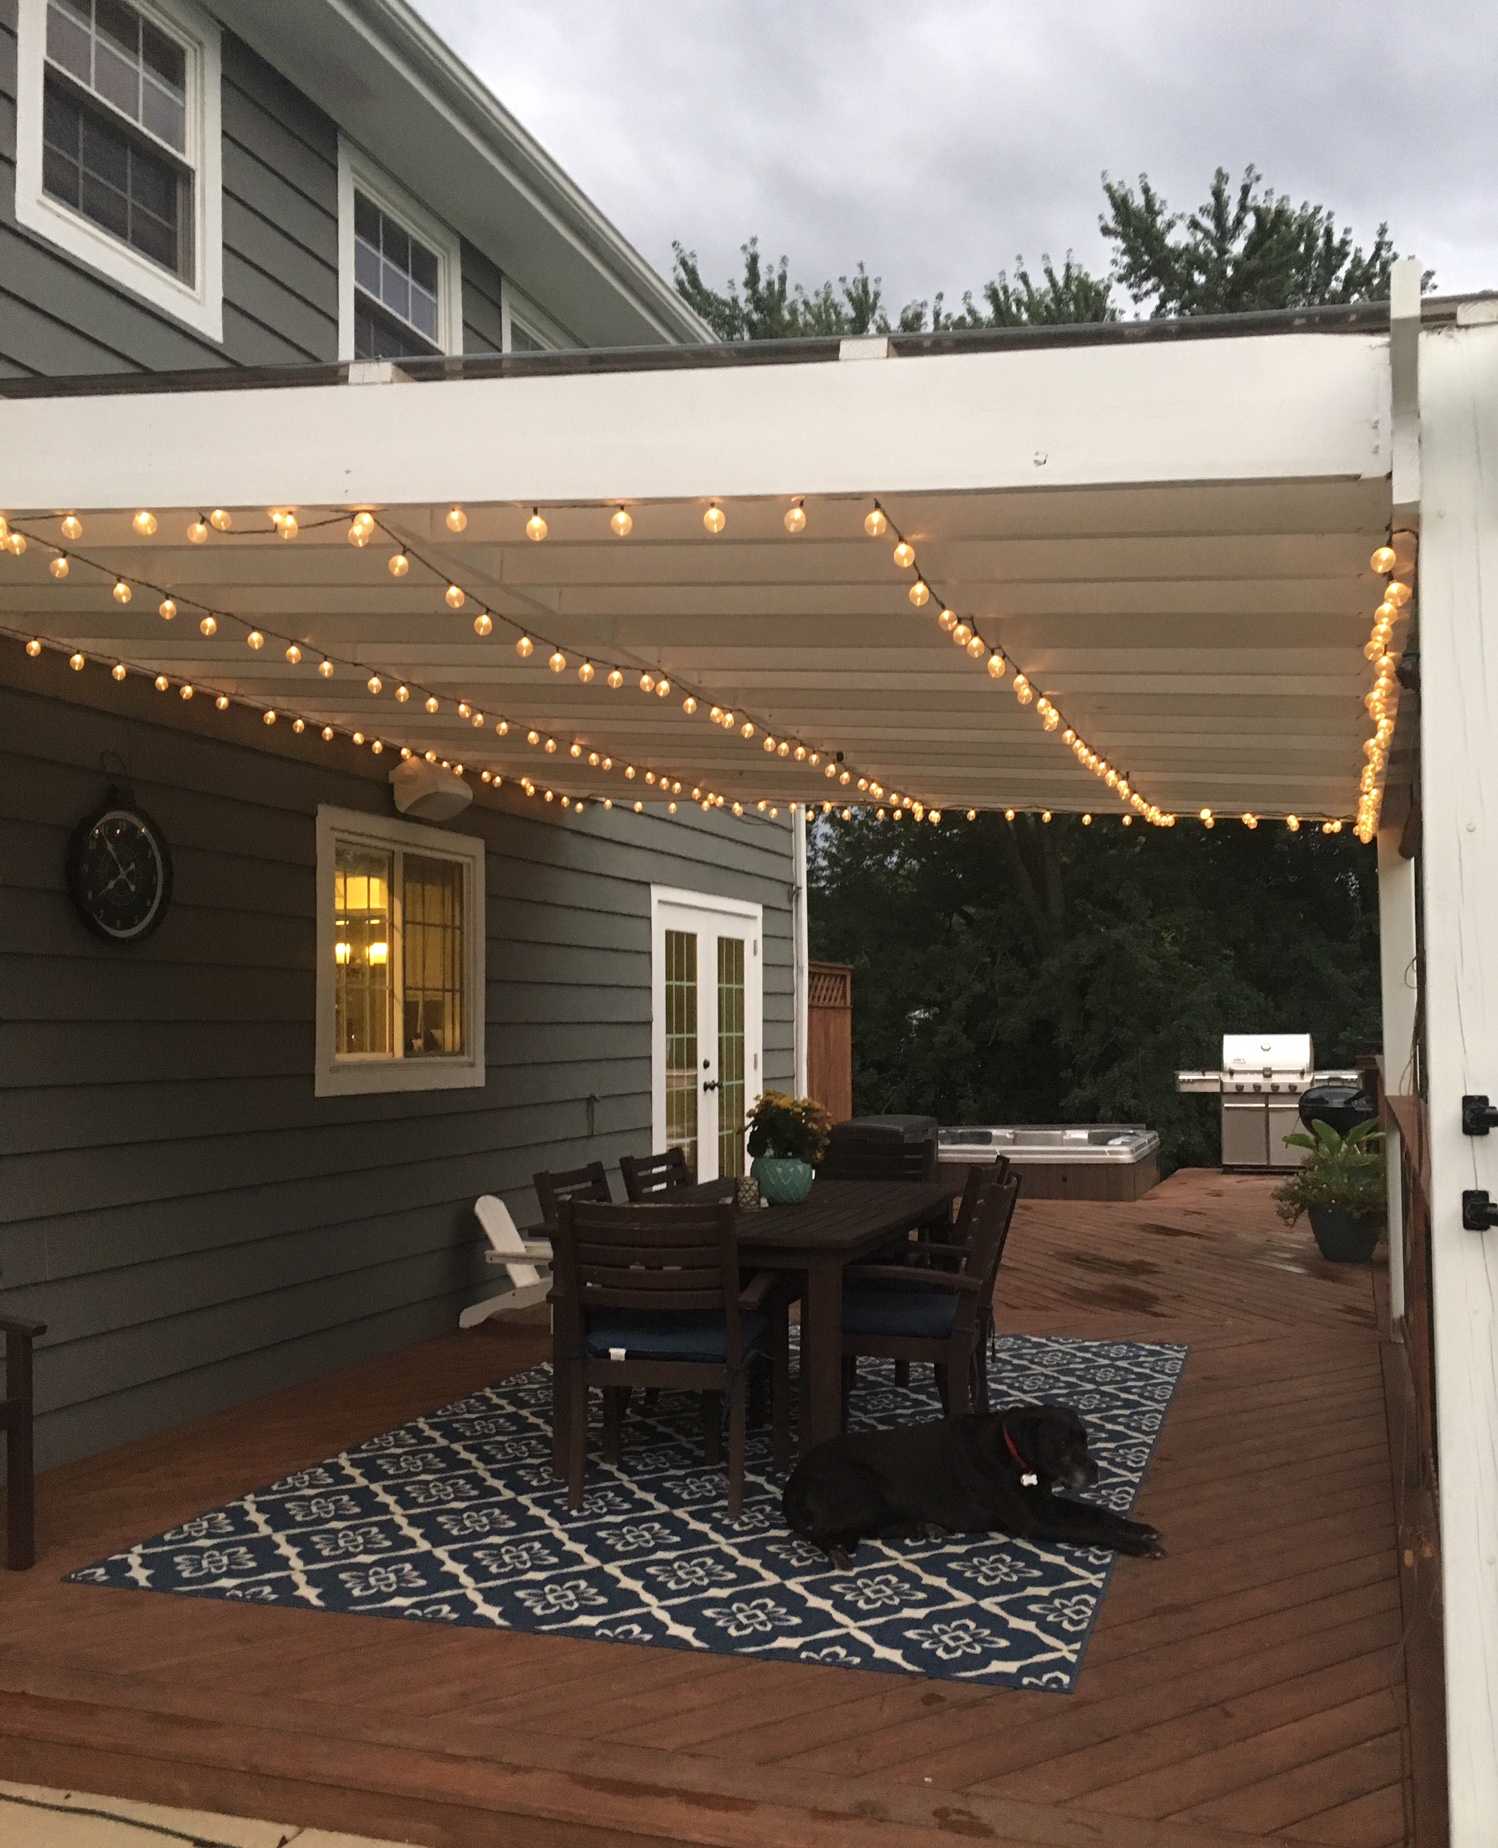
Our outdoor table is from Pottery Barn five or so years ago (similar one here). It was starting to get weathered, so we gave it a quick coat of stain and now it looks as good as new.

pottery barn table

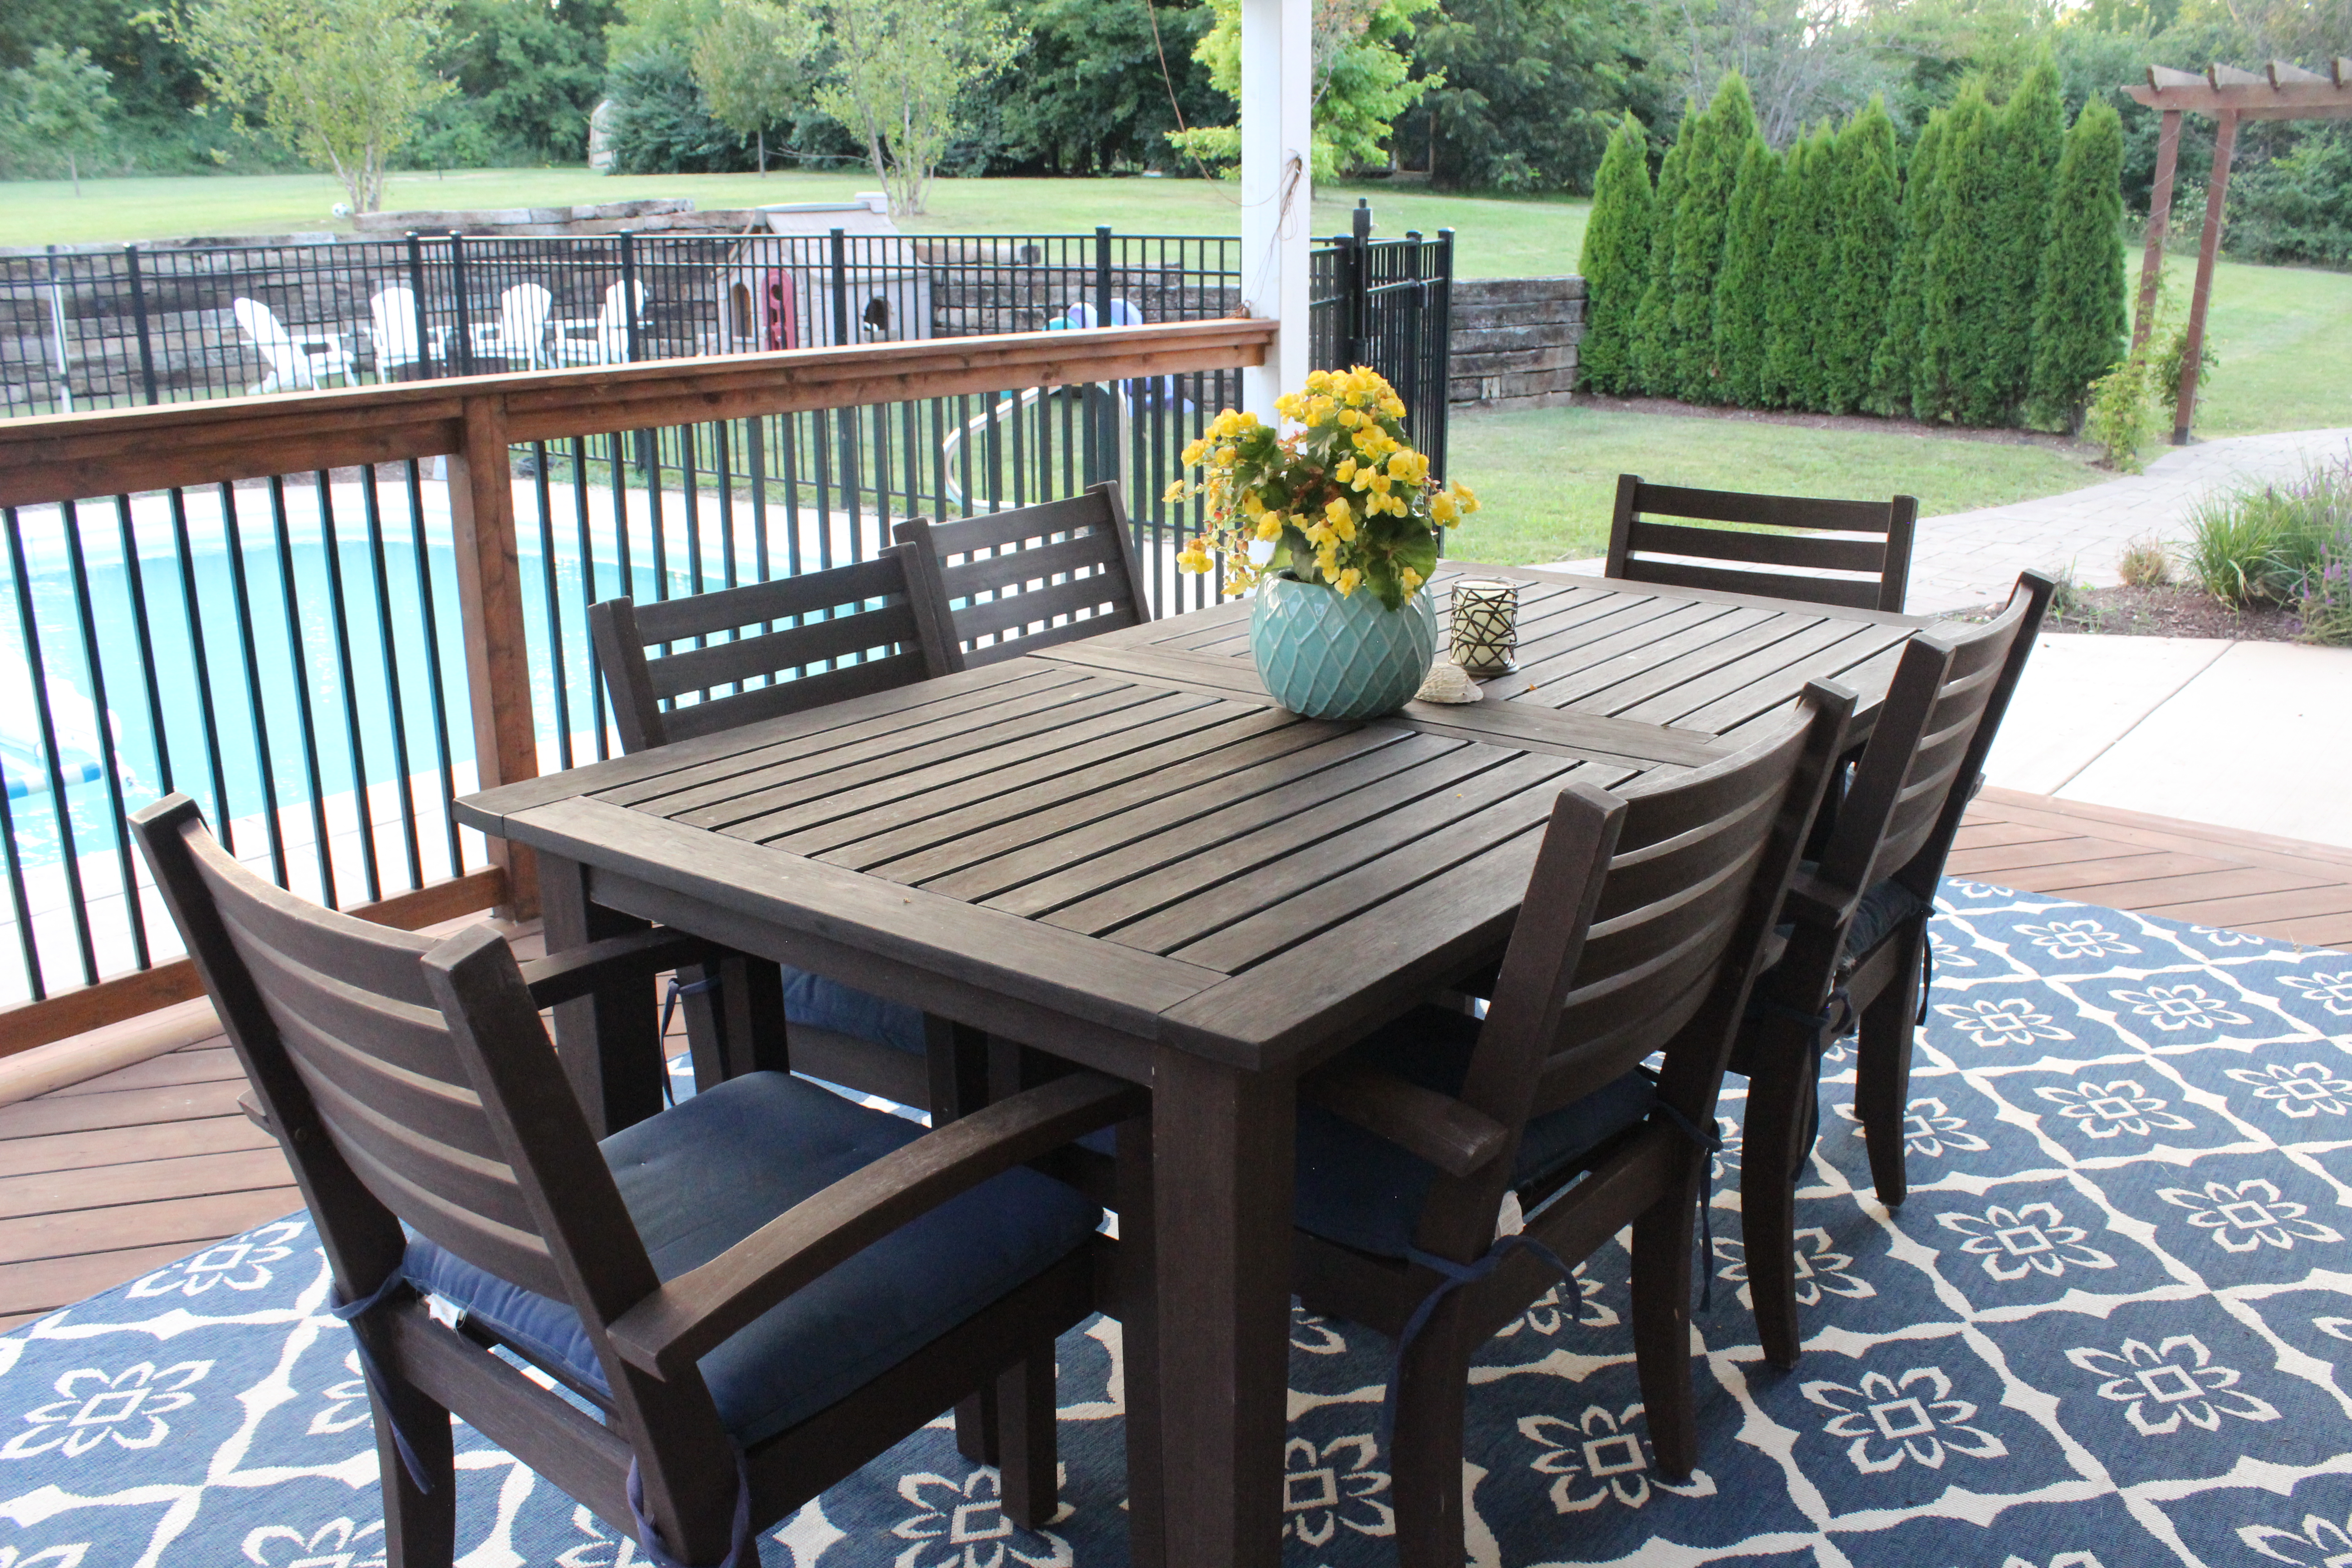
The outdoor rug I purchased this year from Home Decorators (found here).

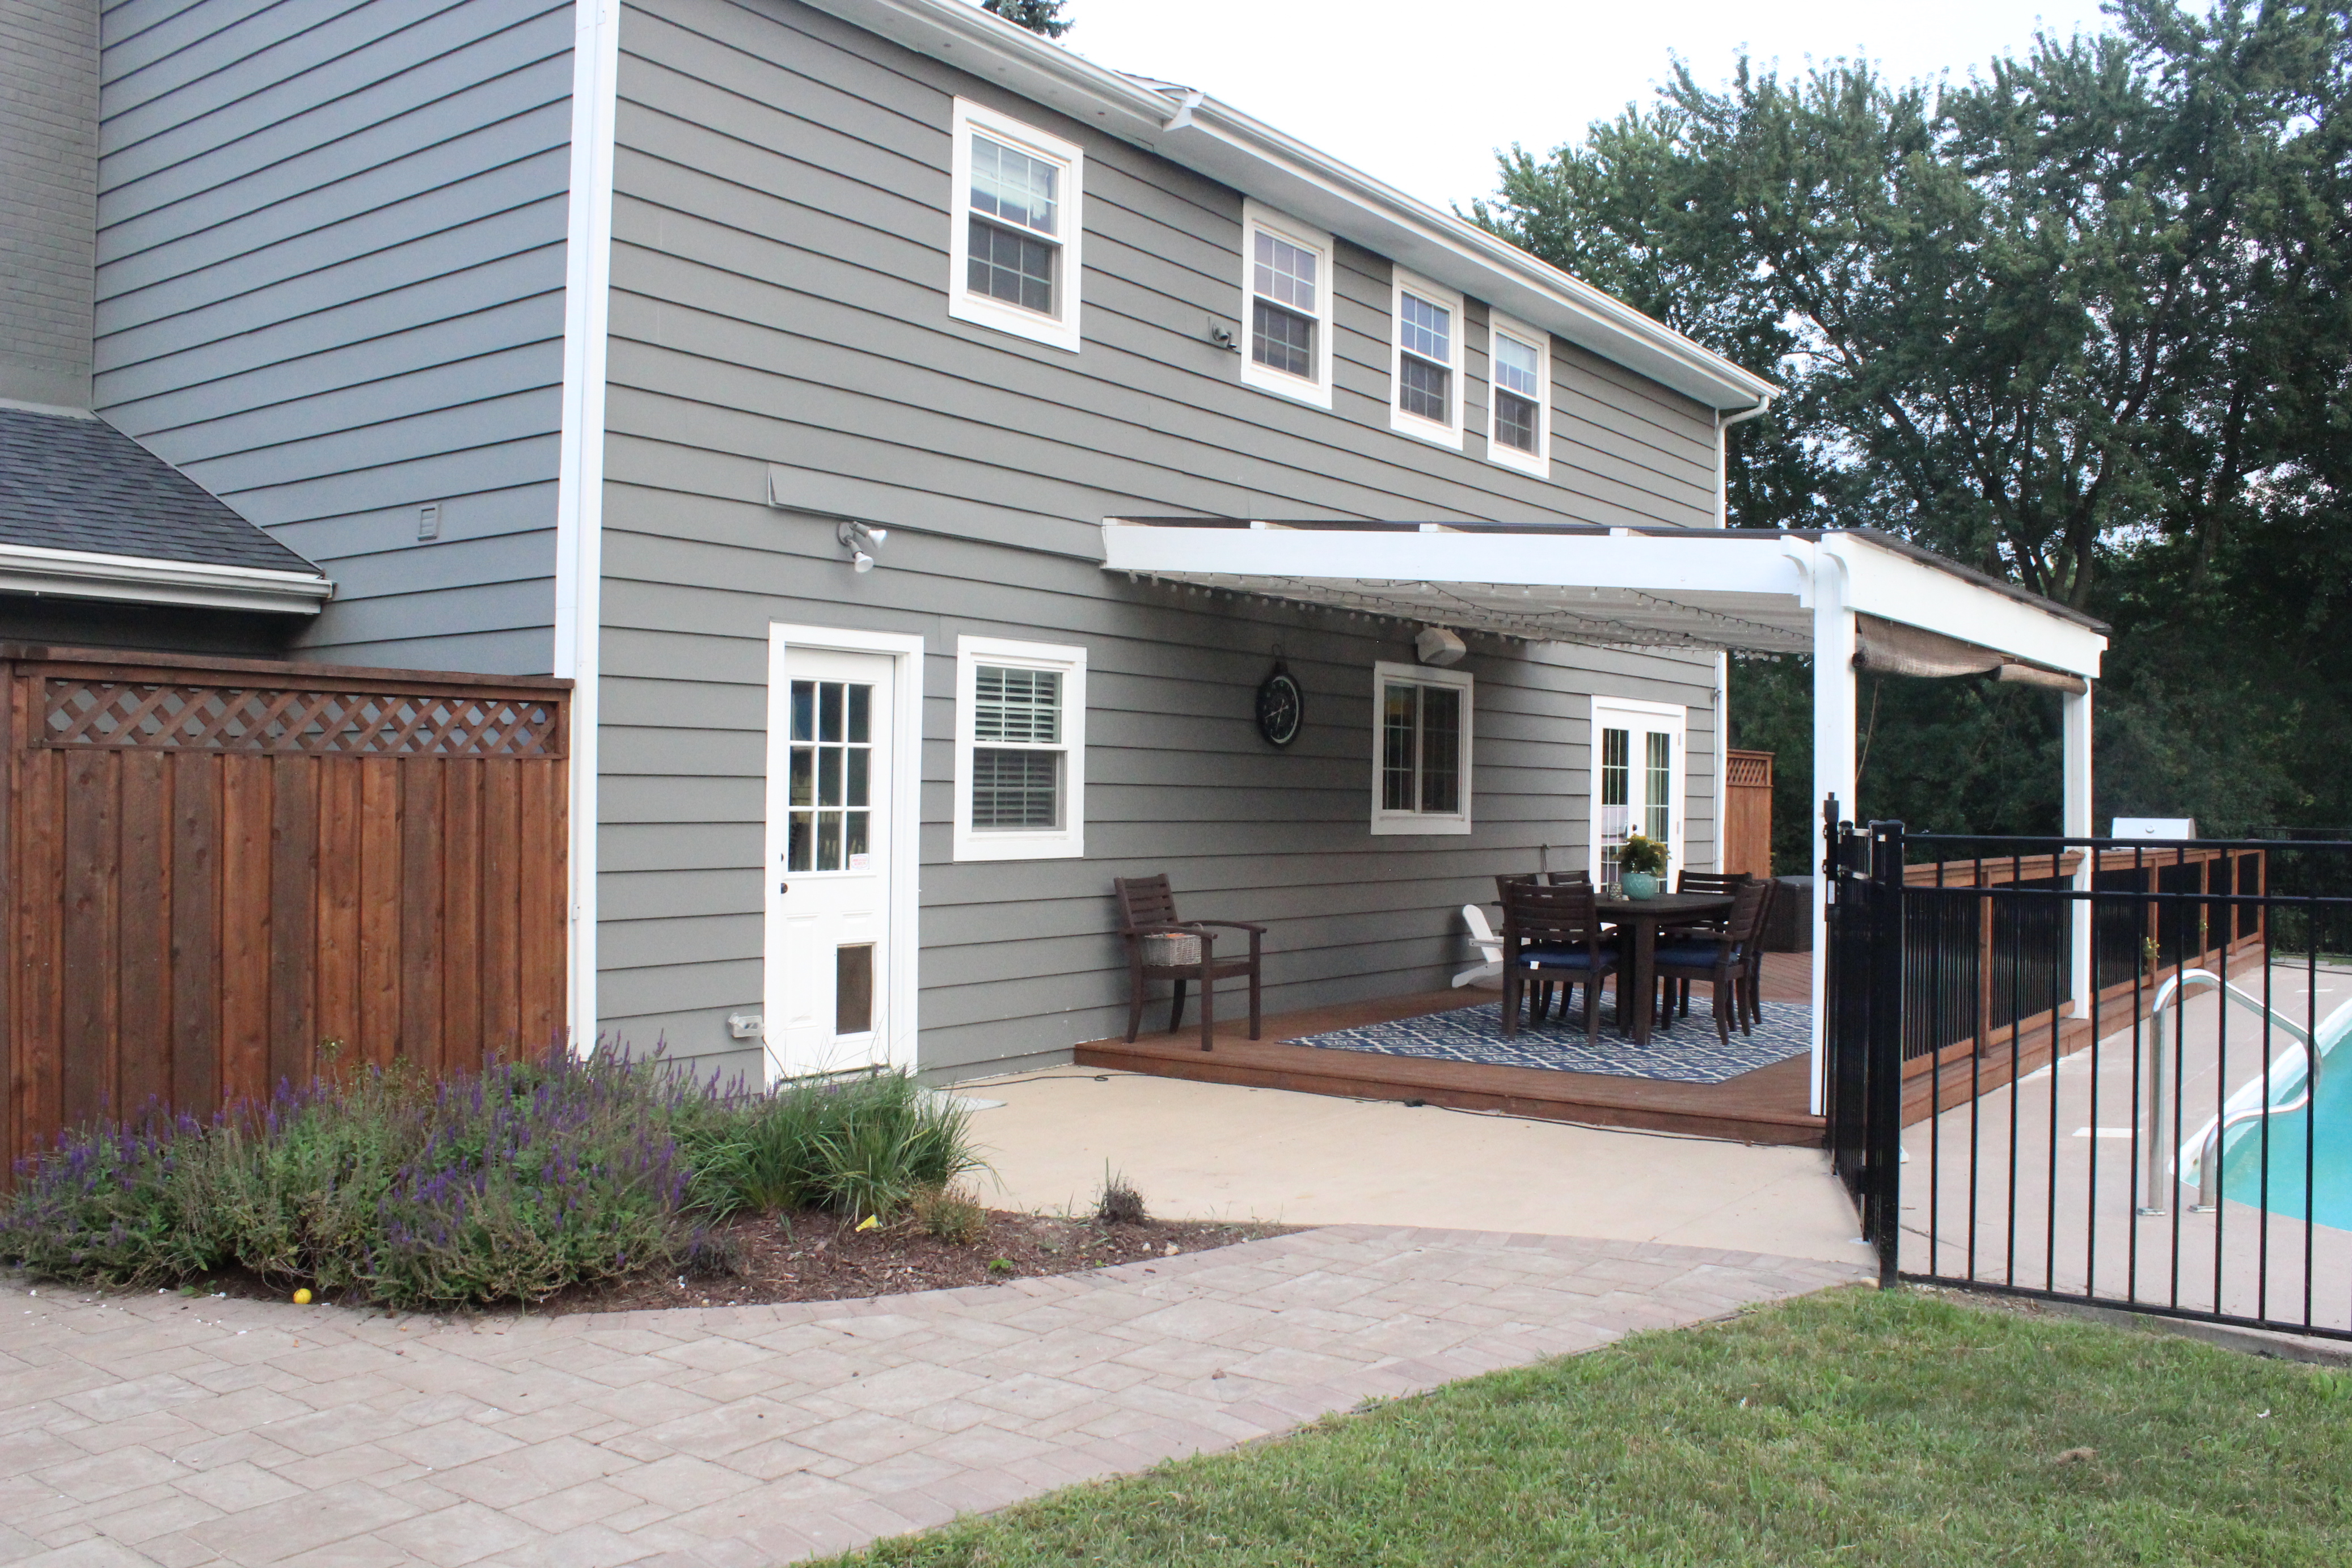
On the other side of the deck is our hot tub, grill and deck box (from Lowe’s here) for pool toy storage. 
IMG_5893

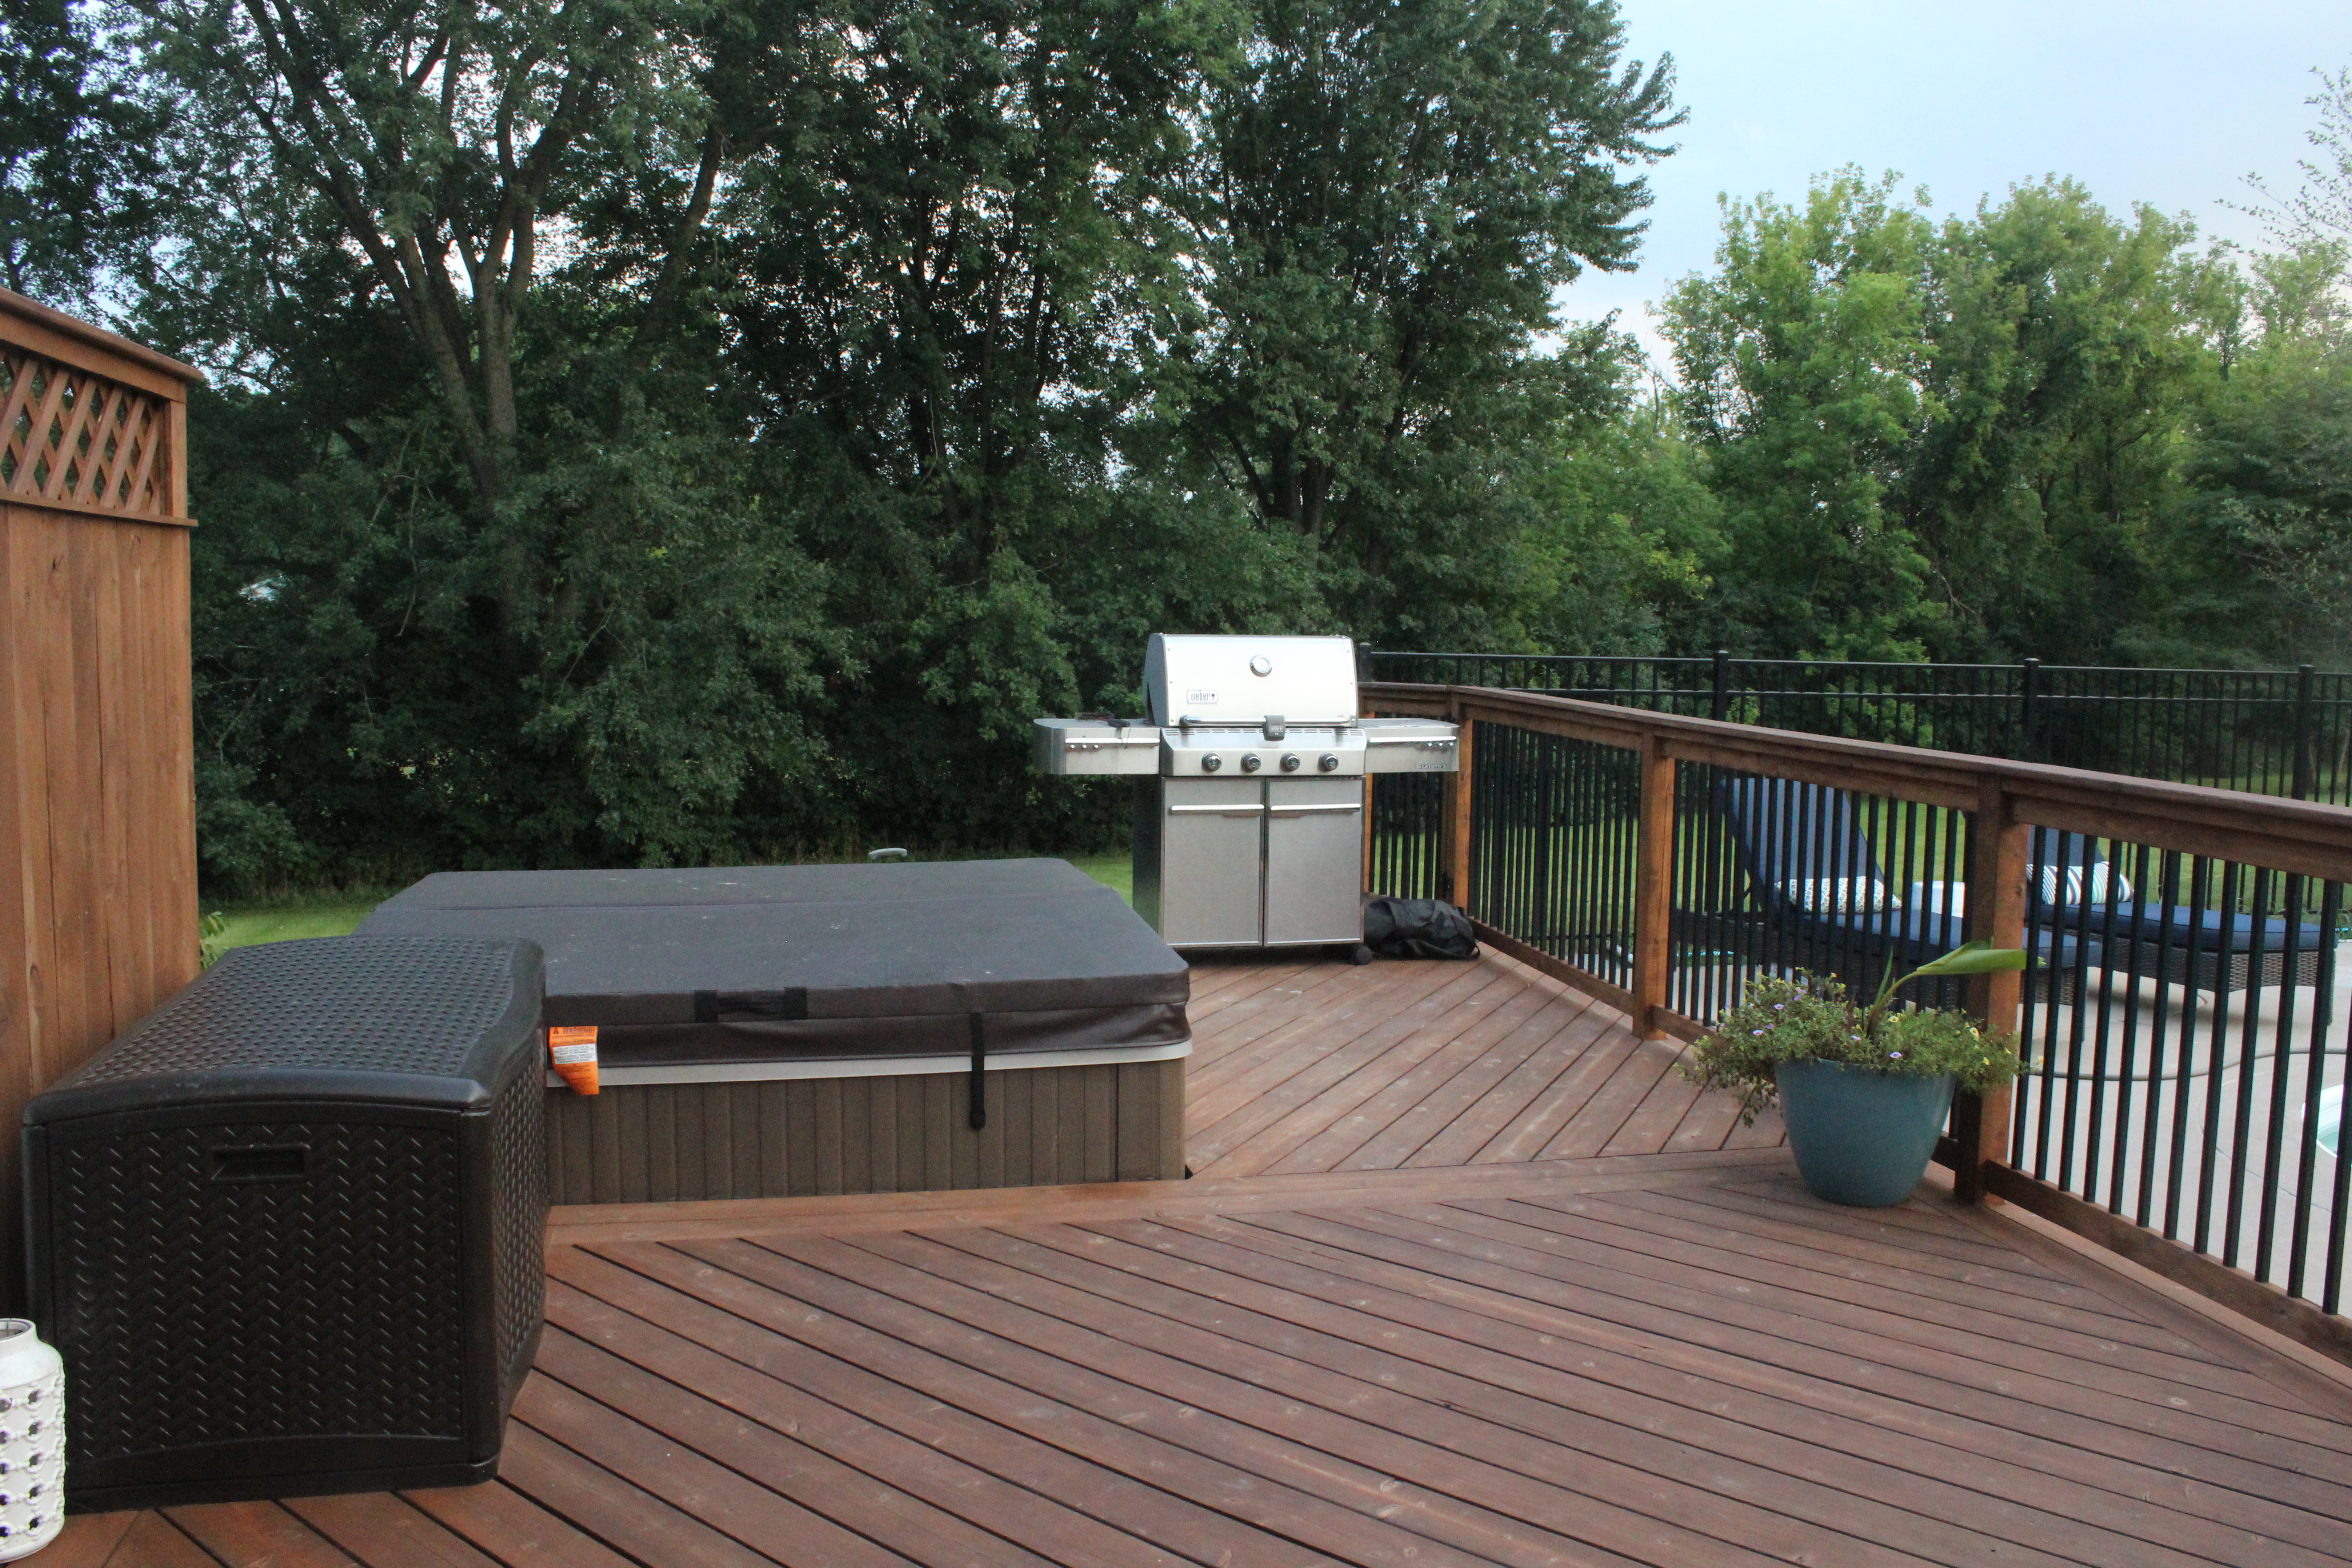
Ben also built that fence on the left for safety reasons because it drops down to the basement stairs.IMG_5906

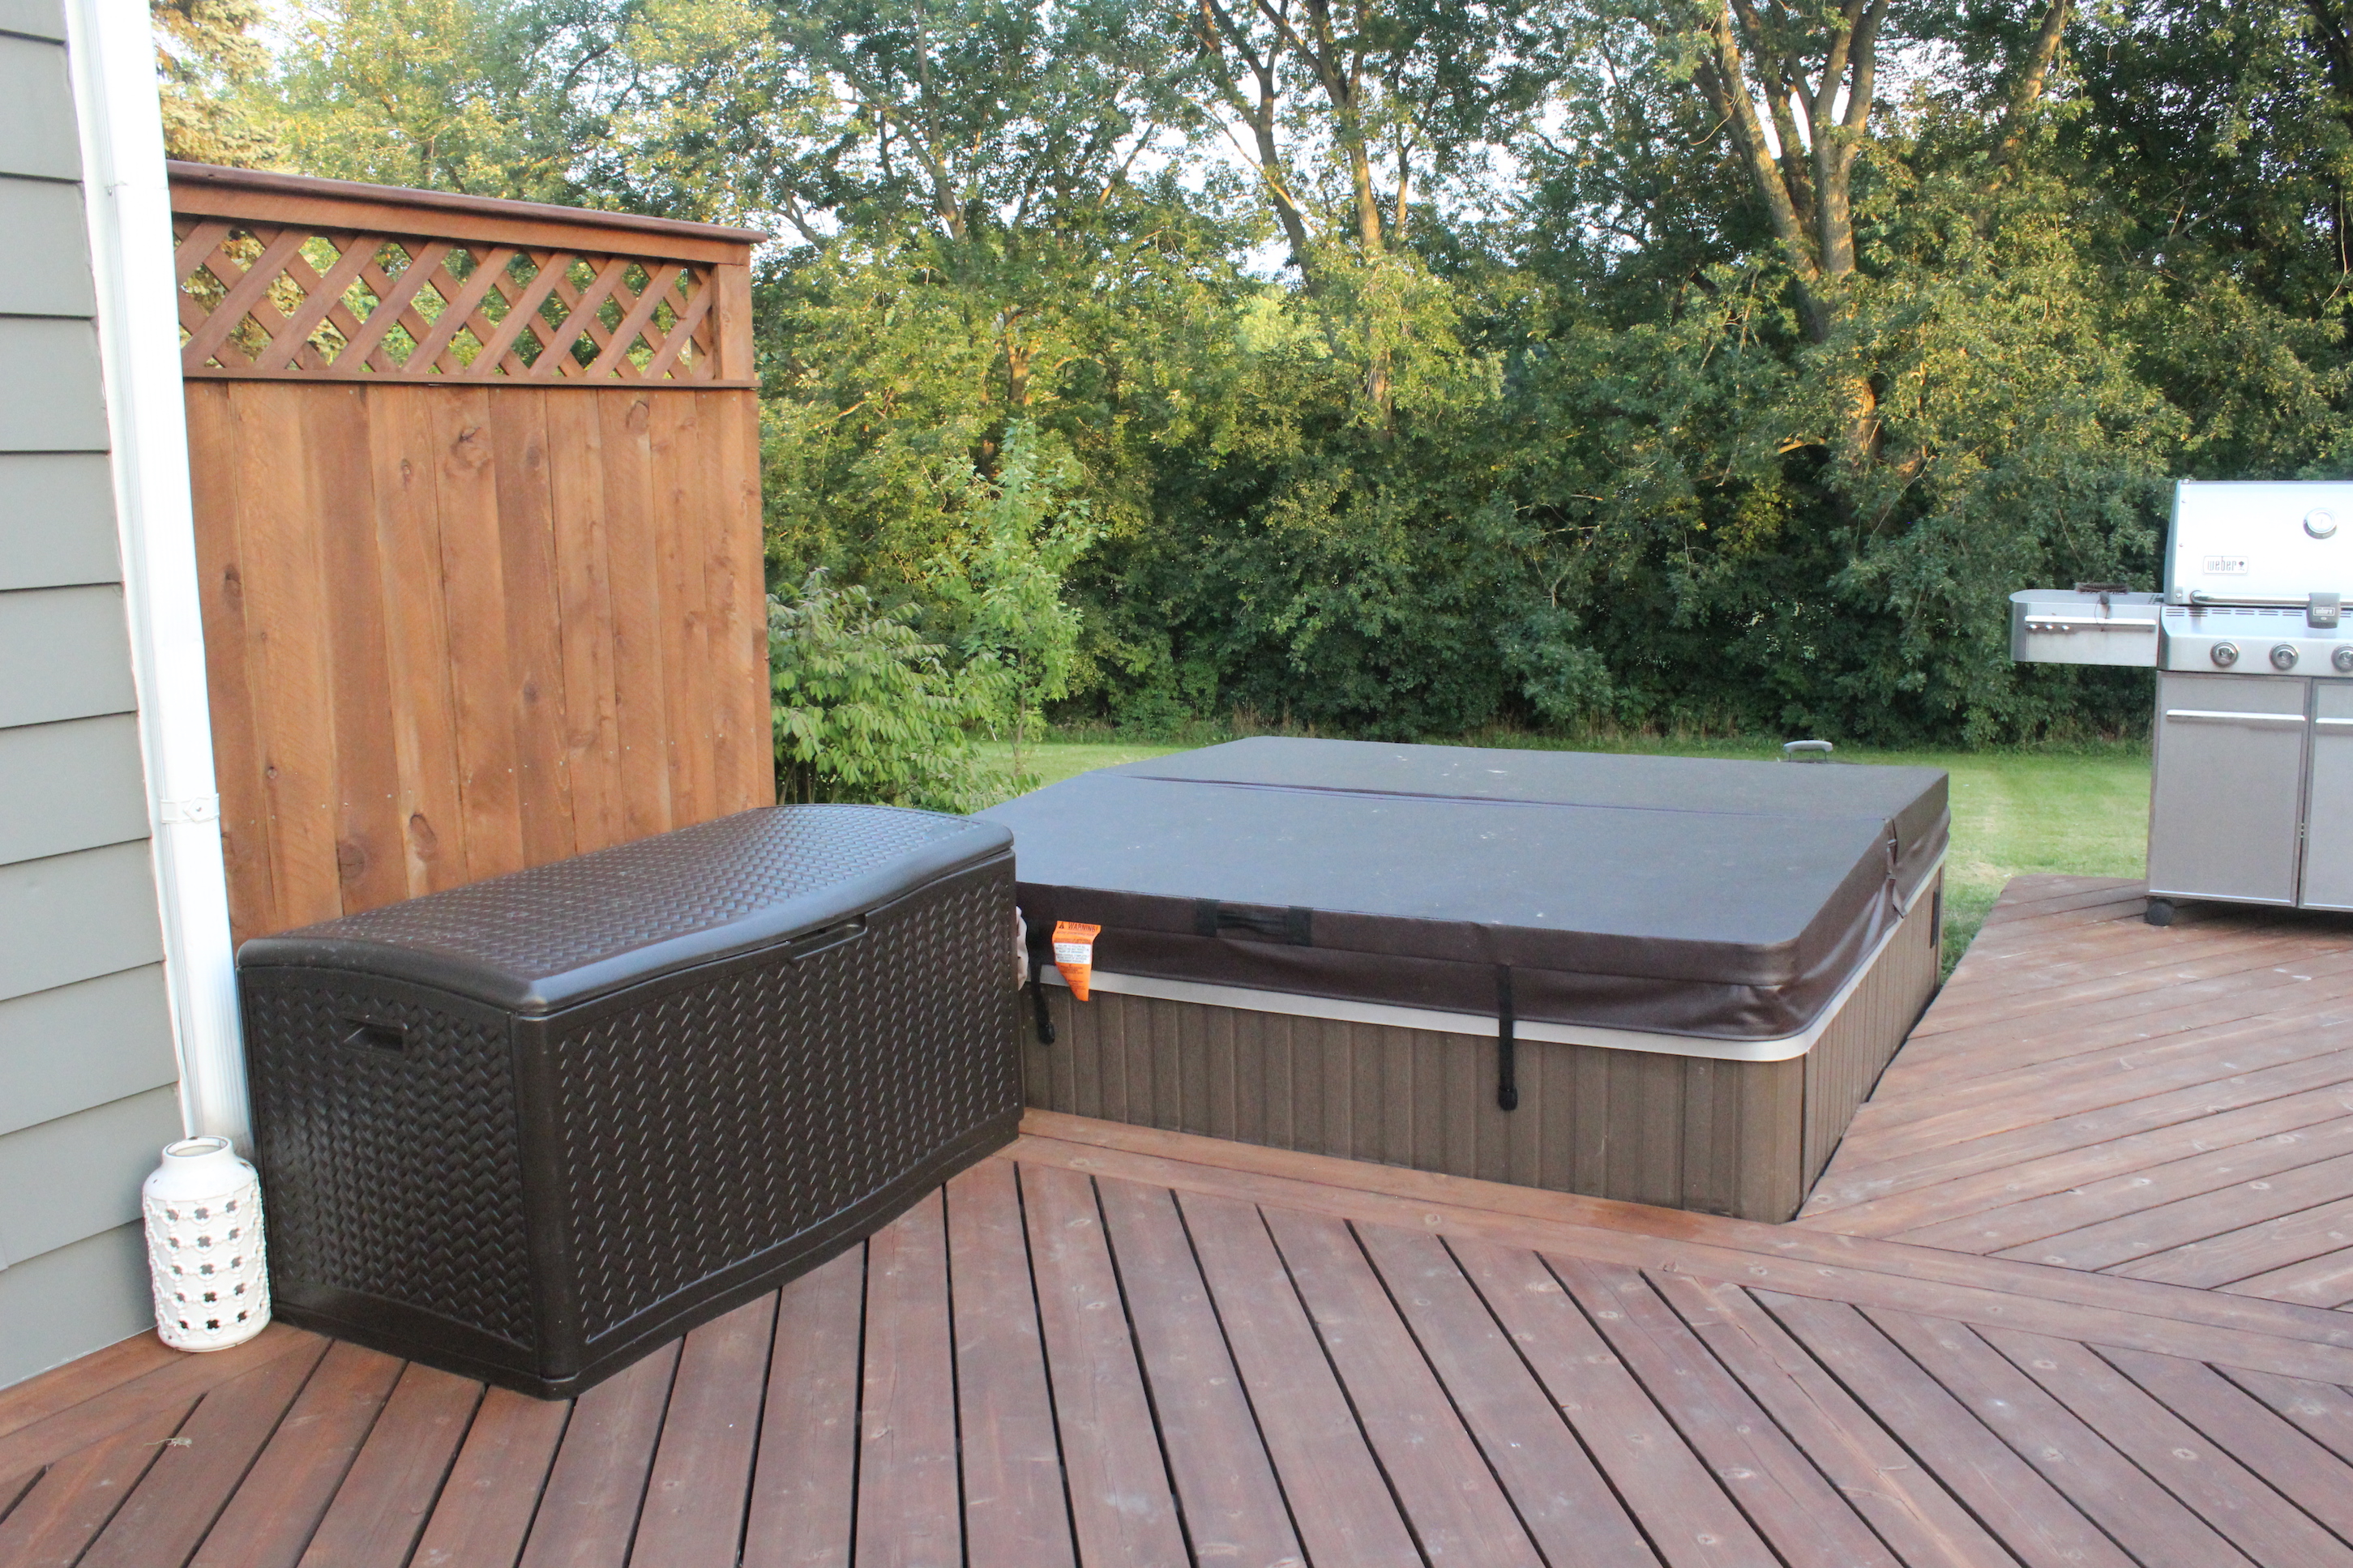
Outside of the pool/deck area we have a little fire pit area with adirondack chairs (from Ace Hardware here) and a fire ring.

fire pit

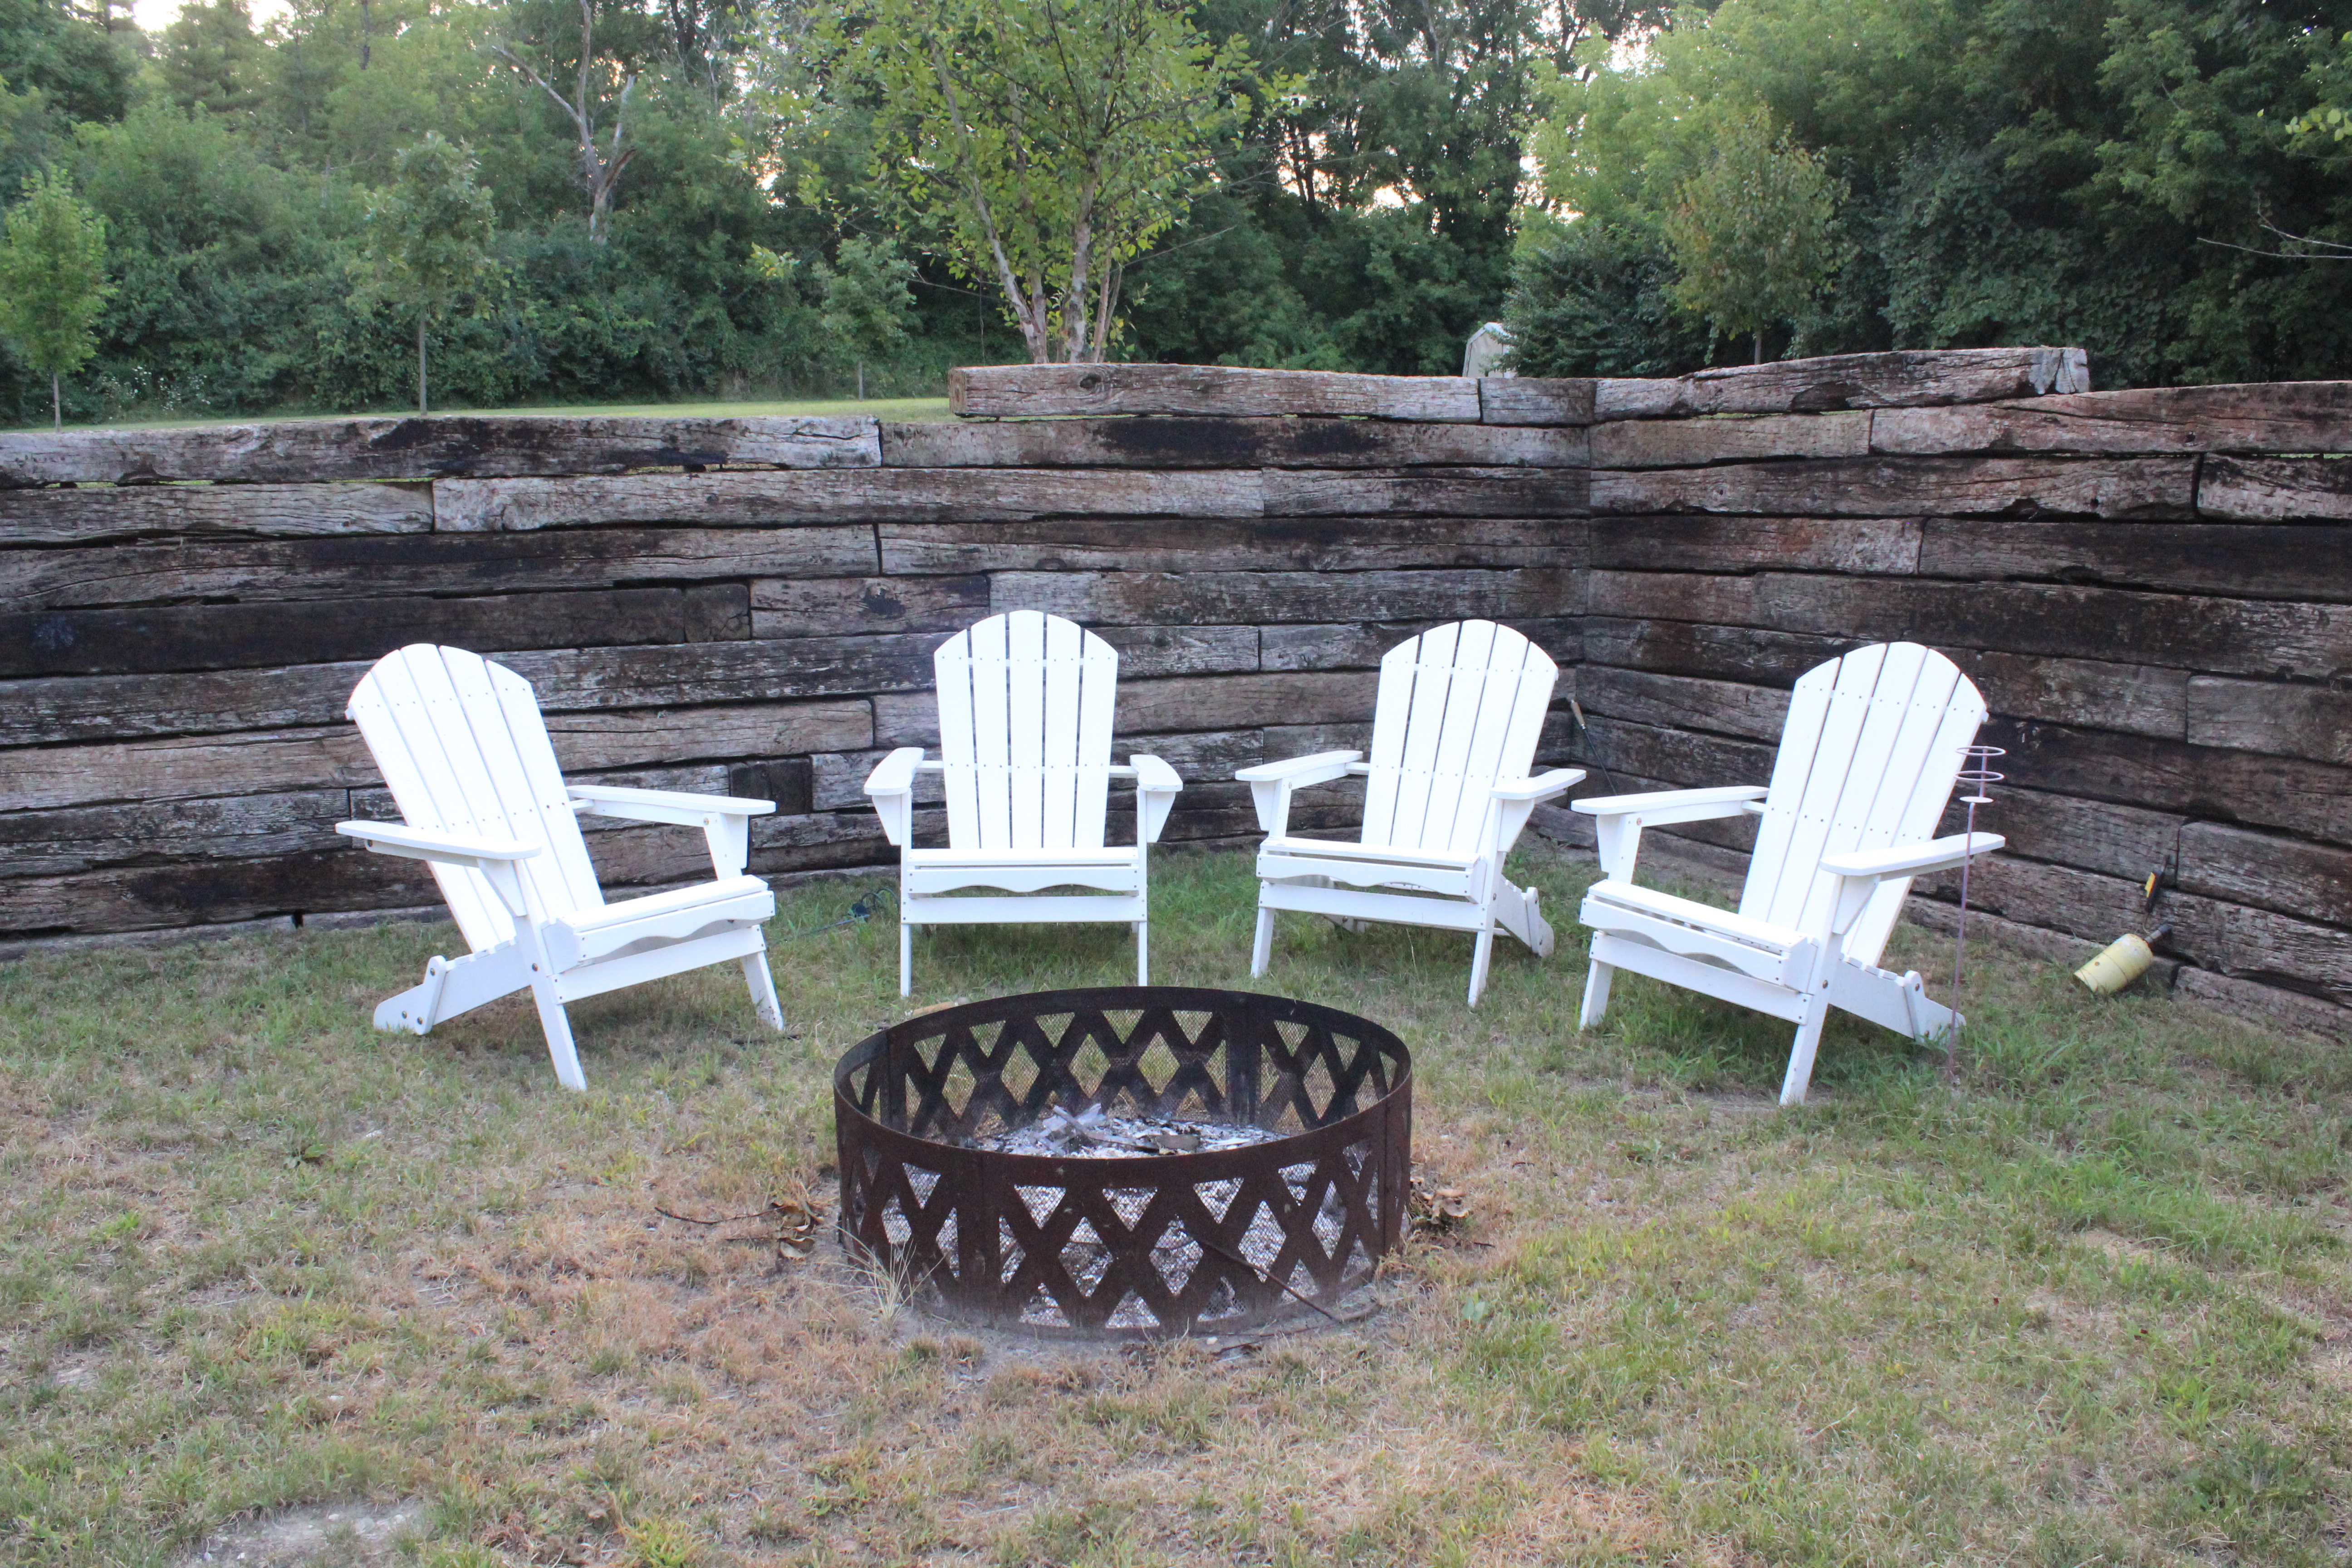
We plan to do a recessed stone fireplace (like this) next year, but for now it gets the job done.

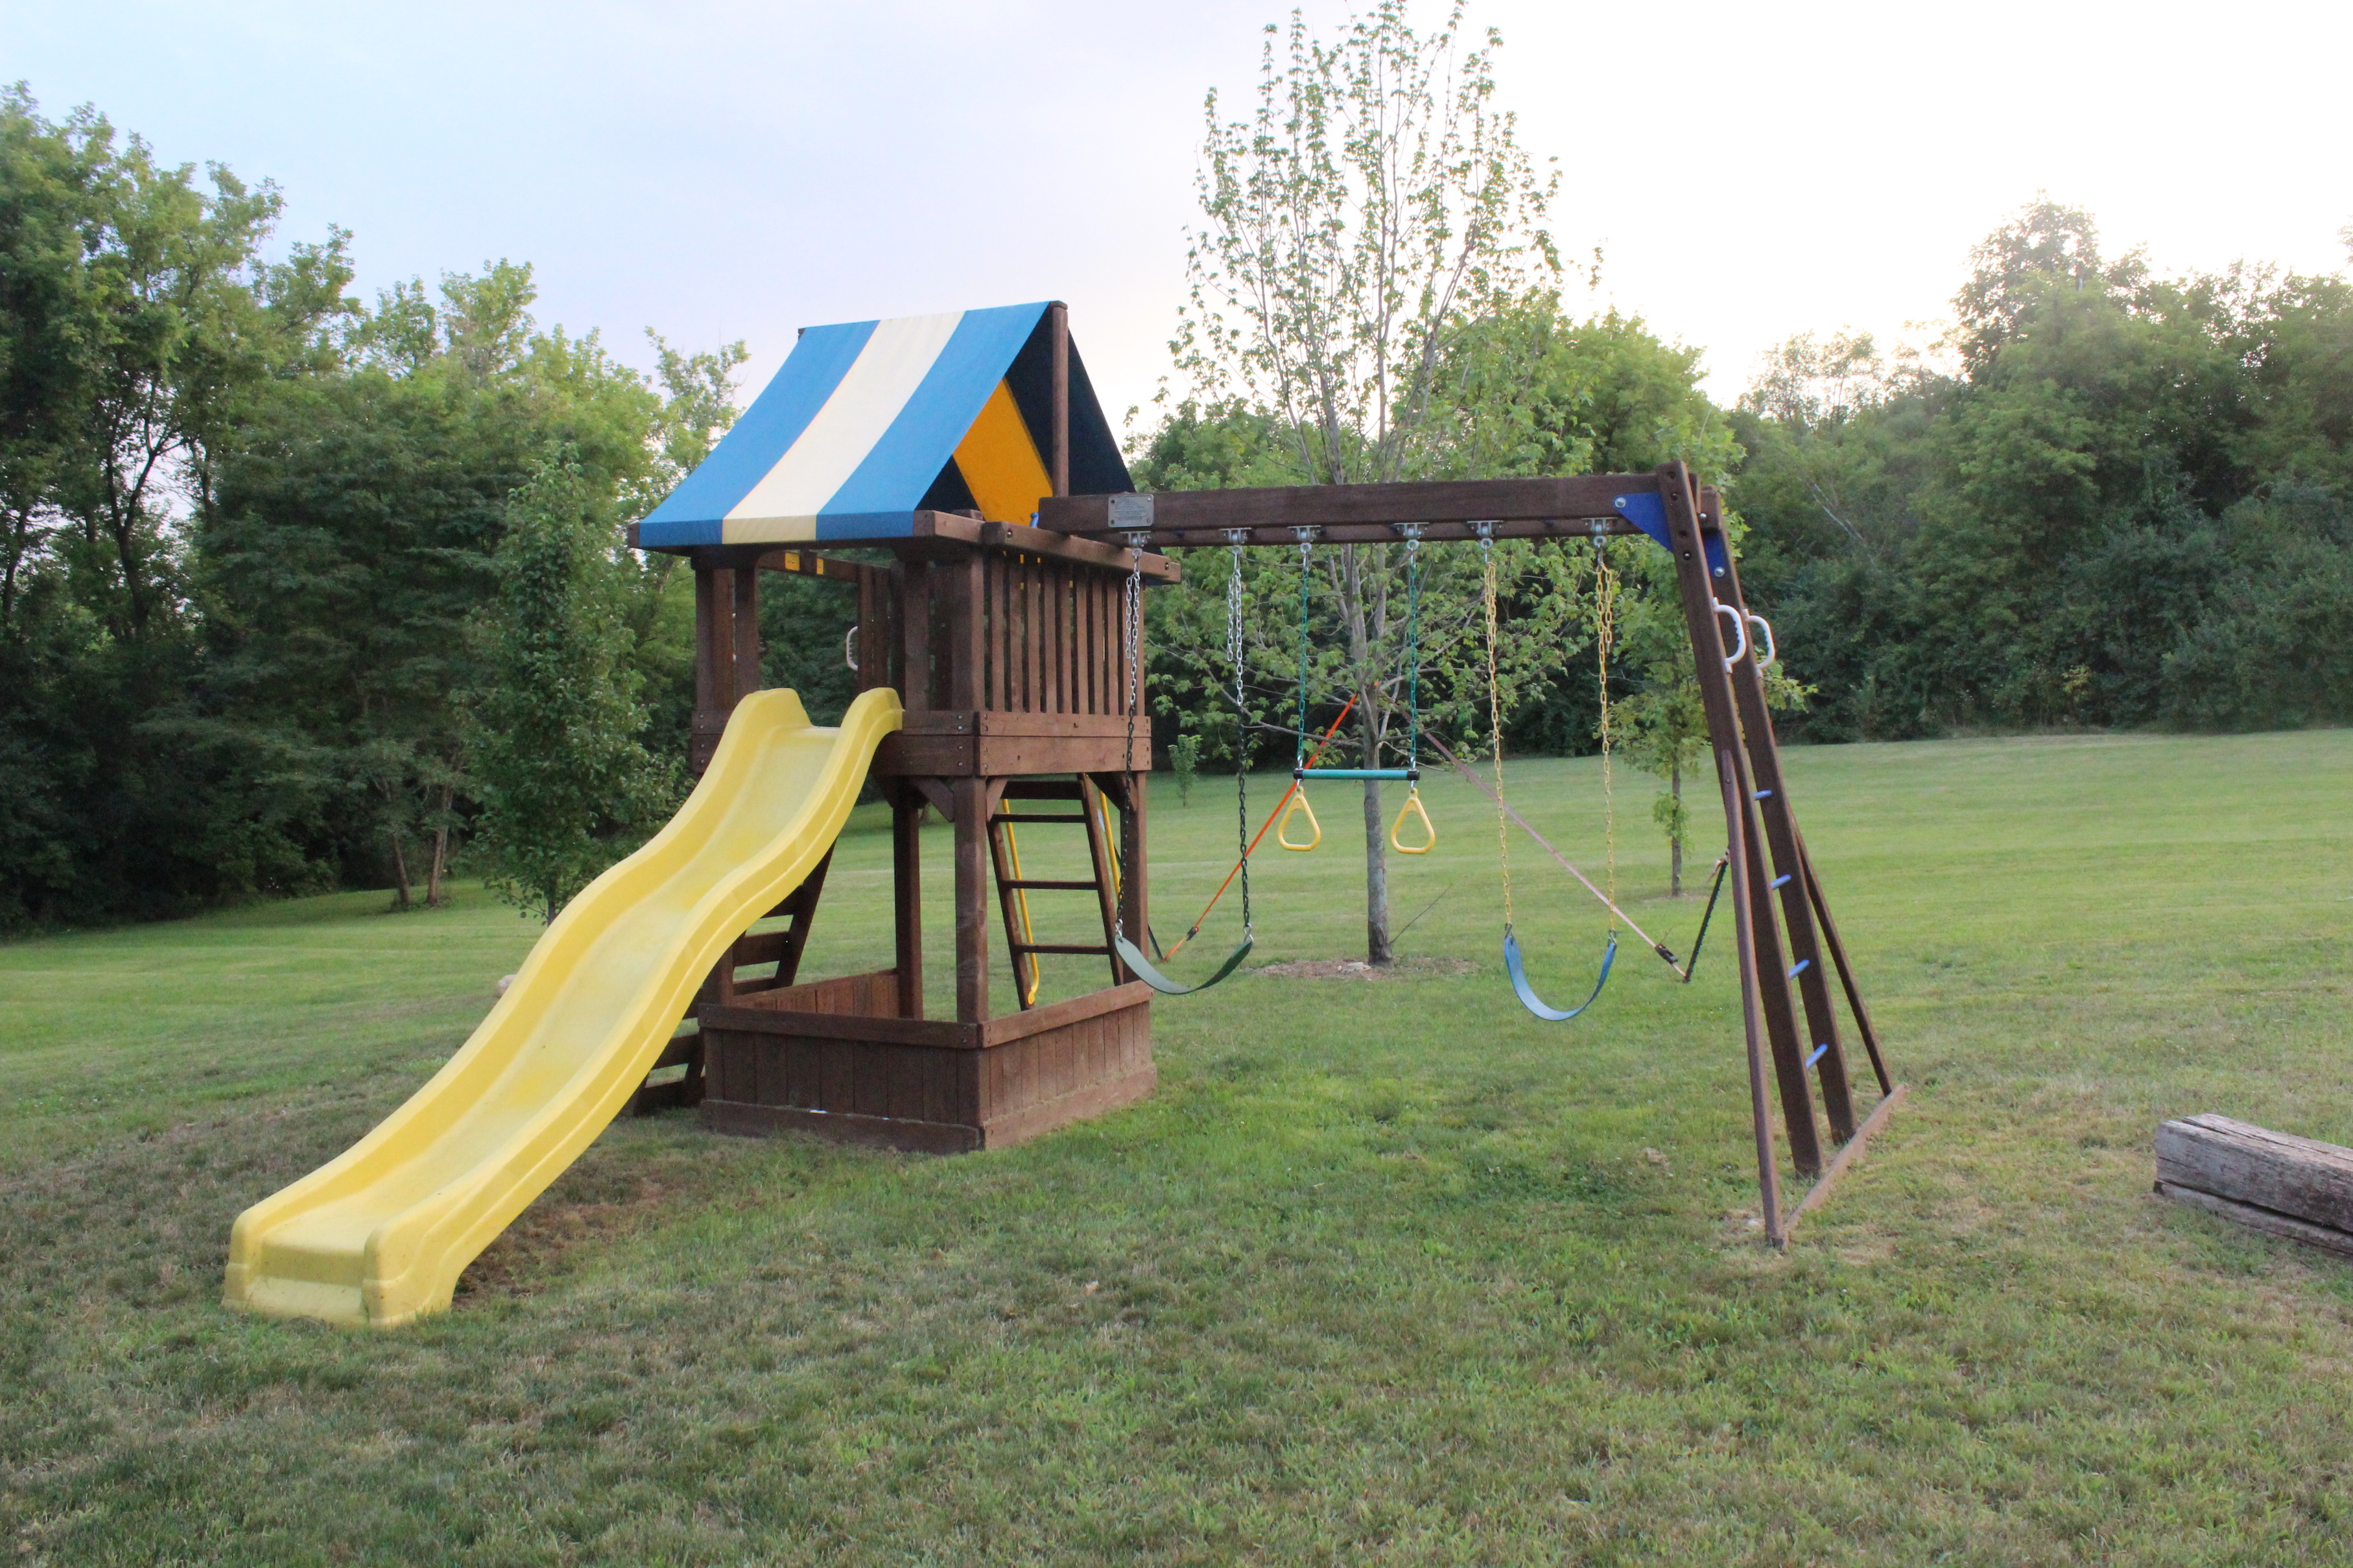
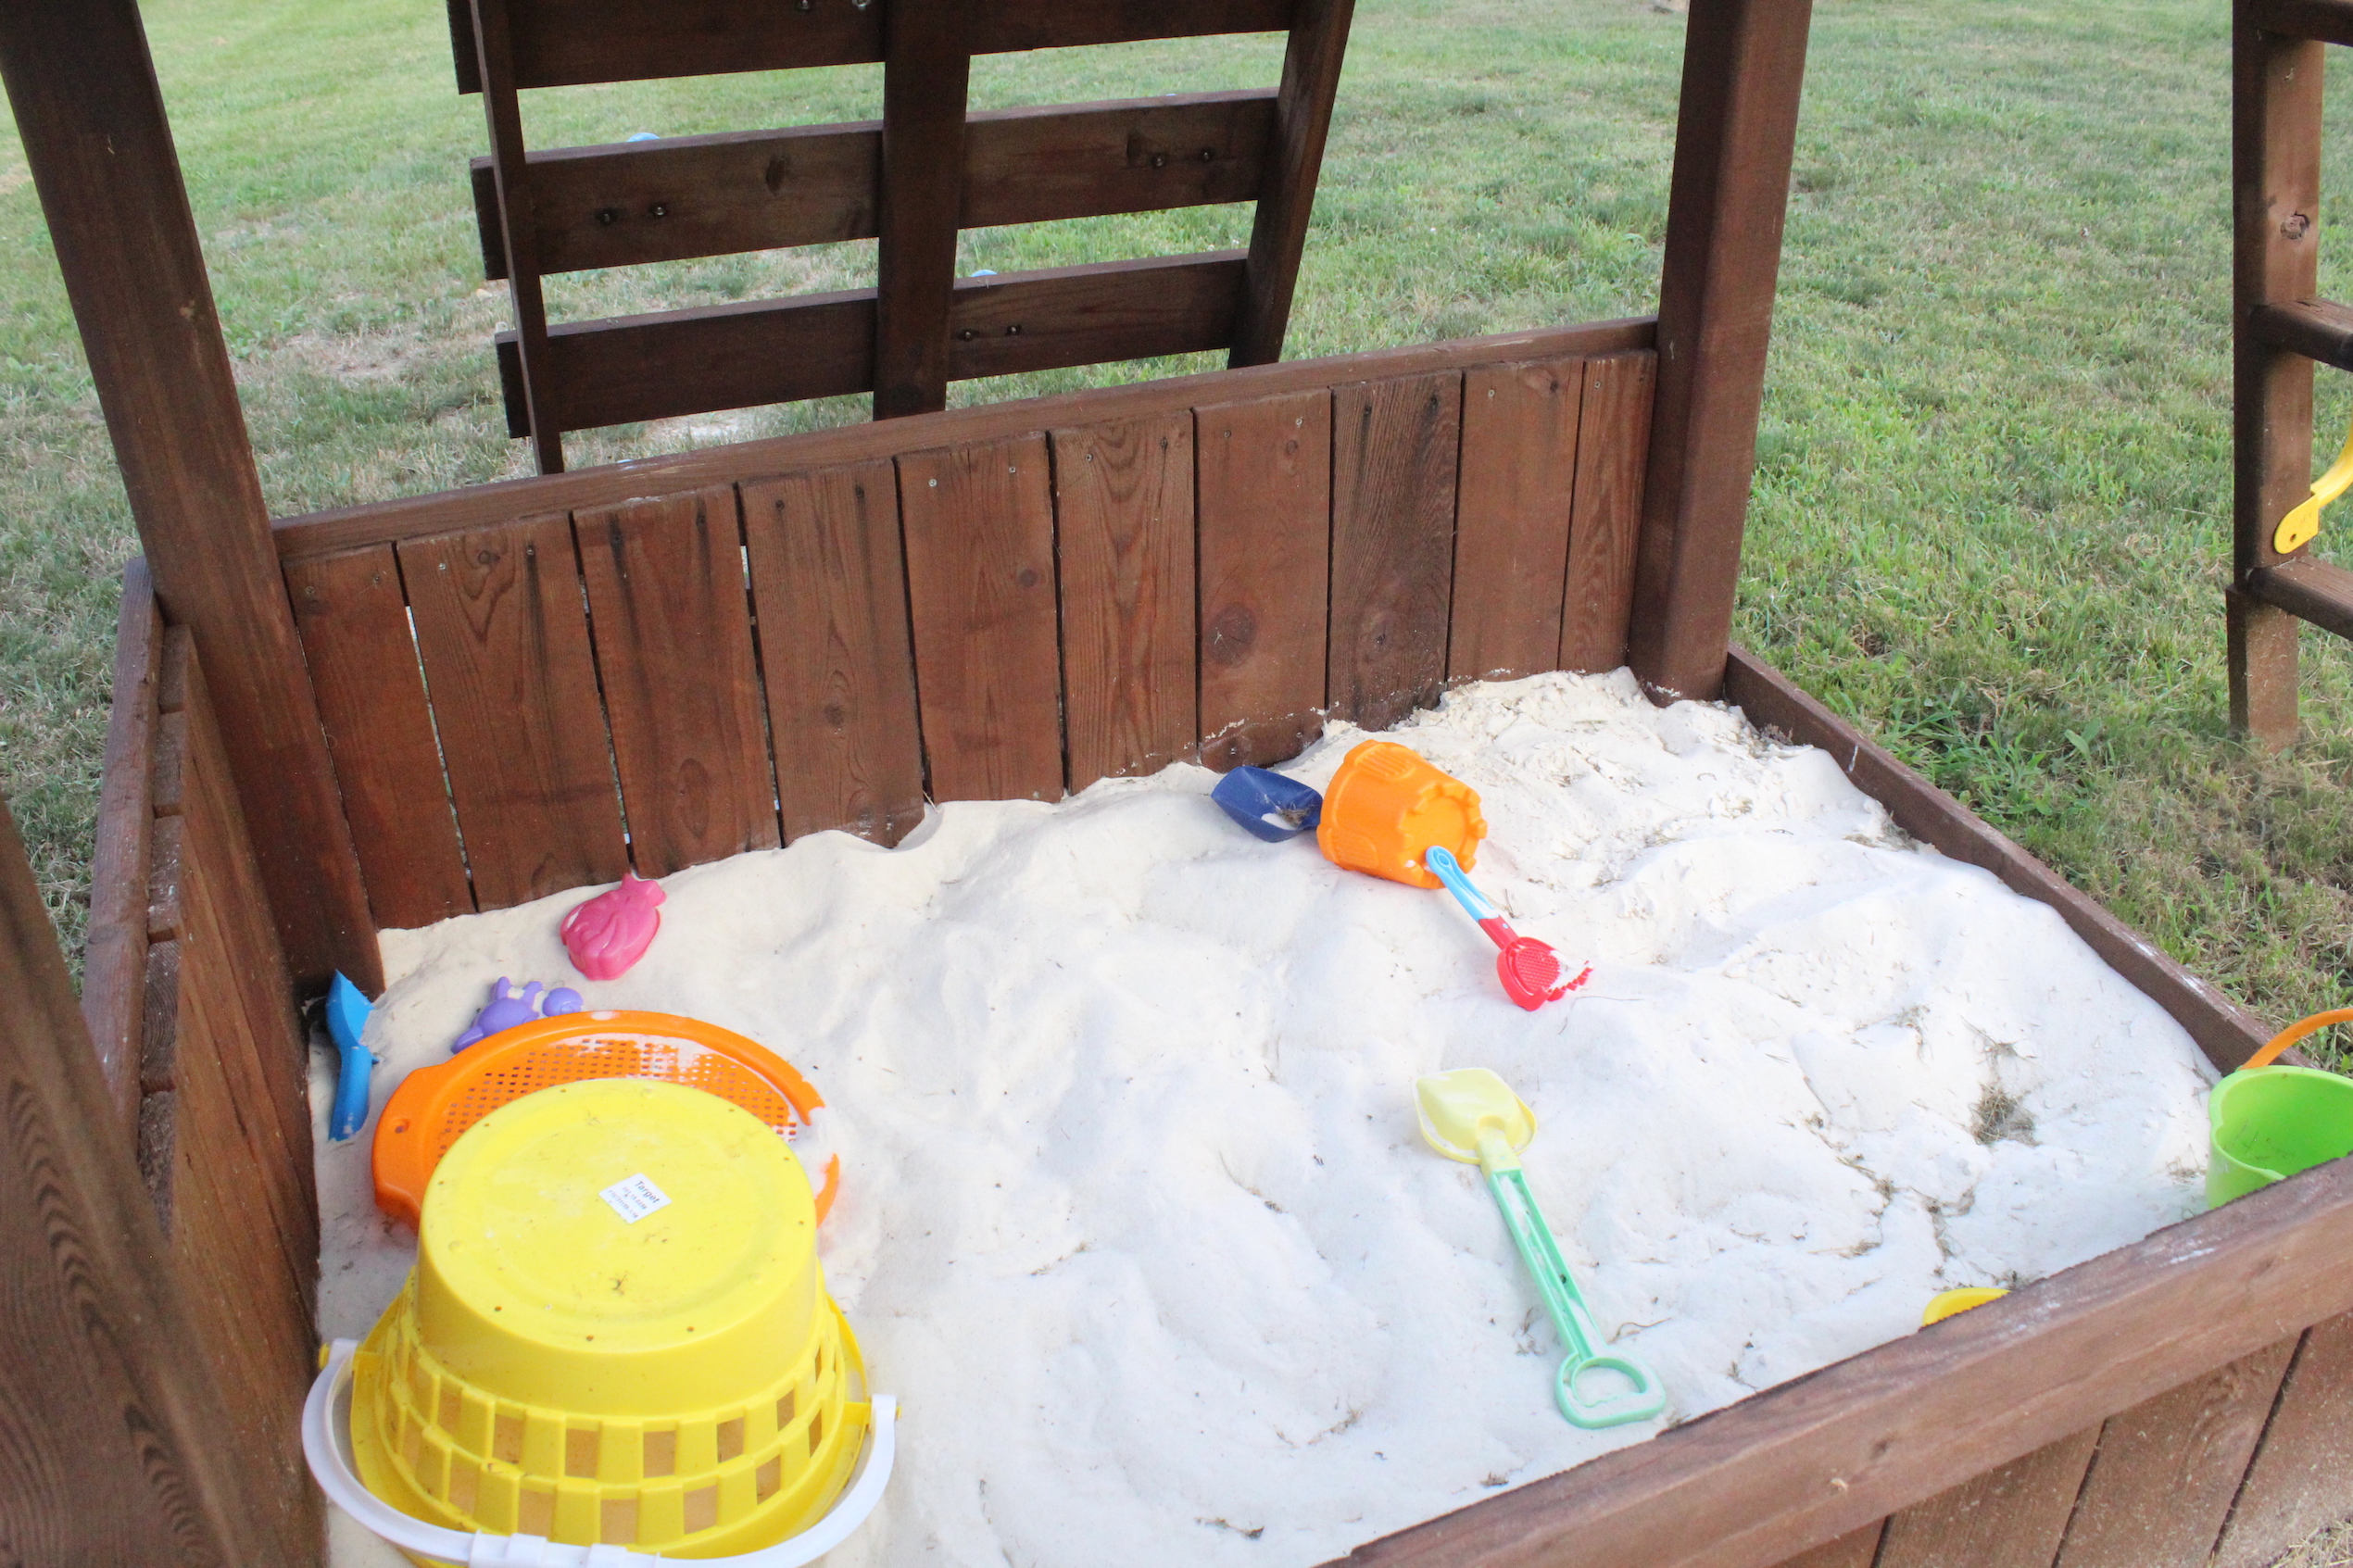
We also installed a playground (used off of Craigslist), and gave it a facelift by re-staining it (same color as the deck) and putting in a sandbox. Our 2-year-old loves it.

IMG_5895

kids sandbox

Finally, let’s look at a few before and afters.

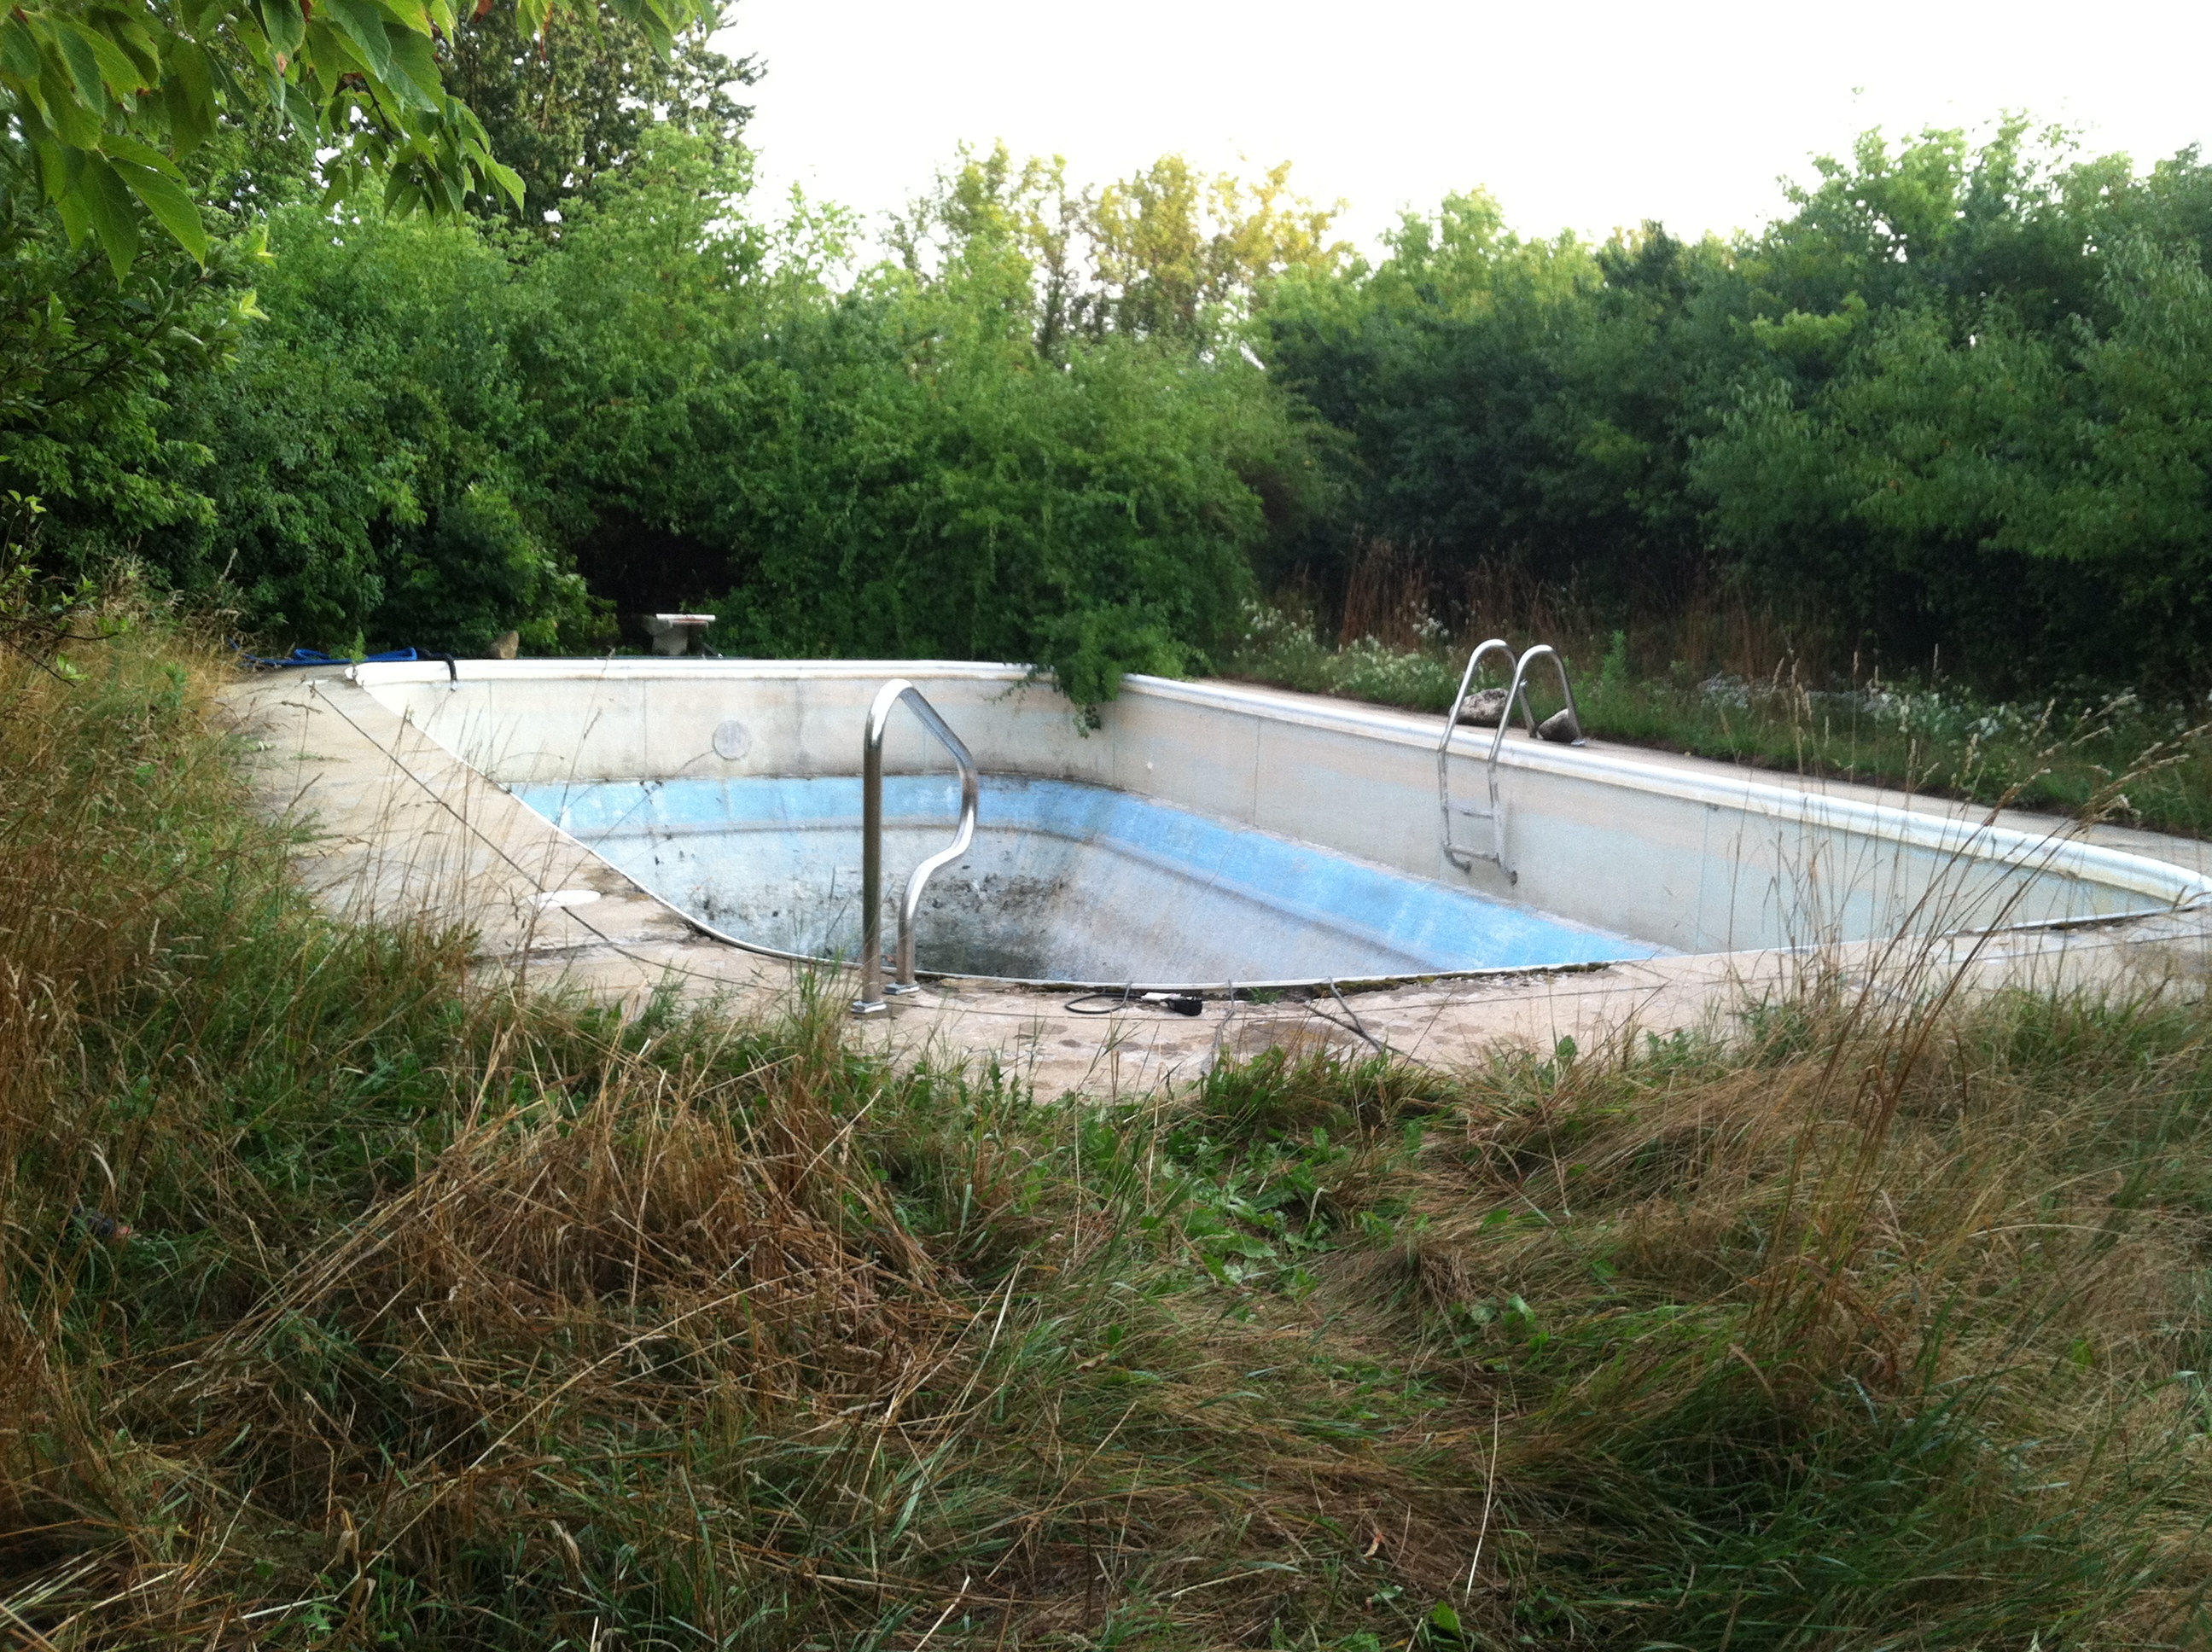
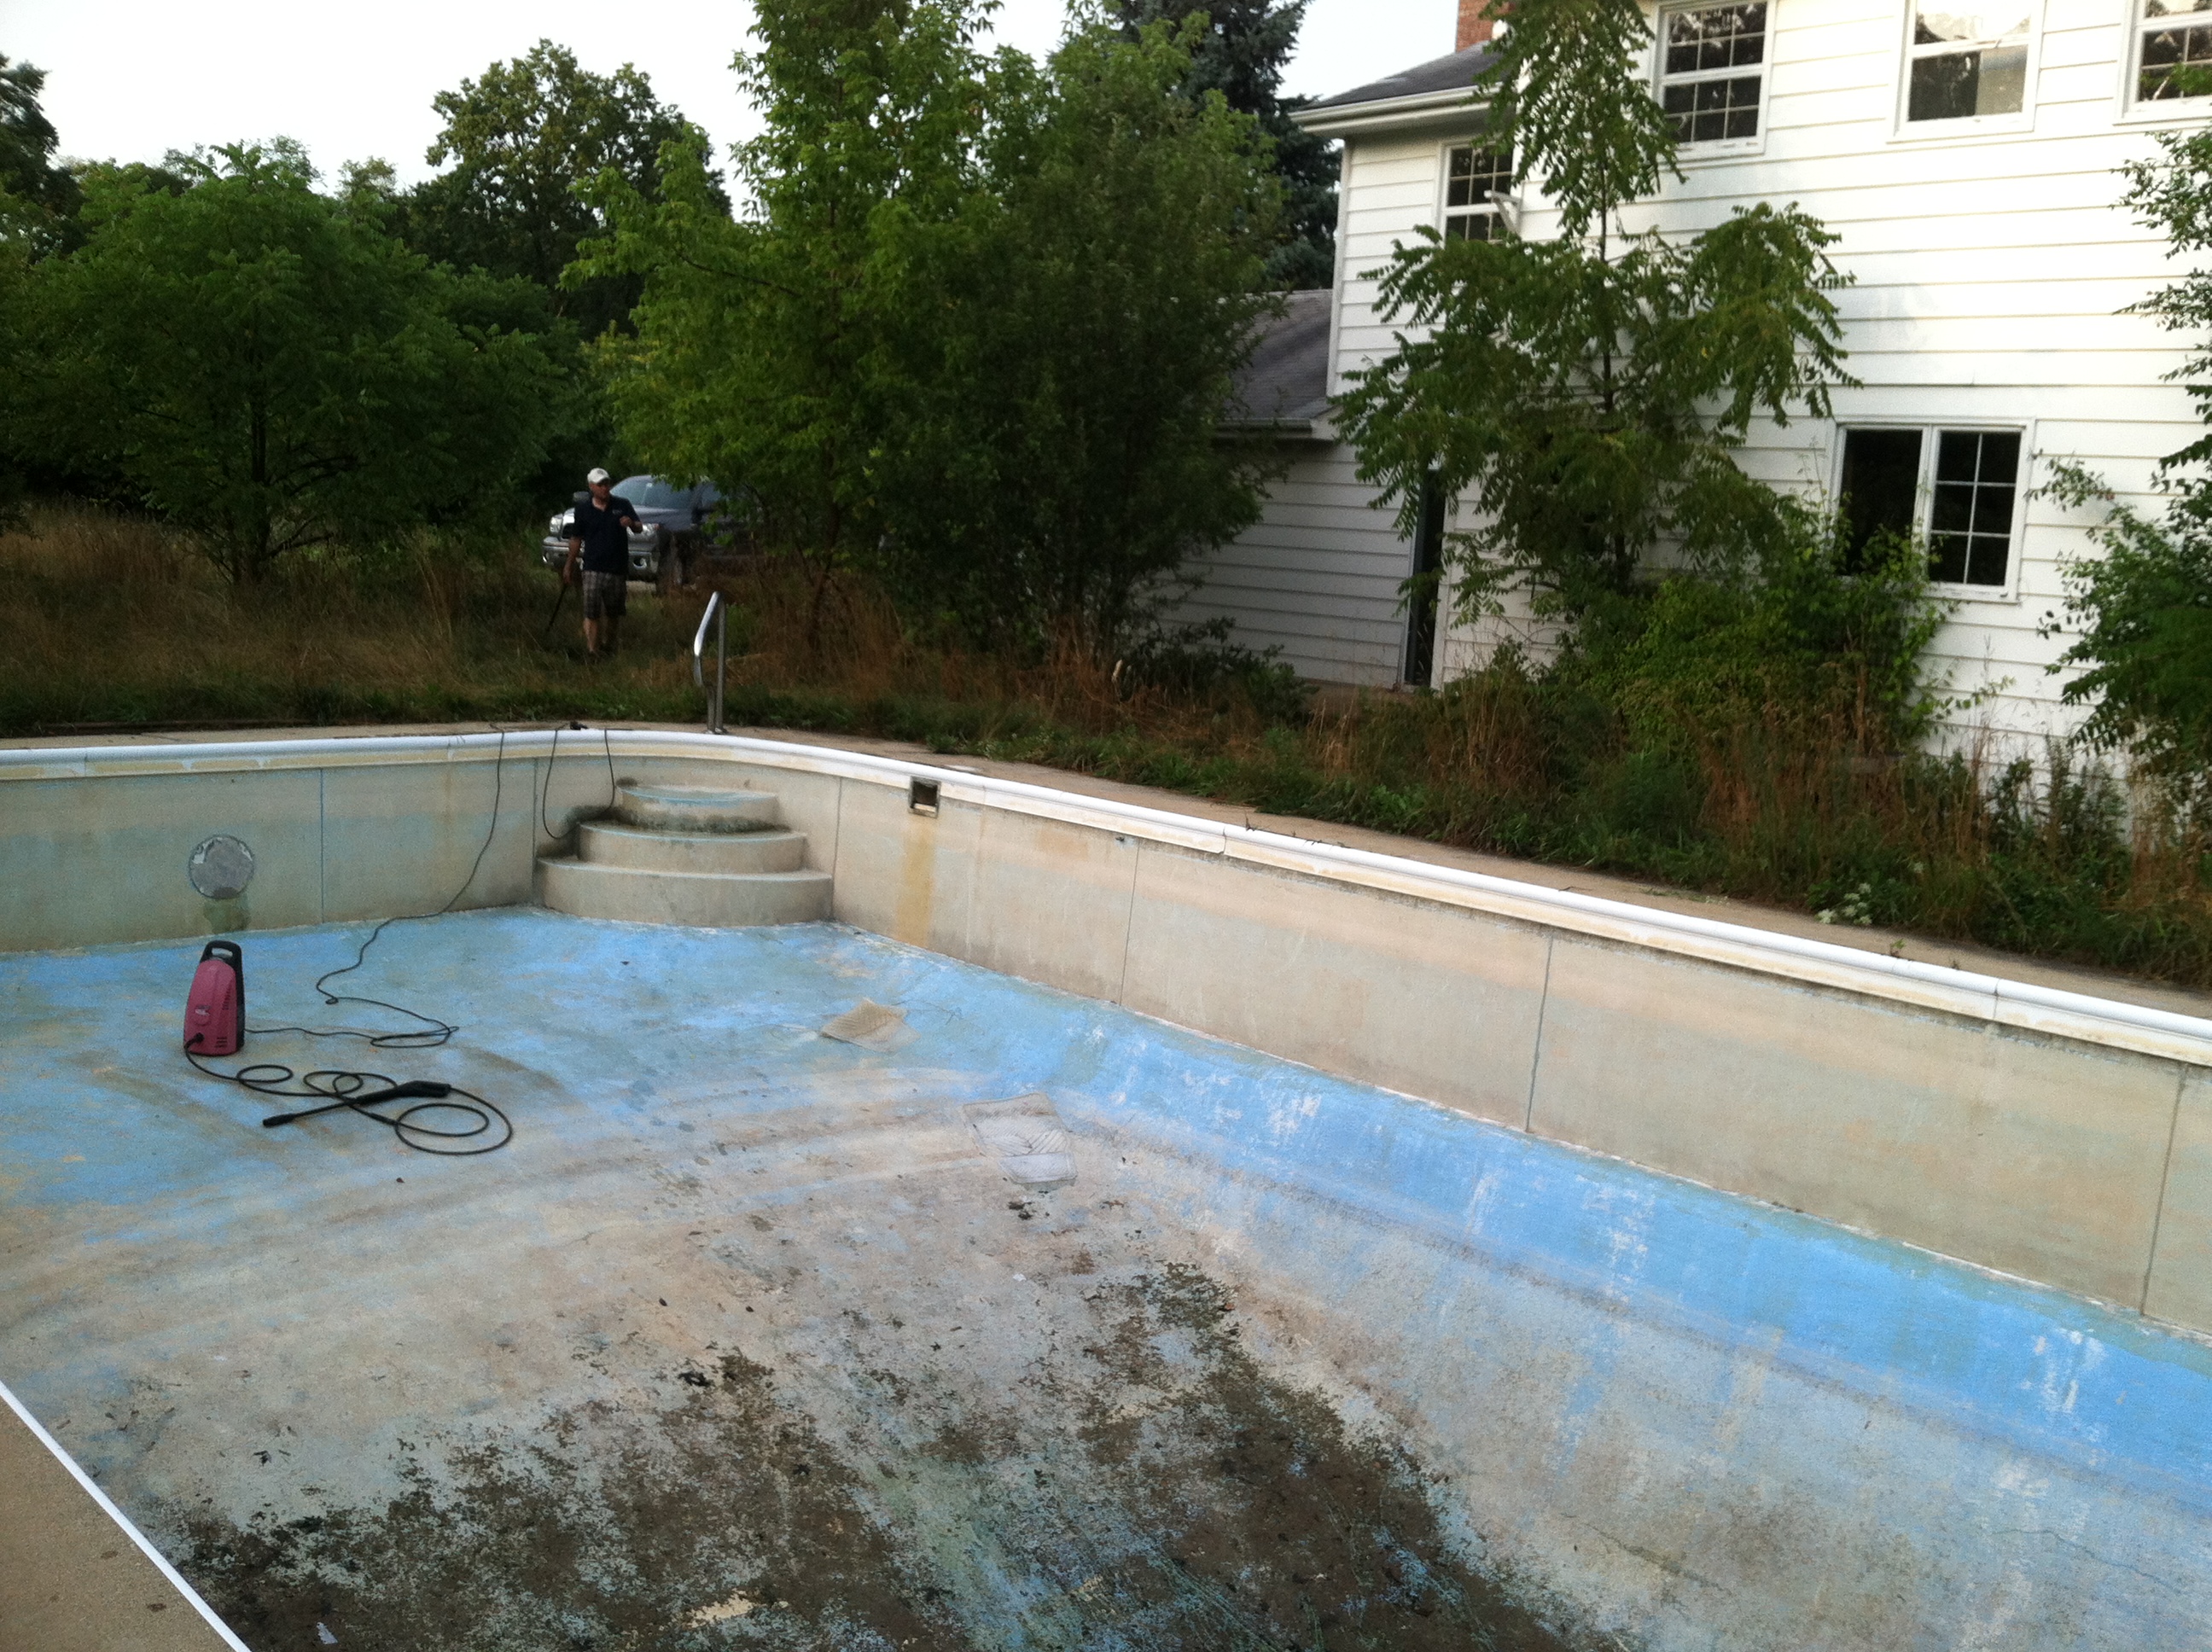
Here’s the scariness it was when we bought it:

IMG_1135

And a similar view now: pool long toward chairs

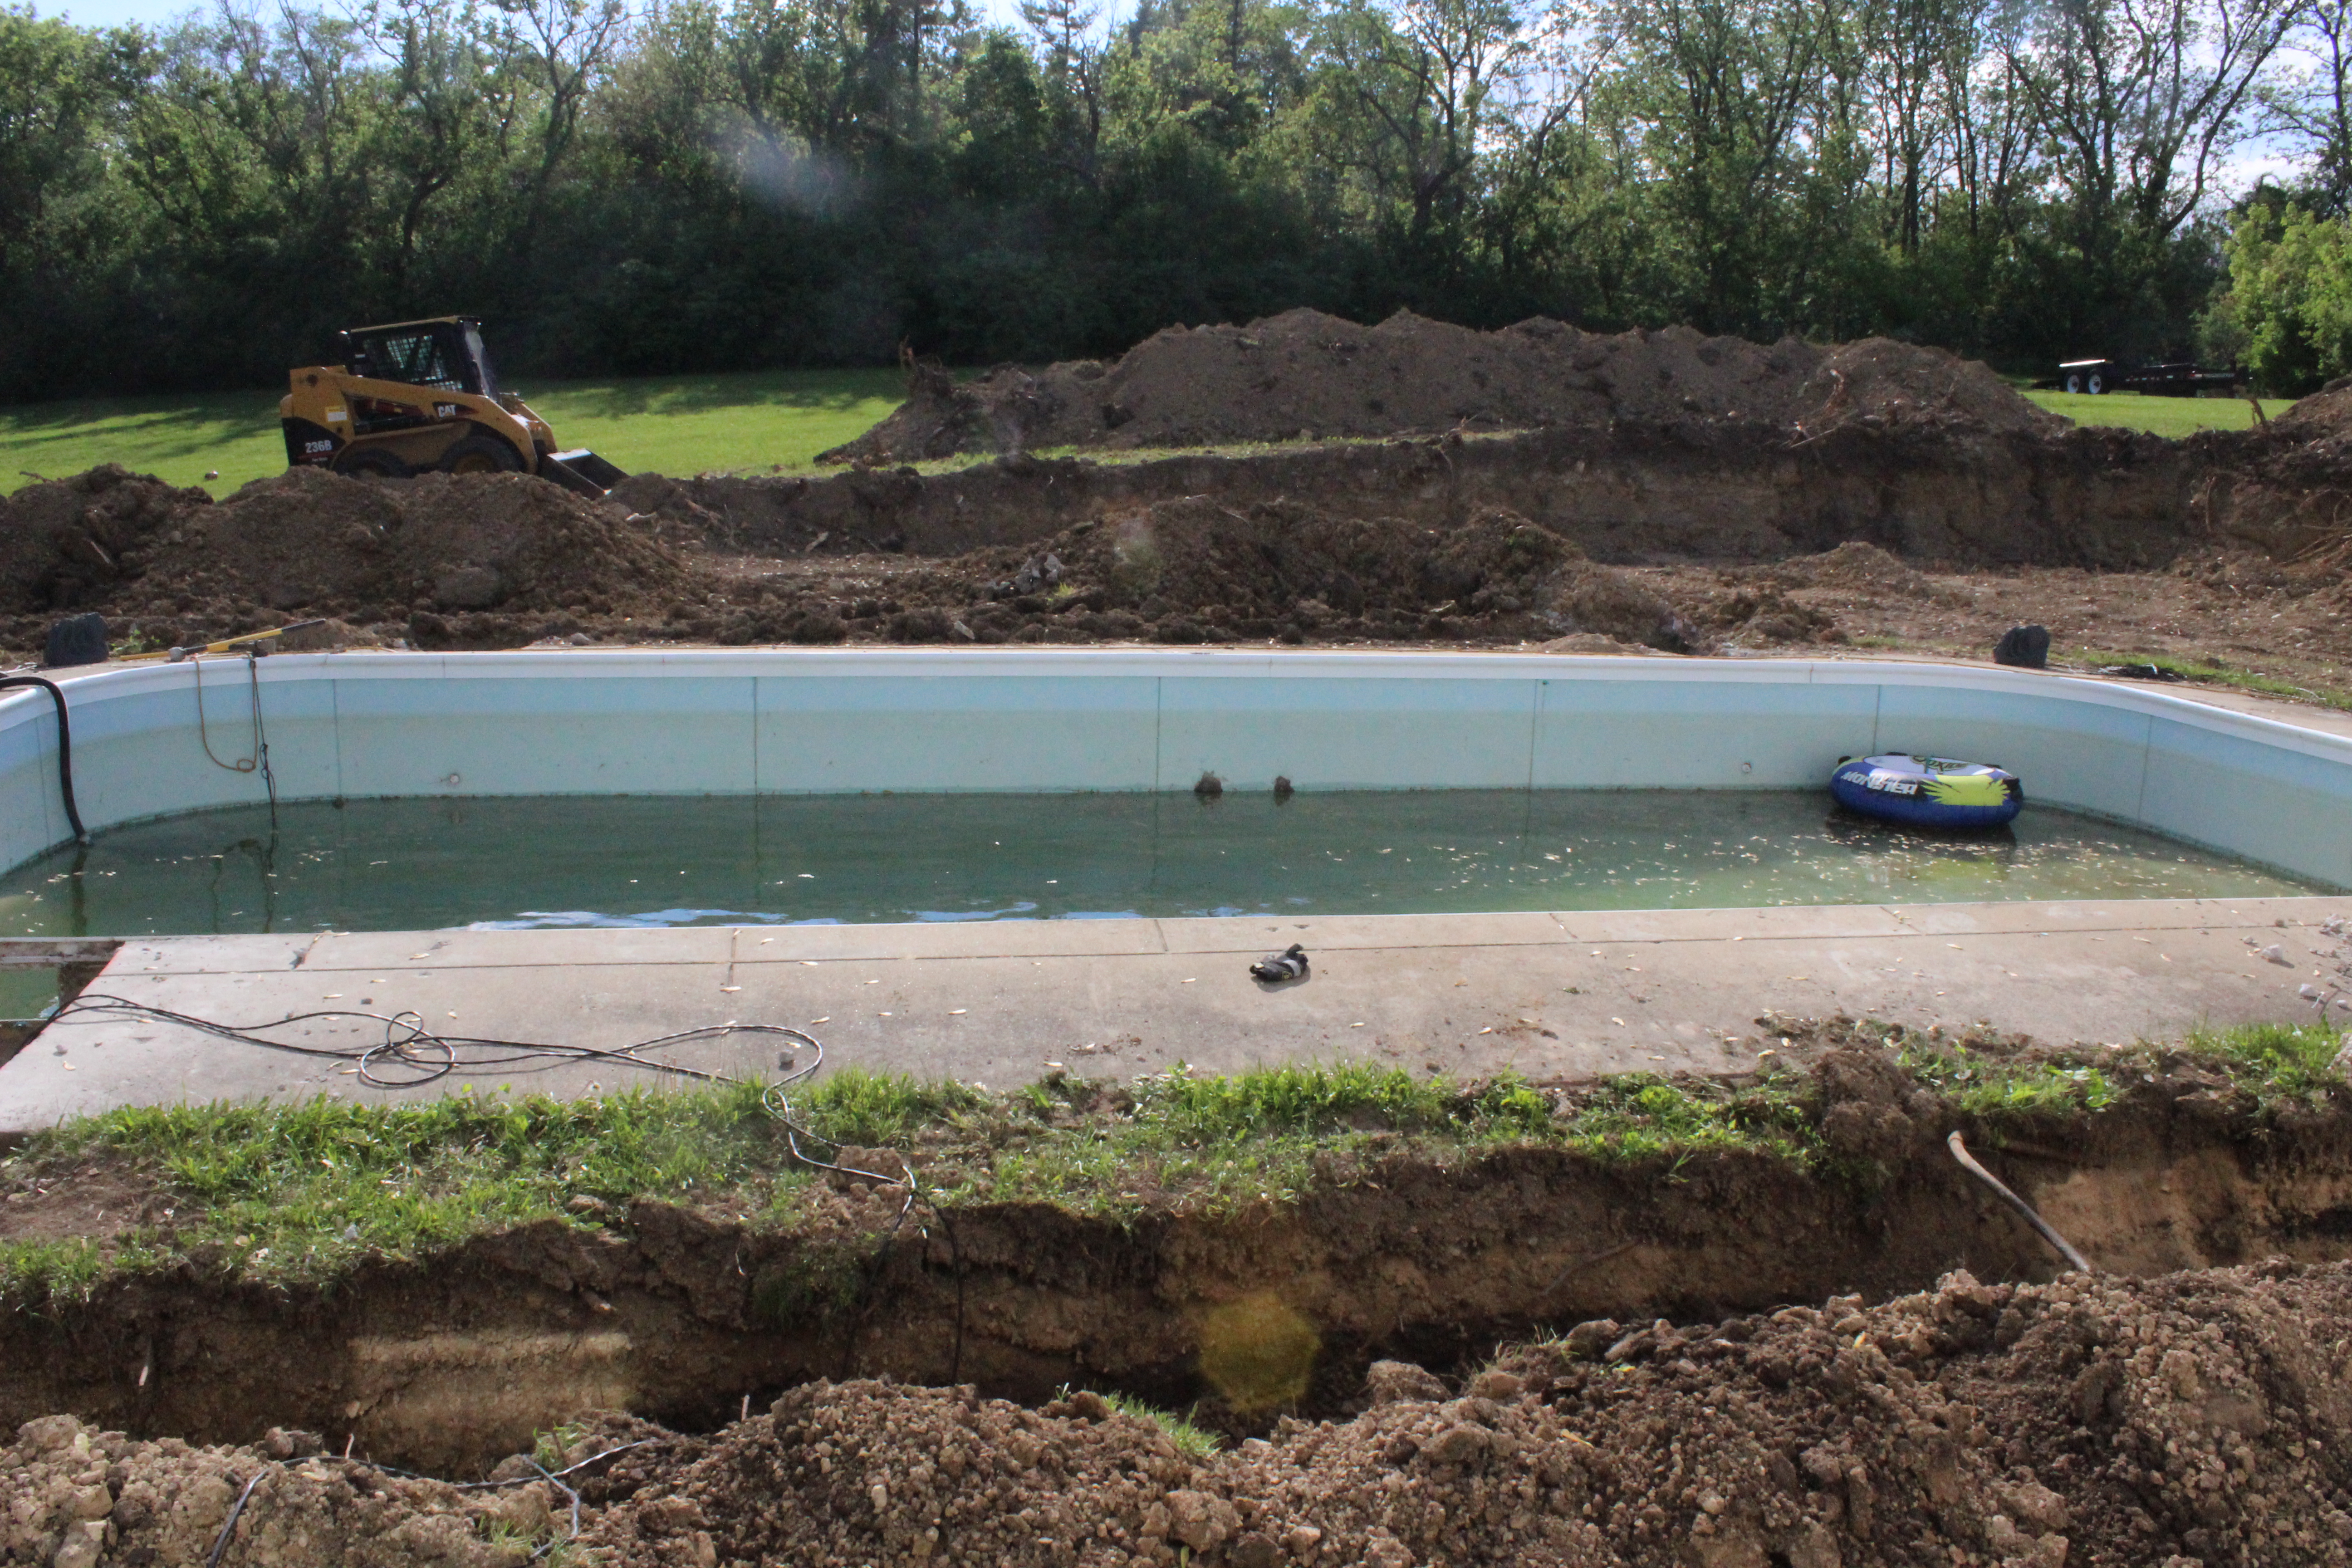
A photo from 2013 when we were digging out the retaining wall:
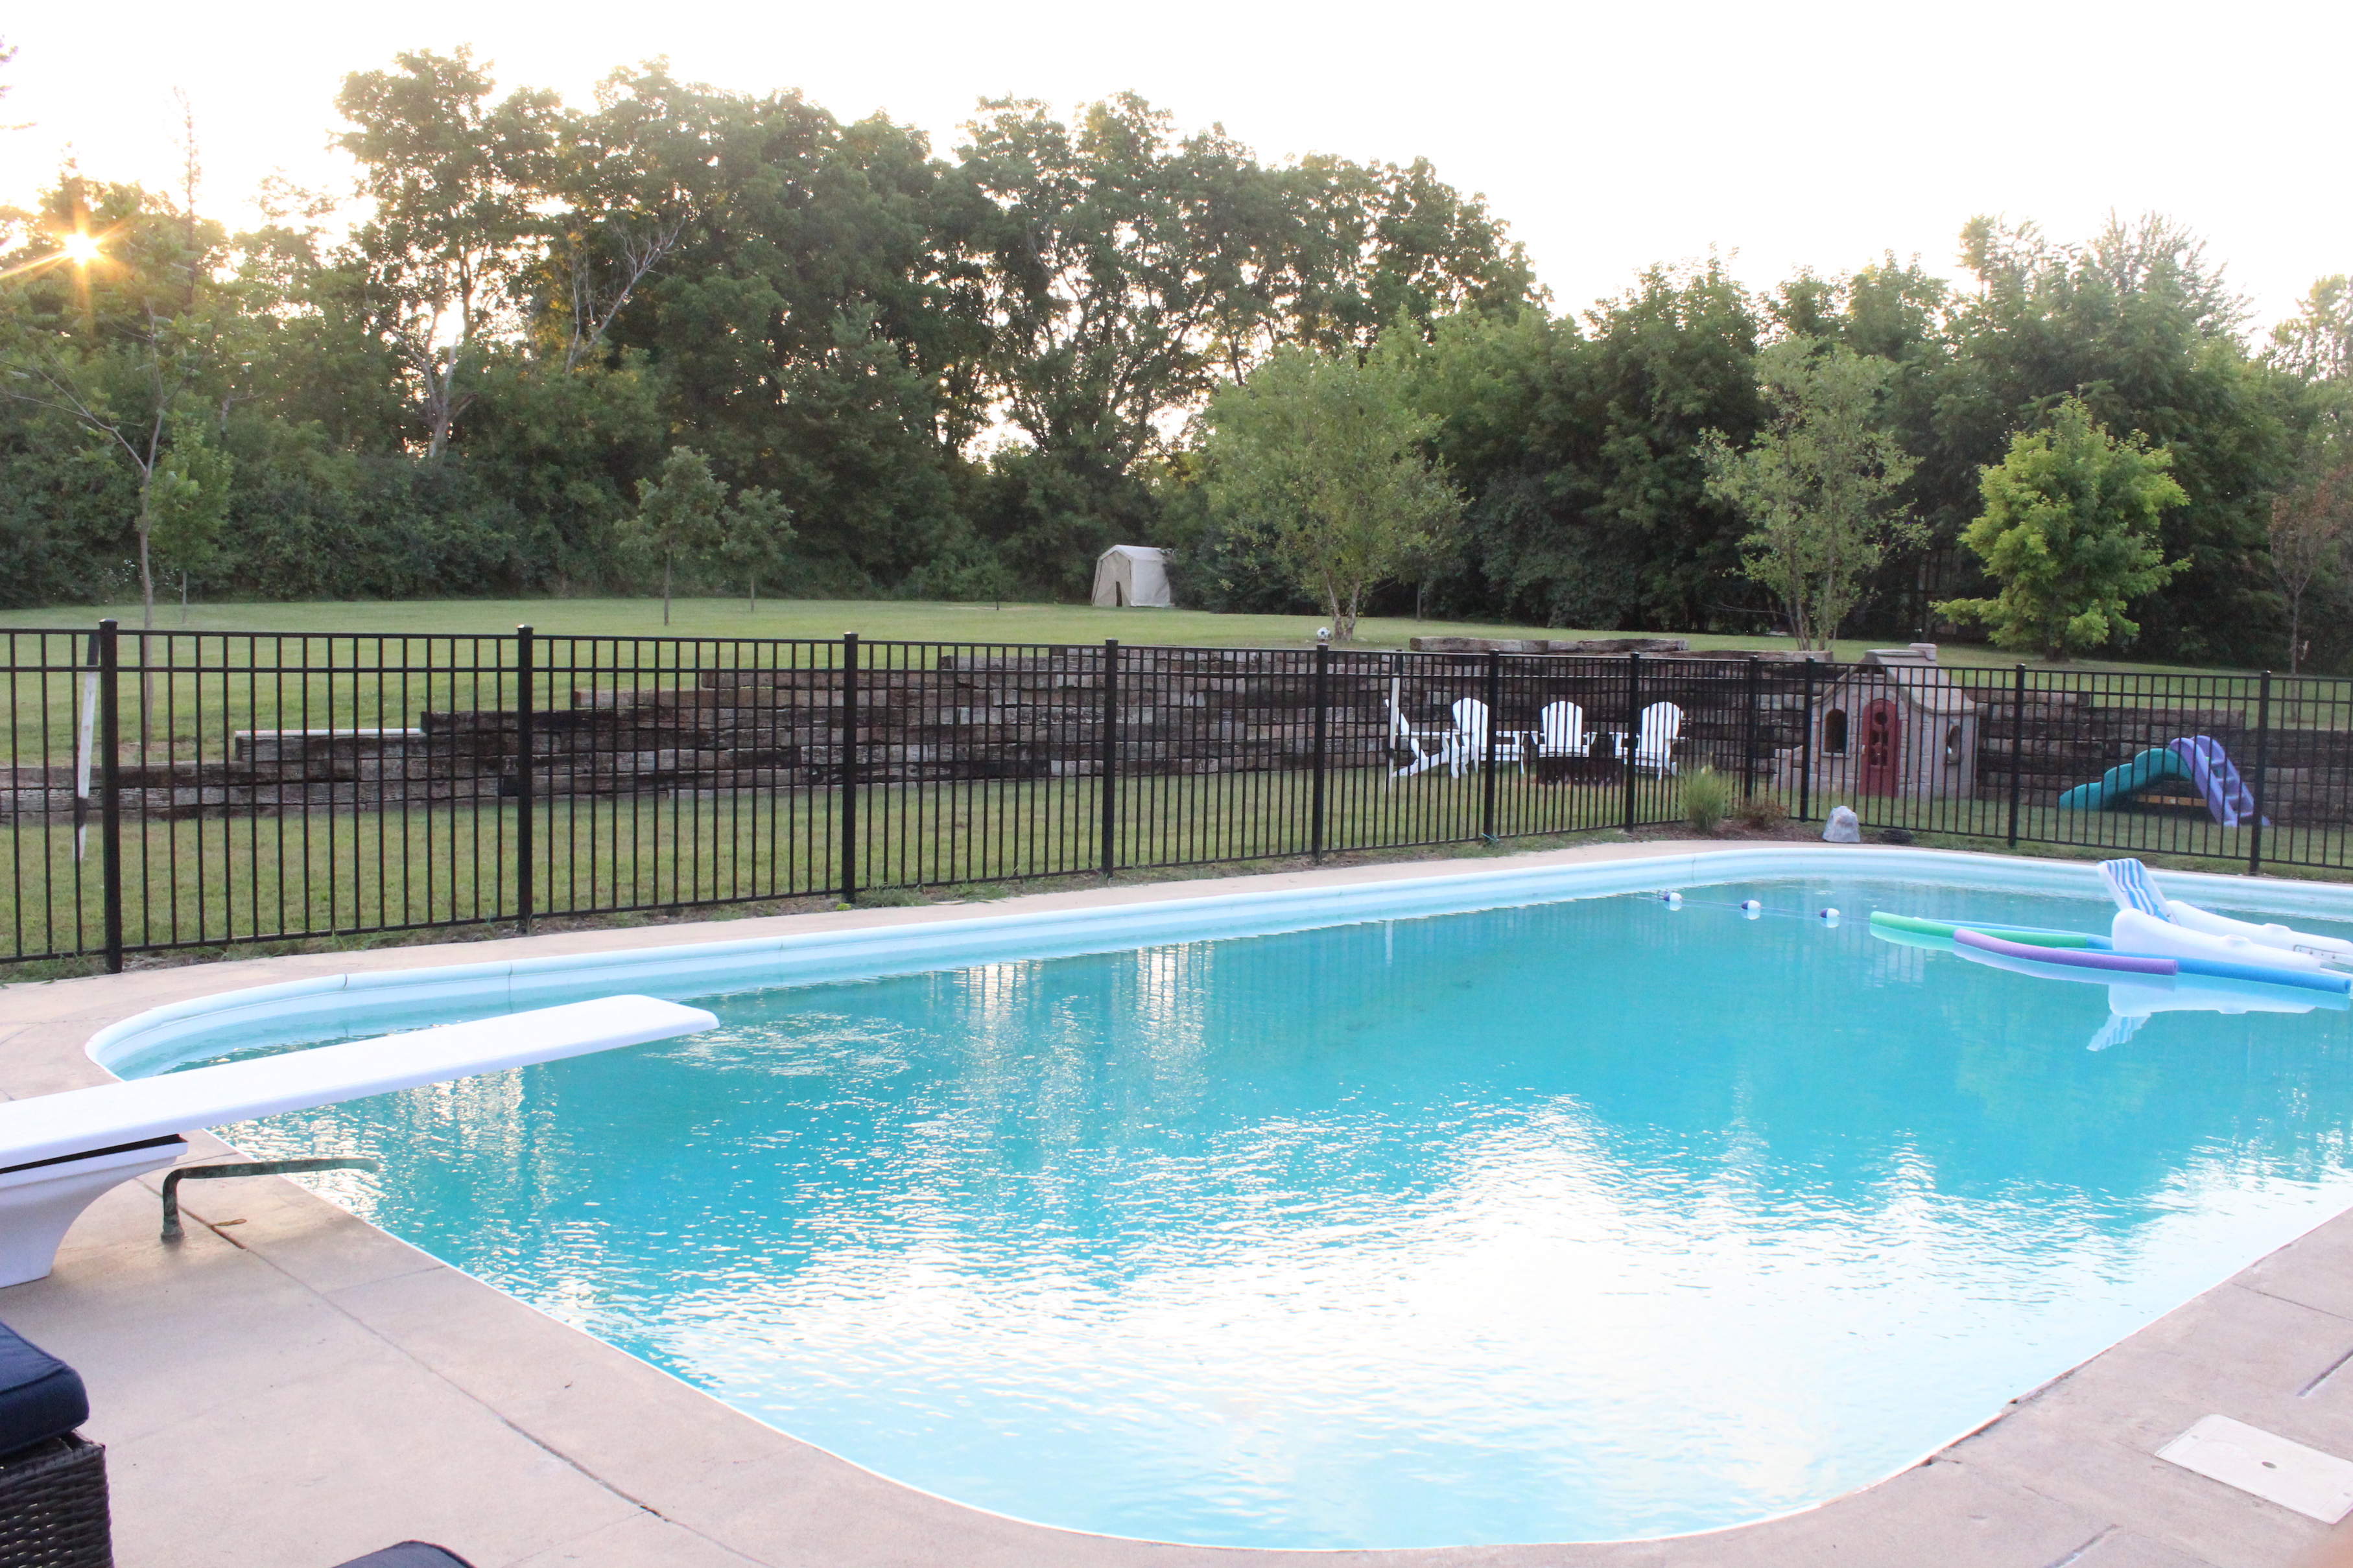
IMG_3128

And now:

IMG_5907

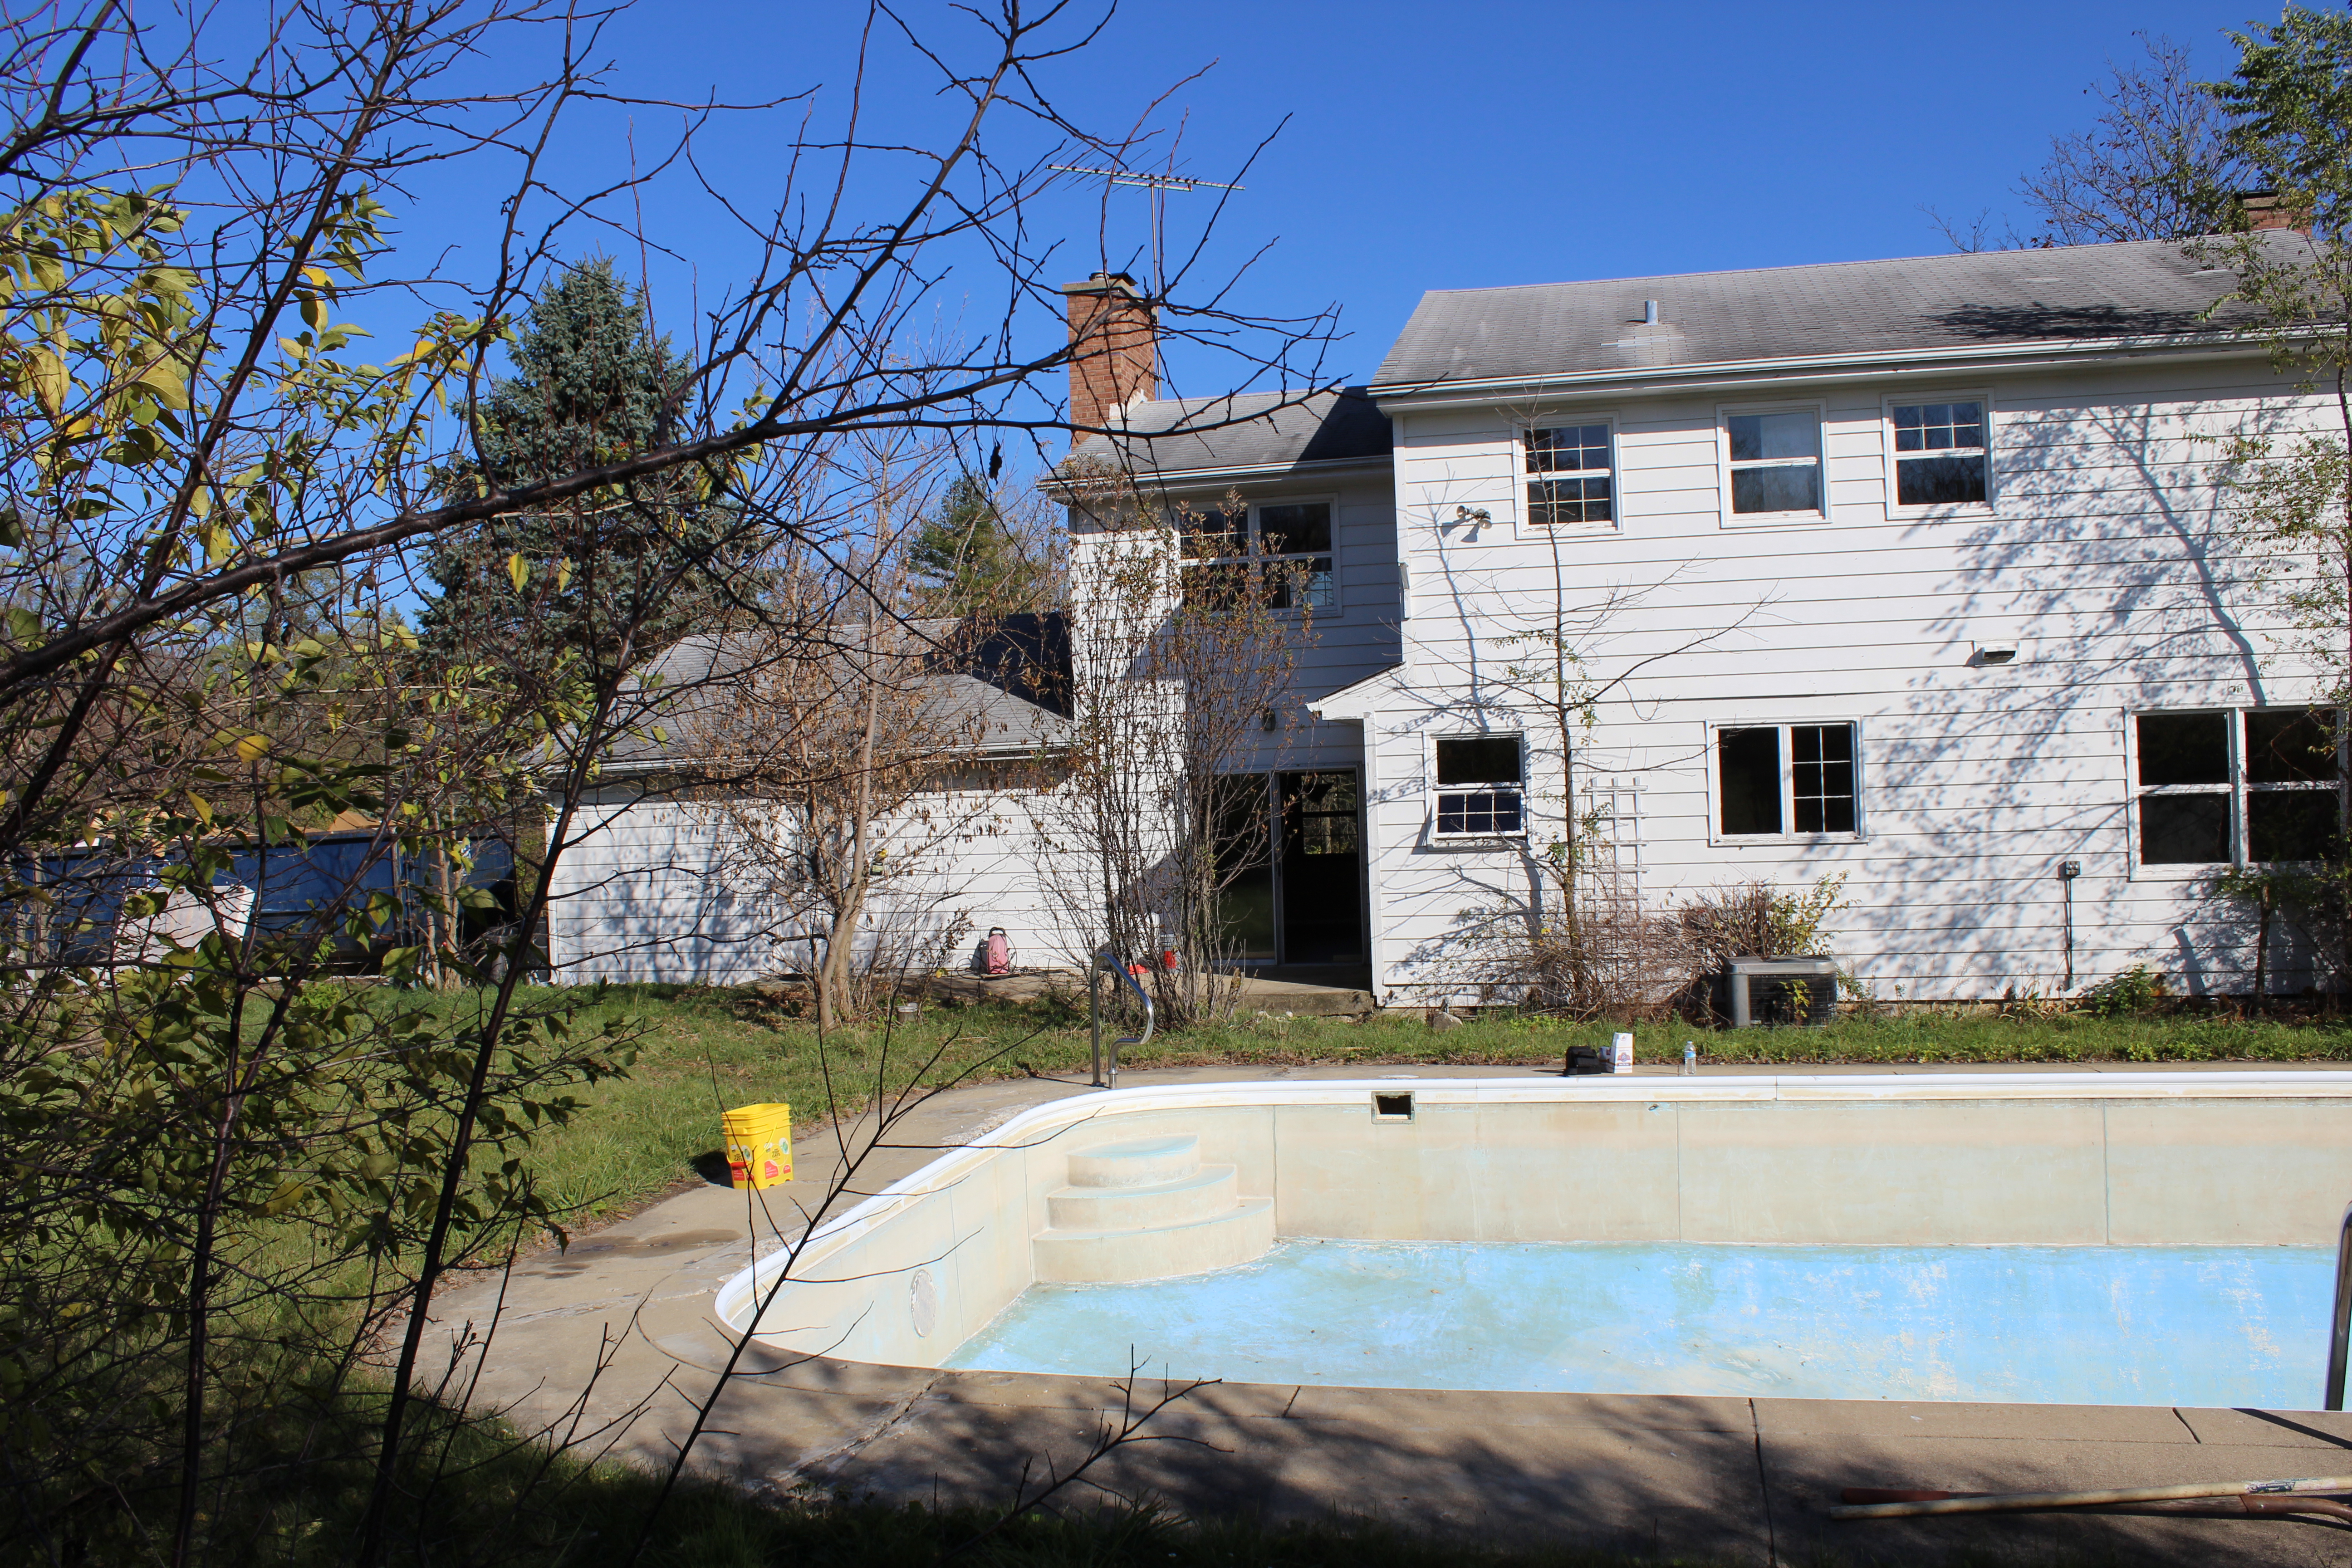
Another before from almost 4  years ago (yikes!):

photo-155

And now:

back of house from diving board

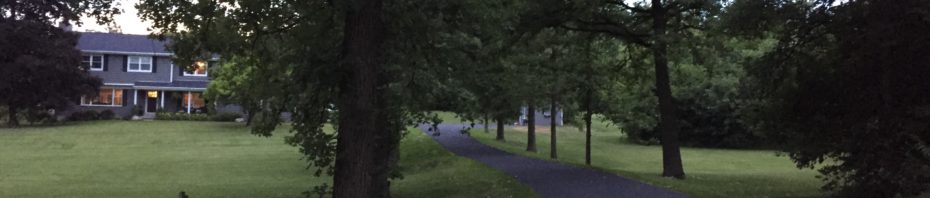
A view of the back shortly after we moved in:

Back of house and pool

And now:

IMG_5890

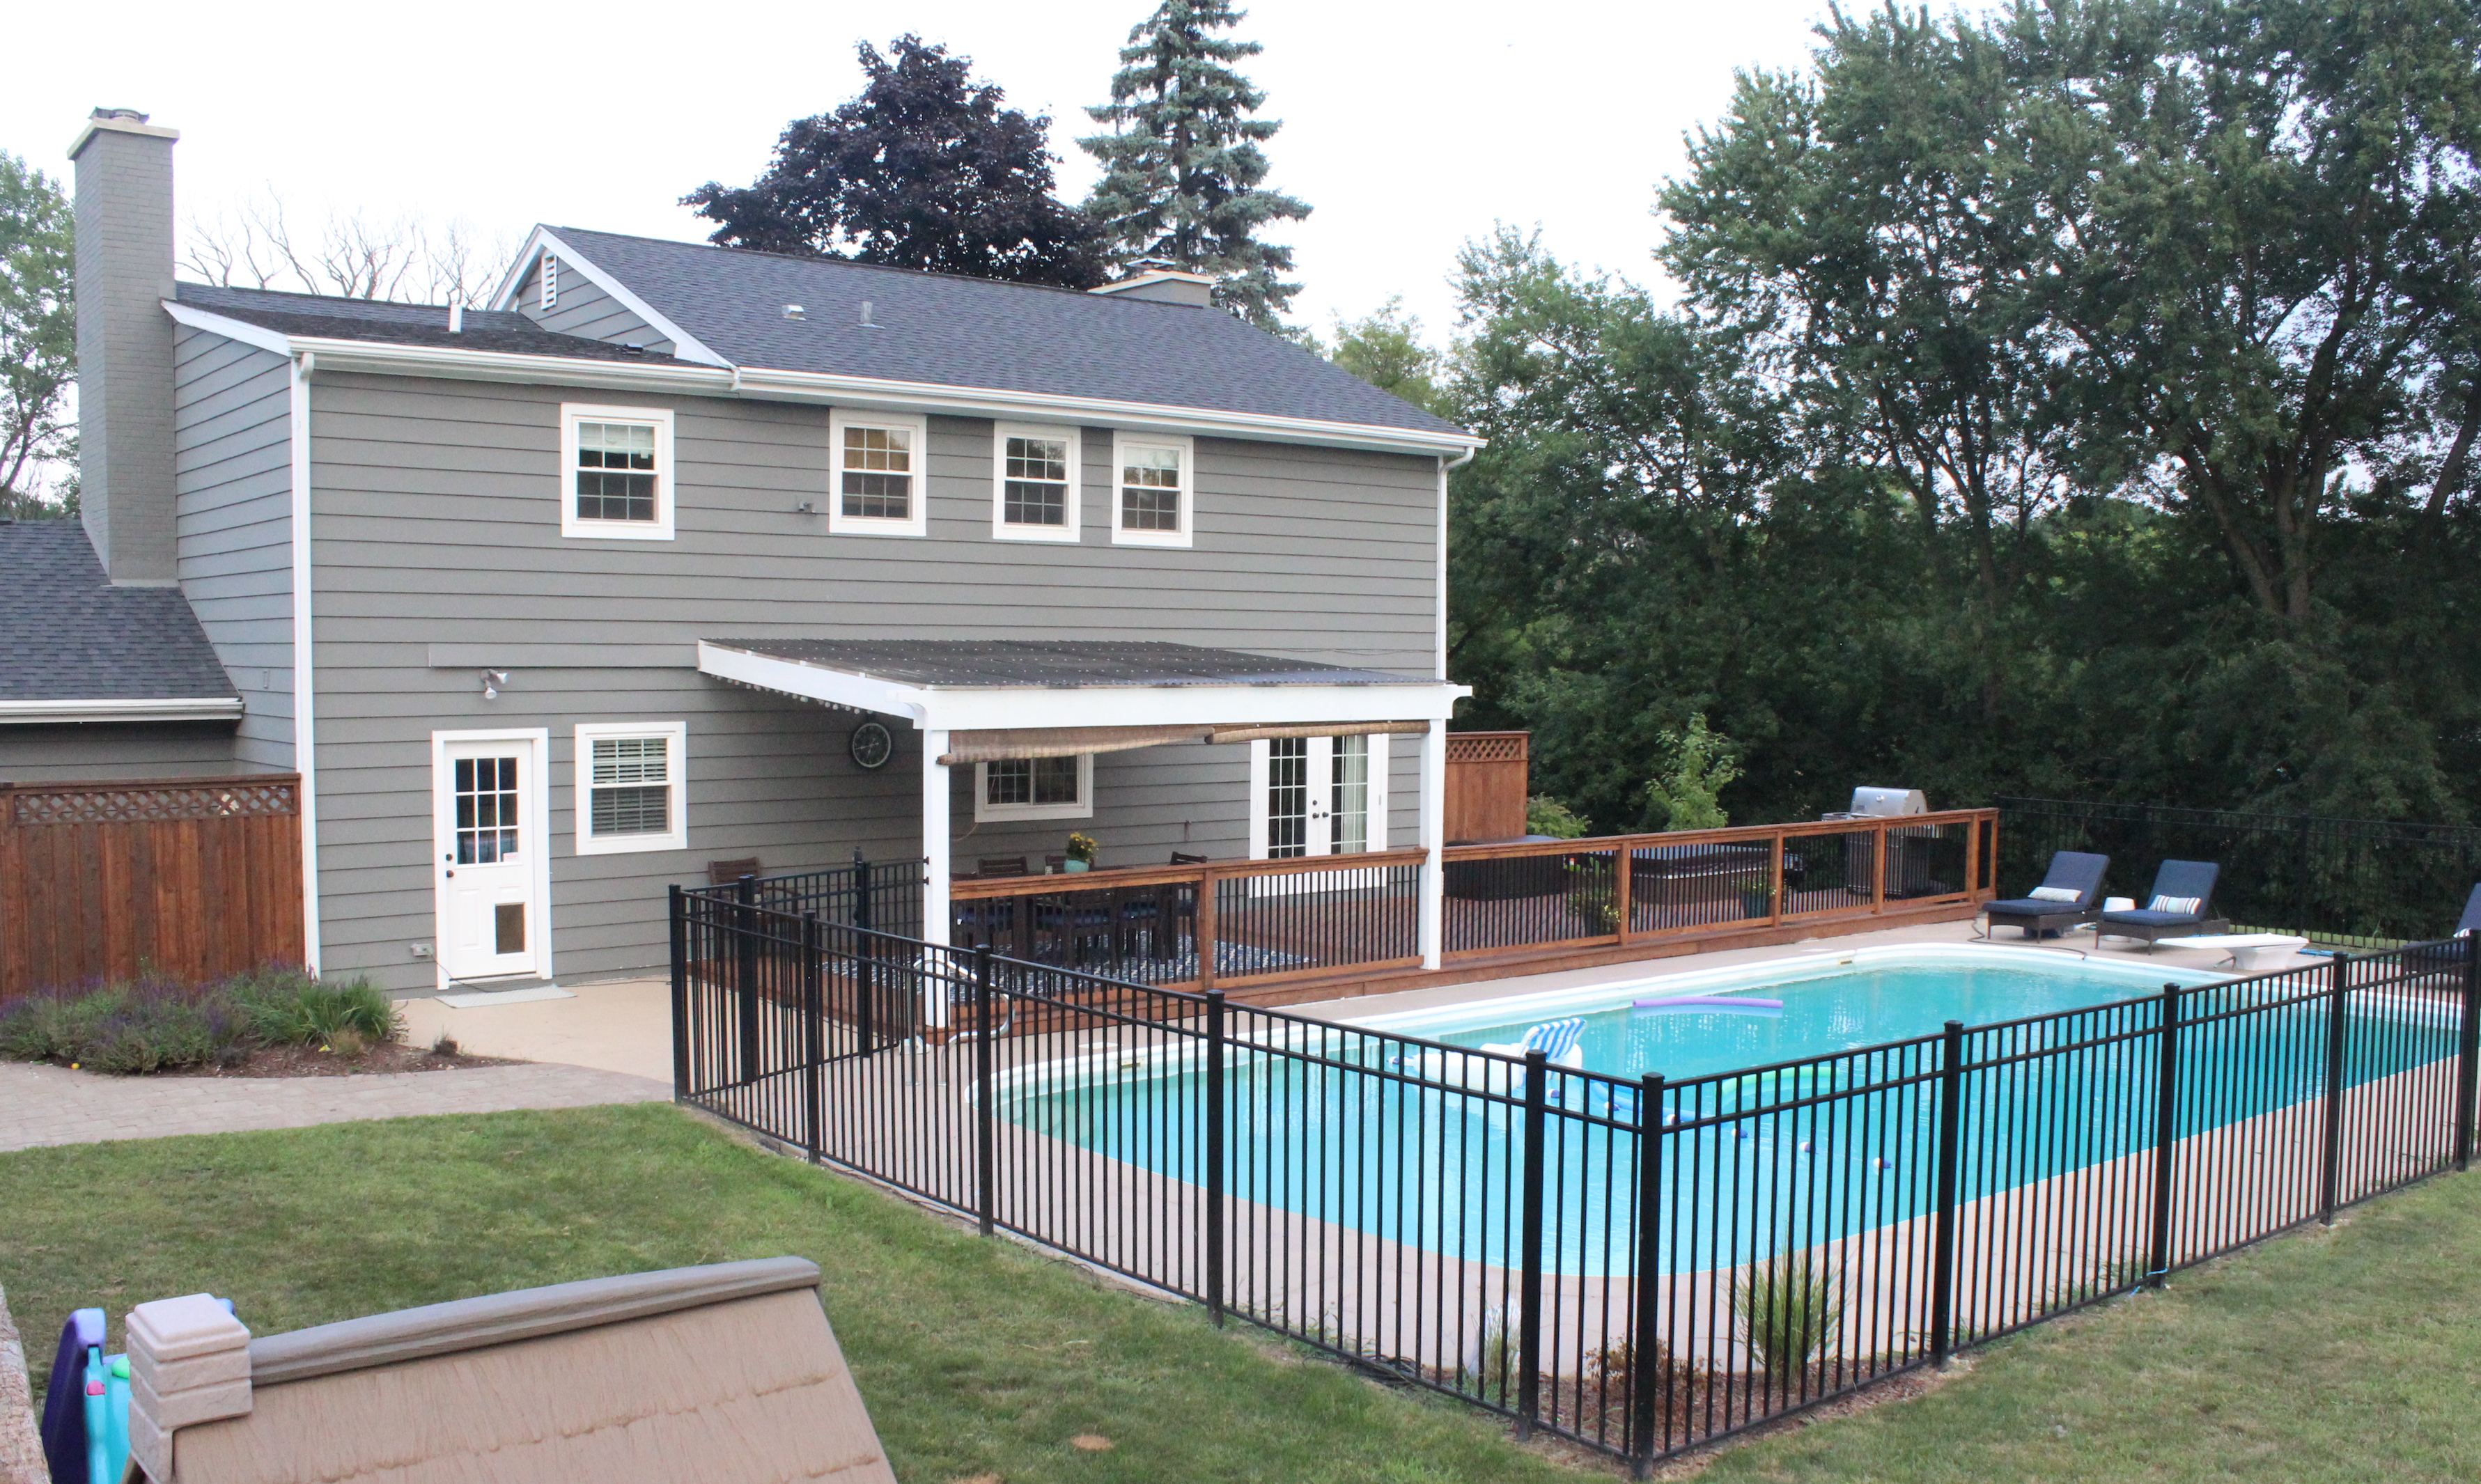
That last view is a good comparison showing our small addition to the house (to the left of the pergola). It houses the powder room and laundry room on the first floor, and our master bathroom and master closet upstairs. And we painted the house Amherst Gray (more on that here).

Phew, I’m exhausted just writing about all that!

It was definitely a labor of love though and was worth all the hard work. We still have a few more things we’d like to do which includes paving around the pool, landscaping a bit more, and doing the fire pit like I mentioned. But I’d say we are 90% of the way to calling this baby D-O-N-E.


Mudroom Update

18 Jul

The last time I showed you the mudroom and shared our plans for the room it was looking like this:

Here is what the mudroom is looking like now:

mudroom vertical 2

mudroom bottom

mudroom top

Lots of progress and it is totally functional, but we still have a lot to finish including:

  • Make and install doors on the end cabinets
  • Add crown molding
  • Get baskets for the top cubbies (bottom ones will remain empty for easy access to shoes)
  • Get hooks— I’m thinking brass ones like this.
  • Install and stain the seat, made from 1x6s.
  • Paint the mudroom cabinets a medium gray color like Coventry Gray.
  • Paint back door a dark gray or black color like Wrought Iron.
  • Paint the rest of the room, probably a light gray like Gray Owl.

We’re hoping to have everything done in the next few weeks. Can’t wait!